Page 1059 of 2000

U151E AUTOMATIC TRANSAXLE – AUTOMATIC TRANSAXLE ASSEMBLYAX–175
AX
INSTALLATION
1. INSPECT TORQUE CONVERTER CLUTCH
ASSEMBLY
(a) Inspect the torque converter clutch (see page AX-
178).
2. INSTALL TORQUE CONVERTER CLUTCH
ASSEMBLY
(a) Install the torque converter clutch to the automatic
transaxle.
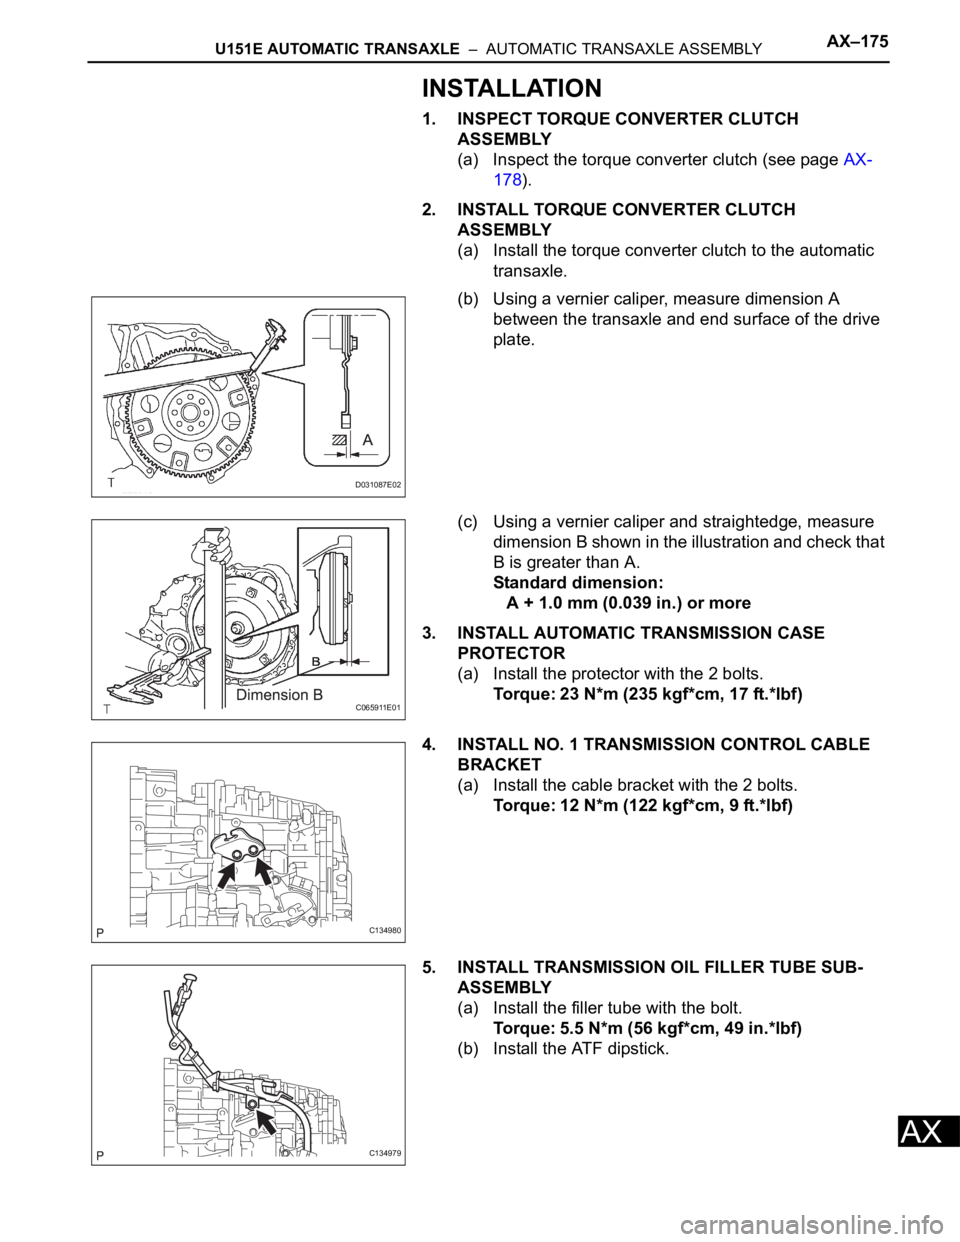
(b) Using a vernier caliper, measure dimension A
between the transaxle and end surface of the drive
plate.
(c) Using a vernier caliper and straightedge, measure
dimension B shown in the illustration and check that
B is greater than A.
Standard dimension:
A + 1.0 mm (0.039 in.) or more
3. INSTALL AUTOMATIC TRANSMISSION CASE
PROTECTOR
(a) Install the protector with the 2 bolts.
Torque: 23 N*m (235 kgf*cm, 17 ft.*lbf)
4. INSTALL NO. 1 TRANSMISSION CONTROL CABLE
BRACKET
(a) Install the cable bracket with the 2 bolts.
Torque: 12 N*m (122 kgf*cm, 9 ft.*lbf)
5. INSTALL TRANSMISSION OIL FILLER TUBE SUB-
ASSEMBLY
(a) Install the filler tube with the bolt.
Torque: 5.5 N*m (56 kgf*cm, 49 in.*lbf)
(b) Install the ATF dipstick.
D031087E02
C065911E01
C134980
C134979
Page 1060 of 2000
AX–176U151E AUTOMATIC TRANSAXLE – AUTOMATIC TRANSAXLE ASSEMBLY
AX
6. INSTALL AUTOMATIC TRANSAXLE ASSEMBLY
(a) Install the automatic transaxle to the engine with the
7 upper side mounting bolts.
Torque: 64 N*m (653 kgf*cm, 47 ft.*lbf)
(b) Install the 3 lower side mounting bolts.
Torque: 37 N*m (377 kgf*cm, 27 ft.*lbf) for bolt A
46 N*m (469 kgf*cm, 34 ft.*lbf) for bolt B
(c) Install the 6 torque converter clutch mounting bolts.
Torque: 41 N*m (418 kgf*cm, 30 ft.*lbf)
HINT:
First install the green colored bolt and then the other
5 bolts.
(d) Install the flywheel housing under cover with the 2
bolts.
Torque: 7.8 N*m (80 kgf*cm, 69 in.*lbf)
7. INSTALL ENGINE MOUNTING BRACKET LH
(a) Install the mounting bracket with the 4 bolts.
Torque: 64 N*m (653 kgf*cm, 47 ft.*lbf)
C134974
C136364E01
D030472E01
D030471E01
C134978
Page 1061 of 2000

U151E AUTOMATIC TRANSAXLE – AUTOMATIC TRANSAXLE ASSEMBLYAX–177
AX
8. INSTALL FRONT ENGINE MOUNTING BRACKET
(a) Install the mounting bracket with the 4 bolts.
Torque: 64 N*m (657 kgf*cm, 47 ft.*lbf)
Torque: 5.5 N*m (56 kgf*cm, 49 in.*lbf) for filler
tube bolt
9. INSTALL REAR ENGINE MOUNTING BRACKET
(a) Install the mounting bracket with the 3 bolts.
Torque: 45 N*m (459 kgf*cm, 33 ft.*lbf)
10. INSTALL TRANSMISSION OIL COOLER HOSES AND
TUBE
(a) Install the transmission oil cooler hoses and tube
(see page AX-152).
11. CONNECT WIRE HARNESS
(a) Connect the wire harness clamps.
(b) Connect the 2 speed sensor connectors.
(c) Connect the transaxle wire connector.
(d) Connect the park/neutral position switch connector.
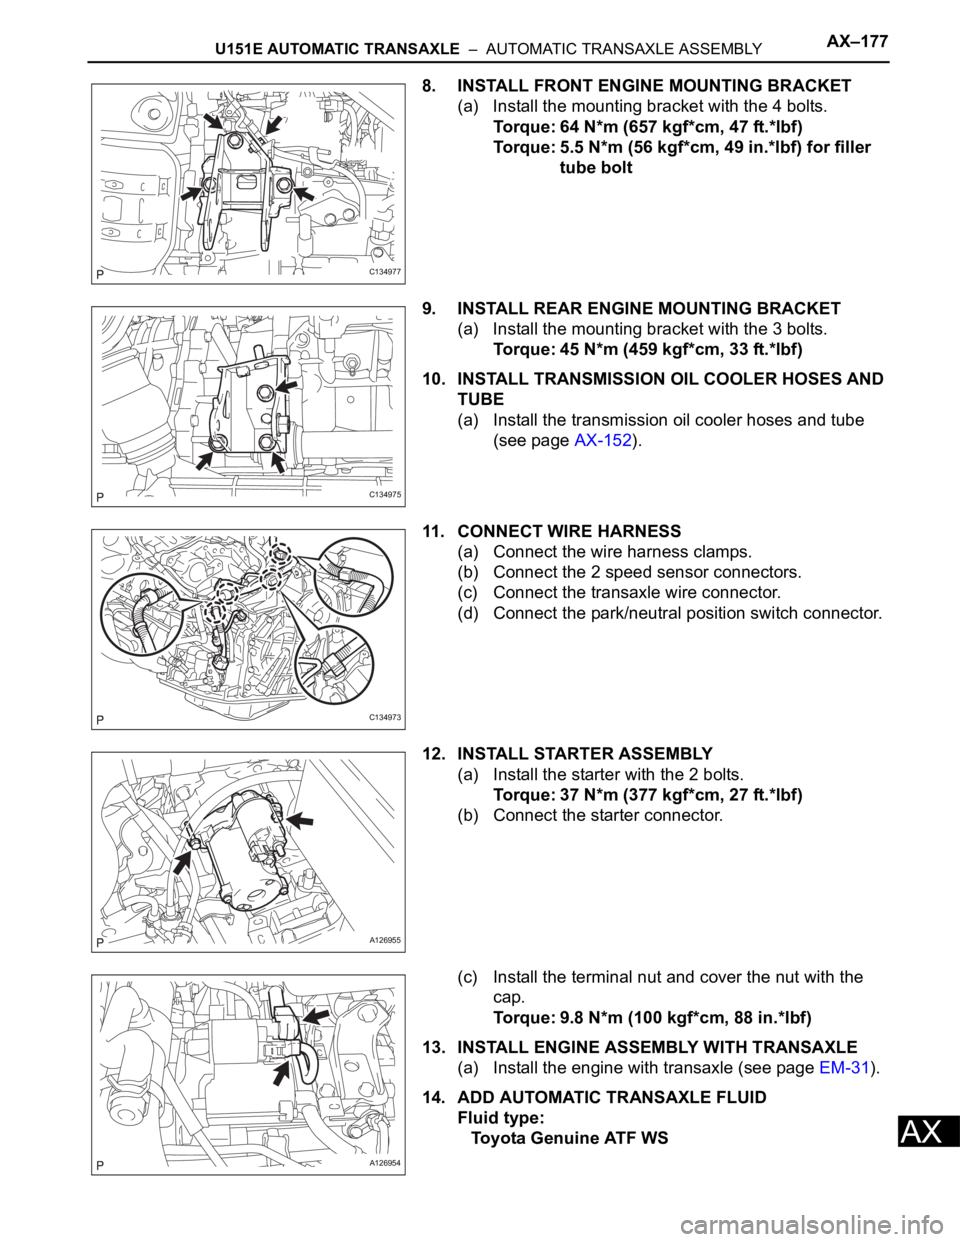
12. INSTALL STARTER ASSEMBLY
(a) Install the starter with the 2 bolts.
Torque: 37 N*m (377 kgf*cm, 27 ft.*lbf)
(b) Connect the starter connector.
(c) Install the terminal nut and cover the nut with the
cap.
Torque: 9.8 N*m (100 kgf*cm, 88 in.*lbf)
13. INSTALL ENGINE ASSEMBLY WITH TRANSAXLE
(a) Install the engine with transaxle (see page EM-31).
14. ADD AUTOMATIC TRANSAXLE FLUID
Fluid type:
Toyota Genuine ATF WS
C134977
C134975
C134973
A126955
A126954
Page 1062 of 2000
AX–178U151E AUTOMATIC TRANSAXLE – AUTOMATIC TRANSAXLE ASSEMBLY
AX
15. INSPECT AUTOMATIC TRANSAXLE FLUID
(a) Inspect the automatic transaxle fluid (see page AX-
126).
16. PERFORM RESET MEMORY
(a) Perform the RESET MEMORY procedures (A/T
initialization) (see page AX-20).
Page 1063 of 2000
U151E AUTOMATIC TRANSAXLE – AUTOMATIC TRANSAXLE UNITAX–189
AX
DISASSEMBLY
1. REMOVE PARK/NEUTRAL POSITION SWITCH
ASSEMBLY
(a) Remove the nut, washer and control shaft lever.
(b) Using a screwdriver, pry off the lock plate.
(c) Remove the nut and lock plate.
(d) Remove the 2 bolts and pull out the switch.
2. REMOVE BREATHER PLUG HOSE
(a) Remove the breather plug hose from the transaxle
case.
3. REMOVE OIL COOLER OUTLET TUBE ELBOW
(a) Remove the elbow.
(b) Remove the O-ring from the elbow.
4. REMOVE OIL COOLER INLET TUBE ELBOW
(a) Remove the elbow.
(b) Remove the O-ring from the elbow.
C140280
D009643E02
D009639E02
C136351E01
C136352E01
Page 1064 of 2000
AX–190U151E AUTOMATIC TRANSAXLE – AUTOMATIC TRANSAXLE UNIT
AX
5. REMOVE SPEED SENSOR
(a) Remove the 2 bolts and the 2 speed sensors from
the transaxle.
6. REMOVE SPEEDOMETER DRIVEN HOLE COVER
SUB-ASSEMBLY
(a) Remove the bolt and cover.
(b) Remove the O-ring from the cover.
7. REMOVE NO. 1 TRANSAXLE CASE PLUG
(a) Remove the 4 plugs from the transaxle case.
(b) Remove the 4 O-rings from the 4 plugs.
8. FIX AUTOMATIC TRANSAXLE ASSEMBLY
(a) Fix the transaxle.
9. REMOVE AUTOMATIC TRANSAXLE OIL PAN SUB-
ASSEMBLY
(a) Remove the 18 bolts, oil pan and gasket.
(b) Remove the 2 magnets from the oil pan.
D030672E06
C136368
D009176E01
C091925E01
C086316E02
Page 1065 of 2000
U151E AUTOMATIC TRANSAXLE – AUTOMATIC TRANSAXLE UNITAX–191
AX
10. INSPECT TRANSMISSION OIL CLEANER MAGNET
(a) Remove the magnets and use them to collect any
steel chips. Examine the chips and particles in the
pan and on the magnet to determine what type of
wear has occurred in the transaxle.
Result:
Steel (magnetic):
Wear of the bearing, gear and plate
Brass (non-magnetic):
Wear of the bush
11. REMOVE VALVE BODY OIL STRAINER ASSEMBLY
(a) Remove the 3 bolts and oil strainer.
(b) Remove the O-ring from the oil strainer.
12. REMOVE TRANSMISSION WIRE
(a) Remove the 7 connectors from the shift solenoid
valves.
(b) Remove the bolt, lock plate and temperature
sensor.
(c) Remove the bolt and transmission wire from the
transaxle case.
AT00103E01
C091931E02
C091932E02
C134996E01
D003547E07
Page 1066 of 2000
AX–192U151E AUTOMATIC TRANSAXLE – AUTOMATIC TRANSAXLE UNIT
AX
13. REMOVE TRANSMISSION VALVE BODY ASSEMBLY
(a) Support the valve body and remove the 17 bolts and
valve body.
14. REMOVE NO. 1 GOVERNOR APPLY GASKET
(a) Remove the gasket from the transaxle case.
15. REMOVE TRANSAXLE CASE 2ND BRAKE GASKET
(a) Remove the gasket from the transaxle case.
16. REMOVE BRAKE DRUM GASKET
(a) Remove the gasket from the transaxle case.
17. REMOVE CHECK BALL BODY
(a) Remove the check ball body and spring from the
transaxle case.
C091933E07
C083127E01
C083128E01
C083129E01
D003554E01