Page 211 of 364

201
OPERATION OF INSTRUMENTS AND
CONTROLS
Other equipment
Clock202
. . . . . . . . . . . . . . . . . . . . . . . . . . . . . . . . . . . . .\
. . . . . . . . . . . . . . . . .
Outside temperature display 202
. . . . . . . . . . . . . . . . . . . . . . . . . . . . . . . . .
Rear view monitor system 203
. . . . . . . . . . . . . . . . . . . . . . . . . . . . . . . . . . .
Cigarette lighter and ashtray 206
. . . . . . . . . . . . . . . . . . . . . . . . . . . . . . . . .
Power outlets 207
. . . . . . . . . . . . . . . . . . . . . . . . . . . . . . . . . . . . \
. . . . . . . . . .
Roll sensing of curtain shield airbags off switch 208
. . . . . . . . . . . . . . . .
Rear console box 209
. . . . . . . . . . . . . . . . . . . . . . . . . . . . . . . . . . . . \
. . . . . . .
Glove box 209
. . . . . . . . . . . . . . . . . . . . . . . . . . . . . . . . . . . . \
. . . . . . . . . . . . . .
Garage door opener 209
. . . . . . . . . . . . . . . . . . . . . . . . . . . . . . . . . . . . \
. . . .
Auxiliary boxes 214
. . . . . . . . . . . . . . . . . . . . . . . . . . . . . . . . . . . . \
. . . . . . . . .
Cup holders 215
. . . . . . . . . . . . . . . . . . . . . . . . . . . . . . . . . . . . \
. . . . . . . . . . . .
Card holder 217
. . . . . . . . . . . . . . . . . . . . . . . . . . . . . . . . . . . . \
. . . . . . . . . . . .
Tie −down hooks 217
. . . . . . . . . . . . . . . . . . . . . . . . . . . . . . . . . . . . \
. . . . . . . .
Cargo net hooks 218
. . . . . . . . . . . . . . . . . . . . . . . . . . . . . . . . . . . . \
. . . . . . . .
Roof luggage carrier 218
. . . . . . . . . . . . . . . . . . . . . . . . . . . . . . . . . . . . \
. . . .
Floor mat 220
. . . . . . . . . . . . . . . . . . . . . . . . . . . . . . . . . . . . \
. . . . . . . . . . . . . .
Coat hooks 221
. . . . . . . . . . . . . . . . . . . . . . . . . . . . . . . . . . . . \
. . . . . . . . . . . .
SECTION 1� 10
Page 219 of 364

209
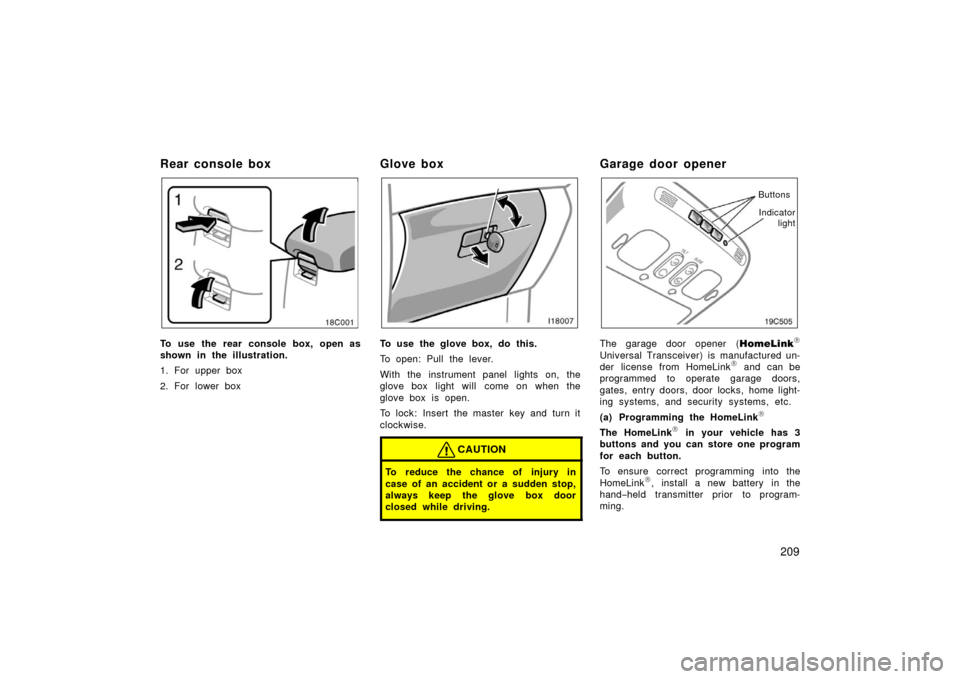
Rear console box
To use the rear console box, open as
shown in the illustration.
1. For upper box
2. For lower box
Glove box
To use the glove box, do this.
To open: Pull the lever.
With the instrument panel lights on, the
glove box light will come on when the
glove box is open.
To lock: Insert the master key and turn it
clockwise.
CAUTION
To reduce the chance of injury in
case of an accident or a sudden stop,
always keep the glove box door
closed while driving.
Garage door opener
Indicatorlight
Buttons
The garage door opener (
HomeLink
Universal Transceiver) is manufactured un-
der license from HomeLink and can be
programmed to operate garage doors,
gates, entry doors, door locks, home light-
ing systems, and security systems, etc.
(a) Programming the HomeLink
The HomeLink in your vehicle has 3
buttons and you can store one program
for each button.
To ensure correct programming into the
HomeLink
, install a new battery in the
hand− held transmitter prior to program-
ming.
Page 221 of 364

211
19C516
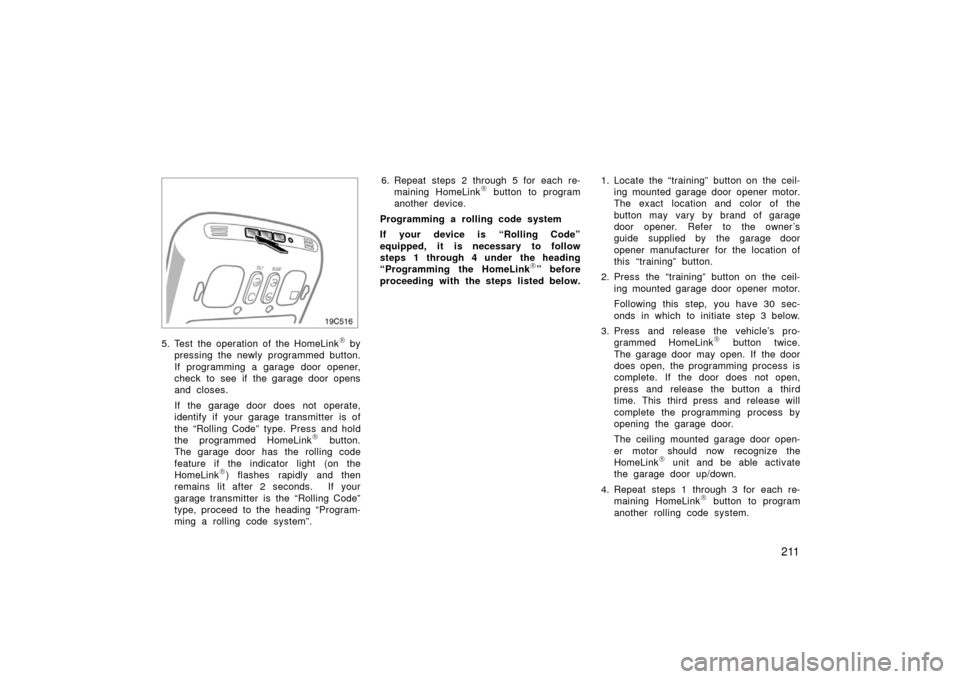
5. Test the operation of the HomeLink by
pressing the newly programmed button.
If programming a garage door opener,
check to see if the garage door opens
and closes.
If the garage door does not operate,
identify if your garage transmitter is of
the “Rolling C ode” type. Press and hold
the programmed HomeLink
button.
The garage door has the rolling code
feature if the indicator light (on the
HomeLink
) flashes rapidly and then
remains lit after 2 seconds. If your
garage transmitter is the “Rolling Code”
type, proceed to the heading “Program-
ming a rolling code system”. 6. Repeat steps 2 through 5 for each re-
maining HomeLink
button to program
another device.
Programming a rolling code system
If your device is “Rolling Code”
equipped, it is necessary to follow
steps 1 through 4 under the heading
“Programming the HomeLink
” before
proceeding with the steps listed below. 1. Locate the “training” button on the ceil-
ing mounted garage door opener motor.
The exact location and color of the
button may vary by brand of garage
door opener. Refer to the owner ’s
guide supplied by the garage door
opener manufacturer for the location of
this “training” button.
2. Press the “training” button on the ceil- ing mounted garage door opener motor.
Following this step, you have 30 sec-
onds in which to initiate step 3 below.
3. Press and release the vehicle’s pro- grammed HomeLink
button twice.
The garage door may open. If the door
does open, the programming process is
complete. If the door does not open,
press and release the button a third
time. This third press and release will
complete the programming process by
opening the garage door.
The ceiling mounted garage door open-
er motor should now recognize the
HomeLink
unit and be able activate
the garage door up/down.
4. Repeat steps 1 through 3 for each re- maining HomeLink
button to program
another rolling code system.
Page 223 of 364

213
For additional programming assistance
with your HomeLink Universal Trans-
celver call the:
�Toyota Customer Experience Center at
1 −800− 331−4331 (U.S.A.)
Refer to HomeLink
on the internet at :
WWW.HOMELINK.COM
CAUTION
�When programming the HomeLink
Universal Transceiver, you may be
operating a garage door or other
device. Make sure people and ob-
jects are out of the way of the ga-
rage door or other device to pre-
vent potential harm or damage.
�Do not use this HomeLink Univer-
sal Transceiver with any garage
door opener that lacks the safety
stop and reverse feature as re-
quired by federal safety standards.
(This includes any garage door
opener model manufactured before
April 1, 1982.) A garage door open-
er which cannot detect an object
(signaling the door to stop and re-
verse), does not meet current feder-
al safety standards. Using a garage
door opener without these features
increases risk of serious injury or
death.
This device complies with Part 15 of the
FCC Rules and with RSS −210 of the IC
Rules. Operation is subject to the fol-
lowing two conditions: (1) This device
may not cause harmful interference, and
(2) this device must accept any interfer-
ence received, including interference
that may cause undesired operation.
WARNING: This transmitter has been
tested and complies with FCC and IC
Rules. Changes or modifications not
expressly approved by the party re-
sponsible for compliance could void
the user’s authority to operate the
device.