Page 13 of 364
3
1. Headlight, turn signal and front foglight switches
2. Cruise control switch
3. Ignition switch
4. Wiper and washer switches
5. Emergency flasher switch
6. Navigation system including air condi- tioning controls (See the separate
“Navigation System Owner ’s Manual”.)
7. Clock and outside temperature display
8. Front passenger ’s seat belt reminder light
9. Audio system
10. Outside rear view mirror heater switch 11. Rear air conditioning switch
12. Rear window defogger switch
13. Center differential lock switch
14. Power antenna switch
15. Power tilt and telescopic steering switch
16. Instrument panel light control dial
17. Power rear view mirror control switches
18. Tire pressure warning system reset switch
19. Power quarter window switch (left− hand side)
20. Power quarter window switch (right −hand side)
21. Roll sensing of curtain shield airbags off switch
�
View B
(Vehicles with navigation system)
11C515b
Page 14 of 364
4
1. Headlight, turn signal and front foglight switches
2. Cruise control switch
3. Ignition switch
4. Wiper and washer switches
5. Emergency flasher switch
6. Clock, outside temperature and trip in- formation display
7. Audio system
8. Front passenger ’s seat belt reminder light
9. Air conditioning controls
10. Outside rear view mirror heater switch 11. Rear air conditioning switch
12. Rear window defogger switch
13. Center differential lock switch
14. Power antenna switch
15. Power tilt and telescopic steering switch
16. Instrument panel light control dial
17. Power rear view mirror control switches
18. Tire pressure warning system reset switch
19. Power quarter window switch (left− hand side)
20. Power quarter window switch (right −hand side)
21. Roll sensing of curtain shield airbags off switch
�
View B
(Vehicles without navigation system)
11C029d
Page 119 of 364

109
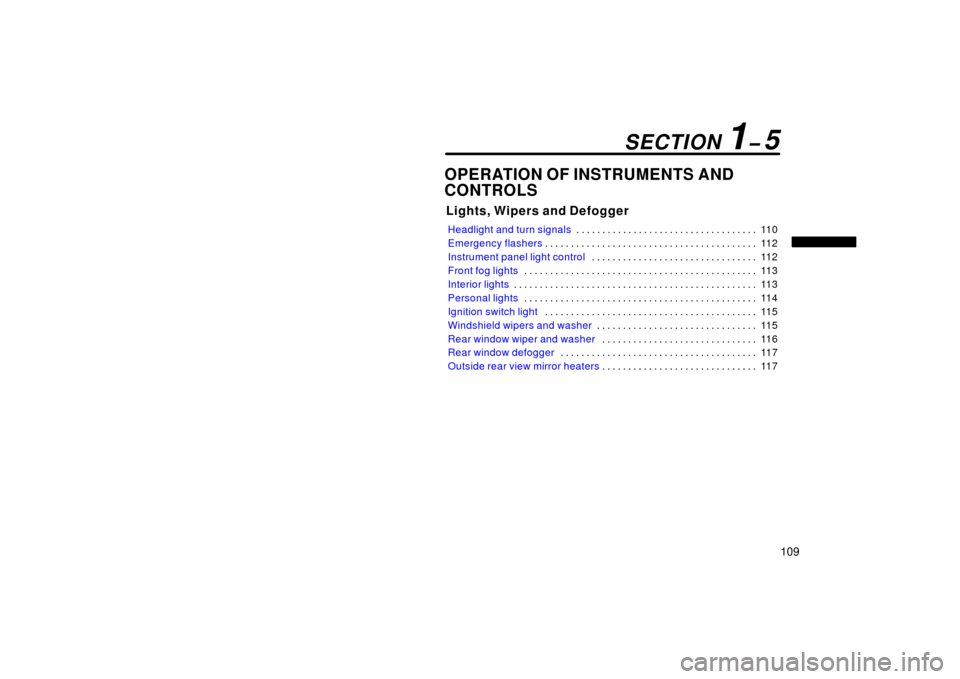
OPERATION OF INSTRUMENTS AND
CONTROLS
Lights, Wipers and Defogger
Headlight and turn signals11 0
. . . . . . . . . . . . . . . . . . . . . . . . . . . . . . . . . . .
Emergency flashers 11 2
. . . . . . . . . . . . . . . . . . . . . . . . . . . . . . . . . . . . \
. . . . .
Instrument panel light control 11 2
. . . . . . . . . . . . . . . . . . . . . . . . . . . . . . . .
Front fog lights 11 3
. . . . . . . . . . . . . . . . . . . . . . . . . . . . . . . . . . . . \
. . . . . . . . .
Interior lights 11 3
. . . . . . . . . . . . . . . . . . . . . . . . . . . . . . . . . . . . \
. . . . . . . . . . .
Personal lights 11 4
. . . . . . . . . . . . . . . . . . . . . . . . . . . . . . . . . . . . \
. . . . . . . . .
Ignition switch light 11 5
. . . . . . . . . . . . . . . . . . . . . . . . . . . . . . . . . . . . \
. . . . .
Windshield wipers and washer 11 5
. . . . . . . . . . . . . . . . . . . . . . . . . . . . . . .
Rear window wiper and washer 11 6
. . . . . . . . . . . . . . . . . . . . . . . . . . . . . .
Rear window defogger 11 7
. . . . . . . . . . . . . . . . . . . . . . . . . . . . . . . . . . . . \
. .
Outside rear view mirror heaters 11 7
. . . . . . . . . . . . . . . . . . . . . . . . . . . . . .
SECTION 1� 5
Page 123 of 364
11 3
Front fog lights
To turn on the front fog lights, twist
the band of the headlight/turn signal
lever. They will come on only when the
headlights are on low beam.
Interior lights
Center
Rear
To turn on the interior light, slide the
switch.
The interior light switch has the following
positions:
“ON”—Keeps the light on all the time.
“OFF”—Turns the light off.
“DOOR”—
—Center: Turn the light on when any of
side doors and back door are opened.
—Rear: Turn the light on when any of the
rear side doors and back door are
opened.
Page 127 of 364

11 7
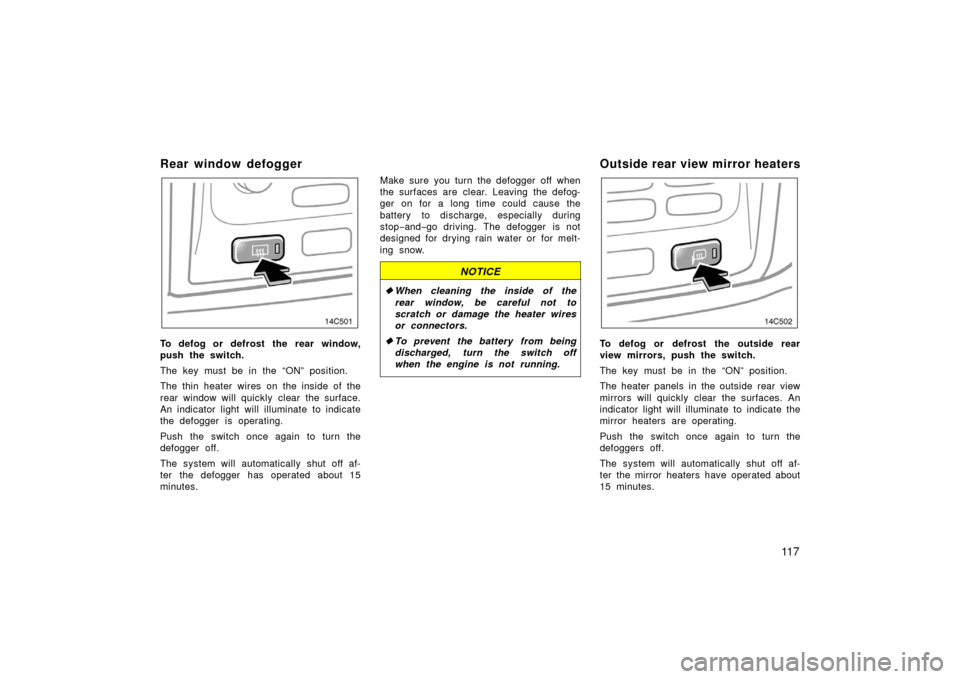
Rear window defogger
To defog or defrost the rear window,
push the switch.
The key must be in the “ON” position.
The thin heater wires on the inside of the
rear window will quickly clear the surface.
An indicator light will illuminate to indicate
the defogger is operating.
Push the switch once again to turn the
defogger off.
The system will automatically shut off af-
ter the defogger has operated about 15
minutes.Make sure you turn the defogger off when
the surfaces are clear. Leaving the defog-
ger on for a long time could cause the
battery to discharge, especially during
stop
−and− go driving. The defogger is not
designed for drying rain water or for melt-
ing snow.
NOTICE
� When cleaning the inside of the
rear window, be careful not to
scratch or damage the heater wires
or connectors.
� To prevent the battery from being
discharged, turn the switch off
when the engine is not running.
Outside rear view mirror heaters
To defog or defrost the outside rear
view mirrors, push the switch.
The key must be in the “ON” position.
The heater panels in the outside rear view
mirrors will quickly clear the surfaces. An
indicator light will illuminate to indicate the
mirror heaters are operating.
Push the switch once again to turn the
defoggers off.
The system will automatically shut off af-
ter the mirror heaters have operated about
15 minutes.
Page 344 of 364

334
The inside of the lens of exterior lights
such as headlights may temporarily fog up
when the lens becomes wet in the rain or
in a car wash. This is not a problem
because the fogging is caused by the
temperature difference between the outside
and inside of the lens, just like the wind-
shield fogs up in the rain. However, if
there is a large drop of water on the
inside of the lens, or if there is water
pooled inside the light, contact your
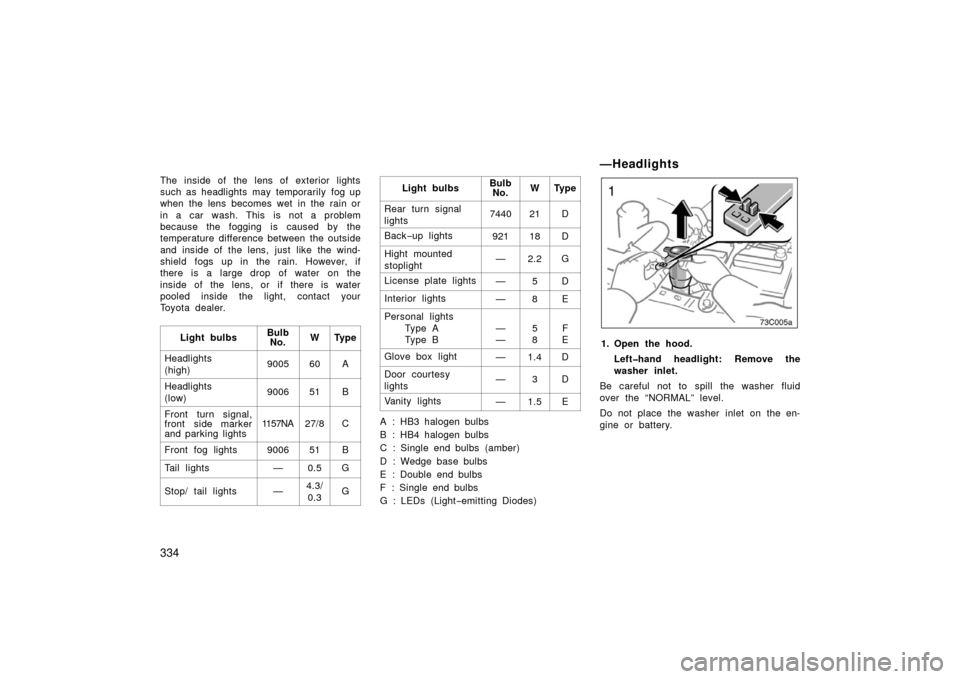
Toyota dealer.Light bulbs
BulbNo.WTy p e
Headlights
(high)900560A
Headlights
(low)900651B
Front turn signal,
front side marker
and parking lights1157NA27/8C
Front fog lights900651B
Tail lights—0.5G
Stop/ tail lights—4.3/
0.3G
Light bulbsBulb No.WTy p e
Rear turn signal
lights744021D
Back −up lights92118D
Hight mounted
stoplight—2.2G
License plate lights—5D
Interior lights—8E
Personal lights
Ty p e A
Ty p e B
—
—5
8F
E
Glove box light—1.4D
Door courtesy
lights—3D
Vanity lights—1.5E
A : HB3 halogen bulbs
B : HB4 halogen bulbs
C : Single end bulbs (amber)
D : Wedge base bulbs
E : Double end bulbs
F : Single end bulbs
G : LEDs (Light −emitting Diodes)
—Headlights
73c005a
1. Open the hood.
Left�hand headlight: Remove the
washer inlet.
Be careful not to spill the washer fluid
over the “NORMAL” level.
Do not place the washer inlet on the en-
gine or battery.
Page 346 of 364
336
—Front fog lights
1. Turn the bulb base counterclockwiseto the front of the vehicle as shown.2. Pull the bulb out of the bulb base.
If the connector is tight, wiggle it.3. Install a new bulb base by turning it clockwise to the front of the vehicle.
Aiming is not necessary after replacing
the bulb. When aiming adjustment is nec-
essary, contact your Toyota dealer.
Page 355 of 364

345
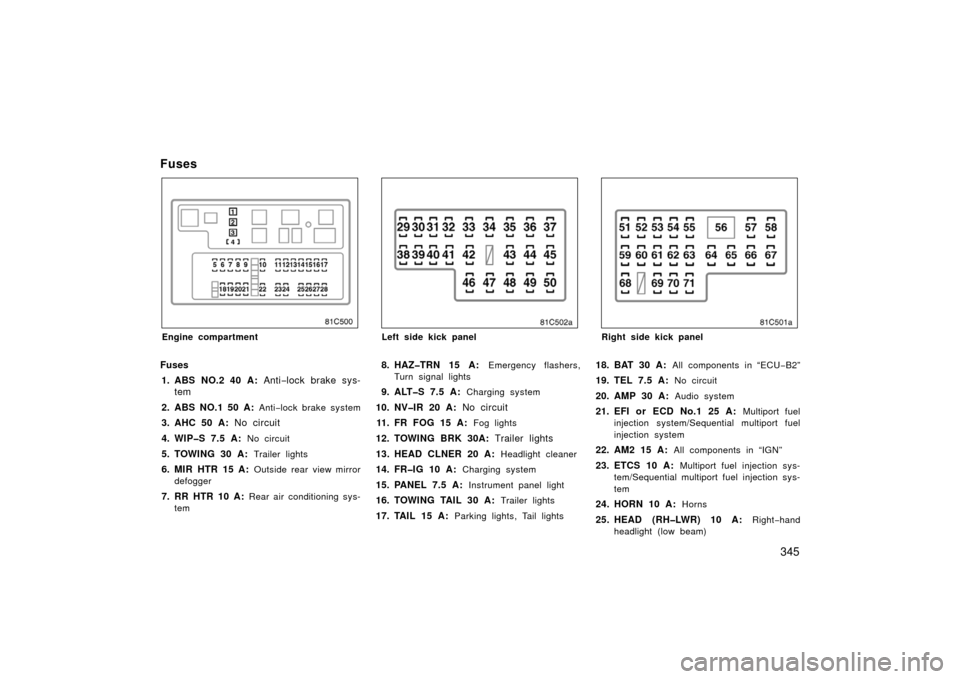
Fuses
Engine compartment
Fuses1. ABS NO.2 40 A: Anti−lock brake sys-
tem
2. ABS NO.1 50 A:
Anti−lock brake system
3. AHC 50 A: No circuit
4. WIP�S 7.5 A:
No circuit
5. TOWING 30 A: Trailer lights
6. MIR HTR 15 A: Outside rear view mirror
defogger
7. RR HTR 10 A: Rear air conditioning sys-
tem
Left side kick panel
8. HAZ�TRN 15 A: Emergency flashers,
Turn signal lights
9. ALT�S 7.5 A: Charging system
10. NV�IR 20 A: No circuit
11. FR FOG 15 A:
Fog lights
12. TOWING BRK 30A: Trailer lights
13. HEAD CLNER 20 A:
Headlight cleaner
14. FR�IG 10 A: Charging system
15. PANEL 7.5 A: Instrument panel light
16. TOWING TAIL 30 A: Trailer lights
17. TAIL 15 A: Parking lights, Tail lights
Right side kick panel
18. BAT 30 A: All components in “ECU− B2”
19. TEL 7.5 A: No circuit
20. AMP 30 A: Audio system
21. EFI or ECD No.1 25 A: Multiport fuel
injection system/Sequential multiport fuel
injection system
22. AM2 15 A: All components in “IGN”
23. ETCS 10 A: Multiport fuel injection sys-
tem/Sequential multiport fuel injection sys-
tem
24. HORN 10 A: Horns
25. HEAD (RH�LWR) 10 A: Right−hand
headlight (low beam)