Page 76 of 364

66
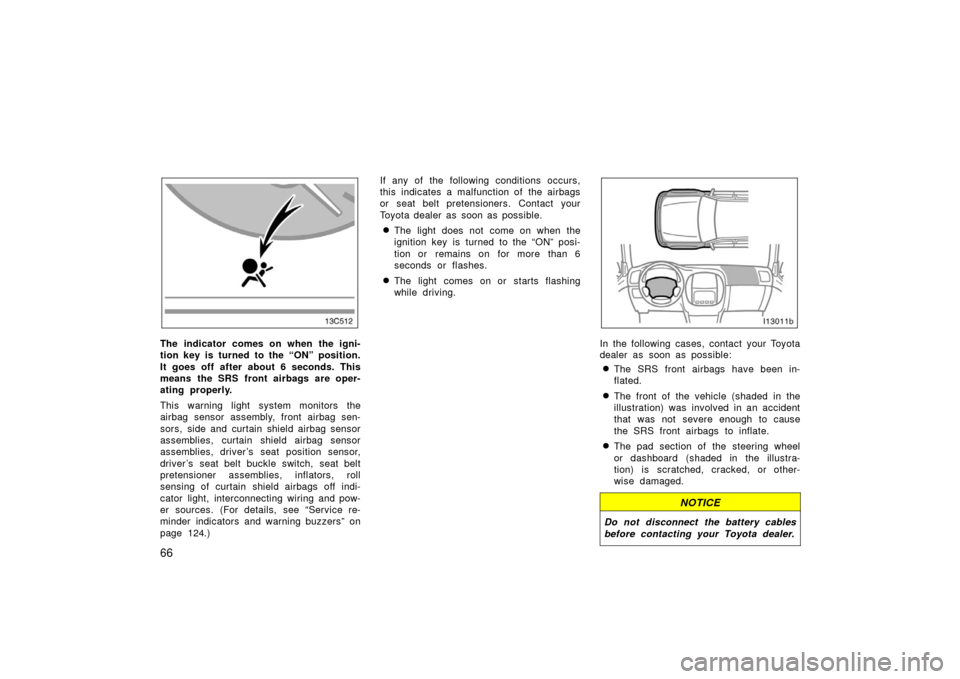
The indicator comes on when the igni-
tion key is turned to the “ON” position.
It goes off after about 6 seconds. This
means the SRS front airbags are oper-
ating properly.
This warning light system monitors the
airbag sensor assembly, front airbag sen-
sors, side and curtain shield airbag sensor
assemblies, curtain shield airbag sensor
assemblies, driver ’s seat position sensor,
driver ’s seat belt buckle switch, seat belt
pretensioner assemblies, inflators, roll
sensing of curtain shield airbags off indi-
cator light, interconnecting wiring and pow-
er sources. (For details, see “Service re-
minder indicators and warning buzzers” on
page 124.)If any of the following conditions occurs,
this indicates a malfunction of the airbags
or seat belt pretensioners. Contact your
Toyota dealer as soon as possible.
�The light does not come on when the
ignition key is turned to the “ON” posi-
tion or remains on for more than 6
seconds or flashes.
�The light comes on or starts flashing
while driving.
In the following cases, contact your Toyota
dealer as soon as possible:
�The SRS front airbags have been in-
flated.
�The front of the vehicle (shaded in the
illustration) was involved in an accident
that was not severe enough to cause
the SRS front airbags to inflate.
�The pad section of the steering wheel
or dashboard (shaded in the illustra-
tion) is scratched, cracked, or other-
wise damaged.
NOTICE
Do not disconnect the battery cables
before contacting your Toyota dealer.
Page 87 of 364

77
If any of the following conditions occurs,
this indicates a malfunction of the airbags
or seat belt pretensioners. Contact your
Toyota dealer as soon as possible.
�The light does not come on when the
ignition key is turned to the “ON” posi-
tion or remains on for more than 6
seconds or flashes.
�The light comes on or starts flashing
while driving.
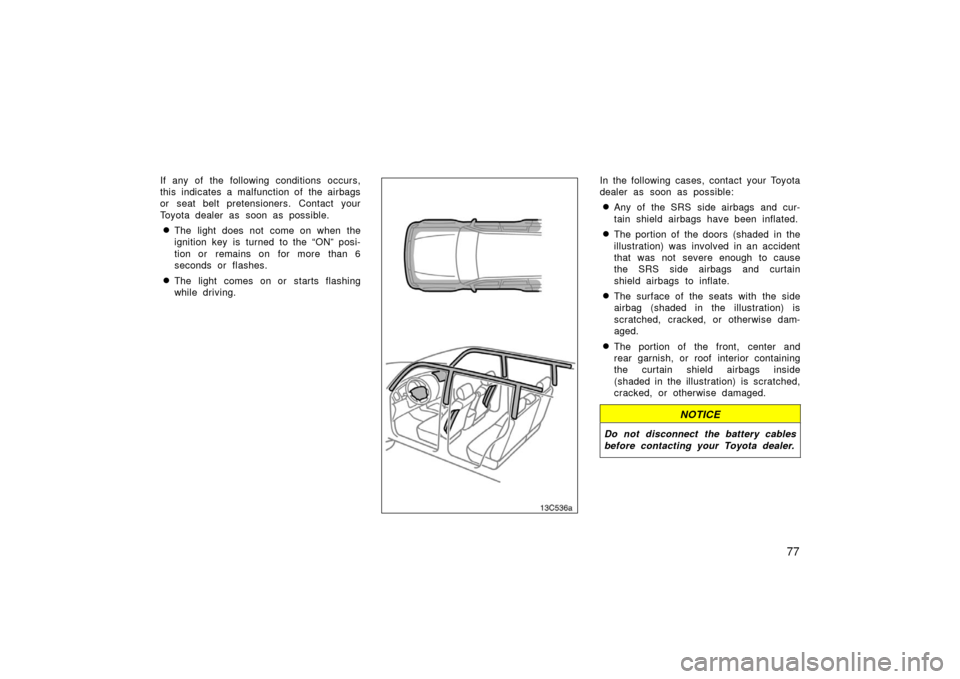
In the following cases, contact your Toyota
dealer as soon as possible:
�Any of the SRS side airbags and cur-
tain shield airbags have been inflated.
�The portion of the doors (shaded in the
illustration) was involved in an accident
that was not severe enough to cause
the SRS side airbags and curtain
shield airbags to inflate.
�The surface of the seats with the side
airbag (shaded in the illustration) is
scratched, cracked, or otherwise dam-
aged.
�The portion of the front, center and
rear garnish, or roof interior containing
the curtain shield airbags inside
(shaded in the illustration) is scratched,
cracked, or otherwise damaged.
NOTICE
Do not disconnect the battery cables
before contacting your Toyota dealer.
Page 114 of 364

104
Pushing the “AUTO” button for longer
3 seconds turns on or off the compass
display.
The compass may not show the correct
direction in the following conditions:
�The vehicle is stopped immediately af-
ter turning. The compass does not ad-
just while the vehicle is stopped.
�The ignition switch is turned off imme-
diately after turning.
�The vehicle is on an inclined surface.
�The vehicle is in a place where the
earth’s magnetic field is subject to in-
terference by artificial magnetic fields
(underground parking, under a steel
tower, between buildings, roof parking,
near a crossing, near a large vehicle,
etc.).
�The vehicle is magnetized. (There is a
magnet or a metal object on or near
the inside rear view mirror.)
�The battery has been disconnected.
�Any door is open.
If the deviation is small, the compass
works to calibrate the direction automati-
cally while the vehicle is in motion.
For obtaining additional precision or for
complete calibrating, see “Calibrating the
compass” below.
NOTICE
Do not put magnets or a metal object
near the inside rear view mirror. Do-
ing this may cause malfunction of the
compass sensor.
CALIBRATING THE COMPASS
(deviation calibration)
The direction display on the compass
deviates from the true direction deter-
mined by the earth’s magnetic field, The
amount of deviation varies according to
the geographic position of the vehicle.
To adjust for this deviation, stop the ve-
hicle and push the button for longer than
about 6 seconds until the number (1 −15)
appears on the display. Then push the
button again, referring to the following
map to select the number of the zone
where the vehicle is.
Page 121 of 364

111
When the headlight switch is on with all
the doors locked, pushing the “LOCK” but-
ton on the wireless remote control key
turns off the headlights.
NOTE: *The time before turning off the
lights can be changed. Ask your Toyota
dealer for details.
NOTICE
To prevent the battery from being dis-
charged, do not leave the lights on
for a long period when the engine is
not running.
Daytime running light system
The headlights turn on at reduced intensi-
ty when the parking brake is released with
the engine started, even with the light
switch in the “OFF” position. They will not
go off until the ignition switch is turned
off.
To turn on the other exterior lights and
instrument panel lights, twist the knob to
the position 1.
Twist the knob to the position 2 to turn
the headlights to full intensity for driving
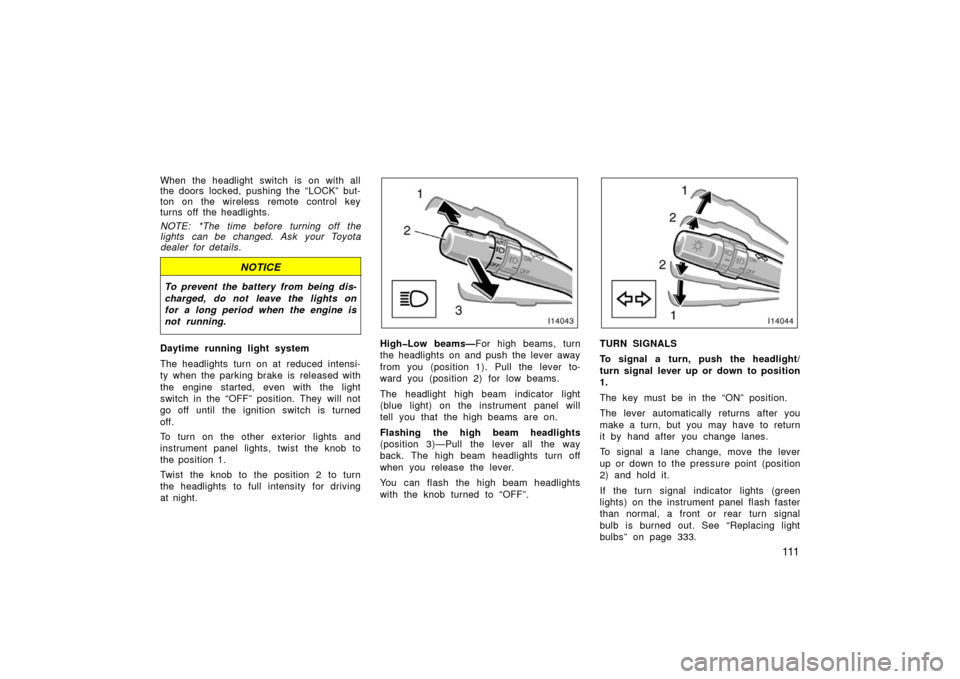
at night.High�Low beams—For high beams, turn
the headlights on and push the lever away
from you (position 1). Pull the lever to-
ward you (position 2) for low beams.
The headlight high beam indicator light
(blue light) on the instrument panel will
tell you that the high beams are on.
Flashing the high beam headlights
(position 3)—Pull the lever all the way
back. The high beam headlights turn off
when you release the lever.
You can flash the high beam headlights
with the knob turned to “OFF”.TURN SIGNALS
To signal a turn, push the headlight/
turn signal lever up or down to position
1.
The key must be in the “ON” position.
The lever automatically returns after you
make a turn, but you may have to return
it by hand after you change lanes.
To signal a lane change, move the lever
up or down to the pressure point (position
2) and hold it.
If the turn signal indicator lights (green
lights) on the instrument panel flash faster
than normal, a front or rear turn signal
bulb is burned out. See “Replacing light
bulbs” on page 333.
Page 122 of 364
11 2
Emergency flashers
To turn on the emergency flashers,
push the switch.
All the turn signal lights will flash. To turn
them off, push the switch once again.
Turn on the emergency flashers to warn
other drivers if your vehicle must be
stopped where it might be a traffic hazard.
Always pull your vehicle as far off the
road as possible.
The turn signal light switch will not work
when the emergency flashers are operat-
ing.
NOTICE
To prevent the battery from being dis-
charged, do not leave the switch on
longer than necessary when the en-
gine is not running.
Instrument panel light control
To adjust the brightness of the instru-
ment panel lights, turn the dial.
Page 127 of 364

11 7
Rear window defogger
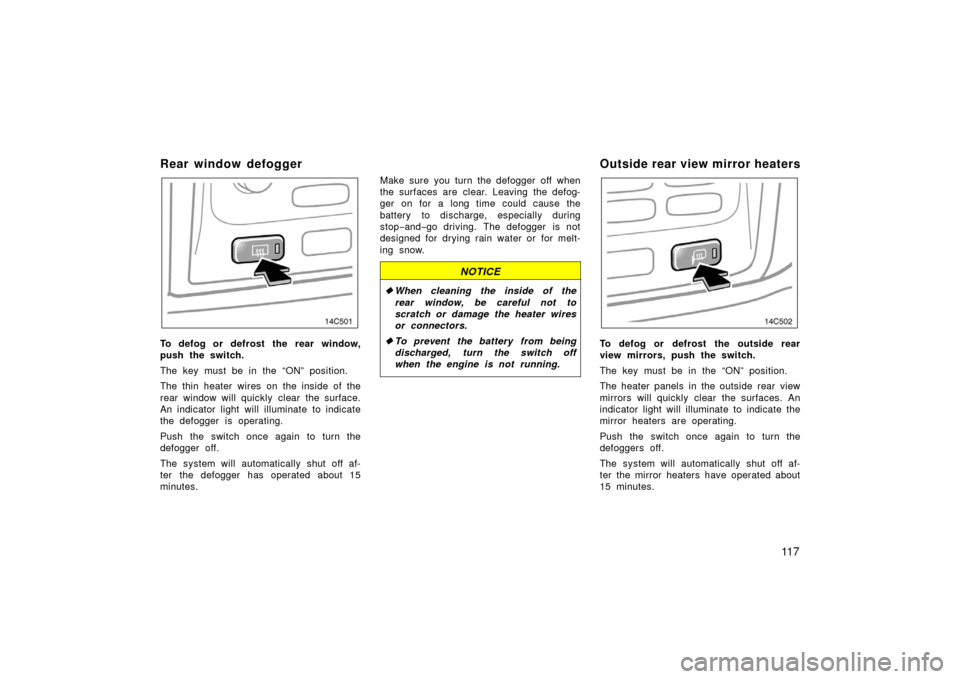
To defog or defrost the rear window,
push the switch.
The key must be in the “ON” position.
The thin heater wires on the inside of the
rear window will quickly clear the surface.
An indicator light will illuminate to indicate
the defogger is operating.
Push the switch once again to turn the
defogger off.
The system will automatically shut off af-
ter the defogger has operated about 15
minutes.Make sure you turn the defogger off when
the surfaces are clear. Leaving the defog-
ger on for a long time could cause the
battery to discharge, especially during
stop
−and− go driving. The defogger is not
designed for drying rain water or for melt-
ing snow.
NOTICE
� When cleaning the inside of the
rear window, be careful not to
scratch or damage the heater wires
or connectors.
� To prevent the battery from being
discharged, turn the switch off
when the engine is not running.
Outside rear view mirror heaters
To defog or defrost the outside rear
view mirrors, push the switch.
The key must be in the “ON” position.
The heater panels in the outside rear view
mirrors will quickly clear the surfaces. An
indicator light will illuminate to indicate the
mirror heaters are operating.
Push the switch once again to turn the
defoggers off.
The system will automatically shut off af-
ter the mirror heaters have operated about
15 minutes.
Page 128 of 364
11 8
CAUTION
Since the mirror surfaces can get hot,
do not touch them when the mirror
heater switch is on.
Make sure you turn the mirror heaters off
when the surfaces are clear. Leaving the
mirror heaters on for a long time could
cause the battery to discharge, especially
during stop−and−go driving. The mirror
heaters are not designed for drying rain
water or for melting snow.
If the outside rear view mirrors are heavi-
ly coated with ice, use a spray de −icer
before operating the switch.
NOTICE
To prevent the battery from being dis-
charged, turn the switch off when the
engine is not running.
Page 132 of 364
122
Vo l t m e t e r
The voltmeter tells whether the battery
is charged or discharged. Check it
while the engine is running—the needle
should always indicate as shown above.
If the needle reads below or above the
normal range while the engine is running,
it indicates the charging system needs im-
mediate repair.
However, it is normal for the needle to
drop below the normal range during en-
gine starting.
Tachometer
The tachometer indicates engine speed
in thousands of rpm (revolutions per
minute). Use it while driving to prevent
engine over-revving.
Driving with the engine running too fast
causes excessive engine wear and poor
fuel economy. Remember, in most cases
the slower the engine speed, the greater
the fuel economy.
NOTICE
Do not let the indicator needle get
into the red zone. This may cause
severe engine damage.