Page 20 of 189

10
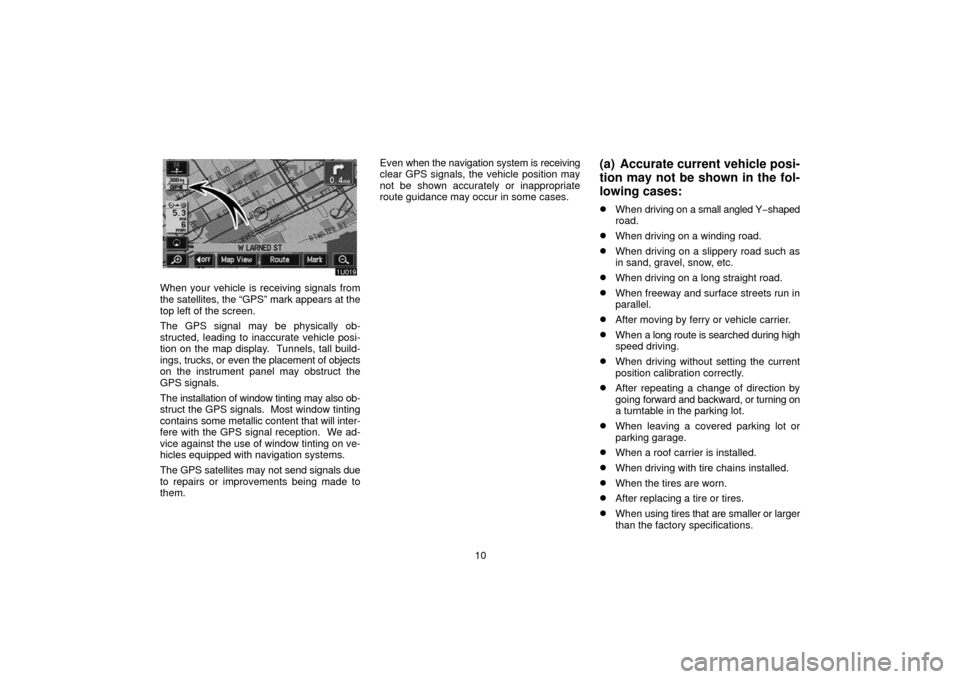
When your vehicle is receiving signals from
the satellites, the “GPS” mark appears at the
top left of the screen.
The GPS signal may be physically ob-
structed, leading to inaccurate vehicle posi-
tion on the map display. Tunnels, tall build-
ings, trucks, or even the placement of objects
on the instrument panel may obstruct the
GPS signals.
The installation of window tinting may also ob-
struct the GPS signals. Most window tinting
contains some metallic content that will inter-
fere with the GPS signal reception. We ad-
vice against the use of window tinting on ve-
hicles equipped with navigation systems.
The GPS satellites may not send signals due
to repairs or improvements being made to
them. Even
when the navigation system is receiving
clear GPS signals, the vehicle position may
not be shown accurately or inappropriate
route guidance may occur in some cases.
(a) Accurate current vehicle posi-
tion may not be shown in the fol-
lowing cases:
�When driving on a small angled Y −shaped
road.
�When driving on a winding road.
�When driving on a slippery road such as
in sand, gravel, snow, etc.
�When driving on a long straight road.
�When freeway and surface streets run in
parallel.
�After moving by ferry or vehicle carrier.
�When a long route is searched during high
speed driving.
�When driving without setting the current
position calibration correctly.
�After repeating a change of direction by
going forward and backward, or turning on
a turntable in the parking lot.
�When leaving a covered parking lot or
parking garage.
�When a roof carrier is installed.
�When driving with tire chains installed.
�When the tires are worn.
�After replacing a tire or tires.
�When using tires that are smaller or larger
than the factory specifications.
Page 140 of 189

130
5u009
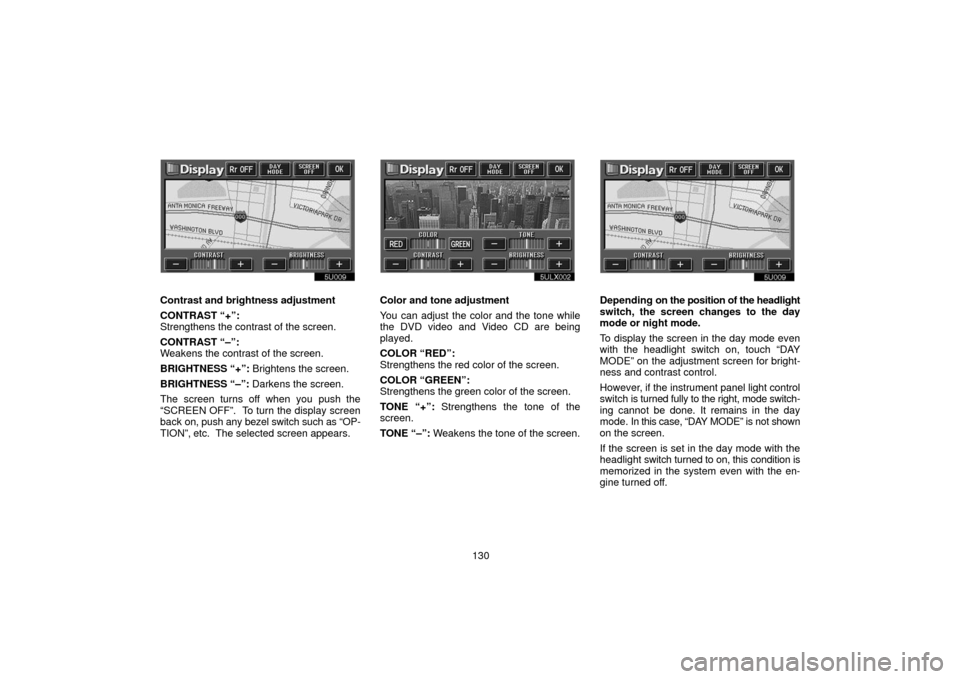
Contrast and brightness adjustment
CONTRAST “+”:
Strengthens the contrast of the screen.
CONTRAST “–”:
Weakens the contrast of the screen.
BRIGHTNESS “+”: Brightens the screen.
BRIGHTNESS “–”: Darkens the screen.
The screen turns off when you push the
“SCREEN OFF”. To turn the display screen
back on, push any bezel switch such as “OP-
TION”, etc. The selected screen appears.Color and tone adjustment
You can adjust the color and the tone while
the DVD video and Video CD are being
played.
COLOR “RED”:
Strengthens the red color of the screen.
COLOR “GREEN”:
Strengthens the green color of the screen.
TONE “+”: Strengthens the tone of the
screen.
TONE “–”: Weakens the tone of the screen.
5u0095u009
Depending on the position of the headlight
switch, the screen changes to the day
mode or night mode.
To display the screen in the day mode even
with the headlight switch on, touch “DAY
MODE” on the adjustment screen for bright-
ness and contrast control.
However, if the instrument panel light control
switch is turned fully to the right, mode switch-
ing cannot be done. It remains in the day
mode. In this case, “DAY MODE” is not shown
on the screen.
If the screen is set in the day mode with the
headlight switch turned to on, this condition is
memorized in the system even with the en-
gine turned off.
Page 145 of 189

135
UNX503
2. Use the “TEMP” button to set the de-
sired temperature.
The “TEMP” button is used to set the desired
passenger compartment temperature. The
temperature of air delivered to the passenger
compartment will be controlled automatically
according to the setting. SETTING OPERATION � manual control
When
one of the manual control buttons is
depressed while operating in automatic
mode, the mode relevant to the depressed
button is set. Other conditions continue to
be adjusted automatically.
If manual air flow selection is desired �
The outlets from which air is delivered can be
selected manually by touching the switch.
The function of each mode is as follows:
1 Panel − Air flows mainly from the instru-
ment panel vents.
2 Bi�level − Air flows from both the floor
vents and the instrument panel vents.
3 Floor − Air flows mainly from the floor
vents.
It is recommended that you close the lower
vent. For details about this, see page 139.
4 Floor/Windshield − Air flows mainly
from the floor vents and windshield
vents.
It is recommended that you close the lower
vent. For details about this, see page 139.
The selected mode is highlighted in green.
If quick heating or cooling is desired �
Push the “TEMP” button on either side and
hold it until the maximum figure or minimum
figure appears.
Page 152 of 189
�For the JBL brand audio system, “JBL” logo is provided on the panel.
7ulc001a
142
Audio system
Quick reference for your audio system
Page
1Audio operation screen display
button 143 . . . . . . . . . . . . . . . . . . . . . . . .
2Function switch display
screen 144 . . . . . . . . . . . . . . . . . . . . . . .
3Cassette tape slot 157
. . . . . . . . . . . . .
4Frequency turning knob 147 . . . . . . .
5[Radio mode] Preset tuning 148 . . . .
[Tape mode] Side change of
cassette tape 157 . . . . . . . . . . . . . . . . .
[DISC mode] Disc selection 161 . . . .
6SCAN button 148, 162
. . . . . . . . . . . . . .
7Mode selectors 144
. . . . . . . . . . . . . . . .
8Stopping and ejecting a
cassette tape 157 . . . . . . . . . . . . . . . . .
9[Radio mode] Seek tuning 148 . . . . . .
[Tape/DISC mode] Direct access to
a desired program 158, 162 . . . . . . . . .
10Turning the system on and
adjusting volume 143. . . . . . . . . . . . . .
Page 171 of 189
161
(b) Playing a disc
ung627
Push the “DISC” button if the magazine is
already loaded in the player.
The “DVD CHANGER” screen appears on the
display.
The discs set in the magazine are played con-
tinuously, starting with disc number 1. The
disc number of the disc currently being
played, the track number and the time from
the beginning of the program are shown on
the display.
(c) Selecting a desired disc
On the screen: Touch the desired disc
number.
The selected disc number is highlighted in
green.
The player will start playing the selected disc
from the first track.
On the audio panel: Push the “
” or “”
side of the “DISC” button.
When you release the button, the player will
start playing the selected disc from the first
track.
(d) Operating an audio CD
(i) Playing an audio CD
lxb008a
Push the “AUDIO” button to display this
screen. You can operate the switches and
choose the number of the disc you want to
play. The selected disc is automatically
played.
VI