Page 357 of 428
’06 HIGHLANDER_U (L/O 0508)
347
Tighten each nut a little at a time in
the order shown. Repeat the process
until all the nuts are tight.
CAUTION
�
When lowering the vehicle,
make sure all portions of your
body and all other persons
around will not be injured as
the vehicle is lowered to the
ground.
� Have the wheel nuts tightened
with torque wrench to 103 N·m
(10.5 kgf·m, 76 ft·lbf), as soon
as possible after changing
wheels. Otherwise, the nuts
may loosen and the wheels
may fall off, which could cause
a serious accident.
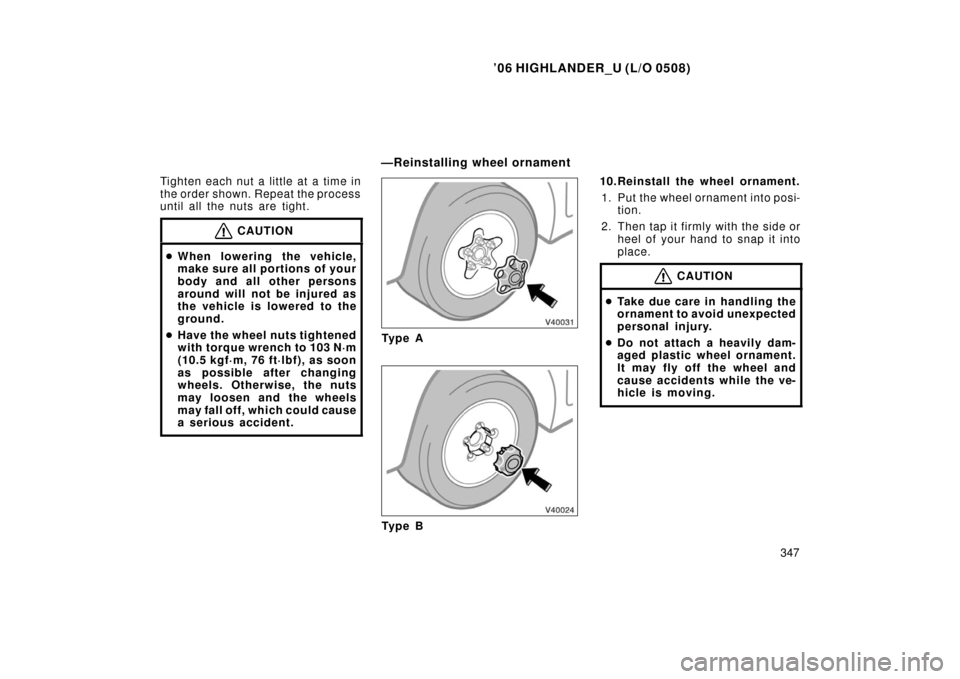
Ty p e A
Ty p e B 10.Reinstall the wheel ornament.
1. Put the wheel ornament into posi- tion.
2. Then tap it firmly with the side or heel of your hand to snap it into
place.
CAUTION
�Take due care in handling the
ornament to avoid unexpected
personal injury.
� Do not attach a heavily dam-
aged plastic wheel ornament.
It may fly off the wheel and
cause accidents while the ve-
hicle is moving.
—Reinstalling wheel ornament
Page 358 of 428

348 11. Check the air pressure of the re-
placed tire.
Adjust the air pressu re to the specifi-
cation designated on page 408 in
Section 8. If the pressure is lower,
dri")
’06 HIGHLANDER_U (L/O 0508)
348 11. Check the air pressure of the re-
placed tire.
Adjust the air pressu re to the specifi-
cation designated on page 408 in
Section 8. If the pressure is lower,
drive slowly to the nearest service
station and fill to the correct pressure.
Do not forget to reinstall the tire infla-
tion valve cap as dirt and moisture
could get into th e valve core and
possibly cause air leakage. If the cap
is missing, have a new one put on as
soon as possible.
12.Restow all the tools, jack and flat tire securely.
As soon after changing wheels as
possible, tighten the wheel nuts to the
torque specified on page 408 in Sec-
tion 8 with a torque wrench. Have a
technician repair the flat tire and re-
place the spare tire with it.
Initial adjustment of the tire pres-
sure warning system is necessary
after you have replaced your tires
or wheels. See “Tire pressure
warning system” on page 159 in
Section 1�7.
CAUTION
Before driving, make sure all the
tools, jack and flat tire are se-
curely in place in their storage
location to reduce the possibility
of personal injury during a colli-
sion or sudden braking.
If your vehicle becomes stuck in snow,
mud, sand, etc., then you may attempt
to rock the vehicle free by moving it
forward and backward.
Two�wheel drive models—
Turn off the traction control system to
become unstuck to allow the tires to
spin enough to remove the vehicle from
the obstruction. (For details, see “Trac-
tion control system (two�wheel drive
models)” on page 154 in Section 1�7.)
CAUTION
Do not attempt to rock the vehicle
free by moving it forward and back-
ward if people or objects are any-
where near the vehicle. During the
rocking operation the vehicle may
suddenly move forward or backward
as it becomes unstuck, causing injury
or damage to nearby people or ob-
jects.
—After changing wheels If your vehicle becomes stuck
Page 418 of 428

408 Tire size and cold tire inflation pressure:
kPa (kgf/cm
2 or bar, psi)
Ti r e siz e
Ti r e inf lat ion pr es s ur eWheel sizeFrontRearSpare
P225/70R16 101S210 (2.1, 3")
’06 HIGHLANDER_U (L/O 0508)
408 Tire size and cold tire inflation pressure:
kPa (kgf/cm
2 or bar, psi)
Ti r e siz e
Ti r e inf lat ion pr es s ur eWheel sizeFrontRearSpare
P225/70R16 101S210 (2.1, 30)210 (2.1, 30)210 (2.1, 30)16 �6 1/ 2 JJ
225/65R17 101S210 (2.1, 30)210 (2.1, 30)210 (2.1, 30)17 �6 1/ 2 JJ
When driving under the above load condition at sustained high speeds above 160 km/h (100 mph), in countries where
such speeds are permitted by −low, inflate the front and rear tires to the following tire inflation pressure provided that
it does not exceed the maximum cold tire in flation pressure molded on the tire sidewall.
P225/70R16 101S tires 240 kPa (2.4 kgf/cm
2 or bar, 35 psi)
225/65R17 101S tires 230 kPa (2.3 kgf/cm2 or bar, 33 psi)
Wheel nut torque, N
·m (kgf·m, ft·lbf):
103 (10.5, 76)
NOTE: For a complete information on tires (e.g. replacing ti res or replacing wheels), see “Checking tire inflation pres-
sure” through “Aluminum wheel precautions”, pages 385 through 392, in Section 7 −2.
Tires