Page 174 of 428

’06 HIGHLANDER_U (L/O 0508)
164
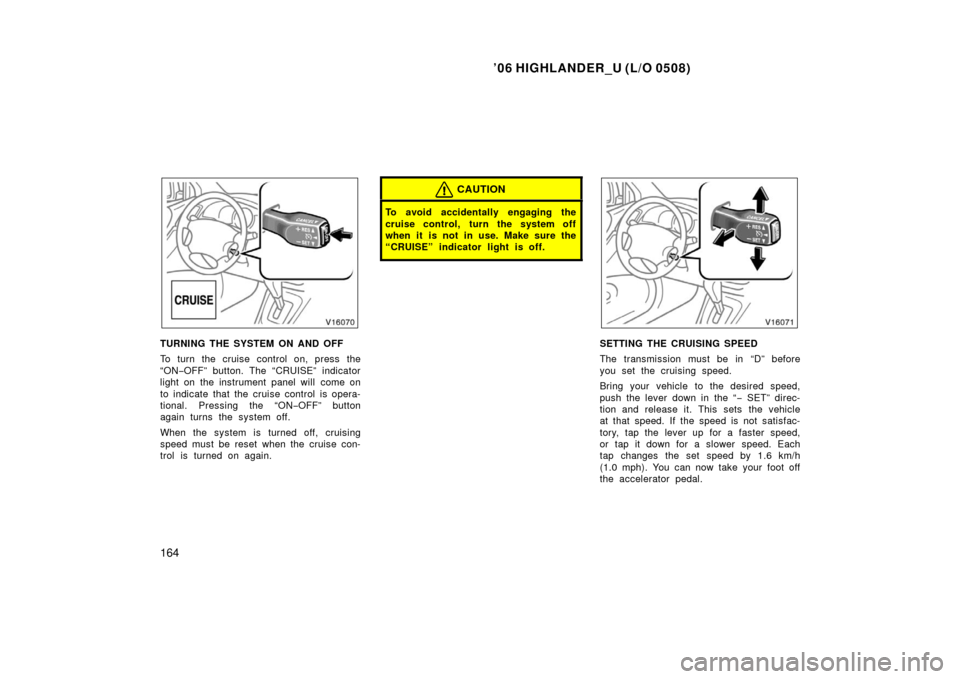
TURNING THE SYSTEM ON AND OFF
To turn the cruise control on, press the
“ON−OFF” button. The “CRUISE” indicator
light on the instrument panel will come on
to indicate that the cruise control is opera-
tional. Pressing the “ON −OFF” button
again turns the system off.
When the system is turned off, cruising
speed must be reset when the cruise con-
trol is turned on again.
CAUTION
To avoid accidentally engaging the
cruise control, turn the system off
when it is not in use. Make sure the
“CRUISE” indicator light is off.
SETTING THE CRUISING SPEED
The transmission must be in “D” before
you set the cruising speed.
Bring your vehicle to the desired speed,
push the lever down in the “ − SET” direc-
tion and release it. This sets the vehicle
at that speed. If the speed is not satisfac-
tory, tap the lever up for a faster speed,
or tap it down for a slower speed. Each
tap changes the set speed by 1.6 km/h
(1.0 mph). You can now take your foot off
the accelerator pedal.
Page 175 of 428

’06 HIGHLANDER_U (L/O 0508)
165
If you need acceleration—for example,
when passing—depress the accelerator
pedal enough for the vehicle to exceed
the set speed. When you release it, the
vehicle will return to the speed set prior
to the acceleration.
CANCELLING THE CRUISE CONTROL
The cruise control may be temporarily
cancelled by the driver or by the system
itself under certain circumstances. Tempo-
rary cancellation allows the set cruising
speed to remain in memory.
The cruise control can be temporarily can-
celled by doing the following:
�Pulling the lever in the “CANCEL” di-
rection and releasing it
�Depressing the brake pedal
Under certain circumstances, the cruise
control is temporarily cancelled:
�When vehicle speed falls below 40
km/h (25 mph)
�When vehicle stability control is acti-
vated
When vehicle speed drops 16 km/h (10
mph) below the set speed, the cruise con-
trol is cancelled and the set speed is
erased from memory. The “CRUISE” indicator light remains on
to indicate that the system is still in op-
eration.
To turn the cruise control off, press the
“ON
−OFF” button. Make sure the
“CRUISE” indicator light is off.
If the cruise control automatically cancels
out other than for the above cases, have
your vehicle checked by your Toyota deal-
er at the earliest opportunity.
RESUMING THE CRUISE CONTROL
If the cruise control is temporarily can-
celled, the cruising speed can be resumed
by pushing the lever up in the “+ RES”
direction.
Vehicle speed must be above 40 km/h (25
mph).
RESETTING TO A FASTER SPEED
Push the lever up in the “+ RES” direction
and hold it. Release the lever when the
desired speed is attained. While the lever
is held up, the vehicle will gradually gain
speed.
However, a faster way to reset is to ac-
celerate the vehicle and then push the
lever down in the “− SET” direction. RESETTING TO A SLOWER SPEED
Push the lever down in the “
− SET” direc-
tion and hold it. Release the lever when
the desired speed is attained. While the
lever is held down, the vehicle speed will
gradually decrease.
However, a faster way to reset is to de-
press the brake pedal and then push the
lever down in the “− SET” direction.
Even if you turn off the overdrive switch
with the cruise control on, engine braking
will not be applied because the cruise
control is not cancelled. To decrease the
vehicle speed, reset to a slower speed
with the cruise control lever or depress
the brake pedal. If you use the brake
pedal, cruise control is cancelled.
Page 176 of 428
’06 HIGHLANDER_U (L/O 0508)
166
CRUISE CONTROL FAILURE WARNING
If the “CRUISE” indicator light flashes
when using the cruise control, press the
“ON−OFF” button to turn the system off
and then press it again to turn it on.
If any of the following conditions then oc-
curs, there is some trouble in the cruise
control system.
�The indicator light does not come on.
�The indicator light flashes again.
�The indicator light goes out after it
comes on.
If this is the case, contact your Toyota
dealer and have your vehicle inspected.
Page 200 of 428

’06 HIGHLANDER_U (L/O 0508)
190
NOTICE
�Benzene or alkaline solutions may
damage the coated surface of the
screen .
� To prevent the battery from being
discharged, do not turn on the rear
seat entertainment system longer
than necessary when the engine is
not running.
The rear seat entertainment system can
be operated with the rear seat entertain-
ment system controller and buttons on the
DVD player unit. The system cannot be
operated by touching the switches on the
screen directly.
CAUTION
Do not disassemble or modify the
controller. It may cause an accident,
fire or electric shock.
NOTICE
Keep the controller away from direct
sunlight, high heat and high humidity.
These conditions could cause the
case to deform or the battery to ex-
plode or leak.
BEFORE USING THE CONTROLLER
(for new vehicle owners)
A battery is already set in the control-
ler with an insulating sheet, which pre-
vents the battery from being dis-
charged. Before using the controller,
remove the insulating sheet according
to the following procedure.
—Rear seat entertainment
system controller
Page 202 of 428
’06 HIGHLANDER_U (L/O 0508)
192
USING THE CONTROLLER
To use the rear seat entertainment sys-
tem controller, direct the signal output
portion of the controller to the signal
reception portion of the rear seat enter-
tainment system display.
The controller does not operate properly
when the signal reception portion of the
display is exposed to direct sunlight.
Block the display from direct sunlight.
CAUTION
To reduce the chance of injury in
case of an accident or a sudden stop
while driving, stow the controller in
the console box or front seatback
pocket when it is not in use.
NOTICE
Observe the followings, otherwise the
controller may be damaged.
�Do not drop or strongly knock the
controller against hard objects.
� Do not sit on or place heavy ob-
jects on the controller.
� Do not leave the controller exposed
to high temperatures (such as on
the instrument panel) for a long
time.
Page 207 of 428
’06 HIGHLANDER_U (L/O 0508)
197
7. “ENT” button
This button inputs the selected switch
or the selected menu for the disc.
8. “DISC” indicator light This light indicates that the disc is
loaded.
Controller
DVD player unit
To turn on the system, push the
“SOURCE” button.
The screen indicates which mode can be
selected. Push the “DVD” or “VIDEO” but-
ton when the connected DVD player or
your personal audio machine is on. The
rear seat entertainment system will be
turned on.
The rear seat entertainment system can
select all the modes.
When a cassette tape, a compact disc, a
DVD video disc, an audio CD, a video
CD, a CD text, a dts −CD or a DVD audio
disc is not loaded on the front audio sys-
tem or the DVD player, only the radio
mode can be selected on the rear seat
entertainment system.
—Turning the rear seat
entertainment system on and
off
Page 214 of 428

’06 HIGHLANDER_U (L/O 0508)
204
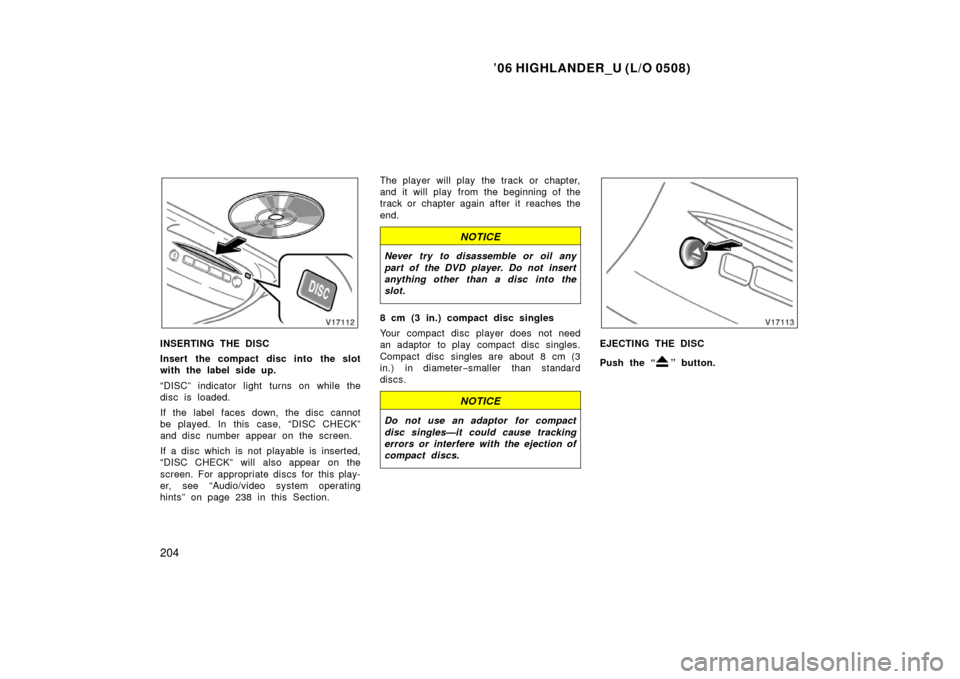
INSERTING THE DISC
Insert the compact disc into the slot
with the label side up.
“DISC” indicator light turns on while the
disc is loaded.
If the label faces down, the disc cannot
be played. In this case, “DISC CHECK”
and disc number appear on the screen.
If a disc which is not playable is inserted,
“DISC CHECK” will also appear on the
screen. For appropriate discs for this play-
er, see “Audio/video system operating
hints” on page 238 in this Section. The player will play the track or chapter,
and it will play from the beginning of the
track or chapter again after it reaches the
end.
NOTICE
Never try to disassemble or oil any
part of the DVD player. Do not insert
anything other than a disc into the
slot.
8 cm (3 in.) compact disc singles
Your compact disc player does not need
an adaptor to play compact disc singles.
Compact disc singles are about 8 cm (3
in.) in diameter
−smaller than standard
discs.
NOTICE
Do not use an adaptor for compact
disc singles—it could cause tracking
errors or interfere with the ejection of
compact discs.
EJECTING THE DISC
Push the “
” button.
Page 216 of 428
’06 HIGHLANDER_U (L/O 0508)
206
The DVD player can be operated with the
controller buttons directly.
1. “DVD” button
2. “RETURN” button
3. “MENU” button
4. “AUDIO” button
5. “SUB TITLE” button
6. “ANGLE” button
7. “SET UP” button
8. “SEARCH” button
9. “TOP MENU” button
10. “
”, “ �”, “ �� ” and “�� ” buttons
Controller
DVD player unit
The player can also be operated with the
switches on the screen.
To operate the switches on the screen,
select the switch by the joystick and push
the “ENT” button. You cannot select the
switches on the screen by touching them
directly.
When the switch is selected by the joys-
tick, the outline of the switch changes to
blue. Push the “ENT” button, and the
switch will be highlighted in green.
—DVD player operation
switches