2006 SUBARU OUTBACK ECO mode
[x] Cancel search: ECO modePage 334 of 425
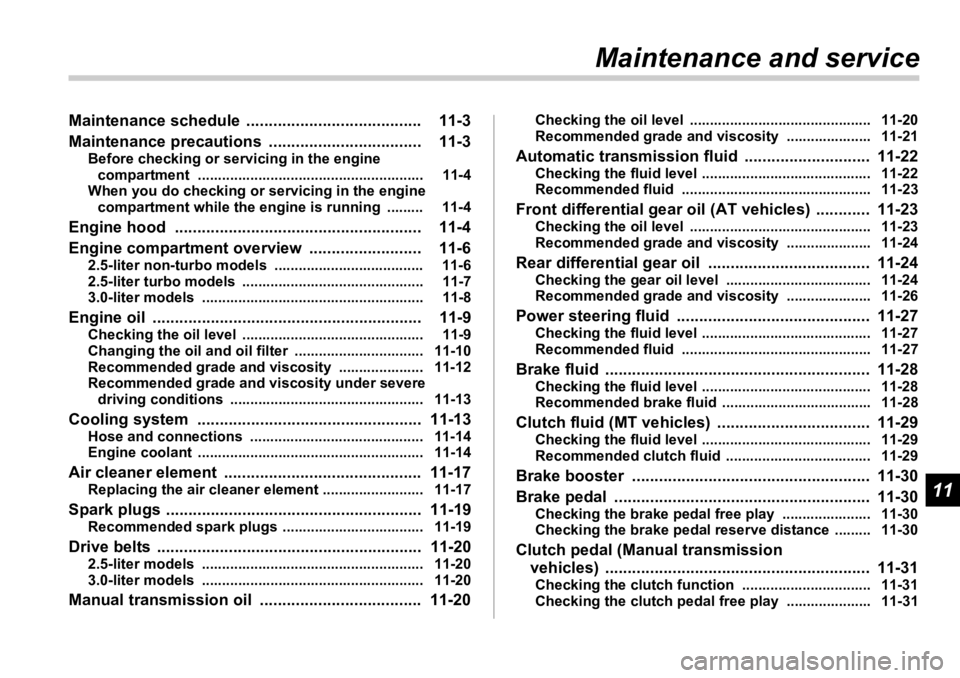
11Maintenance and serviceMaintenance schedule ....................................... 11-3
Maintenance precautions .................................. 11-3 Before checking or servicing in the engine
compartment ........................................................ 11-4
When you do checking or servicing in the engine
compartment while the engine is running ......... 11-4
Engine hood ....................................................... 11-4
Engine compartment overview ......................... 11-6 2.5-liter non-turbo models ..................................... 11-6
2.5-liter turbo models ............................................. 11-7
3.0-liter models ....................................................... 11-8
Engine oil ............................................................ 11-9 Checking the oil level ............................................. 11-9
Changing the oil and oil filter ................................ 11-10
Recommended grade and viscosity ..................... 11-12
Recommended grade and viscosity under severe
driving conditions ................................................ 11-13
Cooling system .................................................. 11-13 Hose and connections ........................................... 11-14
Engine coolant ........................................................ 11-14
Air cleaner element ............................................ 11-17 Replacing the air cleaner element ......................... 11-17
Spark plugs ......................................................... 11-19
Recommended spark plugs ................................... 11-19
Drive belts ........................................................... 11-20
2.5-liter models ....................................................... 11-20
3.0-liter models ....................................................... 11-20
Manual transmission oil .................................... 11-20 Checking the oil level ............................................. 11-20
Recommended grade and viscosity ..................... 11-21
Automatic transmission flui d ............................ 11-22Checking the fluid level .......................................... 11-22
Recommended fluid ............................................... 11-23
Front differential gear oil (AT vehicles) ............ 11-23 Checking the oil level ............................................. 11-23
Recommended grade and viscosity ..................... 11-24
Rear differential gear oil .................................... 11-24 Checking the gear oil level .................................... 11-24
Recommended grade and viscosity ..................... 11-26
Power steering fluid ........................................... 11-27 Checking the fluid level .......................................... 11-27
Recommended fluid ............................................... 11-27
Brake fluid ........................................................... 11-28 Checking the fluid level .......................................... 11-28
Recommended brake fluid ..................................... 11-28
Clutch fluid (MT vehicles) .................................. 11-29 Checking the fluid level .......................................... 11-29
Recommended clutch fluid .................................... 11-29
Brake booster ..................................................... 11-30
Brake pedal ......................................................... 11-30 Checking the brake pedal free play ...................... 11-30
Checking the brake pedal reserve distance ......... 11-30
Clutch pedal (Man ual transmission
vehicles) ........................................................... 11-31
Checking the clutch function ................................ 11-31
Checking the clutch pedal free play ..................... 11-31
Page 345 of 425
11 - 1 2 Maintenance and service
Oil capacity (Guideline):
2.5-liter models: 4.2 US qt (4.0 liters, 3.5
Imp qt)
3.0-liter models: 5.8 US qt (5.5 liters, 4.8
Imp qt)
The oil quantity indicated above is only a
guideline. The necessary quantity of oil
depends on the quantity of oil that has
been drained. The quantity of drained oil
differs slightly depen ding on the tempera-
ture of the oil and the time the oil is left
flowing out. After refilling the engine with
oil, therefore, you must use the dipstick to
confirm that the level is correct.
13.Start the engine and make sure that no
oil leaks appear around the filter’s rubber
seal and drain plug.
14.Run the engine until it reaches the nor-
mal operating temperature. Then stop the
engine and wait a few minutes to allow the
oil drain back. Check the oil level again
and if necessary, add more engine oil.
�„ Recommended grade and
viscosity Oil grade:
ILSAC GF-4, which can be identified
with the ILSAC certification mark
(Starburst mark)
or API classification SM with the
words “ENERGY CONSERVING”
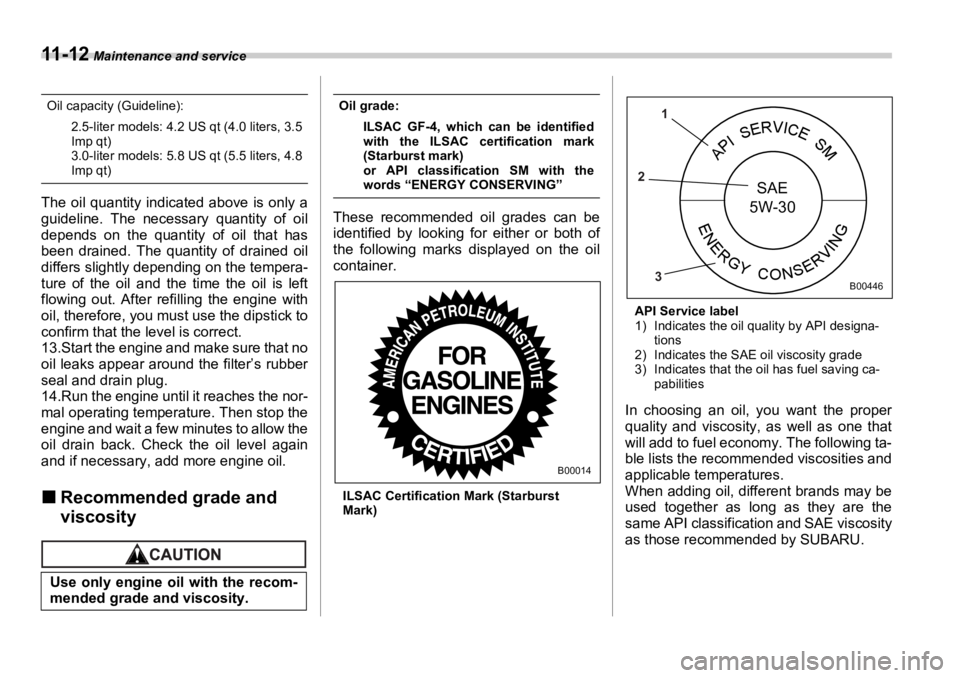
These recommended oil grades can be
identified by looking for either or both of
the following marks displayed on the oil
container.
ILSAC Certification Mark (Starburst
Mark) API Service label
1) Indicates the oil quality by API designa-
tions
2) Indicates the SAE oil viscosity grade
3) Indicates that the oil has fuel saving ca-
pabilities
In choosing an oil, you want the proper
quality and viscosity, as well as one that
will add to fuel economy. The following ta-
ble lists the recommended viscosities and
applicable temperatures.
When adding oil, different brands may be
used together as long as they are the
same API classifica tion and SAE viscosity
as those recommended by SUBARU.
Use only engine oil with the recom-
mended grade and viscosity. B00014
A P ISERVICESM
E
N
E
R
G
Y
C
O
N
S
E
R
V
I
N
G SAE
5W-30 1
2
3 B00446
Page 350 of 425
Maintenance and service
11 - 1 7
– CONTINUED –Air cleaner element
The air cleaner element functions as a fil-
ter screen. When the element is perforat-
ed or removed, engine wear will be exces-
sive and engine life shortened.
The air cleaner element is a dry type. It is
unnecessary to clean or wash the ele-
ment.
�„ Replacing the air cleaner ele-
mentReplace the air cleaner element according
to the maintenance schedule in the “War-
ranty and Maintenance Booklet”. Under
extremely dusty conditions, replace it
more frequently. It is recommended that
you always use genuine SUBARU parts. �T Non-turbo models 0
1) Connector
2) Duct
3) Clamp
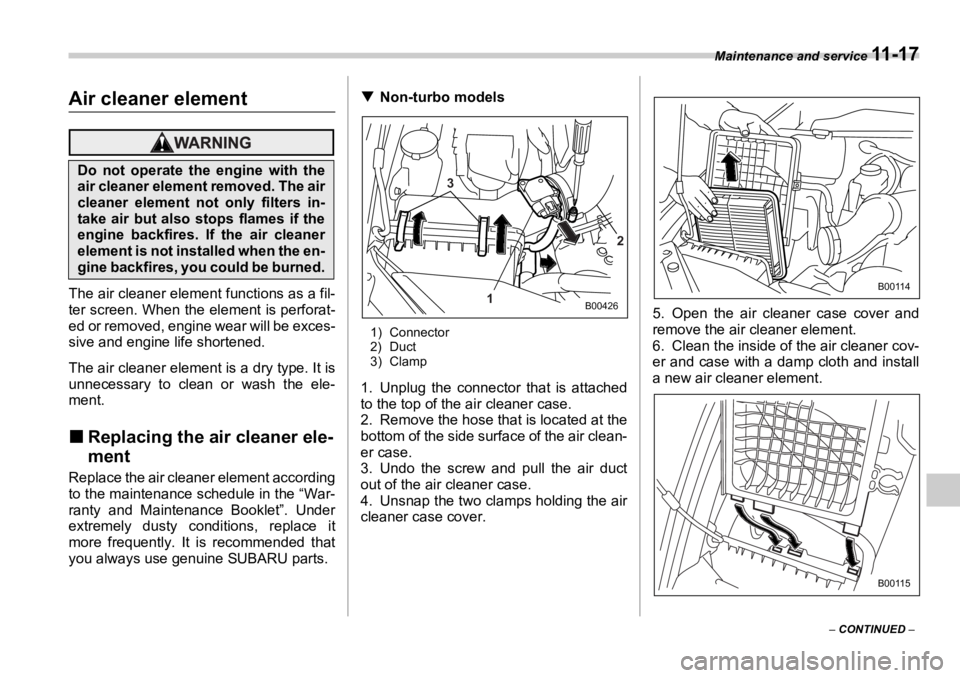
1. Unplug the connector that is attached
to the top of the air cleaner case.
2. Remove the hose that is located at the
bottom of the side surface of the air clean-
er case.
3. Undo the screw and pull the air duct
out of the air cleaner case.
4. Unsnap the two clamps holding the air
cleaner case cover. 5. Open the air cleaner case cover and
remove the air cleaner element.
6. Clean the inside of the air cleaner cov-
er and case with a damp cloth and install
a new air cleaner element.Do not operate the engine with the
air cleaner element removed. The air
cleaner element not only filters in-
take air but also stops flames if the
engine backfires. If the air cleaner
element is not installed when the en-
gine backfires, you could be burned. 13
2 B00426 B00114
B00115
Page 352 of 425

Maintenance and service
11 - 1 9remove the air cleaner element.
6. Clean the inside of the air cleaner cov-
er and case with a damp cloth and install
a new air cleaner element.
7. To install the air cleaner case cover, in-
sert the three projections on the air clean-
er case cover into the slits on the air clean-
er case and then snap the two clamps on
the air cleaner case cover. Spark plugs
It may be difficult to replace the spark
plugs. It is recommended that you have
the spark plugs replaced by your
SUBARU dealer.
The spark plugs should be replaced ac-
cording to the maintenance schedule in
the “Warranty and Maintenance Booklet”. �„ Recommended spark plugs 2.5-liter non-turbo models:
FR5AP-11 (NGK)
2.5-liter turbo and 3.0-liter models:
ILFR6B (NGK)
B00115�y When disconnecting the spark
plug cables, always grasp the
spark plug cap, not the cables.
�y Make sure the cables are replaced
in the correct order.
B00027
Page 354 of 425
Maintenance and service
11 - 2 1
Turbo models
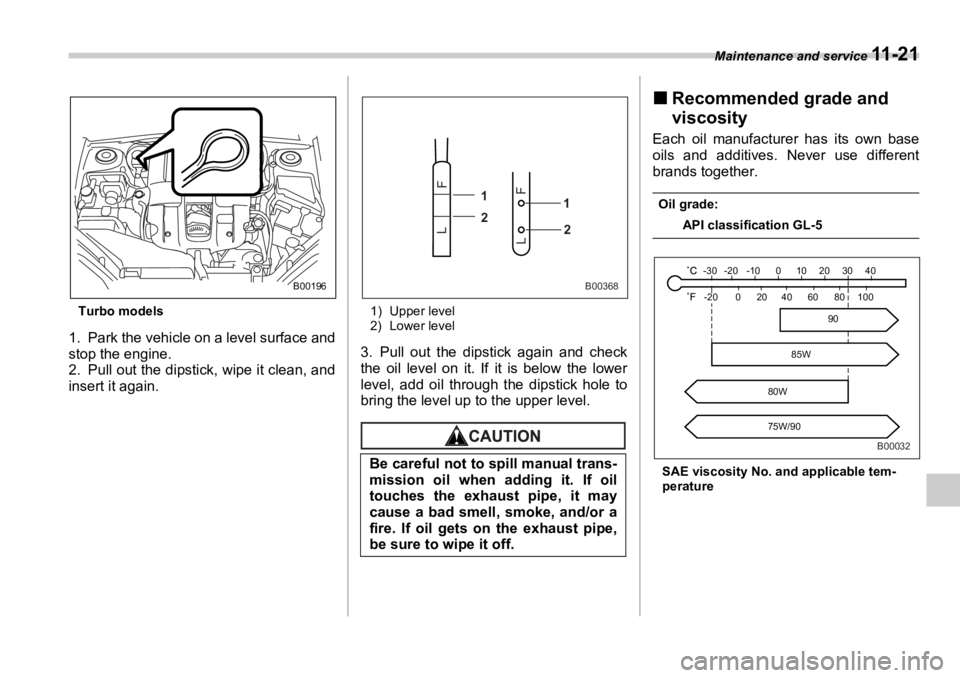
1. Park the vehicle on a level surface and
stop the engine.
2. Pull out the dipstick, wipe it clean, and
insert it again. 1) Upper level
2) Lower level
3. Pull out the dipstick again and check
the oil level on it. If it is below the lower
level, add oil through the dipstick hole to
bring the level up to the upper level. �„ Recommended grade and
viscosity Each oil manufacturer has its own base
oils and additives. Never use different
brands together. Oil grade:
API classification GL-5
SAE viscosity No. and applicable tem-
peratureB00196
Be careful not to spill manual trans-
mission oil when adding it. If oil
touches the exhaus t pipe, it may
cause a bad smell, smoke, and/or a
fire. If oil gets on the exhaust pipe,
be sure to wipe it off.
L
F
FL1
2 1
2 B00368 -30 -20 -10 0 10 20 30 40
-20 0 60 20
80W
75W/90 80 10040
85W 90
B00032
Page 405 of 425
13-6 Consumer information and Reporting safety defects
�T
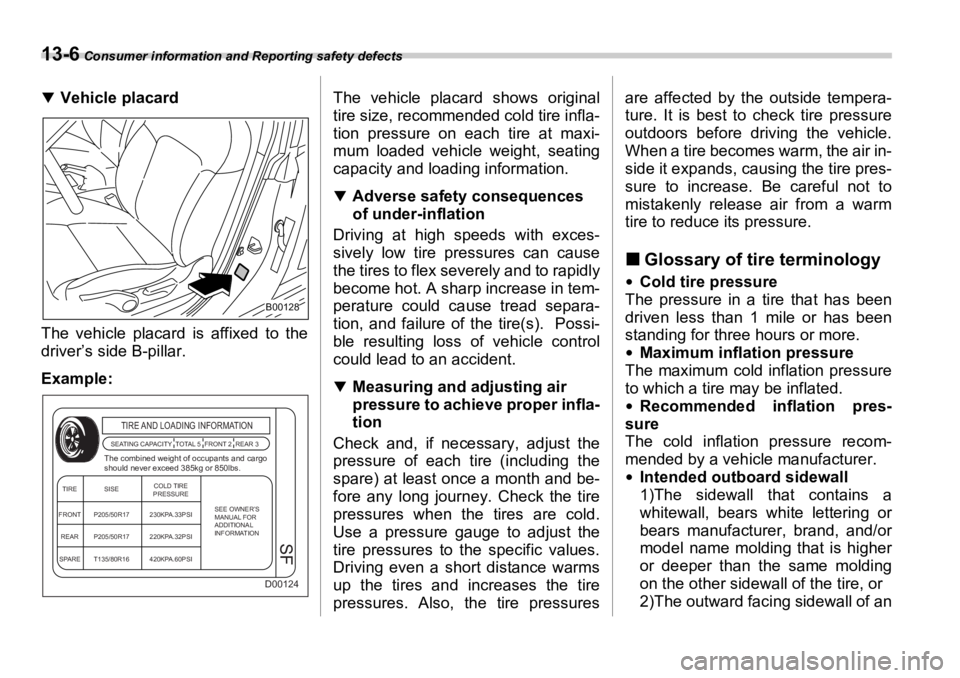
Vehicle placard
The vehicle placard is affixed to the
driver’s side B-pillar.
Example: The vehicle placard shows original
tire size, recommended cold tire infla-
tion pressure on each tire at maxi-
mum loaded vehicle weight, seating
capacity and loading information. �T
Adverse safety consequences
of under-inflation
Driving at high speeds with exces-
sively low tire pressures can cause
the tires to flex severely and to rapidly
become hot. A sharp increase in tem-
perature could cause tread separa-
tion, and failure of the tire(s). Possi-
ble resulting loss of vehicle control
could lead to an accident. �T
Measuring and adjusting air
pressure to achieve proper infla-
tion
Check and, if necessary, adjust the
pressure of each tire (including the
spare) at least once a month and be-
fore any long journey. Check the tire
pressures when th e tires are cold.
Use a pressure gauge to adjust the
tire pressures to the specific values.
Driving even a short distance warms
up the tires and increases the tire
pressures. Also, th e tire pressures are affected by the outside tempera-
ture. It is best to check tire pressure
outdoors before driving the vehicle.
When a tire becomes warm, the air in-
side it expands, causing the tire pres-
sure to increase. Be careful not to
mistakenly release air from a warm
tire to reduce its pressure.
�„ Glossary of tire terminology �y
Cold tire pressure
The pressure in a tire that has been
driven less than 1 mile or has been
standing for three hours or more. �y
Maximum inflation pressure
The maximum cold inflation pressure
to which a tire may be inflated. �y
Recommended inflation pres-
sure
The cold inflation pressure recom-
mended by a vehicle manufacturer. �y
Intended outboard sidewall
1)The sidewall that contains a
whitewall, bears white lettering or
bears manufacturer, brand, and/or
model name molding that is higher
or deeper than the same molding
on the other sidewall of the tire, or
2)The outward facing sidewall of anB00128
D00124TIRE AND LOADING INFORMATION SEATING CAPACITY TOTAL 5 FRONT 2 REAR 3
The combined weight of occupants and cargo
should never exceed 385kg or 850lbs.TIRE SISE
FRONT P205/50R17
P205/50R17
T135/80R16 230KPA.33PSI
220KPA.32PSI
420KPA.60PSIREAR
SPARE COLD TIRE
PRESSURE
SEE OWNER’S
MANUAL FOR
ADDITIONAL
INFORMATION
SF