2006 SUBARU OUTBACK display
[x] Cancel search: displayPage 141 of 425

3-26 Instruments and controls
To adjust the time shown by the clock,
press the “+” button or the “–” button. The
indicated time will change in one-minute
increments. If you keep the button
pressed, the rate at which the indicated
time changes will speed up.
To reset the minutes to “00” with a radio
time signal, push the “SET” button. The clock will also show the time if you
press the “DISP” button while the ignition
switch is in the “LOCK” position. It is pos-
sible to adjust the time setting while the
time is being shown. If you do not press
the “+” button or “–” button for 10 seconds
while the time is being shown, the time in-
dication will go off.
Also, the time indication will go off if you
open and close the driver’s door while the
time is being shown. Information display (Vehicle
without Navigation System) NOTE If your vehicle is equipped with a navi-
gation system, refer to the separate
“Operating Instructions for Monitor
System”.
With the ignition switch in the “ON” posi-
tion, each successive push of the “DISP”
button toggles the display in the following
sequence:300599
To ensure safety, do not attempt to
set the time during driving, as an ac-
cident could result. 300600
300600
Page 143 of 425

3-28 Instruments and controls
When the outside temperature drops to
37 ° F (3 ° C) or lower, the temperature indi-
cation flashes to show that the road sur-
face may be frozen.
If the outside temperature drops to 37 ° F
(3 ° C) or lower while the display is giving
an indication other than the outside tem-
perature, the display switches to the out-
side temperature indication and flashes
for five seconds before returning to its
original indication.
If the display is already indicating an out-
side temperature of 37 ° F (3 ° C) or lower
when the ignition switch is turned to the
“ON” position, the indication does not
flash.
NOTE The outside temperature indication
may differ from the actual outside tem-
perature. The road surface freeze warn-
ing indication should be treated only
as a guide. Be sure to check the condi-
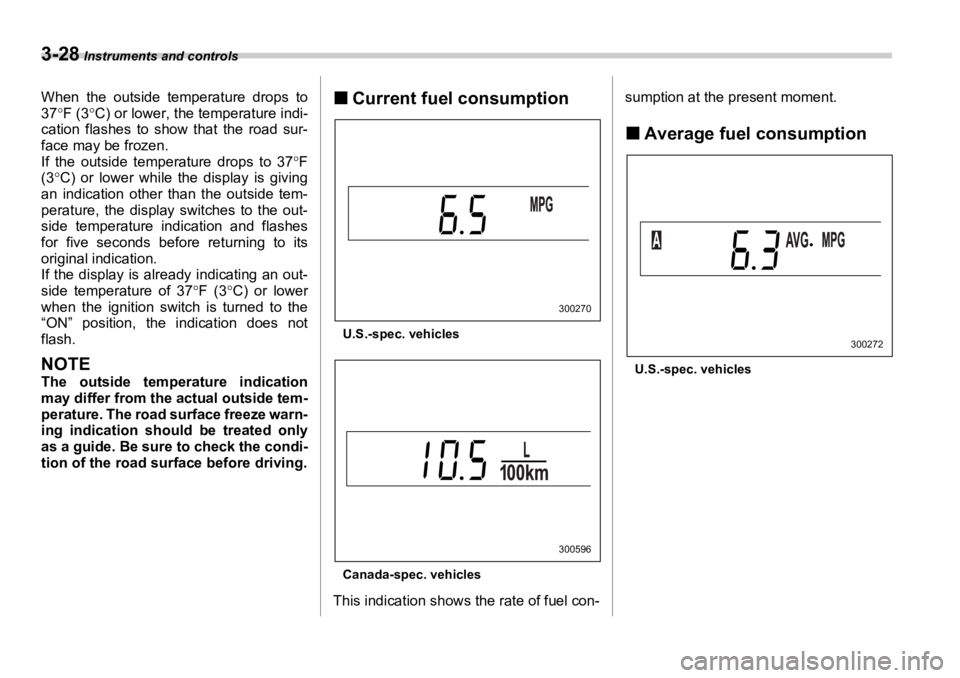
tion of the road surface before driving. �„ Current fuel consumption
U.S.-spec. vehicles
Canada-spec. vehicles
This indication shows the rate of fuel con- sumption at the present moment.
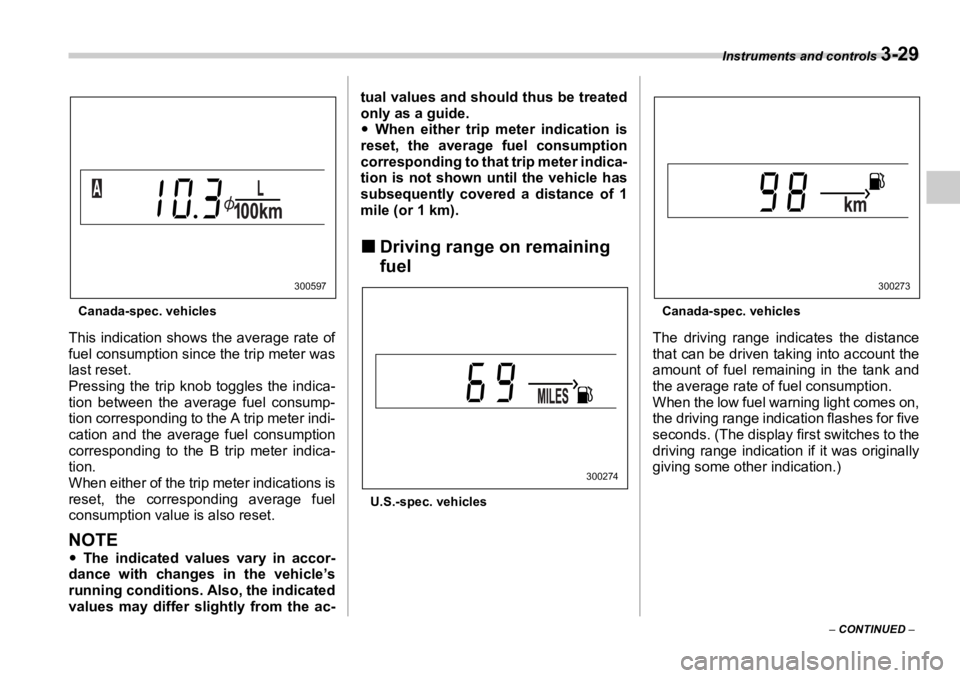
�„ Average fuel consumption
U.S.-spec. vehicles 300270
300596 300272
Page 144 of 425

Instruments and controls
3-29
– CONTINUED –Canada-spec. vehicles
This indication shows the average rate of
fuel consumption since the trip meter was
last reset.
Pressing the trip knob toggles the indica-
tion between the average fuel consump-
tion corresponding to the A trip meter indi-
cation and the average fuel consumption
corresponding to the B trip meter indica-
tion.
When either of the trip meter indications is
reset, the corresponding average fuel
consumption value is also reset.
NOTE �y The indicated values vary in accor-
dance with changes in the vehicle’s
running conditions. Also, the indicated
values may differ slightly from the ac- tual values and should thus be treated
only as a guide.
�y When either trip meter indication is
reset, the average fuel consumption
corresponding to that trip meter indica-
tion is not shown un til the vehicle has
subsequently covered a distance of 1
mile (or 1 km).
�„ Driving range on remaining
fuel
U.S.-spec. vehicles Canada-spec. vehicles
The driving range indicates the distance
that can be driven taking into account the
amount of fuel remaining in the tank and
the average rate of fuel consumption.
When the low fuel warning light comes on,
the driving range indication flashes for five
seconds. (The display first switches to the
driving range indication if it was originally
giving some other indication.)300597
300274 300273
Page 145 of 425

3-30 Instruments and controls
U.S.-spec. vehicles
Canada-spec. vehicles
If the driving range is shown as “ ”,
there is only a tiny amount of fuel left in the tank. You must refuel the vehicle immedi-
ately.
NOTE The driving range on remaining fuel is
only a guide. The indicated value may
differ from the actu al driving range on
remaining fuel, so you must immedi-
ately fill the tank when the low fuel
warning light comes on.
�„ Journey time
The journey time shows the time that has
elapsed since the ignition switch was
turned to the “START” position. The journey time indication flashes each
time a complete hour has elapsed. If the
display is giving an indication other than
the journey time, the display switches to
the journey time, flashes for five seconds,
and returns to its original indication each
time a complete hour has elapsed.
NOTE The journey time is reset when the igni-
tion switch is turned to the “OFF” posi-
tion. It is also reset if the ignition
switch is turned to the “LOCK” or
“ACC” position prio r to restarting of
the engine.300275
400265 400266 400267
Page 148 of 425

Instruments and controls
3-33
Illumination brightness con-
trol
The brightness of clock display, audio, air
conditioner, information display and in-
strument panel illumination dims when the
light switch is in the “ ” or “ ” po-
sitions. You can adjust brightness of the
instrument panel illumination for better
visibility.
In turbo models, you can also adjust the
brightness of the instrument panel illumi-
nation when the lighting switch is in the
OFF position.
To brighten, turn the control dial upward.
To darken, turn the control dial downward.
NOTE
When the control dial is turned fully up- ward, the illumination brightness be-
comes the maximum and the automatic
dimming function does not work at all.
Parking light switch
The parking light switch operates regard-
less of the ignition switch position.
By pushing the front end of this switch, fol-
lowing lights will come on.
– Parking lights
– Front and rear side marker lights
– Tail lights
– License plate lights
To turn off, push the rear end of the park-
ing light switch.
Avoid leaving these lights on for a long
time because that will run down the bat-
tery.300510 300178
Page 155 of 425

3-40 Instruments and controls
Mirrors Always check that the inside and outside
mirrors are properly adjusted before you
start driving.
�„ Inside mirror
The inside mirror has a day and night po-
sition. Pull the tab at the bottom of the mir-
ror toward you for t he night position. Push
it away for the day position. The night po-
sition reduces glare from headlights. �„ Auto-dimming mirror/com-
pass (if equipped)
1) Left button
2) Auto dimming indicator
3) Photosensor
4) Right button
The auto-dimming mirror/compass has an
anti-glare feature which automatically re-
duces glare coming from headlights of ve-
hicles behind you. It also contains a built-
in compass.
�y By pressing and releasing the left but-
ton, the automatic dimm ing function is tog-
gled on or off. When the automatic dim-
ming function is on, the auto dimming indi-
cator light (green) located to the right of
the button will illuminate.
�y By pressing and releasing the right but- ton, the compass display is toggled on or
off. When the compass is on, an illuminat-
ed compass reading will appear in the
lower part of the mirror.
Even with the mirror in anti-glare mode,
the mirror surface turns bright if the trans-
mission is shifted into reverse. This is to
ensure good rearward visibility during re-
versing.
�T Photosensors
The mirror has a photosensor attached on
both the front and back sides. If the glare
from the headlights of vehicles behind you
strikes the mirror, these sensors detect it
and make the reflection surface of the mir-
ror dimmer to help prevent you from being
blinded. For this reason, use care not to300293 1
23 4 300517
300518
Page 156 of 425

Instruments and controls
3-41
– CONTINUED –cover the sensors with stickers, or other
similar items. Periodically wipe the sen-
sors clean using a piece of dry soft cotton
cloth or an applicator.
�T Compass calibration
1. For optimum calibration, switch off all
nonessential electrical accessories (rear
window defogger, heater/air conditioning
system, spotlight , etc.) and ensure all
doors are shut.
2. Drive to an open, level area away from
large metallic objects or structures and
make certain the ignition switch is in the
“ON” position.
3. Press and hold the left button for 3 sec-
onds then release, and the compass will
enter the calibration mode. “CAL” and di-
rection will be displayed.
4. Drive slowly in a circle until “CAL” dis-
appears from the di splay (approximately
two or three circles). The compass is now
calibrated.
5. Further calibration may be necessary
should outside influences cause the mirror
to read inaccurately. You will know that
this has occurred if your compass begins
to read in only limited directions. Should
you encounter this situation, return to step
one of the above procedure and recali-
brate the mirror. �T Compass zone adjustment
1. The zone setting is factory preset to
Zone 8. Refer to the “Compass calibration
zone” map attached to the end of this
manual to verify that the compass zone
setting is correct for your geographical lo-
cation.
2. Press and hold the right button for 3
seconds then release, and the word
“ZONE” will briefly appear and then the
zone number will be displayed.
3. Press the right-hand button repeatedly
to cycle the display through all possible
zone settings. Stop cycling when the cor-
rect zone setting for your location is dis-
played.
4. Releasing the button for 3 seconds will
exit the zone setting mode. �„ Outside mirrors �T Convex mirror (Passenger side)
�T Remote control mirror switch
The remote control mirrors operate only Objects look smaller in a convex
mirror and farther away than when
viewed in a flat mirror. Do not use
the convex mirror to judge the dis-
tance of vehicles behind you when
changing lanes. Use the inside mir-
ror (or glance backwards) to deter-
mine the actual size and distance of
objects that you view in convex mir-
ror.
300519
Page 167 of 425

4-8 Climate control
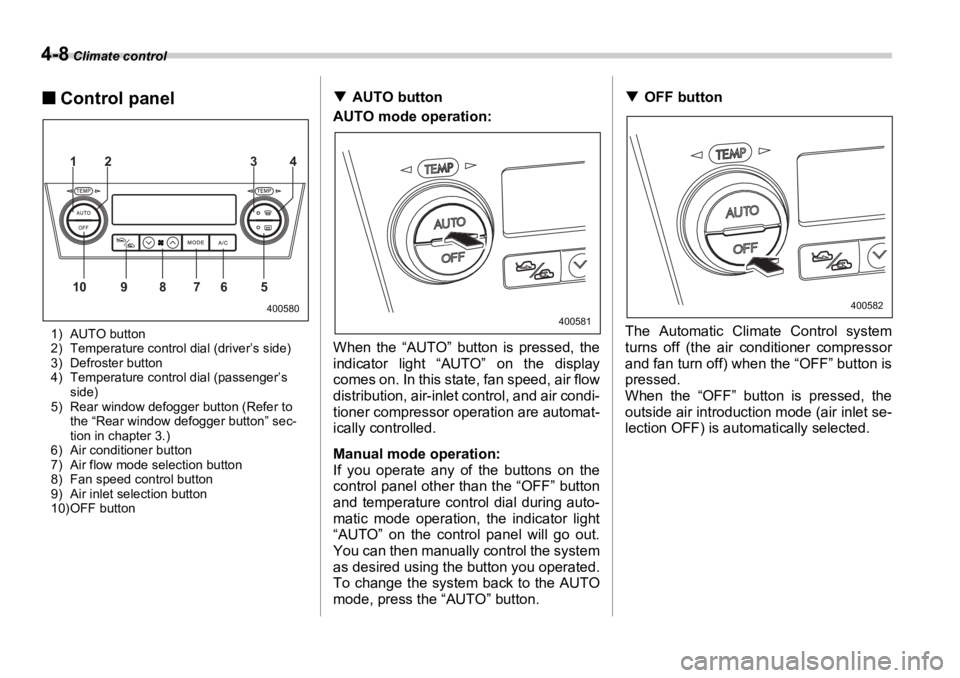
�„ Control panel
1) AUTO button
2) Temperature control dial (driver’s side)
3) Defroster button
4) Temperature control dial (passenger’s
side)
5) Rear window defogger button (Refer to
the “Rear window defogger button” sec-
tion in chapter 3.)
6) Air conditioner button
7) Air flow mode selection button
8) Fan speed control button
9) Air inlet selection button
10) OFF button �T AUTO button
AUTO mode operation:
When the “AUTO” button is pressed, the
indicator light “AUTO” on the display
comes on. In this state, fan speed, air flow
distribution, air-inlet control, and air condi-
tioner compressor o peration are automat-
ically controlled.
Manual mode operation:
If you operate any of the buttons on the
control panel other than the “OFF” button
and temperature control dial during auto-
matic mode operation, the indicator light
“AUTO” on the control panel will go out.
You can then manually control the system
as desired using t he button you operated.
To change the system back to the AUTO
mode, press the “AUTO” button. �T OFF button
The Automatic Clim ate Control system
turns off (the air conditioner compressor
and fan turn off) when the “OFF” button is
pressed.
When the “OFF” button is pressed, the
outside air introduction mode (air inlet se-
lection OFF) is automatically selected.12
10 9 8 7 6 5 34
400580
400581 400582