2006 Seat Cordoba warning lights
[x] Cancel search: warning lightsPage 144 of 255

Intelligent technology
142Anti-lock brake system (ABS)The anti-lock brake system prevents the wheels locking during
braking ⇒ page 140.Electronic differential lock (EDL)*
The electronic differential lock helps prevent the loss of trac-
tion caused if one of the driven wheels starts spinning.EDL helps the vehicle to start moving, accelerate and climb a gradient in slip-
pery conditions where this may otherwise be difficult or even impossible.
The system will control the revolutions of the drive wheels using the ABS
sensors (in case of an EDL fault the warning lamp for ABS lights up)
⇒page 65.
At speeds of up to approximately 80 km/h, it is able to balance out differ-
ences in the speed of the driven wheel s of approximately 100 rpm caused by
a slippery road surface on one side of the vehicle. It does this by braking the
wheel which has lost traction and distributing more driving force to the other
driven wheel via the differential.
To prevent the disc brake of the braked wheel from overheating, the EDL cuts
out automatically if subjected to excessive loads. The vehicle will continue to
function normally without EDL. For this reason, the driver is not informed that
the EDL has been switched off.
The EDL will switch on again automatically when the brake has cooled down.
WARNING
•
When accelerating on a slippery surface, for example on ice and snow,
press the accelerator carefully. Despite EDL, the driven wheels may start to
spin. This could impair the vehicles stability.
•
Always adapt your driving style to suit road conditions and the traffic
situation. Do not let the extra safety afforded by EDL tempt you into taking
any risks when driving, this can cause accidents.Caution
Modifications to the vehicle (e. g. to the engine, the brake system, running
gear or any components affecting the wh eels and tyres) could affect the oper-
ation of the EDL ⇒ page 162.The traction control system (TCS)The traction control system prevents the drive wheels from spinning when the
car is accelerating ⇒ page 140.
WARNING (continued)
cordoba_ingles Seite 142 Freitag, 7. Oktober 2005 6:00 18
Page 147 of 255

Driving and the environment145
Safety First
Operating instructions
Tips and Maintenance
Te c h n i c a l D a t a
WARNING
The catalytic converter reaches very high temperatures! Risk of fire.•
Never park where the catalytic converter could come into contact with
dry grass or inflammable materials under the vehicle.
•
Do not apply additional underseal or anti-corrosion coatings to the
exhaust pipes, catalytic converter or the heat shields on the exhaust
system. These materials could catch fire when the vehicle is driven.Caution
Never fully drain the fuel tank, in this case, the irregularity of the fuel supply
may cause ignition problems. This allow s unburnt fuel to enter the exhaust
system, which could cause overheating and damage the catalytic converter.
For the sake of the environment
Even when the emission control system is working perfectly, there may be a
smell of sulphur from the exhaust unde r some conditions. This depends on
the sulphur content of the fuel used. Quite often the problem can be reme-
died by changing to another brand of fuel.Driving abroadNotesFor driving abroad, the following must be taken into consideration:
•
For vehicles fitted with a catalytic converter ensure that unleaded petrol is
available for the journey. See the chap ter “Refuelling”. Automobile organisa-
tions will have information about service station networks selling unleaded
fuel.
•
In some countries it is possible that a vehicle model is sold under condi-
tions where some spare parts are not available or that the Authorised Service
Centre may only carry out limited repairs.
SEAT importers and distributors will gladly provide information about the
technical preparation of your vehicle in addition to necessary maintenance
and repair possibilities.
Adhesive strips for headlightsIf you have to drive a right-hand drive vehicle in a left-hand drive country, or
vice versa, the asymmetric dipped beam headlights will dazzle oncoming
traffic.
To prevent dazzling, you must apply stickers to certain parts of the headlight
lenses. Further information is available from your Authorised Service
Centre.
cordoba_ingles Seite 145 Freitag, 7. Oktober 2005 6:00 18
Page 181 of 255
Checking and refilling levels179
Safety First
Operating instructions
Tips and Maintenance
Te c h n i c a l D a t a
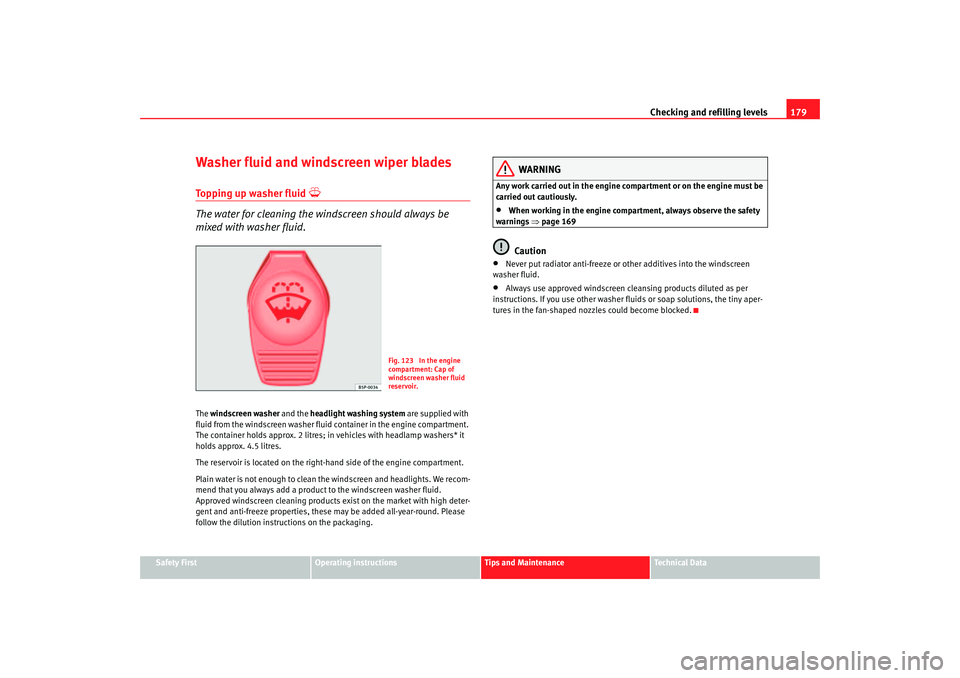
Washer fluid and windscreen wiper bladesTopping up washer fluid
The water for cleaning the windscreen should always be
mixed with washer fluid.The windscreen washer and the headlight washing system are supplied with
fluid from the windscreen washer fluid container in the engine compartment.
The container holds approx. 2 litres; in vehicles with headlamp washers* it
holds approx. 4.5 litres.
The reservoir is located on the right-hand side of the engine compartment.
Plain water is not enough to clean the windscreen and headlights. We recom-
mend that you always add a product to the windscreen washer fluid.
Approved windscreen cleaning products exist on the market with high deter-
gent and anti-freeze properties, these may be added all-year-round. Please
follow the dilution instructions on the packaging.
WARNING
Any work carried out in the engine compartment or on the engine must be
carried out cautiously.•
When working in the engine compartm ent, always observe the safety
warnings ⇒page 169Caution
•
Never put radiator anti-freeze or other additives into the windscreen
washer fluid.
•
Always use approved windscreen cleansing products diluted as per
instructions. If you use other washer fl uids or soap solutions, the tiny aper-
tures in the fan-shaped nozzles could become blocked.
Fig. 123 In the engine
compartment: Cap of
windscreen washer fluid
reservoir.
cordoba_ingles Seite 179 Freitag, 7. Oktober 2005 6:00 18
Page 185 of 255

Checking and refilling levels183
Safety First
Operating instructions
Tips and Maintenance
Te c h n i c a l D a t a
•
Before opening the bonnet to check the brake fluid level, read and
observe the warnings ⇒page 169.
•
Brake fluid should be stored in the closed original container in a safe
place out of reach of children. This represents a toxic danger.
•
Have the brake fluid changed every two years at the latest. Heavy use
of the brakes may cause a vapour lock if the brake fluid is left in the system
for too long. This would seriously affect the efficiency of the brakes and the
safety of the vehicle. This may be an accident risk.Caution
Brake fluid could damage the paintwork. Wipe off any brake fluid from the
paintwork immediately.
For the sake of the environment
Brake fluid must be drained and disposed of in the proper manner observing
environmental regulations.
BatteryWarnings on handling the battery
WARNING
Always be aware of the danger of injury and chemical burns as well as the
risk of accident or fire when working on the battery and the electrical
system:•
Wear eye protection. Protect your eyes , skin and clothing from acid and
particles containing lead.
•
Battery acid is very corrosive and caustic. Wear protective gloves and
eye protection. Do not tilt the batter ies. This could spill acid through the
vents. Rinse battery acid from eyes immediately for several minutes with
clear water. Then seek medical care immediately. Neutralize any acid
splashes on the skin or clothing with a soapy solution, and rinse off with
plenty of water. If acid is swallowed by mistake, consult a doctor immedi-
ately.
•
Fires, sparks, naked lights and smoki ng are prohibited. When handling
cables and electrical equipment, avoid causing sparks and electrostatic
WARNING (continued)
Wear eye protection
Battery acid is very corrosive and caustic. Wear protec-
tive gloves and eye protection!
Fires, sparks, naked lights and smoking are prohibited!
A highly explosive mixture of gases is given off when the
battery is under charge.
Keep children away from acid and batteries!
cordoba_ingles Seite 183 Freitag, 7. Oktober 2005 6:00 18
Page 193 of 255

If and when191
Safety First
Operating instructions
Tips and Maintenance
Te c h n i c a l D a t a
If and whenVehicle tools, spare wheelVeh icle To ols
The tools and jack are stored under the floor panel in the
luggage compartment.–Lift floor panel
– Remove the tools or jack.The tool kit includes:•
Hook for removing wheel covers* or hub caps*
•
Box spanner for wheel bolts
•
Reversible screwdriver with handle (i ncluding hexagonal interior) for the
wheel bolts. The screwdriver is a combination tool.
•
Towing ring*
•
Adapter for the anti-theft wheel bolts*
Before replacing the jack in the storage area, wind the arm of the jack down
as far as it will go.
Some of the items listed are only provided on certain models, or are optional
extras.
WARNING
•
Do not use the hexagonal socket in the screwdriver handle to tighten
the wheel bolts. It is impossible to tighten the bolts with the torque neces-
sary, risk of accident.
•
The jack supplied by the factory is only designed for changing wheels
on this model. On no account attempt to use it for lifting heavier vehicles
or other loads, risk of injury.
•
Use the jack only on firm, level ground.
•
Never start the engine when the vehicle is on the jack, risk of accident.
•
I f w o r k is t o b e ca r r i e d o ut un d e r n ea t h t h e v e h i cle , t h is m u st b e s e c ure d
by suitable stands. Otherwise, there is a risk of injury in an accident.
Wheel changePreparation work
What you must do before changing a wheel.– If you have a flat tyre or puncture, park the vehicle as far away from the flow of traffic as possible. Choose a location that is as
level as possible.
– All passengers should leave the vehicle. They should wait in a
safe area (for instance behind the roadside crash barrier).
– Switch off the engine. Switch on the hazard warning lights.
–Apply the handbrake firmly.
WARNING (continued)
cordoba_ingles Seite 191 Freitag, 7. Oktober 2005 6:00 18
Page 194 of 255

If and when
192
– Engage the first gear, or put the selector lever to position P for
those vehicles with an automatic gearbox.
– If you are towing a trailer, unhitch it from your vehicle.
– Take the vehicle tools and the spare wheel out of the luggage
compartment.
WARNING
Put the hazard warning lights on and pl ace the warning triangle in position.
This is for your own safety and also warns other road users.
Caution
If you have to change the tyre on a gradient, block the wheel opposite the
wheel being changed by placing a stone or similar object under it to prevent
the vehicle from rolling away.
Note
Please observe legal requirements when doing so.Changing a wheelChange the wheel as described below
– Remove the wheel cover. Also refer to page 193, fig.
–Slacken the wheel bolts.
– Raise the car with the jack in the corresponding zone –
Ta k e o f f the wheel and then put on the spare wheel
– Lower the vehicle.
– Tighten the wheel bolts firmly in diagonal sequence with the box
spanner
–Replace the cover .
After changing a wheel
After changing the wheel there are still tasks to complete.– Put the tools and jack back in the luggage compartment.
– Place the wheel with the defective tyre in the luggage compart-
ment and secure it.
– Check the tyre pressure of the newly fitted tyre as soon as possible.
– Have the tightening torque of the wheel bolts checked as soon as possible with a torque wrench. The prescribed torque is 120 Nm.
Note•
If you notice that the wheel bolts are corroded and difficult to turn when
changing a wheel, they must be replaced before having the wheel bolt torque
checked.
•
In the interest of safety, drive at moderate speeds until the wheel bolt
torque has been checked.
cordoba_ingles Seite 192 Freitag, 7. Oktober 2005 6:00 18
Page 220 of 255

If and when
218
Fitting the front towing eye
– First remove the right hand cover from the lower part of the bumper.
–Remove screw ⇒page 217, fig. 157 .
– Take the towing ring and the wheel spanner out of the vehicle tool kit.
– Turn the ring to the left with the box spanner until it is correctly screwed in.
– To remove the ring, turn to the right with the box spanner. Tow-rope or tow-bar
It is easier and safer to tow a vehicle with a tow-bar. You should only use a
tow-rope if you do not have a tow-bar.
A tow-rope should be slightly elastic to reduce the loading on both vehicles.
It is advisable to use a tow-rope made of synthetic fibre or similarly elastic
material.
Attach the tow-rope or the tow-bar only to the towing eyes provided or a
towing bracket.
Driving style
Towing requires some experience, especially when using a tow-rope. Both
drivers should be familiar with the te chnique required for towing. Inexperi-
enced drivers should not attempt to tow-start or tow away another vehicle.
Do not pull too hard with the towing vehicle and take care to avoid jerking the
tow-rope. When towing on an unpaved ro ad, there is always a risk of over-
loading and damaging the anchorage points.
The ignition of the vehicle being towed must be switched on to prevent the
steering wheel from locking and also to allow the use of the turn signals,
horn, windscreen wipers and washers. As the brake servo does not work if the
engine is not running, you must apply
considerably more pressure to the brake pedal than you normally would.
As the power assisted steering does not work if the engine is not running, you
will need more strength to steer than you normally would.
Towing vehicles with an automatic gearbox
•
Put the selector lever into position “N”.
•
Do not drive faster than 50 km/h when towing a vehicle.
•
Do not tow further than 50 km.
•
If a breakdown vehicle is used, the vehicle must be towed with the front
wheels raised.Note
•
Observe legal requirements when towing or tow-starting.
•
Switch on the hazard warning lights of both vehicles. However, observe
any regulations to the contrary.
•
For technical reasons, vehicles with an automatic gearbox must not be
tow-started.
•
If damage to your vehicle means that there is no lubricant in the gearbox,
you must raise the drive wheels while the vehicle is being towed.
•
If the vehicle has to be towed more than 50 km, the front wheels must be
raised during towing, and towing should be carried out by a qualified person.
•
The steering wheel is locked when the vehicle has no electrical power. The
vehicle must then be towed with the front wheels raised. Towing should be
carried out by a qualified person.
Rear towline anchorageAt the rear, on the right below th e rear bumper is a towline point.
AA
cordoba_ingles Seite 218 Freitag, 7. Oktober 2005 6:00 18
Page 247 of 255

Index245
Index
AABS . . . . . . . . . . . . . . . . . . . . . . . . . . . . . . . . . . . 140
Warning lamp . . . . . . . . . . . . . . . . . . . . . . . . . 65
Accessories . . . . . . . . . . . . . . . . . . . . . . . . . . . . 162
Acoustic signal . . . . . . . . . . . . . . . . . . . . . . . . . . 18
Acoustic warning . . . . . . . . . . . . . . . . . . . . . . . . 124
Adjusting simp le headlights
driving on the left . . . . . . . . . . . . . . . . . . . . 146
driving on the right . . . . . . . . . . . . . . . . . . . 146
Adjusting the seat belt height . . . . . . . . . . . . . . 25
Air conditioning system Climatronic . . . . . . . . . . . . . . . . . . . . . . . . . . 118
General notes . . . . . . . . . . . . . . . . . . . . . . . . 120
Air conditioning* Semiautoamtic air conditioning* . . . . . . . . 115
Air outlets . . . . . . . . . . . . . . . . . . . . . . . . . . . . . . 114
Air recirculation Semi-automatic air conditi oning . . . . . . . . 117
Air recirculation mode Climatronic . . . . . . . . . . . . . . . . . . . . . . . . . . 120
Airbag covers . . . . . . . . . . . . . . . . . . . . . . . . . . . . 33
Airbag system . . . . . . . . . . . . . . . . . . . . . . . . . . . 28 Curtain airbags . . . . . . . . . . . . . . . . . . . . . . . 38
Front airbags . . . . . . . . . . . . . . . . . . . . . . . . . 31
Side airbags . . . . . . . . . . . . . . . . . . . . . . . . . . 34
Warning lamp . . . . . . . . . . . . . . . . . . . . . . . . . 29 Airbags
Care . . . . . . . . . . . . . . . . . . . . . . . . . . . . . . . . 30
Disposal . . . . . . . . . . . . . . . . . . . . . . . . . . . . . 30
Safety notes . . . . . . . . . . . . . . . . . . . . . . . . . . 30
Alarm system Switching off . . . . . . . . . . . . . . . . . . . . . . . . . 80
Alterations to the vehicle . . . . . . . . . . . . . . . . . 162
Alternator Warning lamp . . . . . . . . . . . . . . . . . . . . . . . . . 62
Ambient temperature display . . . . . . . . . . . . 55, 58
Anti-freeze . . . . . . . . . . . . . . . . . . . . . . . . . . . . . 177
Anti-lock brake system . . . . . . . . . . . . . . . . . . . 140 Warning lamp . . . . . . . . . . . . . . . . . . . . . . . . . 65
Anti-theft alarm system . . . . . . . . . . . . . . . . . . . . 79 Switching off . . . . . . . . . . . . . . . . . . . . . . . . . 80
Anti-theft wheel bolts . . . . . . . . . . . . . . . . . . . . 194
Aquaplaning . . . . . . . . . . . . . . . . . . . . . . . . . . . 188
Automatic anti-dazzle interior mirror* Activating the anti-dazzle function . . . . . . . 96
Deactivating anti-dazzle function . . . . . . . . . 96
Automatic car washes . . . . . . . . . . . . . . . . . . . . 154
Automatic gearbox . . . . . . . . . . . . . . . . . . . . . . 129 Instructions for driving . . . . . . . . . . . . . . . . 131
Kick-down feature . . . . . . . . . . . . . . . . . . . . 131
Selector lever positions . . . . . . . . . . . . . . . . 130
BBall coupling . . . . . . . . . . . . . . . . . . . . . . . . . . . 150
BAS . . . . . . . . . . . . . . . . . . . . . . . . . . . . . . . . . . . 139
BatteryChanging . . . . . . . . . . . . . . . . . . . . . . . . . . . 185
Charging . . . . . . . . . . . . . . . . . . . . . . . . . . . . 185
Winter conditions . . . . . . . . . . . . . . . . . . . . 183
Belt tension device Disposal . . . . . . . . . . . . . . . . . . . . . . . . . . . . . 26
Warning lamp . . . . . . . . . . . . . . . . . . . . . . . . 29
Belt tension devices . . . . . . . . . . . . . . . . . . . . . . 26
Biodiesel . . . . . . . . . . . . . . . . . . . . . . . . . . . . . . 168
Bonnet . . . . . . . . . . . . . . . . . . . . . . . . . . . . . . . . 171
Brake assist system . . . . . . . . . . . . . . . . . . . . . 139
Brake fluid . . . . . . . . . . . . . . . . . . . . . . . . . . . . . 182 Changing . . . . . . . . . . . . . . . . . . . . . . . . . . . 182
Brake pads . . . . . . . . . . . . . . . . . . . . . . . . . . . . . 143
Brake servo . . . . . . . . . . . . . . . . . . . . . . . 139, 143
Brake system . . . . . . . . . . . . . . . . . . . . . . . . . . . 182 Warning lamp . . . . . . . . . . . . . . . . . . . . . . . . 65
Brakes . . . . . . . . . . . . . . . . . . . . . . . . . . . . . . . . 143
Braking distance . . . . . . . . . . . . . . . . . . . . . . . . 143
Buzzer . . . . . . . . . . . . . . . . . . . . . . . . . . . . . . 92, 124
cordoba_ingles Seite 245 Freitag, 7. Oktober 2005 6:00 18