2006 PORSCHE CAYENNE TURBO spare wheel
[x] Cancel search: spare wheelPage 20 of 387

20
Controls, Safety, Instruments
Remote ControlIn the multi-purpose display of the instrument pan-
el, you can set different variants of locking and un-
locking the doors and the rear lid as well as the
che ck-back signa l w hen locking and unlocking the
vehicle and save them on the respective remote
control.
fPlease observe the chapter “COMFORT” on
Page 116.
The air conditioner settings are stored on the re-
spective remote control when switching off the ig-
nition and locking the vehicle. The “Air flow OFF”
setting is stored for approx. 60 minutes and the
“Recirculated air” setting is stored for approx.
20 minutes.
Unlocking vehicle doorsfBriefly press button 1 on the remote control
twice.
Emergency flasher flashes once.
The alarm system, passenger compartment
monitoring and inclination sensor are switched
off automatically.Unlocking rear lid, rear window and spare
wheel bracketfBriefly press button 3.
Hazard warning light flashes once.
The rear lid, rear window and spare wheel
bracket can be opened with the appropriate
unlocking button.
The rear window and spare wheel bracket are
always unlocked if the rear lid is unlocked.
fPlease observe the chapter “REAR LID” on
Page 194.
fPlease observe the chapter “SPARE WHEEL”
on Page 319.
Note on operation
The vehicle doors remain locked after unlocking
the rear lid.
If the rear window is not opened, both the rear lid
and rear window will lock automatically after
30 seconds.
Opening the rear windowfPress button 3 for approx. two seconds.
The rear window pops open.
Page 22 of 387

22
Controls, Safety, Instruments
Porsche Entry & DrivePorsche Entry & Drive facilitates keyless unlock-
ing and locking of vehicle doors, rear lid and rear
window. To use this facility, you need to have only
the car key with remote control with you.
fDo not expose the car key to a high level of
electromagnetic radiation, as this could ad-
versely affect Porsche Entry & Drive.
Caution!
Risk of being locked out of vehicles with
Porsche Entry & Drive.
fIf the vehicle is locked and access is gained
through the rear lid or rear window, do not
leave the key in the vehicle.
The vehicle is automatically locked within ap-
prox. 30 seconds after the rear lid or rear win-
dow is closed.
The vehicle can then be unlocked only with the second key.
In the multi-purpose display of the instrument pan-
el, you can set different variants of locking and un-
locking the doors and the rear lid as well as the
check-back signal when locking and unlocking the
vehicle and save them on the respective remote
control.
fPlease observe the chapter “DOOR OPENING”
on Page 117.
The air conditioner settings are stored on the re-
spective remote control when switching off the ig-
nition and locking the vehicle.
The “Air flow OFF” setting is stored for approx.
60 minutes and the “Recirculated air” setting is
stored for approx. 20 minutes.
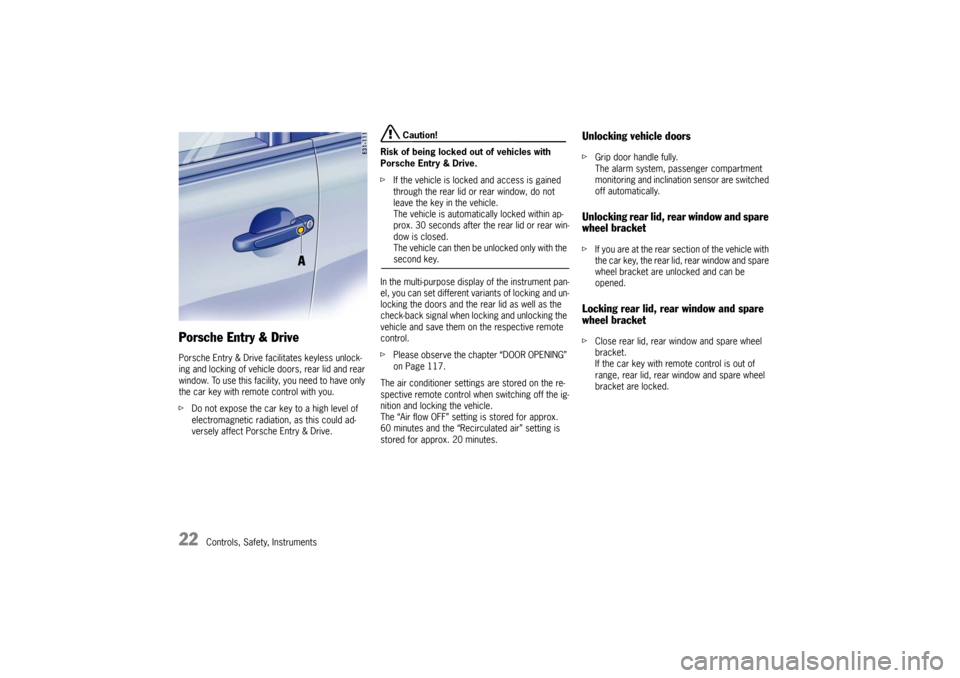
Unlocking vehicle doorsfGrip door handle fully.
The alarm system, passenger compartment
monitoring and inclination sensor are switched
off automatically.Unlocking rear lid, rear window and spare
wheel bracketfIf you are at the rear section of the vehicle with
the car key, the rear lid, rear window and spare
wheel bracket are unlocked and can be
opened.Locking rear lid, rear window and spare
wheel bracketfClose rear lid, rear window and spare wheel
bracket.
If the car key with remote control is out of
range, rear lid, rear window and spare wheel
bracket are locked.
Page 102 of 387

102
Controls, Safety, Instruments
Tire pressure monitoring learning phaseEach time a wheel is changed, the tire pressure
monitoring must complete the learning phase
again. The tire pressure monitoring identifies the
wheel positions in this process.
The current tire pressures will not be available on
the multi-purpose display until the learning phase
is complete.
tire pressure monitoring learning process
fSelect tire type and tire size in the menu TIRE
PRESSURE > SETTINGS > TIRES.
The learning process is started. The tire type
and size must be selected e ve n if the se ttings
for the new set of wheels are the same as for
the old wheels.Note
The spare wheel and collapsible spare wheel do
not contain a wheel transmitter and are not moni-
tored by the tire pressure monitoring.
The tire pressures for cold tires (68°F/20°C) are
shown in the TIRE PRESSURE menu (filling informa-
tion) during the learning phase.
The required pressure for the spare wheel is al-
ways displayed in the TIRE PRESSURE menu (filling
information).
fCheck the tire pressure for the spare wheel
and collapsible spare wheel manually.
Tire pressure filling informationTire pressure menuThe TIRE PRESSURE menu provides an overview
of the current pressure specifications for the re-
spective wheel (filling information). The pressure
differences with respect to the required pressure
are specified irrespective of the tire temperature.
If the wheels have not been learned, the current
pressures are unavailable.
The spare wheel is not monitored. The required
pressure is specified in brackets.
To make changes to the settings of the tire pres-
sure monitoring, select SETTINGS in the TIRE
PRESSURE menu.
Page 103 of 387

Controls, Safety, Instruments
103
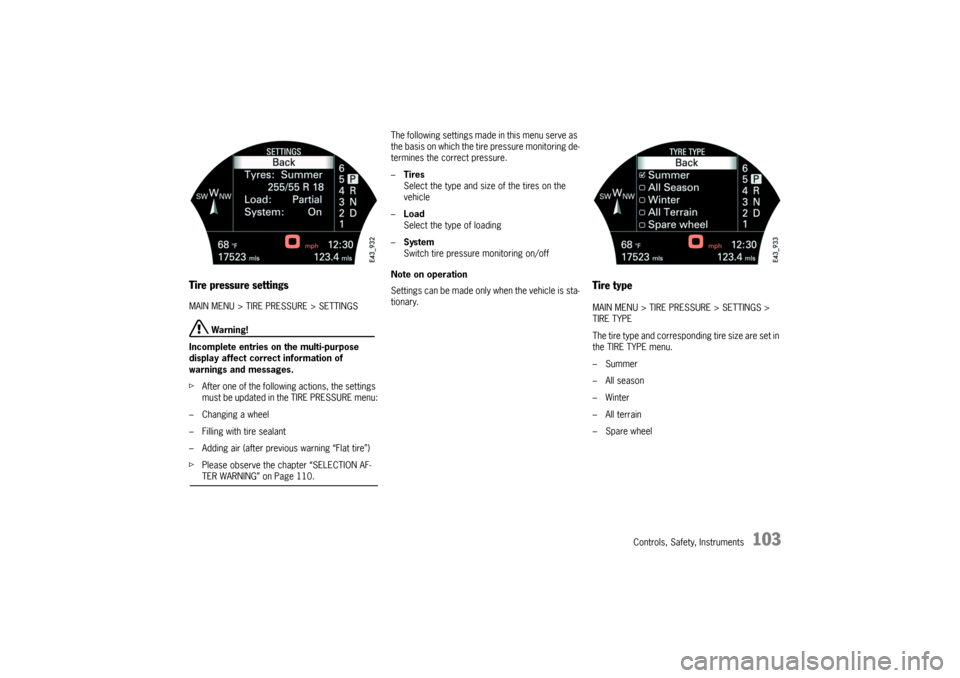
Tire pressure settingsMAIN MENU > TIRE PRESSURE > SETTINGS
Warning!
Incomplete entries on the multi-purpose
display affect correct information of
warnings and messages.
fAfter one of the following actions, the settings
must be updated in the TIRE PRESSURE menu:
– Changing a wheel
– Filling with tire sealant
– Adding air (after previous warning “Flat tire”)
fPlease observe the chapter “SELECTION AF-TER WARNING” on Page 110.The following settings made in this menu serve as
the basis on which the tire pressure monitoring de-
termines the correct pressure.
–Tires
Select the type and size of the tires on the
vehicle
–Load
Select the type of loading
–System
Switch tire pressure monitoring on/off
Note on operation
Settings can be made only when the vehicle is sta-
tionary.
Tire typeMAIN MENU > TIRE PRESSURE > SETTINGS >
TIRE TYPE
The tire type and corresponding tire size are set in
the TIRE TYPE menu.
–Summer
–All season
–Winter
– All terrain
–Spare wheel
Page 105 of 387

Controls, Safety, Instruments
105
Spare wheel selectionSpare wheelMAIN MENU > TIRE PRESSURE > SETTINGS >
TIRE TYPE > SPARE WHEEL
This menu lists all possible spare wheel types
available depending on the equipment of the
vehicle.
–Spare wheel
– Collapsible spare wheel
– Sealing setSpare wheel
Warning!
Risk of accident.
The spare wheel does not contain a wheel
transmitter and is not monitored by the tire
pressure monitoring.
fThe spare wheel must be used only over short distances.
fPlease observe the chapter “SPARE WHEEL”
on Page 319.
fSelect SPARE WHEEL with the rocker switch.
fPress RESET switch.
The message SYSTEM NOT ACTIVE, WORK-
SHOP appears after the RESET switch is
pressed.
The display automatically returns to the TIRE
PRESSURE menu (filling information).
The required pressure specifications can be
read.
fSelect BACK. The menu returns to the basic
screen.
The reminder SPARE WHEEL OR SEALING SET OP-
ERATION appears each time the ignition is
switched on.
fPlease observe the chapter “MESSAGE “SPA-
RE WHEEL OR SEALING SET OPERATION”” on
Page 111.Collapsible spare wheel
Warning!
Risk of accident.
The spare wheel does not contain a wheel
transmitter and is not monitored by the tire
pressure monitoring.
fThe collapsible spare wheel must be used only over short distances.
fPlease observe the chapter “COLLAPSIBLE
SPARE WHEEL” on Page 313.
fSelect COLLAPSIBLE WHEEL with the rocker
switch.
fPress RESET switch.
The required pressure and speed limit for the
collapsible spare wheel are displayed at first.
This is followed by the message SYSTEM NOT
ACTIVE, WORKSHOP.
A warning appears on the multi-purpose display if
the speed limit of 50 mph (80 km/h) is exceeded.
The reminder SPARE WHEEL OR SEALING SET OP-
ERATION appears each time the ignition is
switched on.
fPlease observe the chapter “MESSAGE “SPA-
RE WHEEL OR SEALING SET OPERATION”” on
Page 111.
Page 106 of 387

106
Controls, Safety, Instruments Tire sealant/sealing set
Warning!
Risk of accident.
fHave the tire replaced by a specialist repair
shop as soon as possible.
fAvoid hard acceleration and high cornering
speeds.
fDo not exceed maximum speed of 50 mph
(80 km/h).
fPlease observe the safety and operating in-structions on compressor.
fPlease observe the chapter “TIRE SEALANT”
on Page 305.
fSelect SEALING SET with the rocker switch.
fPress RESET switch.
The display automatically returns to the
TIRE PRESSURE menu (filling information).
fInflate tires according to the displayed
pressure differences.
A warning appears on the multi-purpose display if
the speed limit of 50 mph (80 km/h) is exceeded.
SPARE WHEEL OR SEALING SET OPERATION ap-
pears each time the ignition is switched on.
fPlease observe the chapter “MESSAGE “SPA-
RE WHEEL OR SEALING SET OPERATION”” on
Page 111.
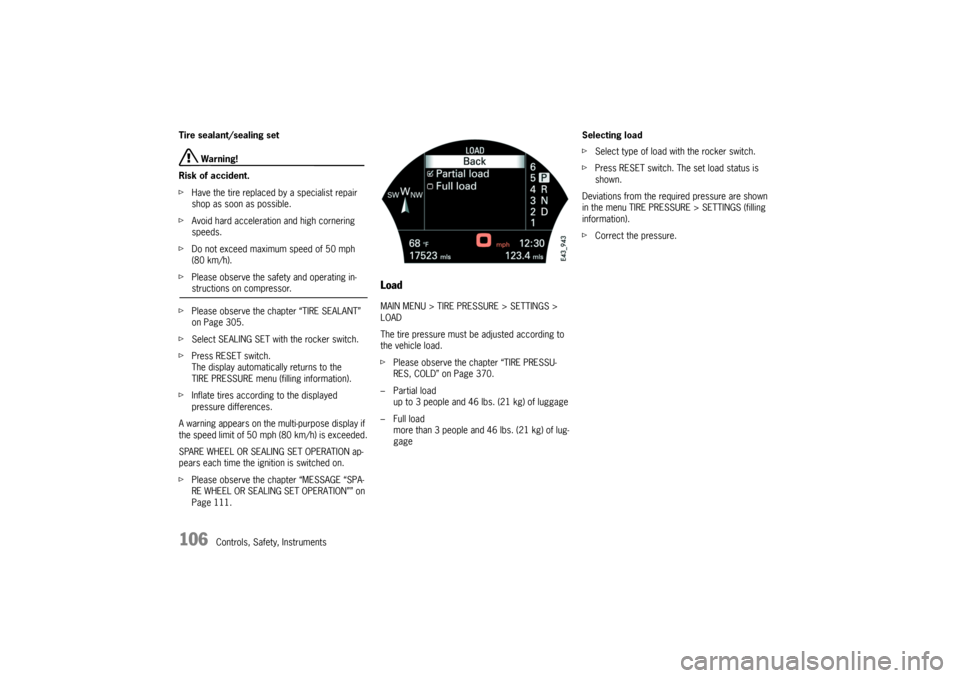
LoadMAIN MENU > TIRE PRESSURE > SETTINGS >
LOAD
The tire pressure must be adjusted according to
the vehicle load.
fPlease observe the chapter “TIRE PRESSU-
RES, COLD” on Page 370.
– Partial load
up to 3 people and 46 lbs. (21 kg) of luggage
– Full load
more than 3 people and 46 lbs. (21 kg) of lug-
gageSelecting load
fSelect type of load with the rocker switch.
fPress RESET switch. The set load status is
shown.
Deviations from the required pressure are shown
in the menu TIRE PRESSURE > SETTINGS (filling
information).
fCorrect the pressure.
Page 110 of 387

110
Controls, Safety, Instruments
Selection after warningWhen the vehicle is stationary after a tire pressure
warning, the screen changes to SELECTION AF-
TER WARNING.
fIn the menu, select the task performed.Adding air
1. Inflate the tire.
For vehicles without air suspension: Please ob-
serve the chapter “REDUCING FILLING PRES-
SURE ON VEHICLES WITHOUT AIR SUSPENSI-
ON” on Page 316.
For vehicles with air suspension:
Please observe the chapter “REDUCING TIRE
PRES SU RE ON V EHICL ES WITH AIR S U SPENS I-
ON” on Page 318.
2. After inflating the wheel in question, select
ADD AIR.
The display returns to the basic screen after
acknowledgement.
Wheel change
1. Change wheel.
2. After changing a wheel, select menu item
WHEEL CHANGE.
The display returns to the SPARE WHEEL menu
after acknowledgement.
3. Select spare wheel type.
Please observe the chapter “SPARE WHEEL”
on Page 105.Sealing set
1. Remedy the tire damage with a tire sealant.
Please observe the chapter “TIRE SEALANT”
on Page 305.
2. After filling in the flat with the tire sealant, se-
lect menu item SEALING SET.
Please observe the chapter “TIRE SEALANT/
SEALING SET” on Page 106.
The display returns to the basic screen after
selecting SEALING SET.
A warning appears on the multi-purpose dis-
play if the speed limit of 50 mph (80 km/h) is
exceeded.
Note on operation
If you make a selection without performing the
action described in the selection, the message
CAUTION – FLAT TIRE – CHECK TIRES will appear
again.
fCheck the tires for signs of damage and fill or
change them if necessary.
Page 111 of 387

Controls, Safety, Instruments
111
Warning “When vehicle stops,
Hit selection”If you drive off after changing a wheel or inflating
the tires and neglect to make a selection in the
screen SELECTION AFTER WARNING, the following
message will appear:
WHEN VEHICLE STOPS, HIT SELECTION.
fThe next time you stop the vehicle, perform
the settings in the “Selection after warning”.
Wheel change messageThe WHEEL CHANGE? message CHECK
SETTINGS appears after a wheel change, if the
tire type and tire size of the new tires have not
been set in the TIRE PRESSURE > SETTINGS
menu.
When the vehicle is stationary, the display
changes to SELECTION AFTER WARNING.
fPlease observe the chapter “SELECTION
AFTER WARNING” on Page 110.
fSelect WHEEL CHANGE. The menu automati-
cally changes to TIRE TYPE.
fSelect the appropriate tire type and tire size.
Only if the tire type and size are selected will
the tire pressure monitoring re-learn the tires.
Message “Spare wheel or sealing set
operation”The message SPARE WHEEL OR SEALING SET
OPERATION? appears after switching on the igni-
tion if a spare wheel type (spare wheel, collapsible
spare wheel, or sealing set) was set.
fSelect YES or NO with the rocker switch.
fPress RESET switch.