2006 PORSCHE BOXSTER warning light
[x] Cancel search: warning lightPage 30 of 296
30
Controls, Instruments
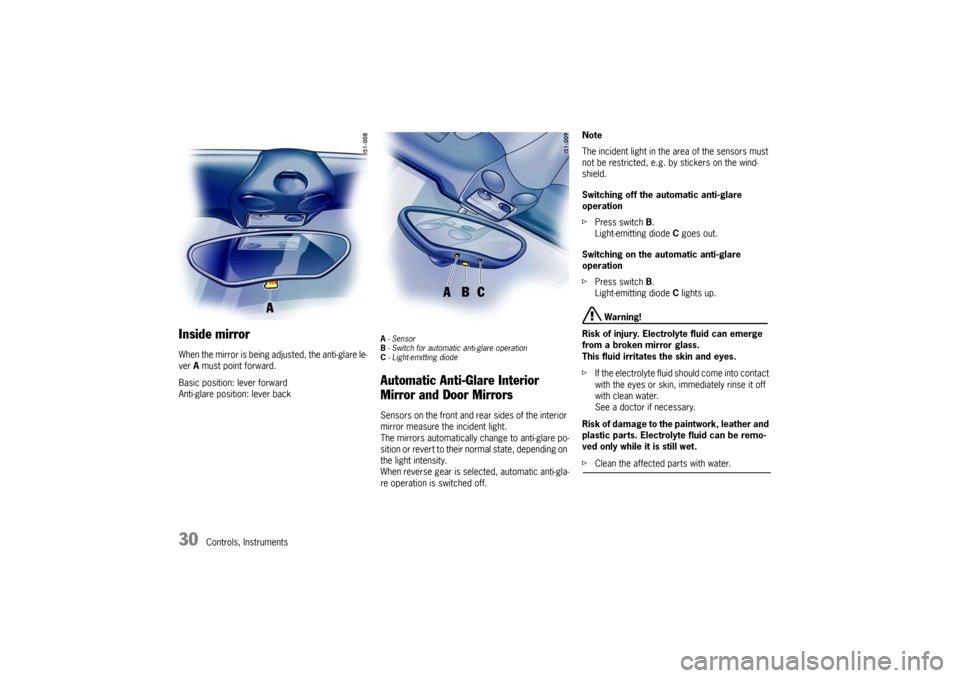
Inside mirror When the mirror is being adjusted, the anti-glare le-
ver A must point forward.
Basic position: lever forward
Anti-glare position: lever back
A - Sensor
B - Switch for automatic anti-glare operation
C - Light-emitting diode Automatic Anti-Glare Interior
Mirror and Door Mirrors Sensors on the front and rear sides of the interior
mirror measure the incident light.
The mirrors automatically change to anti-glare po-
sition or revert to their normal state, depending on
the light intensity.
When reverse gear is selected, automatic anti-gla-
re operation is switched off. Note
The incident light in the area of the sensors must
not be restricted, e.g. by stickers on the wind-
shield.
Switching off the automatic anti-glare
operation
fPress switch B.
Light-emitting diode C goes out.
Switching on the automatic anti-glare
operation
fPress switch B.
Light-emitting diode C lights up.
Warning!
Risk of injury. Electrolyte fluid can emerge
from a broken mirror glass.
This fluid irritates the skin and eyes.
fIf the electrolyte fluid should come into contact
with the eyes or skin, immediately rinse it off
with clean water.
See a doctor if necessary.
Risk of damage to the paintwork, leather and
plastic parts. Electrolyte fluid can be remo-
ved only while it is still wet.
fClean the affected parts with water.
Page 34 of 296
34
Controls, Instruments
Seat Adjustment
Warning!
The seat may move unexpectedly if you
attempt to adjust while driving. This could
cause sudden loss of control or personal in-
jury.
fDo not adjust seats while the vehicle is in mo-
tion.
The backrest locks must be engaged at all
times while the vehicle is in motion.
Safety belts only offer protection when the
backrest is upright and the belts are properly
positioned on the body.
Improperly positioned safety belts or safety
belts worn by passengers in an excessively
reclined position can cause serious personal
injury in an accident.
fDo not operate the car with the driver or pas-
senger backrests excessively reclined (see “Seat position”).
Seat position An ergonomically correct sitting position is
important for safe and fatigue-free driving.
We recommend the following procedure for adjust-
ing the driver’s seat to suit individual
requirements:
1. Vehicles with manual transmission:
Adjust the seat until, with the clutch pedal fully
depressed, your leg remains at a slight angle.
Vehicles with Tiptronic S:
Adjust the seat until, with your left foot on the
footrest, your left leg remains at a slight angle.2. Rest your outstretched arm on the steering
wheel.
Set the backrest angle and the steering-wheel
position so that your wrist rests on the outer
rim of the steering wheel. At the same time,
the shoulders must still be in noticeable
contact with the backrest.
3. Adjust the seat height to give yourself enough
headroom and a good overview of the vehicle.
4. Electrically adjustable seat:
Adjust the seat angle until your thighs rest
lightly on the seat cushion.
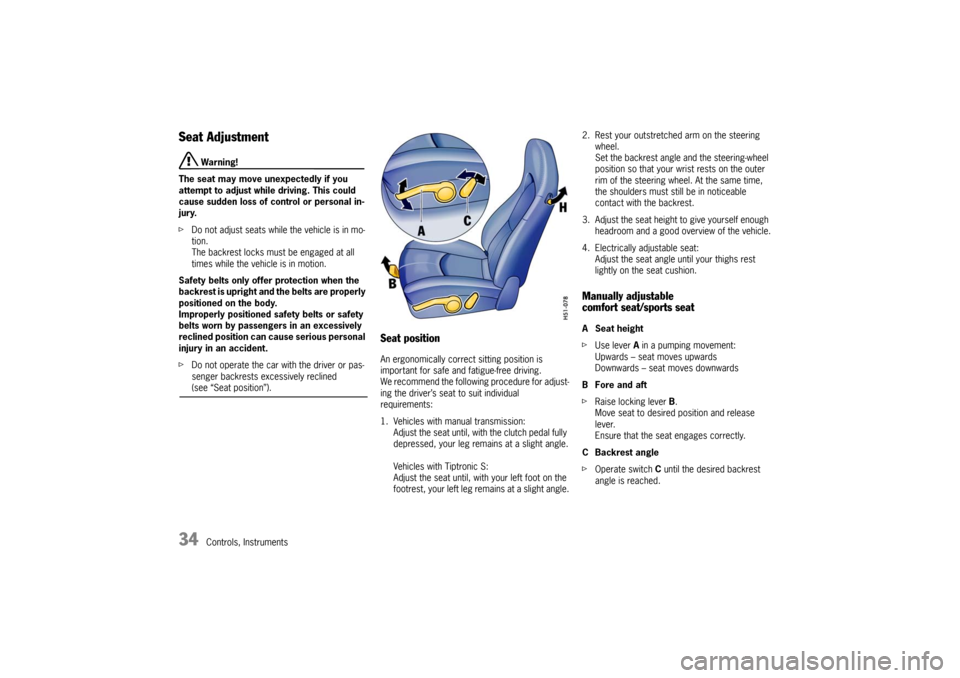
Manually adjustable
comfort seat/sports seatA Seat height
fUse lever A in a pumping movement:
Upwards – seat moves upwards
Downwards – seat moves downwards
B Fore and aft
fRaise locking lever B.
Move seat to desired position and release
lever.
Ensure that the seat engages correctly.
CBackrest angle
fOperate switch C until the desired backrest
angle is reached.
Page 39 of 296
Controls, Instruments
39
Steering Wheel Adjustment
Warning!
Risk of accident.
The steering wheel may move further than
desired if you attempt to adjust it when
driving.
You may lose control of the vehicle.
fDo not adjust the steering wheel when driving.
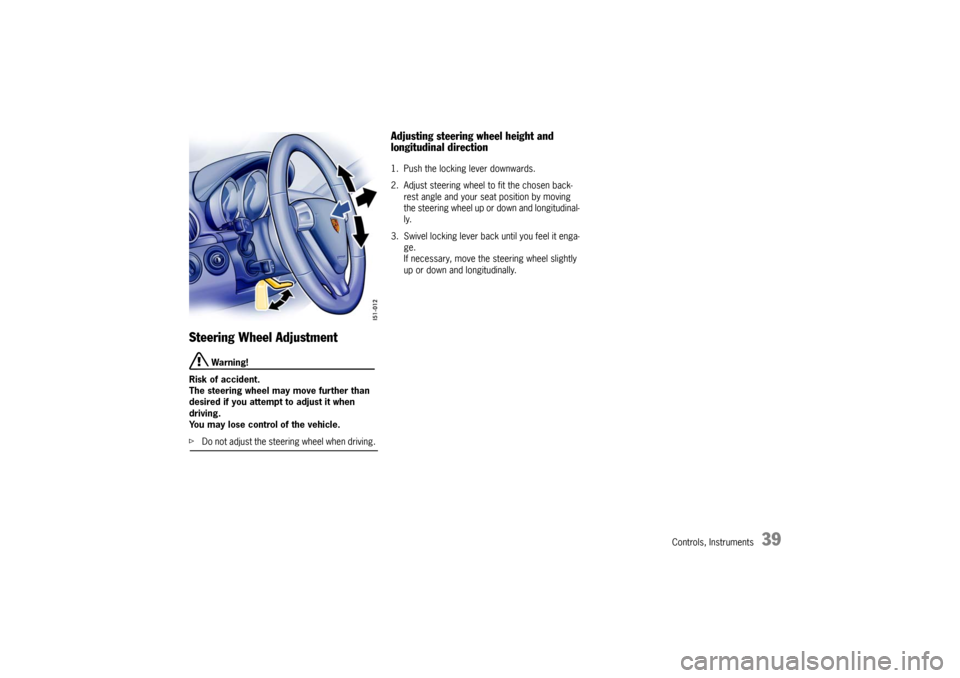
Adjusting steering wheel height and
longitudinal direction 1. Push the locking lever downwards.
2. Adjust steering wheel to fit the chosen back-
rest angle and your seat position by moving
the steering wheel up or down and longitudinal-
ly.
3. Swivel locking lever back until you feel it enga-
ge.
If necessary, move the steering wheel slightly
up or down and longitudinally.
Page 41 of 296
Controls, Instruments
41
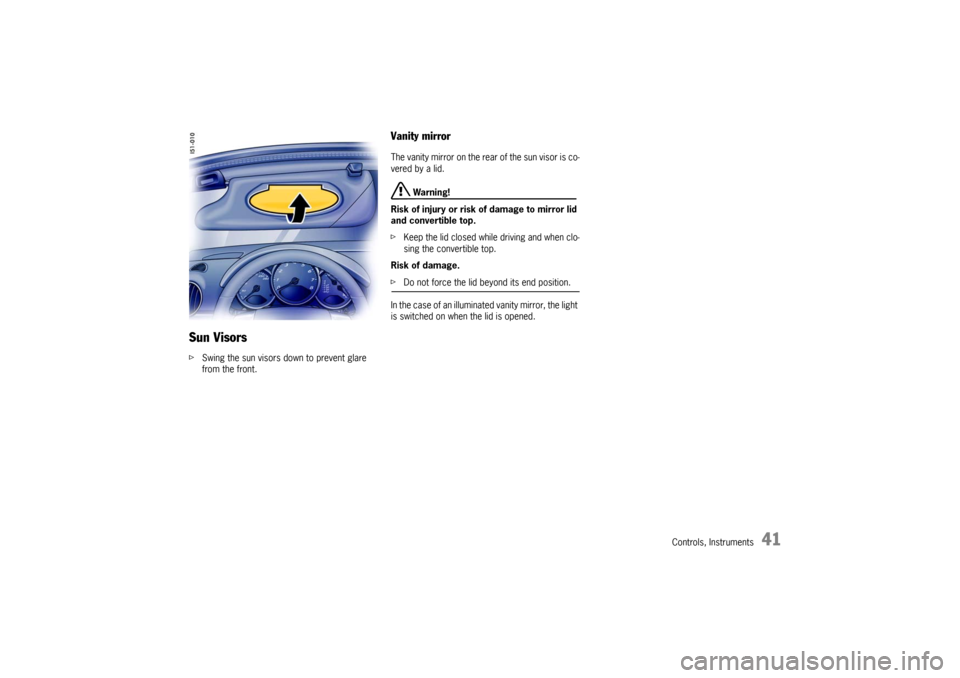
Sun Visors fSwing the sun visors down to prevent glare
from the front.
Vanity mirror The vanity mirror on the rear of the sun visor is co-
vered by a lid.
Warning!
Risk of injury or risk of damage to mirror lid
and convertible top.
fKeep the lid closed while driving and when clo-
sing the convertible top.
Risk of damage.
fDo not force the lid beyond its end position.
In the case of an illuminated vanity mirror, the light
is switched on when the lid is opened.
Page 42 of 296

42
Controls, Instruments
Safety Belts
Warning!
Always make sure your and your passenger’s
safety belts are properly fastened while the
vehicle is in motion.
Failure to follow safety belt warnings may re-
sult in serious personal injury or death.
fFor your and your passenger’s protection, use
safety belts at all times while the vehicle is in
motion.
fUse appropriate child restraint systems for all
small children.
Proper wearing of safety belts
fS a f e t y b e l t s m u s t b e p o s i t i o n e d o n t h e b o d y a s
to restrain the upper body and lap from sliding
forward. Improperly positioned safety belts
can cause serious personal injury or death in
case of an accident.
fThe shoulder belt should always rest on your
upper body. The shoulder belt should never be
worn behind your back or under your arm.
fFor maximum effectiveness, the lap belt
should be worn low across the hips.
fPregnant women should position the belt as
low as possible across the pelvis. Make sure it
is not pressing against the abdomen. fBelts should not be worn twisted.
fDo not wear belts over rigid or breakable ob-
jects in or on your clothing, such as eye glas-
ses, pens, keys, etc. as these may cause inju-
ry.
fSeveral layers of heavy clothing may interfere
with proper positioning of belts.
fBelts must not rub against sharp objects or da-
mage may occur to the belt.
fTwo occupants should never share the same
belt at the same time.
Care and maintenance
fKeep belt buckles free of any obstruction that
may prevent a secure locking.
fBelts that have been subjected to excesssive
stretch forces in an accident must be inspec-
ted or replaced to ensure their continued effec-
tiveness in restraining you.
The same applies to belt tensioner systems
which have been triggered.
In addition, the anchor points of the belts
should be checked.
fIf safety belts do not work properly, see your
authorized Porsche dealer immediately.
fI f t h e b e l t s s h o w d a m a g e t o w e b b i n g , b i n d i n g s ,
buckles or retractors, they should be replaced
to ensure safe operation.
fDo not modify or disassemble the safety belts
in your vehicle. fThe belts must be kept clean or the retractors
may not work properly.
Please observe the chapter “CAR CARE IN-
STRUCTIONS” on Page 209.
fNever bleach or dye safety belts.
fDo not allow safety belts to retract until they
are completely dry after cleaning or this may
cause damage to the belt.
Belt tensioner Depending on the force of an impact, fastened
safety belts are tightened in an accident.
The belt tensioners are triggered by:
– Front, side and rear impacts of sufficient
severity.
– Vehicle rollover.
Note
The belt tensioner system can be triggered only
once; the system must be replaced afterward.
If there is a fault in the belt-tensioner system, the
airbag warning light lights up.
Work may be performed on the belt-tensioner sys-
tem only by an authorized Porsche dealer.
Smoke is released when the belt tensioners are
triggered. This does not indicate a fire in the
vehicle.
Page 43 of 296
Controls, Instruments
43
An audio-visual warning system is interconnec-
ted with the driver’s safety belt.
Every time the ignition is turned on, the gong will
sound for about 6 seconds to remind driver and
passenger to buckle up.
In addition, the gong will sound for approx. 90 se-
conds if the vehicle speed exceeds 15 mph
(24 km/h).
The safety belt warning light in the instrument
panel and on-board computer will go off as soon
as the driver has buckled up.
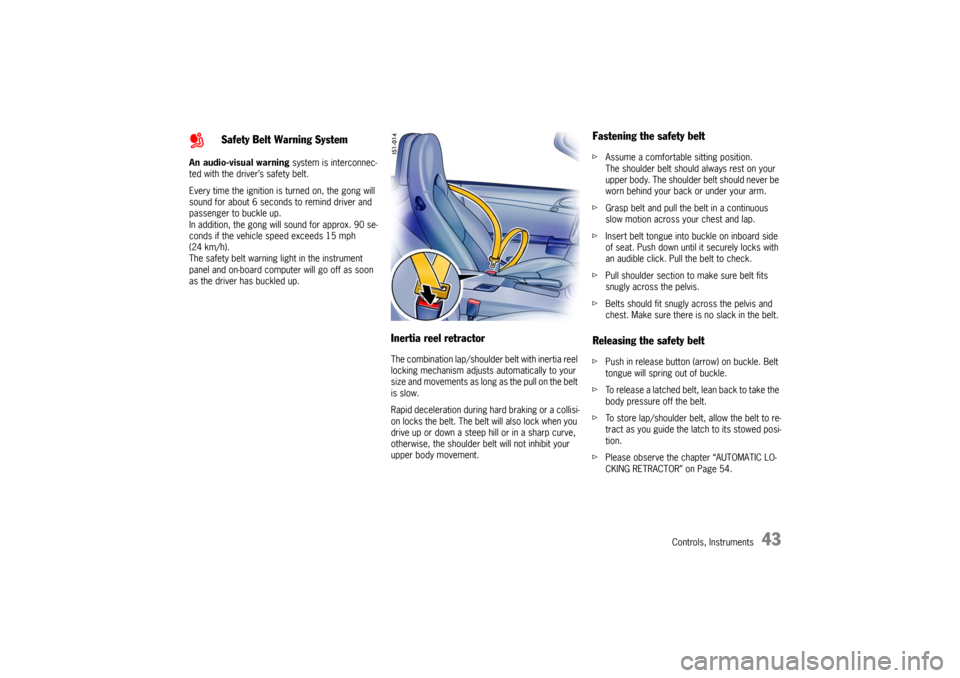
Inertia reel retractor The combination lap/shoulder belt with inertia reel
locking mechanism adjusts automatically to your
size and movements as long as the pull on the belt
is slow.
Rapid deceleration during hard braking or a collisi-
on locks the belt. The belt will also lock when you
drive up or down a steep hill or in a sharp curve,
otherwise, the shoulder belt will not inhibit your
upper body movement.
Fastening the safety beltfAssume a comfortable sitting position.
The shoulder belt should always rest on your
upper body. The shoulder belt should never be
worn behind your back or under your arm.
fGrasp belt and pull the belt in a continuous
slow motion across your chest and lap.
fInsert belt tongue into buckle on inboard side
of seat. Push down until it securely locks with
an audible click. Pull the belt to check.
fPull shoulder section to make sure belt fits
snugly across the pelvis.
fBelts should fit snugly across the pelvis and
chest. Make sure there is no slack in the belt. Releasing the safety beltfPush in release button (arrow) on buckle. Belt
tongue will spring out of buckle.
fTo release a latched belt, lean back to take the
body pressure off the belt.
fTo store lap/shoulder belt, allow the belt to re-
tract as you guide the latch to its stowed posi-
tion.
fPlease observe the chapter “AUTOMATIC LO-
CKING RETRACTOR” on Page 54.
Safety Belt Warning System
Page 45 of 296

Controls, Instruments
45
fAlways keep the lid of the door storage com-
partment closed. Objects must not protrude
out of the door storage compartment.
fNo changes may be made to the wiring or
components of the airbag system.
fDo not add any additional coverings or stickers
to the steering wheel or in the area of the pas-
senger airbag, side airbags and head airbags.
Doing so may adversely affect the functioning
of the airbag system or cause harm to the oc-
cupants if the airbag system should deploy.
fDo not modify the seat coverings. Do not at-
tach additional cushions, protective coverings,
or pillows to the passenger's seat. Do not affix
things to the passenger's seat or cover it with
other materials. Do not cover the back of the
backrest. Do not make changes to the passen-
ger's seat and to the seat base frame.
fDo not undertake any wiring for electrical ac-
cessory equipment in the vicinity of the airbag
wiring harnesses. Doing so may disable the air-
bag system or cause inadvertent inflation.
fIf the warning light comes on, the airbag sys-
tem should be repaired immediately by your
authorized Porsche dealer.
fAlways keep feet in the footwell while driving.
Do not put feet on the dashboard or the seat
area. Do not lean against the inside of the door
or outside the window while the vehicle is mov-
ing.fUsing accessories not approved by Porsche
can cause the weight sensing system to be im-
paired.
fDo not squeeze objects, such as the fire extin-
guisher, or first aid kit under the seat.
fOnly have seats removed and installed by an
authorized Porsche dealer so that weight sens-
ing components will not be damaged.
fGive your passenger all of the information in
this chapter.Note
Airbag components (e.g. steering wheel, door lin-
ing, seats) may be disassembled only by an autho-
rized Porsche dealer.
When disposing of a used airbag unit, our safety
instructions must be followed. These instructions
can be obtained at any authorized Porsche dealer.
Page 48 of 296
48
Controls, Instruments Automatic deactivation of the passenger’s
airbags Danger!
The use of a child restraint system in the
passenger seat can result in serious
personal injury or death to the child from an
airbag deployment.
fPlease observe the chapter “PASSENGER
AIRBAG OFF INDICATOR LAMP DOES NOT
LIGHT UP” on Page 49.
fBefore transporting a child on the passenger’s
seat:
Please observe the chapter “CHILD RESTRAINT SYSTEMS” on Page 51.
– When an up to one-year old child is seated
in the child restraint system, the front airbag is
automatically deactivated on the passenger si-
de.
– When an adult is seated in the front seat the
front airbag remains active on the passenger‘s
side.
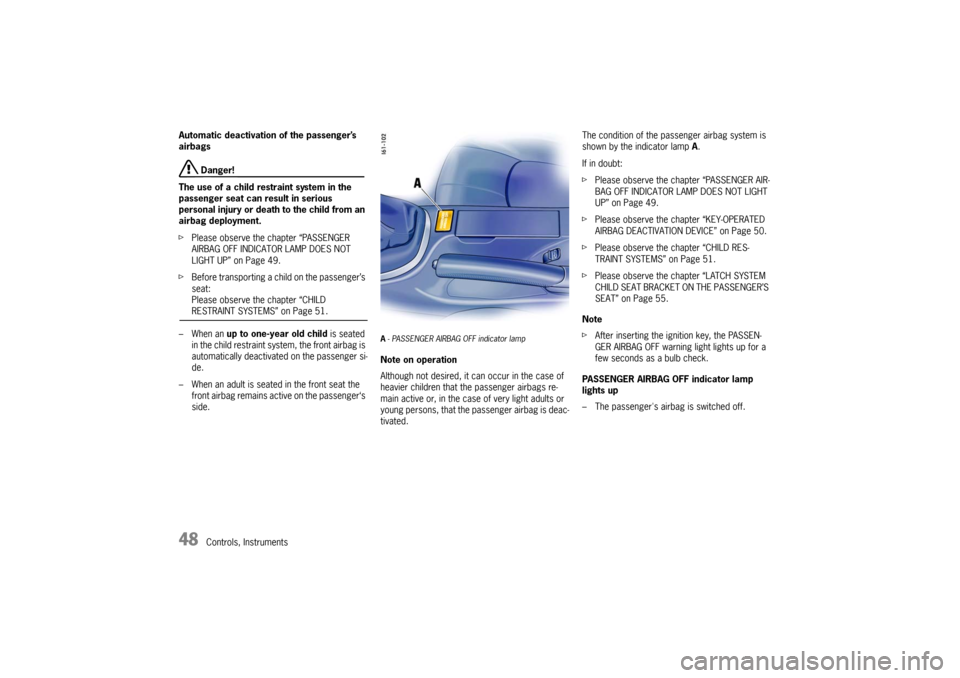
A- PASSENGER AIRBAG OFF indicator lampNote on operation
Although not desired, it can occur in the case of
heavier children that the passenger airbags re-
main active or, in the case of very light adults or
young persons, that the passenger airbag is deac-
tivated.The condition of the passenger airbag system is
shown by the indicator lamp A.
If in doubt:
fPlease observe the chapter “PASSENGER AIR-
BAG OFF INDICATOR LAMP DOES NOT LIGHT
UP” on Page 49.
fPlease observe the chapter “KEY-OPERATED
AIRBAG DEACTIVATION DEVICE” on Page 50.
fPlease observe the chapter “CHILD RES-
TRAINT SYSTEMS” on Page 51.
fPlease observe the chapter “LATCH SYSTEM
CHILD SEAT BRACKET ON THE PASSENGER’S
SEAT” on Page 55.
Note
fAfter inserting the ignition key, the PASSEN-
GER AIRBAG OFF warning light lights up for a
few seconds as a bulb check.
PASSENGER AIRBAG OFF indicator lamp
lights up
– The passenger's airbag is switched off.