2006 PONTIAC GRAND PRIX heating
[x] Cancel search: heatingPage 81 of 472

2. Remove the old battery and replace it with the new
one. Make sure the positive side (+) of the battery
faces up. Use one three-volt, CR2032 battery,
or equivalent type.
3. Put the two halves back together. Make sure the
cover is on tight so water will not get inside the
transmitter.
4. Test the operation of the transmitter with
the vehicle.
Remote Vehicle Start
Your vehicle may have a remote start feature. This
feature allows you to start the engine from outside the
vehicle. It may also start the vehicle’s heating or air
conditioning systems and rear window defogger. When
the remote start system is active, the climate control
system will heat or cool the inside of the vehicle based
on the outside temperature. The rear window defogger
will be turned on by the climate control system when it is
heating the inside of the vehicle. Normal operation of
the system will return after the key is turned to RUN.
Laws in some communities may restrict the use of
remote starters. For example, some laws may require a
person using remote start to have the vehicle in view
when doing so. Check local regulations for any
requirements on remote starting of vehicles.Do not use the remote start feature if your vehicle is low
on fuel. Your vehicle may run out of fuel.
The remote start feature provides two separate starts
per ignition cycle, each with 10 minutes of engine
running time.
The remote start system needs to be reset after your
vehicle’s engine is started two times using the
transmitter’s remote start button. The remote start
system is reset by inserting the vehicle’s key into the
ignition switch and turning to RUN. SeeIgnition
Positions on page 2-22for information regarding the
ignition positions on your vehicle.
Your remote keyless entry transmitter with the
remote start button provides an increased range of
operation. You can start your vehicle from approximately
492 feet (150 m) away. However, the range may be
less while the vehicle is running, and as a result
you may need to be closer to your vehicle to turn it off
than you were to turn it on.
There are other conditions which can affect the
performance of the transmitter, seeRemote Keyless
Entry System on page 2-3for additional information.
2-7
Page 87 of 472
When you want to open a rear door when the security
lock is on, do the following:
1. Unlock the door using the remote keyless entry
transmitter, if equipped, the power door lock
switch, or by lifting the rear door manual lock.
2. Open the door from the outside.
To cancel the rear door security lock, do the following:
1. Unlock the door and open it from the outside.
2. Insert the key into the security lock slot and turn it
so the slot is in the vertical position.
Lockout Protection
The lockout protection feature makes it more difficult to
lock the key in the vehicle. If the driver’s door is
open while the key is in the ignition, the door cannot be
locked with the power door lock switch.
This feature cannot guarantee that you will never be
locked out of the vehicle. If the key is not left in
the ignition, or, if the manual door lock pin is used, the
key could still be locked inside the vehicle. Always
remember to take the key with you.
Trunk
{CAUTION:
It can be dangerous to drive with the trunk lid
open because carbon monoxide (CO) gas can
come into your vehicle. You cannot see or
smell CO. It can cause unconsciousness and
even death. If you must drive with the trunk lid
open or if electrical wiring or other cable
connections must pass through the seal
between the body and the trunk lid:
Make sure all other windows are shut.
Turn the fan on your heating or cooling
system to its highest speed and select the
control setting that will force outside air
into your vehicle. See Climate Control
System.
If you have air outlets on or under the
instrument panel, open them all the way.
SeeEngine Exhaust on page 2-33.
To unlock and open the trunk from the outside, press the
trunk button on the remote keyless entry transmitter. See
Remote Keyless Entry System Operation on page 2-4.
2-13
Page 143 of 472

Certain electrical accessories may not be compatible
with the accessory power outlet and could result
in blown vehicle or adapter fuses. See your dealer for
additional information on accessory power outlets.
Notice:Adding any electrical equipment to your
vehicle may damage it or keep other components
from working as they should. The repairs would not
be covered by your warranty. Do not use equipment
exceeding maximum amperage rating. Check
with your dealer before adding electrical equipment.
When adding electrical equipment, be sure to follow
the proper installation instructions included with it.
Notice:Improper use of the power outlet can cause
damage not covered by your warranty. Do not
hang any type of accessory or accessory bracket
from the plug because the power outlets are
designed for accessory power plugs only.Ashtray(s) and Cigarette Lighter
Ashtray
Notice:If you put papers, pins, or other �ammable
items in the ashtray, hot cigarettes or other
smoking materials could ignite them and possibly
damage your vehicle. Never put �ammable items in
the ashtray.
If your vehicle is equipped, the ashtray is located to the
right of the transaxle shift lever on the center console.
To open it, push and release the rear of the cover.
To empty the ashtray, lift the side tab and pull up
to remove the ashtray from the center console. To
reinstall, push the tray back into place.
Cigarette Lighter
Notice:Holding a cigarette lighter in while it is
heating will not allow the lighter to back away from
the heating element when it is hot. Damage from
overheating may occur to the lighter or heating
element, or a fuse could be blown. Do not hold a
cigarette lighter in while it is heating.
If your vehicle is equipped with a cigarette lighter, it is
located on the center console.
Push the lighter to activate the heating element and
release it. Once the heating element is hot, it will pop out
by itself.
3-25
Page 144 of 472
Climate Controls
Climate Control System
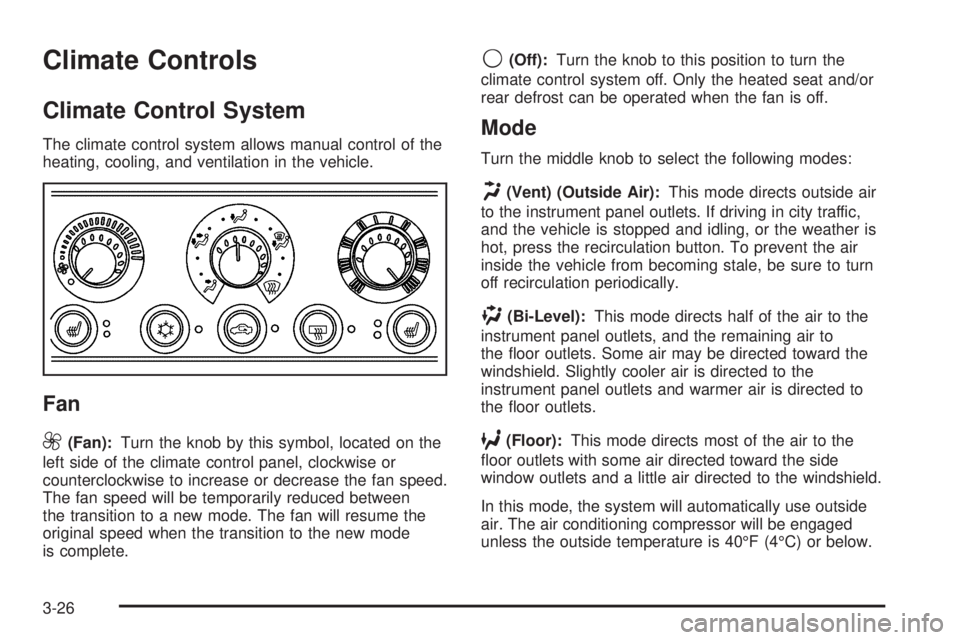
The climate control system allows manual control of the
heating, cooling, and ventilation in the vehicle.
Fan
9
(Fan):Turn the knob by this symbol, located on the
left side of the climate control panel, clockwise or
counterclockwise to increase or decrease the fan speed.
The fan speed will be temporarily reduced between
the transition to a new mode. The fan will resume the
original speed when the transition to the new mode
is complete.
9(Off):Turn the knob to this position to turn the
climate control system off. Only the heated seat and/or
rear defrost can be operated when the fan is off.
Mode
Turn the middle knob to select the following modes:
H(Vent) (Outside Air):This mode directs outside air
to the instrument panel outlets. If driving in city traffic,
and the vehicle is stopped and idling, or the weather is
hot, press the recirculation button. To prevent the air
inside the vehicle from becoming stale, be sure to turn
off recirculation periodically.
)(Bi-Level):This mode directs half of the air to the
instrument panel outlets, and the remaining air to
the �oor outlets. Some air may be directed toward the
windshield. Slightly cooler air is directed to the
instrument panel outlets and warmer air is directed to
the �oor outlets.
6(Floor):This mode directs most of the air to the
�oor outlets with some air directed toward the side
window outlets and a little air directed to the windshield.
In this mode, the system will automatically use outside
air. The air conditioning compressor will be engaged
unless the outside temperature is 40°F (4°C) or below.
3-26
Page 147 of 472
Rear Window Defogger
The rear window defogger uses a warming grid to
remove fog or frost from the rear window. Be sure to
clear as much snow from the rear window as possible.
Notice:Do not use a razor blade or sharp object
to clear the inside rear window. Do not adhere
anything to the defogger grid lines in the rear glass.
These actions may damage the rear defogger.
Repairs would not be covered by your warranty.
=(Rear Window Defogger):Press this button to turn
the rear window defogger on or off.
An indicator light to the right of the button will come on
to show that the rear window defogger is on. The
instrument panel brightness control may have to be
adjusted to the highest setting during the daytime
in order to see the indicator light.
The rear window defogger will turn off approximately
20 minutes after the button is pressed. If the button is
pressed again, it will run another 20 minutes. The
defogger can be turned off by pressing the button again
or by turning off the engine.
Do not drive the vehicle until all windows are clear.
Dual Automatic Climate
Control System
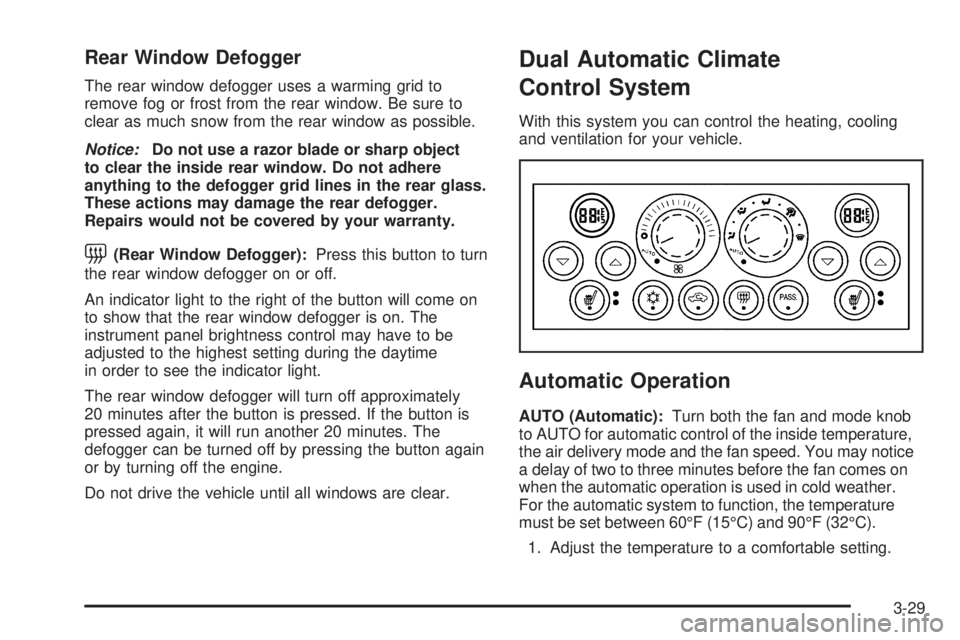
With this system you can control the heating, cooling
and ventilation for your vehicle.
Automatic Operation
AUTO (Automatic):Turn both the fan and mode knob
to AUTO for automatic control of the inside temperature,
the air delivery mode and the fan speed. You may notice
a delay of two to three minutes before the fan comes on
when the automatic operation is used in cold weather.
For the automatic system to function, the temperature
must be set between 60°F (15°C) and 90°F (32°C).
1. Adjust the temperature to a comfortable setting.
3-29
Page 195 of 472

HEADLAMPS SUGGESTED
This message comes on when the amount of available
light outside the vehicle is low and the exterior lamps
control has been turned off. This condition happens
when the headlamps are turned off at night or the
Daytime Running Lamps (DRL) are turned off during the
day. This message informs the driver that it has
become dark enough outside to require the headlamps
to be turned on. When the headlamps are turned
on, this message will clear from the screen. SeeExterior
Lamps on page 3-15andDaytime Running Lamps
(DRL) on page 3-16for more information.
This message will display while the ignition is in RUN. A
chime will sound for two seconds when this message
is displayed. Press the set/reset button to acknowledge
this warning message and to clear it from the screen.
This message will continue to display if it has not been
acknowledged when the engine is turned off. It will
also re-display for three seconds if the message has
been acknowledged, but the condition still exists
when the engine is turned off.
If the condition still exists, the message will re-appear
when the engine is turned on.
HOT COOLANT
Notice:If the HOT COOLANT warning message
appears on the DIC display, stop the vehicle as soon
as possible. Do not increase the engine speed
above normal idling speed. Severe engine damage
can result from driving a vehicle with an overheated
engine. SeeEngine Overheating on page 5-28for
more information.
This symbol comes on with
the HOT COOLANT
warning message.
This warning message will appear while the engine
coolant temperature is too hot. The hot coolant
temperature warning light will also appear on the
instrument panel cluster. Also, the engine coolant
temperature gage will read in the red or hot area. See
Engine Coolant Temperature Warning Light on
page 3-46andEngine Coolant Temperature Gage on
page 3-46for more information.
To avoid added strain, turn off the air conditioner if it is
on. When the coolant temperature returns to normal,
the air conditioner can be turned back on.
3-77
Page 260 of 472
Because this antenna is built into your rear window,
there is a reduced risk of damage caused by car washes
and vandals.
If you choose to add a cellular telephone to your
vehicle, and the antenna needs to be attached to the
glass, be sure that you do not damage the grid lines for
the AM-FM antenna. There is enough space between
the lines to attach a cellular telephone antenna
without interfering with radio reception.
Do not apply aftermarket glass tinting to the back glass.
The metallic �lm in some tinting materials will interfere
with or distort the incoming radio reception. Care
must be taken when cleaning the rear window because
it breaks in the resistive material heating element
and will adversely affect radio and defogger
performance. See your dealer for details.
XM™ Satellite Radio Antenna
System
The XM™ Satellite Radio antenna is located on the roof
of your vehicle. Keep this antenna clear of snow and
ice build up for clear radio reception.If your vehicle has a sunroof, the performance of the
XM™ system may be affected if the sunroof is open.
Loading items onto the roof of your vehicle can interfere
with the performance of the XM™ system. Make sure
the XM™ Satellite Radio antenna is not obstructed.
Chime Level Adjustment
The radio is used to adjust the vehicle’s chime level.
To change the volume level of the chime, press and hold
pushbutton 6 with the ignition on and the radio power
off. The volume level will change from the normal
level to loud, and LOUD will appear on the radio display.
To change back to the default or normal setting,
press and hold pushbutton 6 again. The volume level
will change from the loud level to normal, and NORMAL
will appear on the radio display. Each time the chime
volume is changed, three chimes will sound as an
example of the new volume selected. Removing the
radio and not replacing it with a factory radio or chime
module will disable vehicle chimes.
3-142
Page 305 of 472
When towing a trailer, the arrows on the instrument
panel will �ash for turns even if the bulbs on the trailer
are burned out. You may think drivers behind you
are seeing the turn signal when they are not. It is
important to check occasionally to be sure the trailer
bulbs are still working.
The vehicle has bulb warning lights. When a trailer
lighting system is plugged into the vehicle’s lighting
system, its bulb warning lights may not indicate if one of
the lamps goes out. So, when a trailer lighting system
is plugged in, be sure to check the vehicle and
trailer lamps from time to time to be sure they are all
working. Once the trailer lamps have been disconnected,
the bulb warning lights can once again indicate if
one of the vehicle lamps is out.
Driving On Grades
Reduce speed and shift to a lower gear before starting
down a long or steep downgrade. If the vehicle is
not shifted down, the brakes may have to be used so
much that they would get hot and no longer work well.
On a long uphill grade, shift down and reduce the
vehicle’s speed to around 45 mph (70 km/h) to reduce
the possibility of engine and transaxle overheating.
If the vehicle has overdrive, it may be driven in
THIRD (3) instead of AUTOMATIC OVERDRIVE (D).
Parking on Hills
{CAUTION:
You really should not park your vehicle, with a
trailer attached, on a hill. If something goes
wrong, your rig could start to move. People
can be injured, and both your vehicle and the
trailer can be damaged.
But if the rig ever has to be parked on a hill, here is
how to do it:
1. Apply the regular brakes, but do not shift into
PARK (P) yet.
2. Have someone place chocks under the
trailer wheels.
3. When the wheel chocks are in place, release the
regular brakes until the chocks absorb the load.
4. Reapply the regular brakes. Then apply the parking
brake, and then shift to PARK (P).
5. Release the regular brakes.
4-45