2006 NISSAN XTERRA CD player
[x] Cancel search: CD playerPage 135 of 304

4 Heater, air conditioner and audio
systems
Ventilators........................................4-2
Heater and air conditioner (manual)..................4-2
Controls.......................................4-3
Heater operation...............................4-4
Air conditioner operation........................4-5
Air flow charts..................................4-6
Servicing air conditioner............................4-9
Audio system....................................4-10
Radio........................................4-10
FM radio reception............................4-10
AM radio reception............................4-10Satellite radio reception (if so equipped).........4-10
Audio operation precautions....................4-11
FM-AM radio with compact disc (CD) player
(if so equipped)...............................4-16
FM-AM-SAT radio with compact disc (CD)
changer......................................4-20
CD care and cleaning..........................4-25
Steering wheel switch for audio control
(if so equipped)...............................4-25
Antenna......................................4-26
Car phone or CB radio............................4-26
ZREVIEW COPYÐ2006 Xterra(xtr)
Owners ManualÐUSA_English(nna)
08/01/05Ðdebbie
X
Page 145 of 304

the vehicle outside of any metal or large building
for satellite radio to receive all of the necessary
data.
No satellite radio reception is available and “NO
SAT” is displayed when the SAT band option is
selected unless optional satellite receiver and
antenna are installed and an XMTor SIRIUS™
satellite radio service subscription is active. Sat-
ellite radio can only be installed in vehicles that
were factory pre-wired for satellite radio. Satellite
radio is not available in Alaska, Hawaii and Guam.
Satellite radio performance may be affected if
cargo carried on the roof blocks the satellite radio
signal.
If possible, do not put cargo over the satellite
antenna.
AUDIO OPERATION PRECAUTIONS
Compact disc (CD) player
cOnly use high quality 4.7 inches (12 cm)
round discs that have the “COMPACTdisc DIGITAL AUDIO” logo on the disc
or packaging.
cDuring cold weather or rainy days, the
player may malfunction due to the hu-
midity. If this occurs, remove the CD
and dehumidify or ventilate the player
completely.
cThe player may skip while driving on
rough roads.
cThe CD player sometimes cannot func-
tion when the compartment tempera-
ture is extremely high or low.
Decrease/increase the temperature
before use.
cDo not expose the CD to direct sun-
light.
cCDs that are in poor condition or are
dirty, scratched or covered with finger-
prints may not work properly.
cThe following CDs may not work prop-
erly:
cCopy control compact discs (CCCD)
cRecordable compact discs (CD-R)
cRewritable compact discs (CD-RW)
LHA0099
Heater, air conditioner and audio systems4-11
ZREVIEW COPYÐ2006 Xterra(xtr)
Owners ManualÐUSA_English(nna)
08/01/05Ðdebbie
X
Page 146 of 304

cDo not use the following CDs as they
may cause the CD player to malfunc-
tion:
c3.1 in (8 cm) discs with an adapter
cCDs that are not round
cCDs with a paper label
cCDs that are warped, scratched, or
have abnormal edges
cThis audio system can only play pre-
recorded CDs. It has no capability to
record or burn CDs.
cIf the CD cannot be played, one of the
following messages will be displayed.
CHECK DISC:
cConfirm that the CD is inserted cor-
rectly (the label side is facing up,
etc.) .
cConfirm that the CD is not bent or
warped and it is free of scratches.PUSH EJECT:
This is an error due to excessive tem-
perature inside the player. Remove the
CD by pushing the EJECT button. After
a short time, reinsert the CD. The CD
can be played when the temperature of
the player returns to normal.
UNPLAYABLE:
The file is unplayable in this audio sys-
tem (only MP3 CD) .
Compact Disc with MP3
Terms:
cMP3 — MP3 is short for Moving Pictures
Experts Group Audio Layer 3. MP3 is the
most well-known compressed digital audio
file format. This format allows for near “CD
quality” sound, but at a fraction of the size of
normal audio files. MP3 conversion of an
audio track from CD-ROM can reduce the
file size by approximately a 10:1 ratio with
virtually no perceptible loss in quality. MP3
compression removes the redundant and
irrelevant parts of a sound signal that the
human ear doesn’t hear.cBit rate — Bit rate denotes the number of
bits per second used by a digital music file.
The size and quality of a compressed digital
audio file is determined by the bit rate used
when encoding the file.
cSampling frequency — Sampling frequency
is the rate at which the samples of a signal
are converted from analog to digital (A/D
conversion) per second.
cID3 tag — The ID3 tag is the part of the
encoded MP3 file that contains information
about the digital music file such as song title,
artist, album title, encoding bit rate, track
time duration, etc. ID3 tag information is
displayed on the Album/Artist/Track title line
on the display.
4-12Heater, air conditioner and audio systems
ZREVIEW COPYÐ2006 Xterra(xtr)
Owners ManualÐUSA_English(nna)
08/01/05Ðdebbie
X
Page 149 of 304

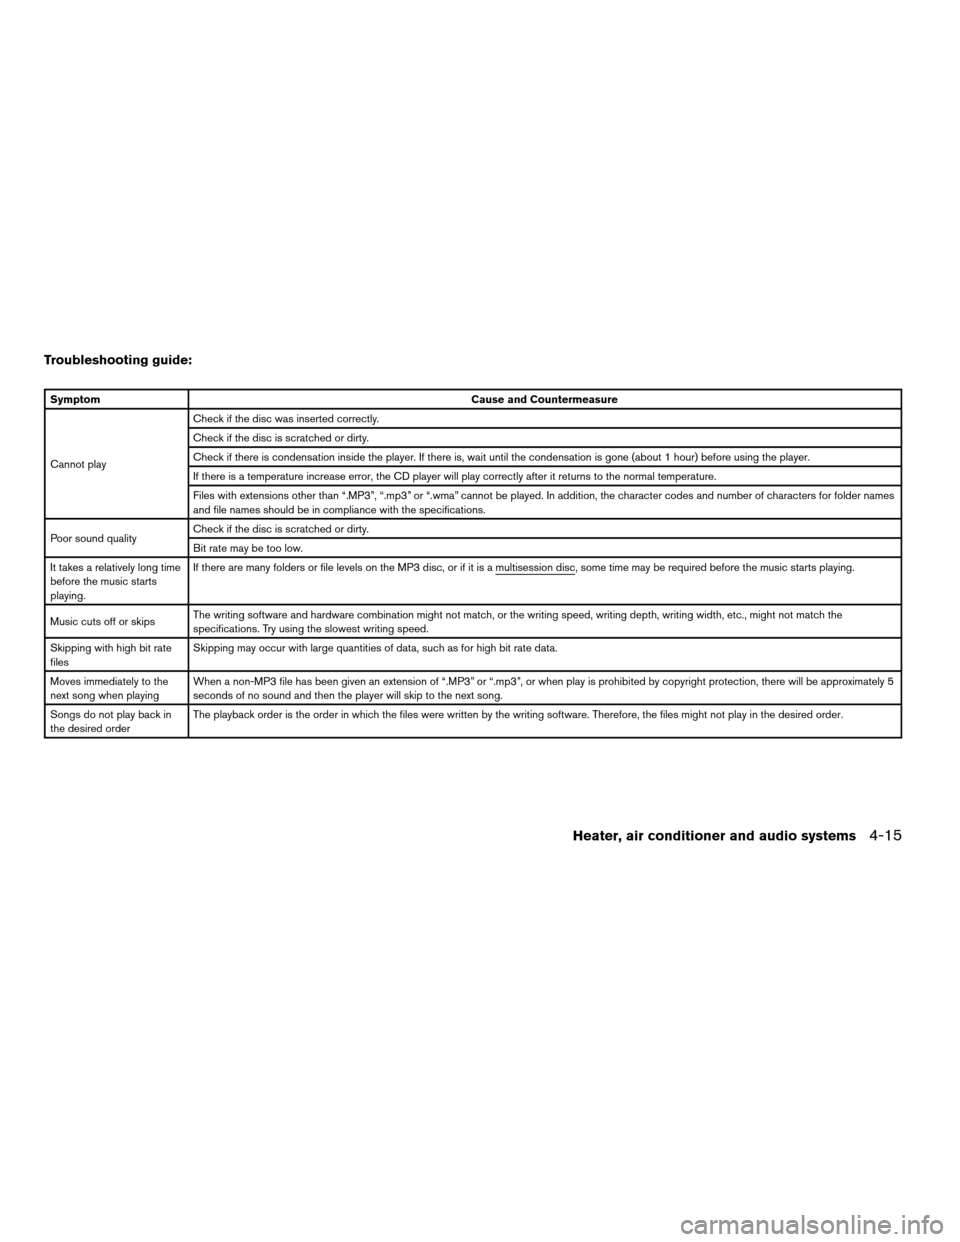
Troubleshooting guide:
SymptomCause and Countermeasure
Cannot playCheck if the disc was inserted correctly.
Check if the disc is scratched or dirty.
Check if there is condensation inside the player. If there is, wait until the condensation is gone (about 1 hour) before using the player.
If there is a temperature increase error, the CD player will play correctly after it returns to the normal temperature.
Files with extensions other than “.MP3”, “.mp3” or “.wma” cannot be played. In addition, the character codes and number of characters for folder names
and file names should be in compliance with the specifications.
Poor sound qualityCheck if the disc is scratched or dirty.
Bit rate may be too low.
It takes a relatively long time
before the music starts
playing.If there are many folders or file levels on the MP3 disc, or if it is a multisession disc, some time may be required before the music starts playing.
Music cuts off or skipsThe writing software and hardware combination might not match, or the writing speed, writing depth, writing width, etc., might not match the
specifications. Try using the slowest writing speed.
Skipping with high bit rate
filesSkipping may occur with large quantities of data, such as for high bit rate data.
Moves immediately to the
next song when playingWhen a non-MP3 file has been given an extension of “.MP3” or “.mp3”, or when play is prohibited by copyright protection, there will be approximately 5
seconds of no sound and then the player will skip to the next song.
Songs do not play back in
the desired orderThe playback order is the order in which the files were written by the writing software. Therefore, the files might not play in the desired order.
Heater, air conditioner and audio systems4-15
ZREVIEW COPYÐ2006 Xterra(xtr)
Owners ManualÐUSA_English(nna)
08/01/05Ðdebbie
X
Page 150 of 304

1. PRESET ABC button
2. Display
3. CD button
4. CD eject button
5. CD insert slot
6. MENU button7. AUDIO button
8. Station select buttons
9. SEEK/TRACK button
10. PWR/VOL control knob
11. BAND select button
FM-AM RADIO WITH COMPACT
DISC (CD) PLAYER (if so equipped)
PWR/VOL control knob
Turn the ignition key to the ACC or ON position,
then push the PWR/VOL control knob. If you
listen to the radio with the engine not running,
turn the key to the ACC position. The mode (radio
or CD) that was playing immediately before the
system was turned off resumes playing.
When no CD is loaded, the radio comes on.
Pushing the PWR/VOL control knob again turns
the system off.
Turn the PWR/VOL control knob to the right to
increase volume or to the left to decrease volume.
WHA0586
4-16Heater, air conditioner and audio systems
ZREVIEW COPYÐ2006 Xterra(xtr)
Owners ManualÐUSA_English(nna)
08/01/05Ðdebbie
X
Page 153 of 304

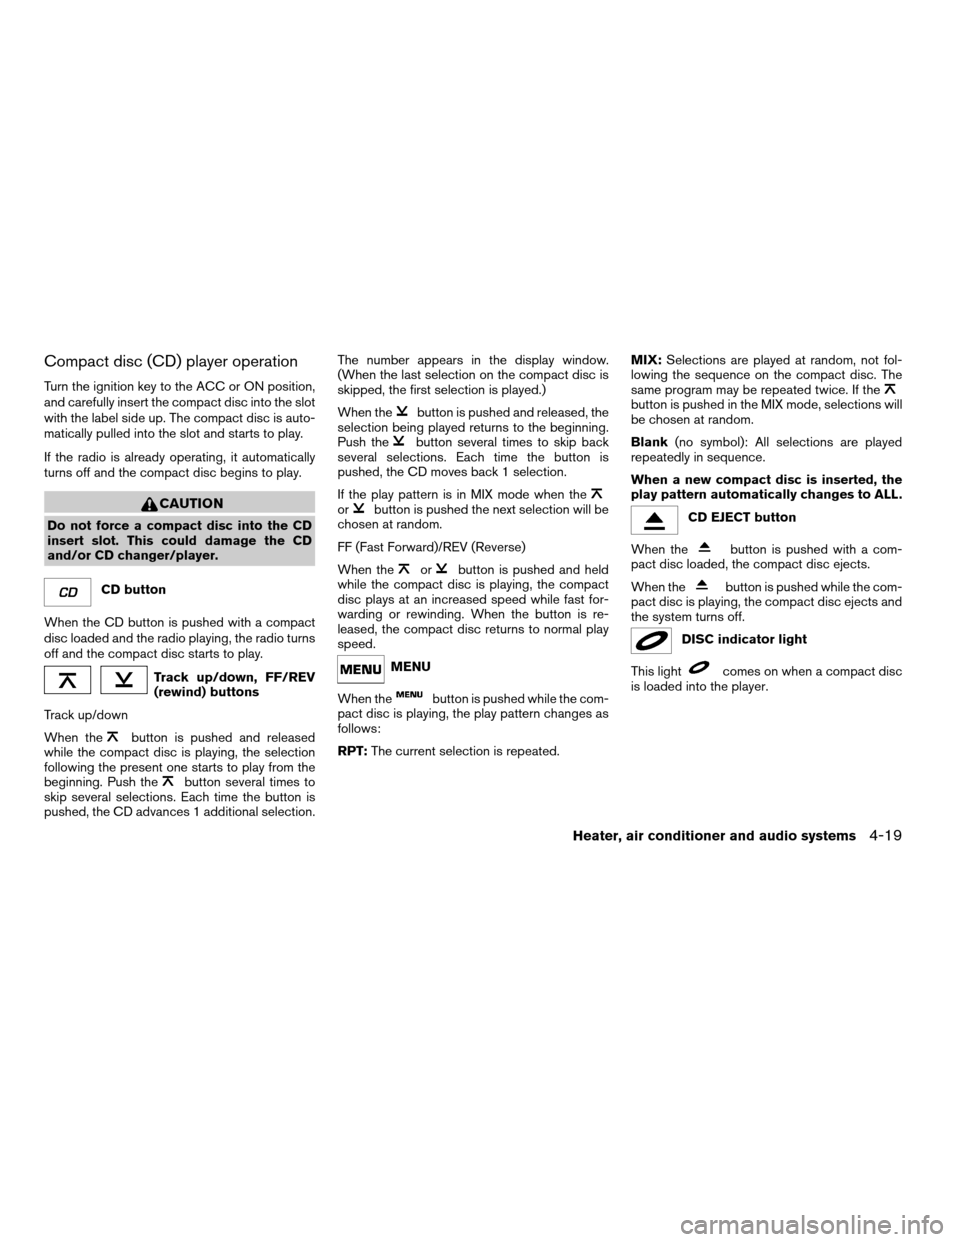
Compact disc (CD) player operation
Turn the ignition key to the ACC or ON position,
and carefully insert the compact disc into the slot
with the label side up. The compact disc is auto-
matically pulled into the slot and starts to play.
If the radio is already operating, it automatically
turns off and the compact disc begins to play.
CAUTION
Do not force a compact disc into the CD
insert slot. This could damage the CD
and/or CD changer/player.
CD button
When the CD button is pushed with a compact
disc loaded and the radio playing, the radio turns
off and the compact disc starts to play.
Track up/down, FF/REV
(rewind) buttons
Track up/down
When the
button is pushed and released
while the compact disc is playing, the selection
following the present one starts to play from the
beginning. Push the
button several times to
skip several selections. Each time the button is
pushed, the CD advances 1 additional selection.The number appears in the display window.
(When the last selection on the compact disc is
skipped, the first selection is played.)
When the
button is pushed and released, the
selection being played returns to the beginning.
Push the
button several times to skip back
several selections. Each time the button is
pushed, the CD moves back 1 selection.
If the play pattern is in MIX mode when the
orbutton is pushed the next selection will be
chosen at random.
FF (Fast Forward)/REV (Reverse)
When the
orbutton is pushed and held
while the compact disc is playing, the compact
disc plays at an increased speed while fast for-
warding or rewinding. When the button is re-
leased, the compact disc returns to normal play
speed.
MENU
When the
button is pushed while the com-
pact disc is playing, the play pattern changes as
follows:
RPT:The current selection is repeated.MIX:Selections are played at random, not fol-
lowing the sequence on the compact disc. The
same program may be repeated twice. If the
button is pushed in the MIX mode, selections will
be chosen at random.
Blank(no symbol): All selections are played
repeatedly in sequence.
When a new compact disc is inserted, the
play pattern automatically changes to ALL.
CD EJECT button
When the
button is pushed with a com-
pact disc loaded, the compact disc ejects.
When the
button is pushed while the com-
pact disc is playing, the compact disc ejects and
the system turns off.
DISC indicator light
This light
comes on when a compact disc
is loaded into the player.
Heater, air conditioner and audio systems4-19
ZREVIEW COPYÐ2006 Xterra(xtr)
Owners ManualÐUSA_English(nna)
08/01/05Ðdebbie
X
Page 158 of 304

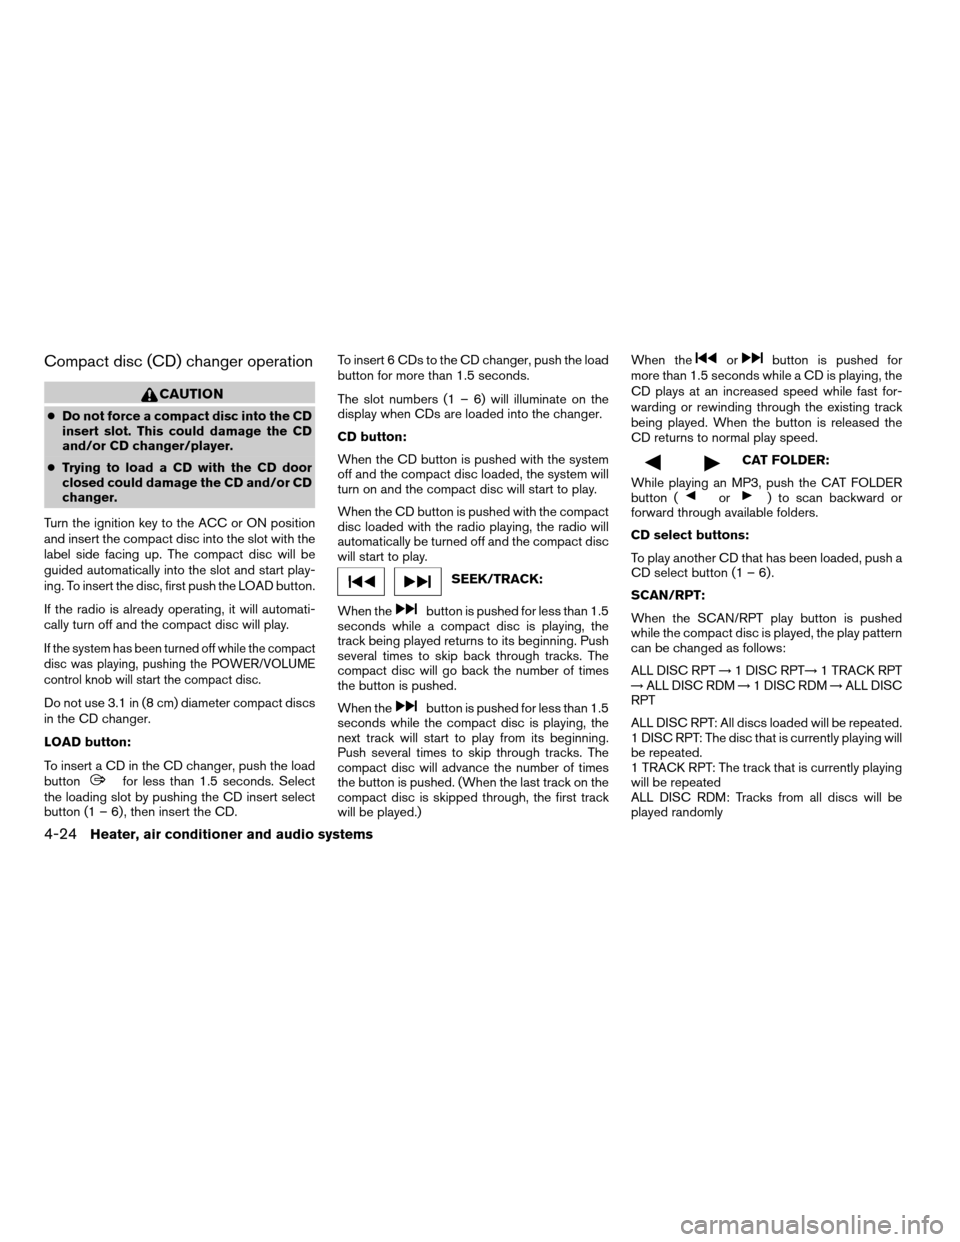
Compact disc (CD) changer operation
CAUTION
cDo not force a compact disc into the CD
insert slot. This could damage the CD
and/or CD changer/player.
cTrying to load a CD with the CD door
closed could damage the CD and/or CD
changer.
Turn the ignition key to the ACC or ON position
and insert the compact disc into the slot with the
label side facing up. The compact disc will be
guided automatically into the slot and start play-
ing. To insert the disc, first push the LOAD button.
If the radio is already operating, it will automati-
cally turn off and the compact disc will play.
If the system has been turned off while the compact
disc was playing, pushing the POWER/VOLUME
control knob will start the compact disc.
Do not use 3.1 in (8 cm) diameter compact discs
in the CD changer.
LOAD button:
To insert a CD in the CD changer, push the load
button
for less than 1.5 seconds. Select
the loading slot by pushing the CD insert select
button (1 – 6) , then insert the CD.To insert 6 CDs to the CD changer, push the load
button for more than 1.5 seconds.
The slot numbers (1 – 6) will illuminate on the
display when CDs are loaded into the changer.
CD button:
When the CD button is pushed with the system
off and the compact disc loaded, the system will
turn on and the compact disc will start to play.
When the CD button is pushed with the compact
disc loaded with the radio playing, the radio will
automatically be turned off and the compact disc
will start to play.
SEEK/TRACK:
When the
button is pushed for less than 1.5
seconds while a compact disc is playing, the
track being played returns to its beginning. Push
several times to skip back through tracks. The
compact disc will go back the number of times
the button is pushed.
When the
button is pushed for less than 1.5
seconds while the compact disc is playing, the
next track will start to play from its beginning.
Push several times to skip through tracks. The
compact disc will advance the number of times
the button is pushed. (When the last track on the
compact disc is skipped through, the first track
will be played.)When the
orbutton is pushed for
more than 1.5 seconds while a CD is playing, the
CD plays at an increased speed while fast for-
warding or rewinding through the existing track
being played. When the button is released the
CD returns to normal play speed.
CAT FOLDER:
While playing an MP3, push the CAT FOLDER
button (
or) to scan backward or
forward through available folders.
CD select buttons:
To play another CD that has been loaded, push a
CD select button (1 – 6) .
SCAN/RPT:
When the SCAN/RPT play button is pushed
while the compact disc is played, the play pattern
can be changed as follows:
ALL DISC RPT!1 DISC RPT!1 TRACK RPT
!ALL DISC RDM!1 DISC RDM!ALL DISC
RPT
ALL DISC RPT: All discs loaded will be repeated.
1 DISC RPT: The disc that is currently playing will
be repeated.
1 TRACK RPT: The track that is currently playing
will be repeated
ALL DISC RDM: Tracks from all discs will be
played randomly
4-24Heater, air conditioner and audio systems
ZREVIEW COPYÐ2006 Xterra(xtr)
Owners ManualÐUSA_English(nna)
08/01/05Ðdebbie
X
Page 293 of 304

10 Index
4WD warning light...............2-12
A
Active brake limited slip (ABLS) system
(if so equipped).................5-30
Active head restraint...............1-5
Air bag (See supplemental restraint
system).....................1-39
Air bag system
Front (See supplemental front impact air
bag system).................1-46
Air bag warning labels.............1-53
Air bag warning light...........1-54, 2-14
Air cleaner housing filter............8-17
Air conditioner
Air conditioner operation...........4-5
Air conditioner service............4-9
Air conditioner specification label.....9-11
Air conditioner system refrigerant and oil
recommendations..............9-6
Heater and air conditioner controls.....4-2
Servicing air conditioner...........4-9
Air flow charts..................4-6
Alarm system
(See vehicle security system).........2-18
Anchor point locations.............1-31
Antenna.....................4-26
Anti-lock brake system (ABS).........5-29
Anti-lock brake warning light..........2-10
Audible reminders................2-18Audio system..................4-10
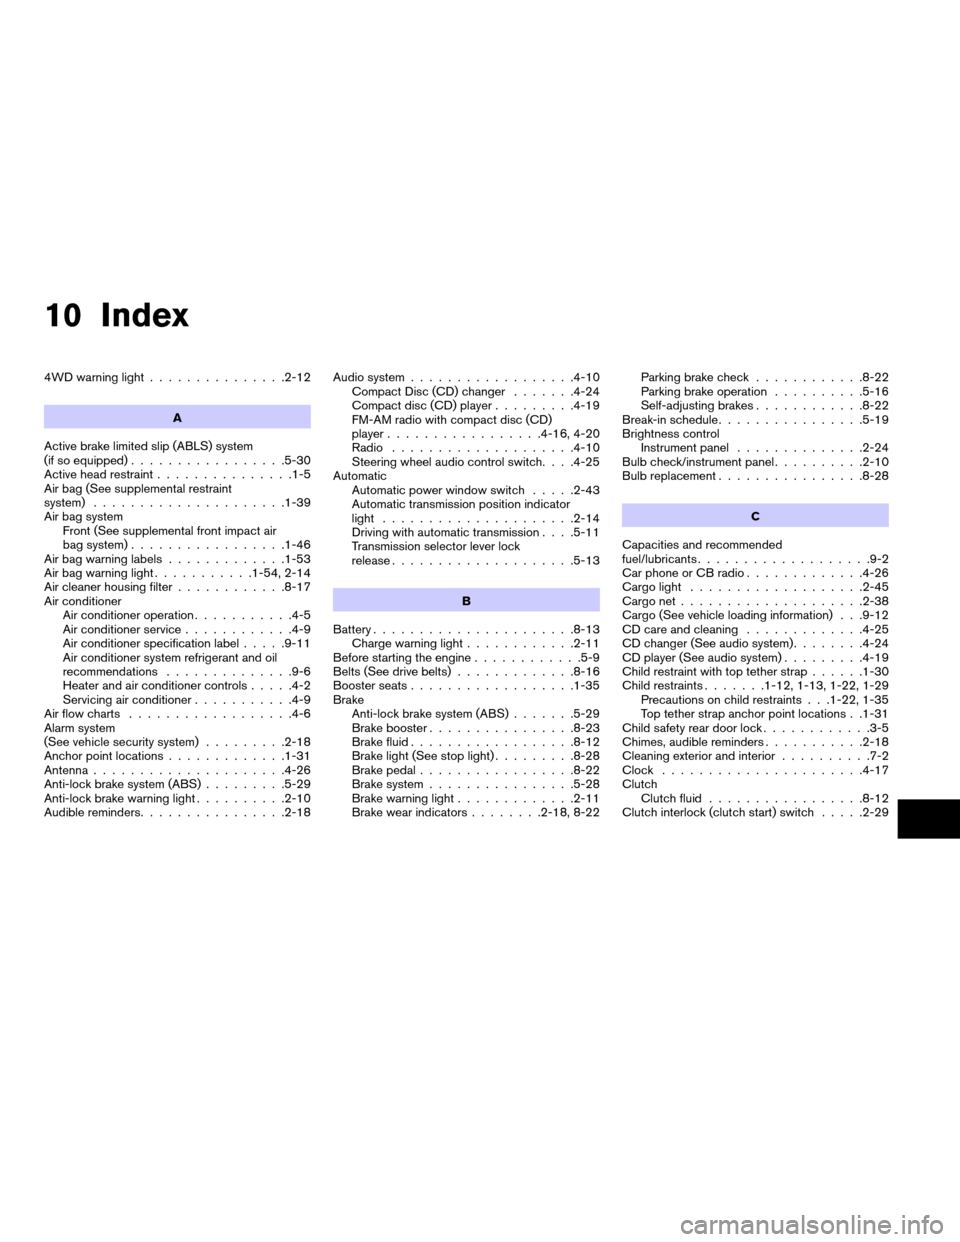
Compact Disc (CD) changer.......4-24
Compact disc (CD) player.........4-19
FM-AM radio with compact disc (CD)
player.................4-16, 4-20
Radio....................4-10
Steering wheel audio control switch. . . .4-25
Automatic
Automatic power window switch.....2-43
Automatic transmission position indicator
light.....................2-14
Driving with automatic transmission. . . .5-11
Transmission selector lever lock
release....................5-13
B
Battery......................8-13
Charge warning light............2-11
Before starting the engine............5-9
Belts (See drive belts).............8-16
Booster seats..................1-35
Brake
Anti-lock brake system (ABS).......5-29
Brake booster................8-23
Brake fluid..................8-12
Brake light (See stop light).........8-28
Brake pedal.................8-22
Brake system................5-28
Brake warning light.............2-11
Brake wear indicators........2-18, 8-22Parking brake check............8-22
Parking brake operation..........5-16
Self-adjusting brakes............8-22
Break-in schedule................5-19
Brightness control
Instrument panel..............2-24
Bulb check/instrument panel..........2-10
Bulb replacement................8-28
C
Capacities and recommended
fuel/lubricants...................9-2
Car phone or CB radio.............4-26
Cargo light...................2-45
Cargo net....................2-38
Cargo (See vehicle loading information) . . .9-12
CD care and cleaning.............4-25
CD changer (See audio system)........4-24
CD player (See audio system).........4-19
Child restraint with top tether strap......1-30
Child restraints.......1-12, 1-13, 1-22, 1-29
Precautions on child restraints . . .1-22, 1-35
Top tether strap anchor point locations . .1-31
Child safety rear door lock............3-5
Chimes, audible reminders...........2-18
Cleaning exterior and interior..........7-2
Clock......................4-17
Clutch
Clutch fluid.................8-12
Clutch interlock (clutch start) switch.....2-29
ZREVIEW COPYÐ2006 Xterra(xtr)
Owners ManualÐUSA_English(nna)
08/01/05Ðdebbie
X