2006 NISSAN TITAN clock
[x] Cancel search: clockPage 189 of 360

stalled and an XMTor SIRIUS™ satellite radio
service subscription is active. Satellite radio is
not available in Alaska, Hawaii and Guam.
Audio main operation
POWER/VOLUME control:
Turn the ignition key to ACC or ON, and then
push the POWER/VOLUME control knob while
the system is off to call up the mode (radio or CD)
which was playing immediately before the system
was turned off.
To turn the system off, press the
POWER/VOLUME control knob.
Turn the POWER/VOLUME control knob to ad-
just the volume.
This vehicle may be equipped with speed sensi-
tive control volume (SSV) for audio. The audio
volume changes as the driving speed changes.
AUDIO knob (BASS, MIDRANGE, TREBLE,
FADE, BALANCE and SSV if so equipped):
Press the AUDIO knob to change the mode as
follows:
BASS!MID!TREBLE!FADE!BALANCE
!SSV (if so equipped)
To adjust Bass, Mid (Midrange) , Treble, Fade and
Balance, press the AUDIO knob until the desired
mode appears in the display. Turn the Tuningknob to adjust Bass and Treble to the desired
level. You can also use the Tuning knob to adjust
Fader and Balance modes. Fader adjusts the
sound level between the front and rear speakers
and Balance adjusts the sound between the right
and left speakers.
To change the SSV mode to OFF, LOW, MID or
HIGH, turn the Tuning knob to the right or left.
Once you have adjusted the sound quality to the
desired level, press the AUDIO knob repeatedly
until the radio or CD display reappears. Other-
wise, the radio or CD display will automatically
reappear after about 10 seconds.
Clock set (type C and D only)
1. Press and hold the H button to advance
hours.
2. Press and hold the M button to advance
minutes.
For setting the clock on type A and B audio
systems see “Adjusting the time” earlier in this
section.
DISP (display) button:
This DISP (display) button will show text about
MP3, SAT or CD information in the audio display.CD display mode
To change the text displayed while playing a CD
with text, press the DISP button. The DISP button
will allow you to scroll through CD text as follows:
Disc titleÃ!Track title.
To change the default display mode push the
tune knob to display mode and rotate the knob to
select the following display mode: Disc titleÃ!
Track titleÃ!Track number.
Once the display mode is selected press the tune
knob to store your selection. If the tuning knob is
not pressed after 8 seconds the display will re-
fresh with the last selected display mode setting.
cTrack title mode displays the title of the se-
lected CD track.
cDisk title mode displays the title of the CD
being played.
cTrack number mode displays the number
selected disc and the track that is currently
being played on the disk.
MP3 display mode
To change the text displayed when listening to an
MP3 with MP3 text (when CD with text is being
used) , press the DISP button. The DISP button
will scroll through the CD text as follows: Disc
titleÃ!Track titleÃ!Folder title.
Display screen, heater, air conditioner and audio systems4-35
ZREVIEW COPYÐ2006 Titan(tzw)
Owners ManualÐUSA_English(nna)
06/15/05Ðdebbie
X
Page 197 of 360
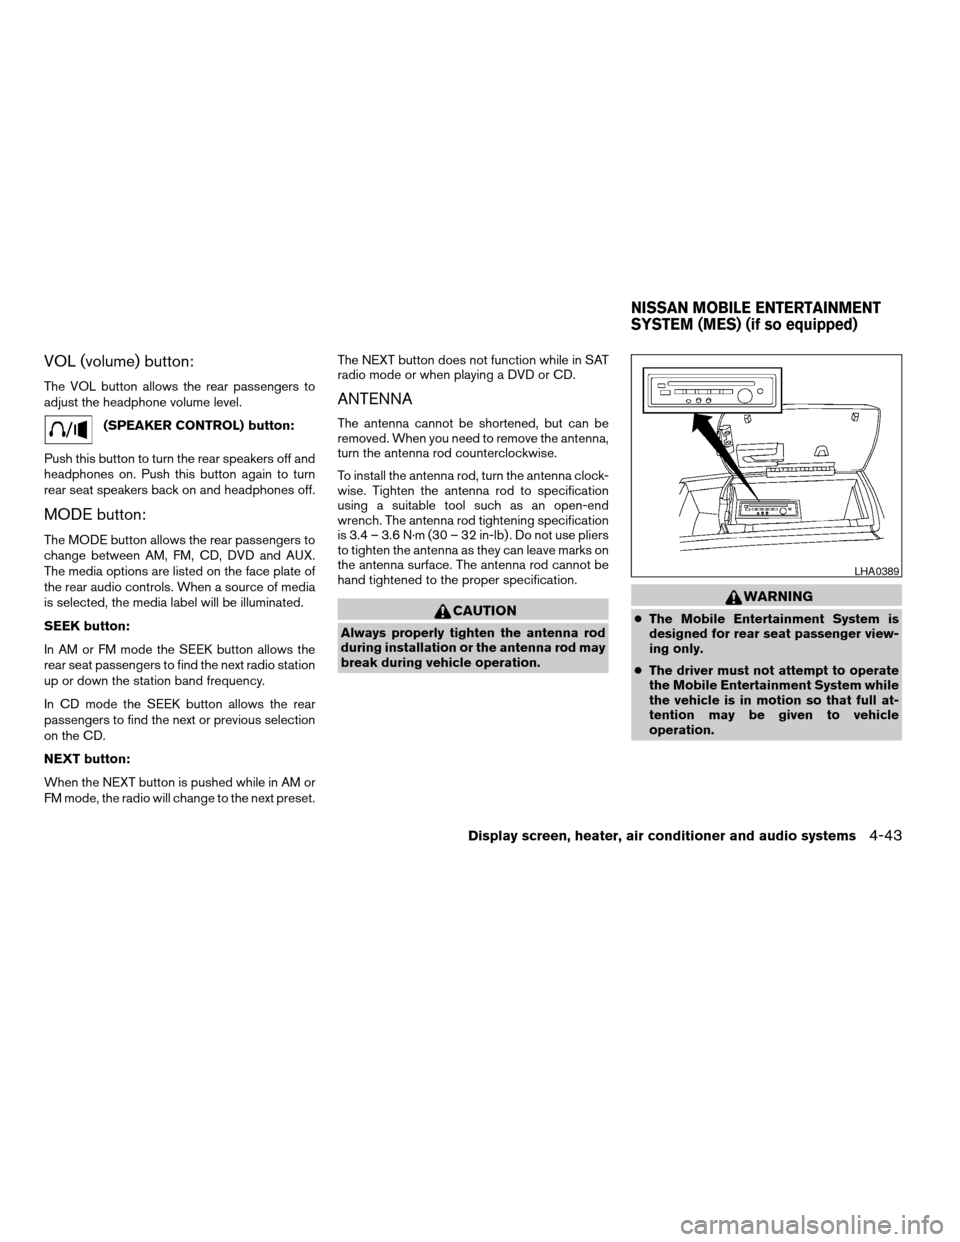
VOL (volume) button:
The VOL button allows the rear passengers to
adjust the headphone volume level.
(SPEAKER CONTROL) button:
Push this button to turn the rear speakers off and
headphones on. Push this button again to turn
rear seat speakers back on and headphones off.
MODE button:
The MODE button allows the rear passengers to
change between AM, FM, CD, DVD and AUX.
The media options are listed on the face plate of
the rear audio controls. When a source of media
is selected, the media label will be illuminated.
SEEK button:
In AM or FM mode the SEEK button allows the
rear seat passengers to find the next radio station
up or down the station band frequency.
In CD mode the SEEK button allows the rear
passengers to find the next or previous selection
on the CD.
NEXT button:
When the NEXT button is pushed while in AM or
FM mode, the radio will change to the next preset.The NEXT button does not function while in SAT
radio mode or when playing a DVD or CD.
ANTENNA
The antenna cannot be shortened, but can be
removed. When you need to remove the antenna,
turn the antenna rod counterclockwise.
To install the antenna rod, turn the antenna clock-
wise. Tighten the antenna rod to specification
using a suitable tool such as an open-end
wrench. The antenna rod tightening specification
is 3.4 – 3.6 N·m (30 – 32 in-lb) . Do not use pliers
to tighten the antenna as they can leave marks on
the antenna surface. The antenna rod cannot be
hand tightened to the proper specification.
CAUTION
Always properly tighten the antenna rod
during installation or the antenna rod may
break during vehicle operation.
WARNING
cThe Mobile Entertainment System is
designed for rear seat passenger view-
ing only.
cThe driver must not attempt to operate
the Mobile Entertainment System while
the vehicle is in motion so that full at-
tention may be given to vehicle
operation.
LHA0389
NISSAN MOBILE ENTERTAINMENT
SYSTEM (MES) (if so equipped)
Display screen, heater, air conditioner and audio systems4-43
ZREVIEW COPYÐ2006 Titan(tzw)
Owners ManualÐUSA_English(nna)
06/15/05Ðdebbie
X
Page 216 of 360
To remove the key from the ignition switch:
1. Shift the selector lever to the P (Park) posi-
tion with the key in the ON position.
2. Turn the key to the LOCK position.
3. Remove the key from the ignition.
If the selector lever is shifted to the P (Park)
position after the key is turned to the OFF posi-
tion or when the key cannot be turned to the
LOCK position, proceed as follows to remove the
key.
1. Move the shift selector lever into the P (Park)
position.
2. Turn the ignition key slightly toward the ON
position.
3. Turn the key to the LOCK position.
4. Remove the key.
The shift selector lever is designed so it cannot
moved out of P (Park) and into any of the other
gear positions if the ignition key is turned to OFF
position or if the key is removed from the switch.
The shift selector lever can be moved if the
ignition switch is in the ON position and the
foot brake pedal is depressed.There is an OFF position between the
LOCK and ACC positions. The OFF position
is indicated by a “1” on the key cylinder.
When the ignition is in the OFF position,
the steering wheel is not locked.
In order for the steering wheel to be locked, it
must be turned about 1/8 of a turn clockwise
from the straight up position.
To lock the steering wheel, turn the key to
the LOCK position. Remove the key. To
unlock the steering wheel, insert the key
and turn it gently while rotating the steer-
ing wheel slightly right and left.
If the key will not turn from the LOCK posi-
tion, turn the steering wheel to the left or
right while turning the key to unlock the
key cylinder.
WARNING
Never remove or turn the key to the LOCK
position while driving. The steering wheel
will lock. This may cause the driver to lose
control of the vehicle and could result in
serious vehicle damage or personal injury.
KEY POSITIONS
LOCK: Normal parking position (0)
OFF: (Not used) (1)
ACC: (Accessories) (2)
This position activates electrical accessories
such as the radio when the engine is not running.
ON: Normal operating position (3)
This position turns on the ignition system and the
electrical accessories.
START: (4)
This position starts the engine. As soon as the
engine has started, release the key. It automati-
cally returns to the ON position.
NISSAN VEHICLE IMMOBILIZER
SYSTEM
The NISSAN Vehicle Immobilizer System will not
allow the engine to start without the use of the
registered key.
5-8Starting and driving
ZREVIEW COPYÐ2006 Titan(tzw)
Owners ManualÐUSA_English(nna)
06/15/05Ðdebbie
X
Page 217 of 360

If the engine fails to start using a registered key
(for example, when interference is caused by
another registered key, an automated toll road
device or automatic payment device on the key
ring) , restart the engine using the following pro-
cedures:
1. Leave the ignition switch in the ON position
for approximately 5 seconds.
2. Turn the ignition switch to the OFF or LOCK
position, and wait approximately 10 sec-
onds.
3. Repeat steps 1 and 2.
4. Restart the engine while holding the device
(which may have caused the interference)
separate from the registered key.
If the no start condition re-occurs, NISSAN rec-
ommends placing the registered key on a sepa-
rate key ring to avoid interference from other
devices.cMake sure the area around the vehicle is
clear.
cCheck fluid levels such as engine oil, cool-
ant, brake fluid, and window washer fluid as
frequently as possible, or at least whenever
you refuel.
cCheck that all windows and lights are clean.
cVisually inspect tires for their appearance
and condition. Also check tires for proper
inflation.
cLock all doors.
cPosition seat and adjust head restraints.
cAdjust inside and outside mirrors.
cFasten seat belts and ask all passengers to
do likewise.
cCheck the operation of warning lights when
the key is turned to the ON (3) position. See
“Warning/indicator lights and audible re-
minders” in the “Instruments and controls”
section of this manual.1. Apply the parking brake.
2. Move the shift selector lever to P (Park) or N
(Neutral) . P (Park) is recommended.
The shift selector lever cannot be
moved out of P (Park) and into any of
the other gear positions if the ignition
key is turned to the OFF position or if
the key is removed from the ignition
switch.
The starter is designed not to operate if
the shift selector lever is in any of the
driving positions.
3. Crank the enginewith your foot off the
accelerator pedalby turning the ignition
key to START. Release the key when the
engine starts. If the engine starts, but fails to
run, repeat the above procedure.
cIf the engine is very hard to start in ex-
tremely cold weather or when restarting,
depress the accelerator pedal a little (ap-
proximately 1/3 to the floor) and hold it
and then crank the engine. Release the
key and the accelerator pedal when the
engine starts.
BEFORE STARTING THE ENGINE STARTING THE ENGINE
Starting and driving5-9
ZREVIEW COPYÐ2006 Titan(tzw)
Owners ManualÐUSA_English(nna)
06/15/05Ðdebbie
X
Page 246 of 360
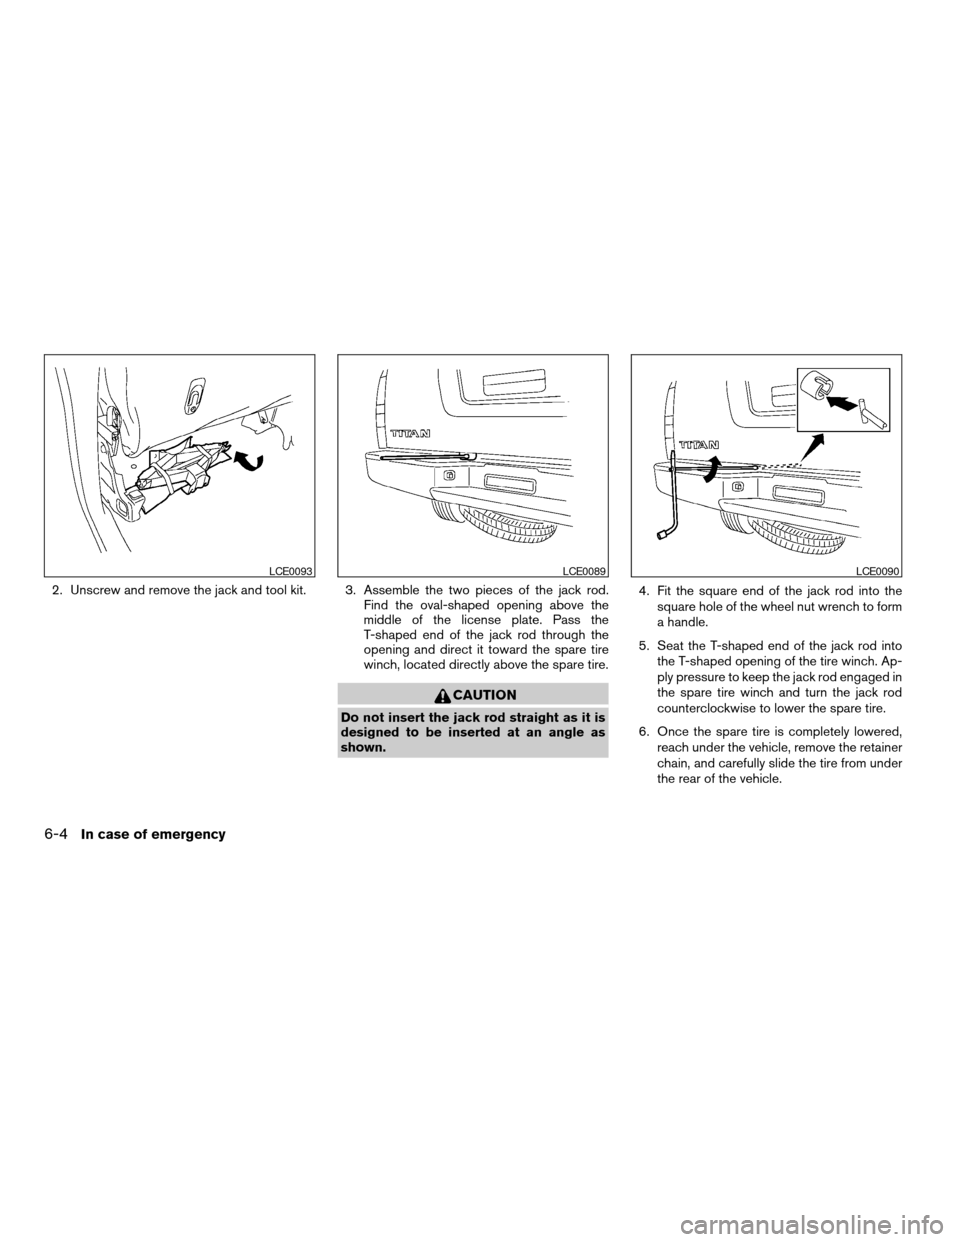
2. Unscrew and remove the jack and tool kit. 3. Assemble the two pieces of the jack rod.
Find the oval-shaped opening above the
middle of the license plate. Pass the
T-shaped end of the jack rod through the
opening and direct it toward the spare tire
winch, located directly above the spare tire.
CAUTION
Do not insert the jack rod straight as it is
designed to be inserted at an angle as
shown.4. Fit the square end of the jack rod into the
square hole of the wheel nut wrench to form
a handle.
5. Seat the T-shaped end of the jack rod into
the T-shaped opening of the tire winch. Ap-
ply pressure to keep the jack rod engaged in
the spare tire winch and turn the jack rod
counterclockwise to lower the spare tire.
6. Once the spare tire is completely lowered,
reach under the vehicle, remove the retainer
chain, and carefully slide the tire from under
the rear of the vehicle.
LCE0093LCE0089LCE0090
6-4In case of emergency
ZREVIEW COPYÐ2006 Titan(tzw)
Owners ManualÐUSA_English(nna)
06/15/05Ðdebbie
X
Page 247 of 360
CAUTION
Be sure to center the spare tire suspend-
ing plate on the wheel and then lift the
spare tire.
Jacking up vehicle and removing the
damaged tire
WARNING
cNever get under the vehicle while it is
supported only by the jack. If it is nec-
essary to work under the vehicle, sup-
port it with safety stands.
cUse only the jack provided with your
vehicle to lift the vehicle. Do not use the
jack provided with your vehicle on other
vehicles. The jack is designed for lifting
only your vehicle during a tire change.
cUse the correct jack-up points. Never
use any other part of the vehicle for jack
support.
cNever jack up the vehicle more than
necessary.
cNever use blocks on or under the jack.cDo not start or run the engine while
vehicle is on the jack. It may cause the
vehicle to move. This is especially true
for vehicles with limited slip
differentials.
cDo not allow passengers to stay in the
vehicle while it is on the jack.
cNever run the engine with a wheel(s) off
the ground. It may cause the vehicle to
move.
Always refer to the illustration for the correct
placement and jack-up points for your specific
vehicle model and jack type.
Carefully read the caution label attached to
the jack body and the following instruc-
tions.
1. Loosen each wheel nut one or two turns by
turning counterclockwise with the wheel nut
wrench.Do not remove the wheel nuts
until the tire is off the ground.
In case of emergency6-5
ZREVIEW COPYÐ2006 Titan(tzw)
Owners ManualÐUSA_English(nna)
06/15/05Ðdebbie
X
Page 271 of 360
CAUTION
Oil level should be checked regularly. Op-
erating the engine with an insufficient
amount of oil can damage the engine, and
such damage is not covered by warranty.
CHANGING ENGINE OIL
1. Park the vehicle on a level surface and apply
the parking brake.
2. Start the engine and let it idle until it reaches
operating temperature, then turn it off.
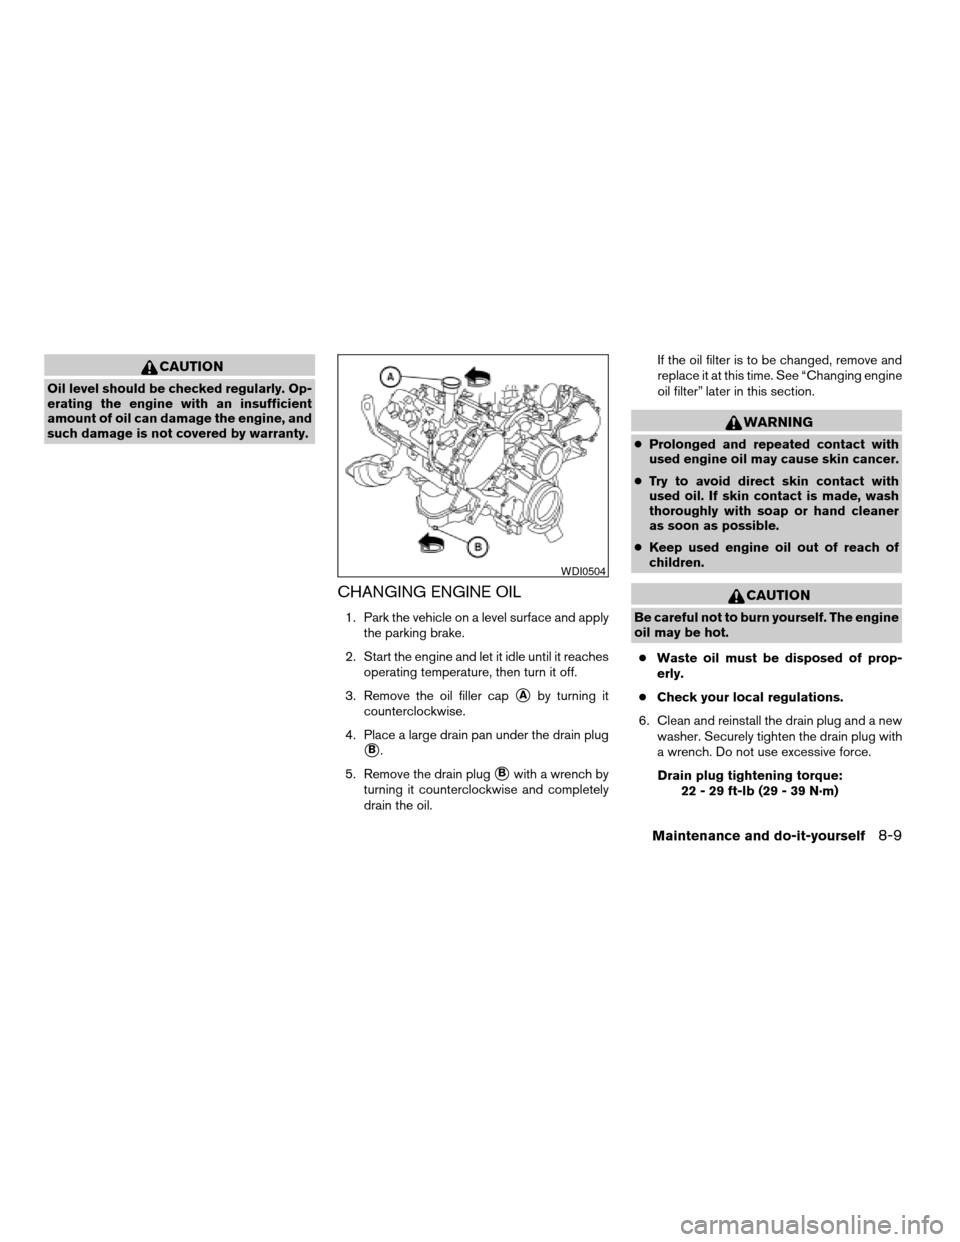
3. Remove the oil filler cap
sAby turning it
counterclockwise.
4. Place a large drain pan under the drain plug
sB.
5. Remove the drain plug
sBwith a wrench by
turning it counterclockwise and completely
drain the oil.If the oil filter is to be changed, remove and
replace it at this time. See “Changing engine
oil filter” later in this section.
WARNING
cProlonged and repeated contact with
used engine oil may cause skin cancer.
cTry to avoid direct skin contact with
used oil. If skin contact is made, wash
thoroughly with soap or hand cleaner
as soon as possible.
cKeep used engine oil out of reach of
children.
CAUTION
Be careful not to burn yourself. The engine
oil may be hot.
cWaste oil must be disposed of prop-
erly.
cCheck your local regulations.
6. Clean and reinstall the drain plug and a new
washer. Securely tighten the drain plug with
a wrench. Do not use excessive force.
Drain plug tightening torque:
22 - 29 ft-lb (29 - 39 N·m)
WDI0504
Maintenance and do-it-yourself8-9
ZREVIEW COPYÐ2006 Titan(tzw)
Owners ManualÐUSA_English(nna)
06/15/05Ðdebbie
X
Page 272 of 360
7. Refill engine with recommended oil through
the oil filler opening, then install the oil filler
cap securely.
See “Capacities and recommended
fuel/lubricants” in the “Technical and con-
sumer information” section of this manual for
drain and refill capacity.
The drain and refill capacity depends on the
oil temperature and drain time. Use these
specifications for reference only. Always use
the dipstick to determine when the proper
amount of oil is in the engine.
8. Start the engine. Check for leakage around
the drain plug and oil filter. Correct as re-
quired.
9. Turn the engine off and wait more than 10
minutes. Check the oil level with the dipstick.
Add engine oil if necessary.
CHANGING ENGINE OIL FILTER
1. Park the vehicle on a level surface and apply
the parking brake.
2. Turn the engine off.
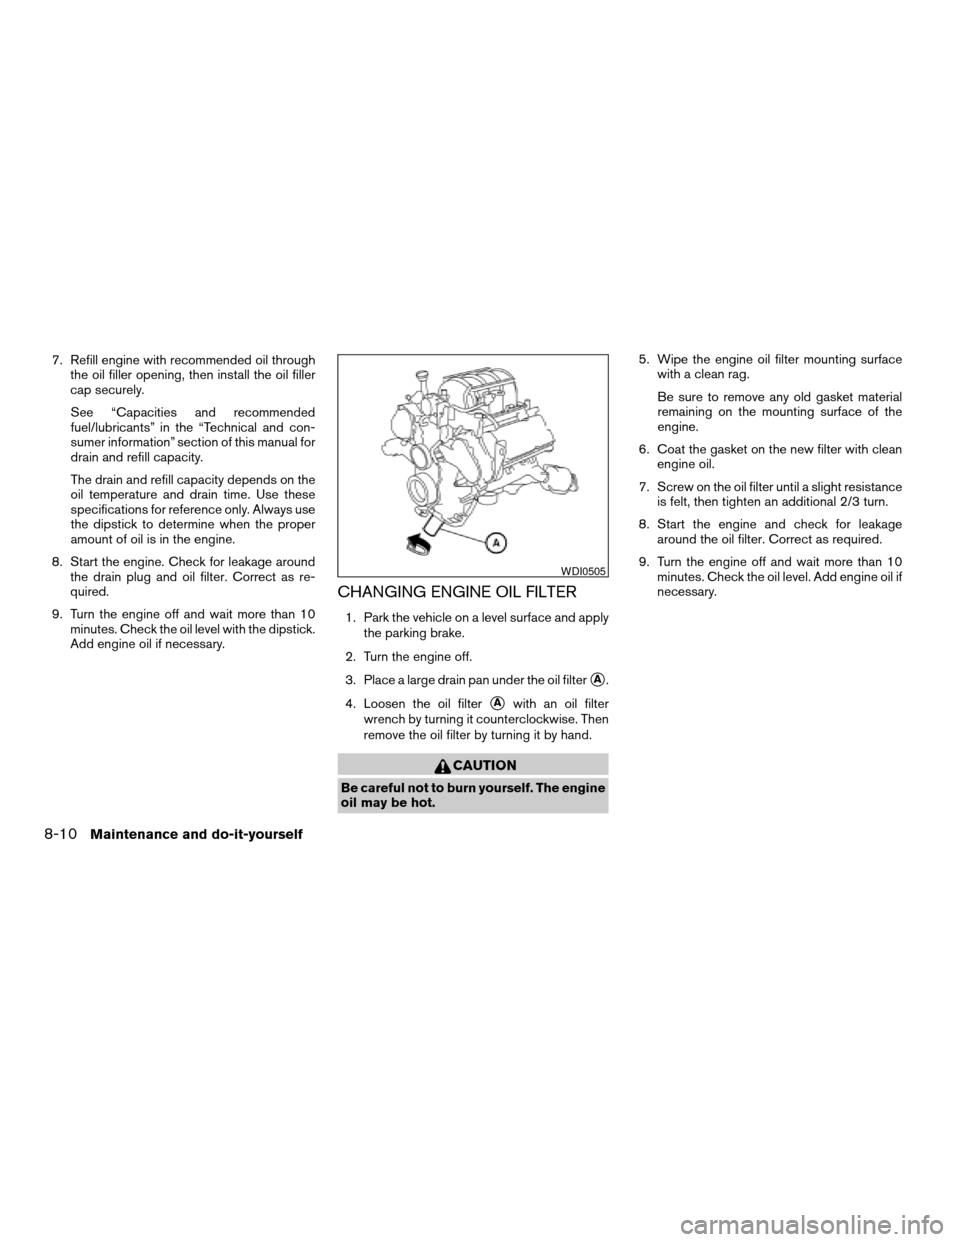
3. Place a large drain pan under the oil filter
sA.
4. Loosen the oil filter
sAwith an oil filter
wrench by turning it counterclockwise. Then
remove the oil filter by turning it by hand.
CAUTION
Be careful not to burn yourself. The engine
oil may be hot.5. Wipe the engine oil filter mounting surface
with a clean rag.
Be sure to remove any old gasket material
remaining on the mounting surface of the
engine.
6. Coat the gasket on the new filter with clean
engine oil.
7. Screw on the oil filter until a slight resistance
is felt, then tighten an additional 2/3 turn.
8. Start the engine and check for leakage
around the oil filter. Correct as required.
9. Turn the engine off and wait more than 10
minutes. Check the oil level. Add engine oil if
necessary.
WDI0505
8-10Maintenance and do-it-yourself
ZREVIEW COPYÐ2006 Titan(tzw)
Owners ManualÐUSA_English(nna)
06/15/05Ðdebbie
X