2006 NISSAN SENTRA audio
[x] Cancel search: audioPage 120 of 256

Adjusting tone quality and speaker balance
To adjust BASS/TREBLE or FADER/BALANCE,
press the AUDIO button until the desired mode
(BASS, TREBLE, FADER, or BALANCE) ap-
pears in the display. Press the
orbutton to adjust BASS and TREBLE to the de-
sired level. Use theorbutton also
to adjust FADER or BALANCE modes. FADER
adjusts the sound level between the front and
rear speakers and BALANCE adjusts the sound
between the right and left speakers.
Clock operation
Pressing the clock button alternates the clock
and the radio/CD player options in the display.
Clock set
1. Press and hold the CLOCK button for more
than 2.0 seconds to enter the clock set
mode.
2. Press the CLOCK button until the hour
flashes in the display screen, then use
the
orbuttons to adjust and
set the hour.
3. Press the CLOCK button again until the
minutes flash in the display screen, then use
the
orbuttons to adjust and
set the minutes.
LHA0330
4-14Heater, air conditioner and audio systems
ZREVIEW COPYÐ2006 Sentra(b15)
Owners ManualÐUSA_English(nna)
09/01/05Ðdebbie
X
Page 121 of 256
4. Press the CLOCK button again to exit the
clock set mode and store the time setting.
Clock priority mode
In this mode the clock is shown in the display. If
any radio or CD functions are activated, the radio
or CD display illuminates for 10 seconds then
returns to the clock mode.
NOTE:
After clock adjustment, the radio is in the
clock priority mode.
FM/AM/SAT radio operation
FM/AM/SAT band select
Push the RADIO button to change from AM to
FM and SAT (Satellite) (if so equipped) recep-
tion.
No Satellite radio reception is available and “NO
SAT” will be displayed when the SAT band option
is selected unless optional satellite receiver and
antenna were factory installed and an XMTor
Sirius™ satellite radio service subscription is ac-
tive. Satellite radio is not available in Alaska,
Hawaii and Guam.
The FM stereo indicator, ST, illuminates during
FM stereo reception. When the stereo broadcast
signal is weak, the radio automatically changes
from stereo to monaural reception.
TUNE/SEEK buttons
WARNING
The radio should not be tuned while driv-
ing so full attention may be given to ve-
hicle operation.
Push the
orbutton for less than 0.5
seconds for manual tuning.
SEEK tuning
Push the
orbutton for more than
1.5 seconds to seek through the frequencies.
SEEK tuning begins from low to high frequen-
cies, or high to low frequencies depending on
which button is pushed, and stops at the next
broadcasting station. Once the highest broad-
casting station is reached, the radio continues in
the SEEK mode at the lowest broadcasting sta-
tion.
SCAN button
Push the SCAN tuning button. SCAN illuminates
in the display. SCAN tuning begins from low to
high frequencies. SCAN tuning stops at each
broadcasting station for 5 seconds. Pushing the
button again during this 5 second period stops
SCAN tuning and the radio remains tuned to that
station.Station memory operation
Each preset mode (A, B or C) has 6 presets,
capable of storing any combination of AM, FM
and SAT stations.
LHA0478
Heater, air conditioner and audio systems4-15
ZREVIEW COPYÐ2006 Sentra(b15)
Owners ManualÐUSA_English(nna)
09/01/05Ðdebbie
X
Page 122 of 256
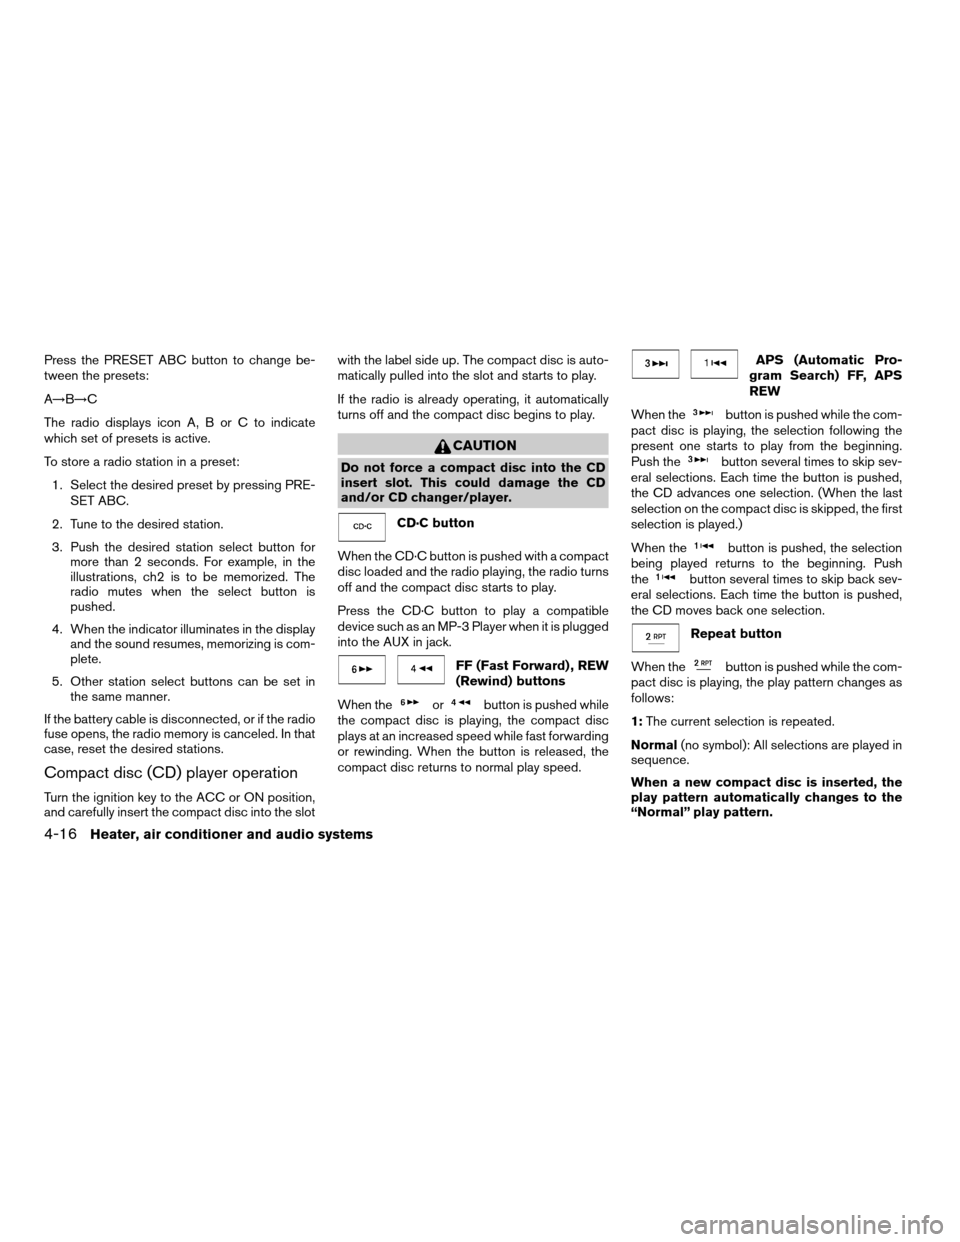
Press the PRESET ABC button to change be-
tween the presets:
A!B!C
The radio displays icon A, B or C to indicate
which set of presets is active.
To store a radio station in a preset:
1. Select the desired preset by pressing PRE-
SET ABC.
2. Tune to the desired station.
3. Push the desired station select button for
more than 2 seconds. For example, in the
illustrations, ch2 is to be memorized. The
radio mutes when the select button is
pushed.
4. When the indicator illuminates in the display
and the sound resumes, memorizing is com-
plete.
5. Other station select buttons can be set in
the same manner.
If the battery cable is disconnected, or if the radio
fuse opens, the radio memory is canceled. In that
case, reset the desired stations.
Compact disc (CD) player operation
Turn the ignition key to the ACC or ON position,
and carefully insert the compact disc into the slotwith the label side up. The compact disc is auto-
matically pulled into the slot and starts to play.
If the radio is already operating, it automatically
turns off and the compact disc begins to play.
CAUTION
Do not force a compact disc into the CD
insert slot. This could damage the CD
and/or CD changer/player.
CD·C button
When the CD·C button is pushed with a compact
disc loaded and the radio playing, the radio turns
off and the compact disc starts to play.
Press the CD·C button to play a compatible
device such as an MP-3 Player when it is plugged
into the AUX in jack.
FF (Fast Forward) , REW
(Rewind) buttons
When the
orbutton is pushed while
the compact disc is playing, the compact disc
plays at an increased speed while fast forwarding
or rewinding. When the button is released, the
compact disc returns to normal play speed.
APS (Automatic Pro-
gram Search) FF, APS
REW
When the
button is pushed while the com-
pact disc is playing, the selection following the
present one starts to play from the beginning.
Push the
button several times to skip sev-
eral selections. Each time the button is pushed,
the CD advances one selection. (When the last
selection on the compact disc is skipped, the first
selection is played.)
When the
button is pushed, the selection
being played returns to the beginning. Push
the
button several times to skip back sev-
eral selections. Each time the button is pushed,
the CD moves back one selection.
Repeat button
When the
button is pushed while the com-
pact disc is playing, the play pattern changes as
follows:
1:The current selection is repeated.
Normal(no symbol): All selections are played in
sequence.
When a new compact disc is inserted, the
play pattern automatically changes to the
“Normal” play pattern.
4-16Heater, air conditioner and audio systems
ZREVIEW COPYÐ2006 Sentra(b15)
Owners ManualÐUSA_English(nna)
09/01/05Ðdebbie
X
Page 123 of 256

MIX button
When the
button is pushed while the com-
pact disc is playing, the play pattern changes as
follows:
RANDOM:Selections are played at random, not
following the sequence on the compact disc. The
same program may be repeated twice.
Normal(no symbol): All selections are played in
sequence.
When a new compact disc is inserted, the
play pattern automatically changes to the
“Normal” play pattern.
CD EJECT button
When the
button is pushed with a com-
pact disc loaded, the compact disc ejects.
When the
button is pushed while the com-
pact disc is playing, the compact disc ejects and
the system turns off.
DISC indicator light
CD IN appears in the display when a CD is
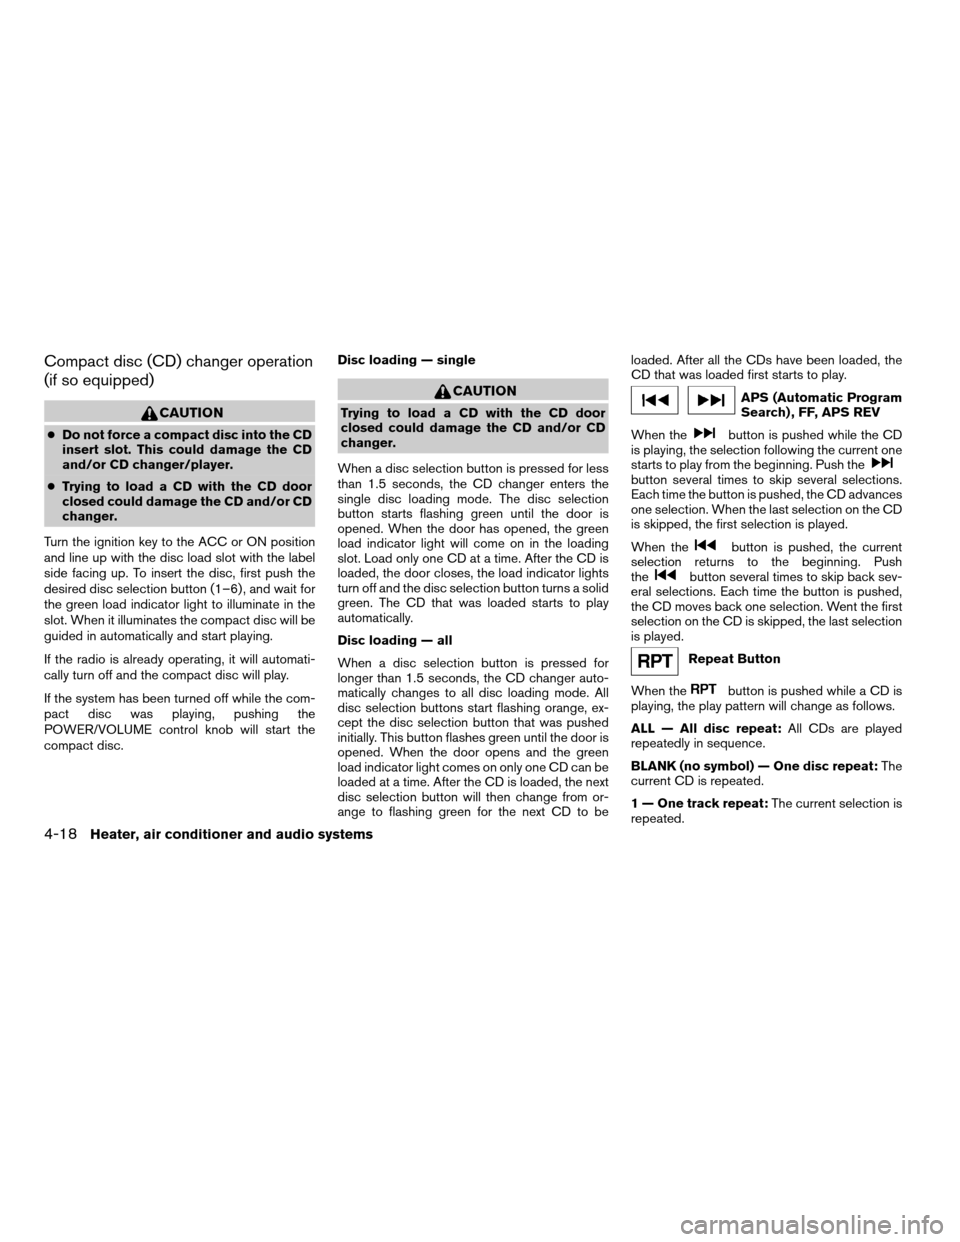
loaded with the system ON.1. CD eject button
2. Disc indication light
3. Load indicator light/Loading slot
4. Disc selection button
LHA0486
Heater, air conditioner and audio systems4-17
ZREVIEW COPYÐ2006 Sentra(b15)
Owners ManualÐUSA_English(nna)
09/01/05Ðdebbie
X
Page 124 of 256
Compact disc (CD) changer operation
(if so equipped)
CAUTION
cDo not force a compact disc into the CD
insert slot. This could damage the CD
and/or CD changer/player.
cTrying to load a CD with the CD door
closed could damage the CD and/or CD
changer.
Turn the ignition key to the ACC or ON position
and line up with the disc load slot with the label
side facing up. To insert the disc, first push the
desired disc selection button (1–6) , and wait for
the green load indicator light to illuminate in the
slot. When it illuminates the compact disc will be
guided in automatically and start playing.
If the radio is already operating, it will automati-
cally turn off and the compact disc will play.
If the system has been turned off while the com-
pact disc was playing, pushing the
POWER/VOLUME control knob will start the
compact disc.Disc loading — single
CAUTION
Trying to load a CD with the CD door
closed could damage the CD and/or CD
changer.
When a disc selection button is pressed for less
than 1.5 seconds, the CD changer enters the
single disc loading mode. The disc selection
button starts flashing green until the door is
opened. When the door has opened, the green
load indicator light will come on in the loading
slot. Load only one CD at a time. After the CD is
loaded, the door closes, the load indicator lights
turn off and the disc selection button turns a solid
green. The CD that was loaded starts to play
automatically.
Disc loading — all
When a disc selection button is pressed for
longer than 1.5 seconds, the CD changer auto-
matically changes to all disc loading mode. All
disc selection buttons start flashing orange, ex-
cept the disc selection button that was pushed
initially. This button flashes green until the door is
opened. When the door opens and the green
load indicator light comes on only one CD can be
loaded at a time. After the CD is loaded, the next
disc selection button will then change from or-
ange to flashing green for the next CD to beloaded. After all the CDs have been loaded, the
CD that was loaded first starts to play.APS (Automatic Program
Search) , FF, APS REV
When the
button is pushed while the CD
is playing, the selection following the current one
starts to play from the beginning. Push the
button several times to skip several selections.
Each time the button is pushed, the CD advances
one selection. When the last selection on the CD
is skipped, the first selection is played.
When the
button is pushed, the current
selection returns to the beginning. Push
the
button several times to skip back sev-
eral selections. Each time the button is pushed,
the CD moves back one selection. Went the first
selection on the CD is skipped, the last selection
is played.
Repeat Button
When the
button is pushed while a CD is
playing, the play pattern will change as follows.
ALL — All disc repeat:All CDs are played
repeatedly in sequence.
BLANK (no symbol) — One disc repeat:The
current CD is repeated.
1 — One track repeat:The current selection is
repeated.
4-18Heater, air conditioner and audio systems
ZREVIEW COPYÐ2006 Sentra(b15)
Owners ManualÐUSA_English(nna)
09/01/05Ðdebbie
X
Page 125 of 256

When a new CD is inserted, the play pattern
automatically changes to the “ALL” play
pattern.
CD Eject — Single
When the
button is pressed for less than
1.5 seconds, the current CD that is playing (or if
the CD changer is off, the last CD that was
played) ejects. The disc indicator light starts
flashing orange until the CD is ejected. When the
CD is ejected, the disc indicator light turns off to
show that the disc selection button is empty.
When the CD is removed from the unit, the CD
changer automatically changes to single disc
loading mode so a new CD can be loaded into
the empty holder. The disc indicator light will start
flashing green until a CD is loaded, if no CD is
loaded within 15 seconds the single disc loading
mode is cancelled. The single disc loading mode
is also cancelled if another disc selection button
is pushed.
CD Eject — ALL
When the
button is pressed for longer than
1.5 seconds, the CD changer automatically
changes to all disc eject mode. The disc indicator
light for the current CD (or the last CD that was
played) starts flashing orange until the CD ejects.
When the CD ejects, the disc indicator light turns
off showing that disc selection button as empty.When the CD is removed from the unit, the next
CD starts to eject. After all the CDs are ejected,
the CD changer turns off.
If a CD is ejected and is not removed within
10 seconds, it will be pulled back into the
slot.
CD CARE AND CLEANING
cHandle a CD by its edges. Do not bend the
disc. Never touch the surface of the disc.
cAlways place the discs in the storage case
when they are not being used.
cTo clean a disc, wipe the surface from the
center to the outer edge using a clean, soft
cloth. Do not wipe the disc using a circular
motion.
cDo not use a conventional record cleaner or
alcohol intended for industrial use.
LHA0049
Heater, air conditioner and audio systems4-19
ZREVIEW COPYÐ2006 Sentra(b15)
Owners ManualÐUSA_English(nna)
09/01/05Ðdebbie
X
Page 126 of 256
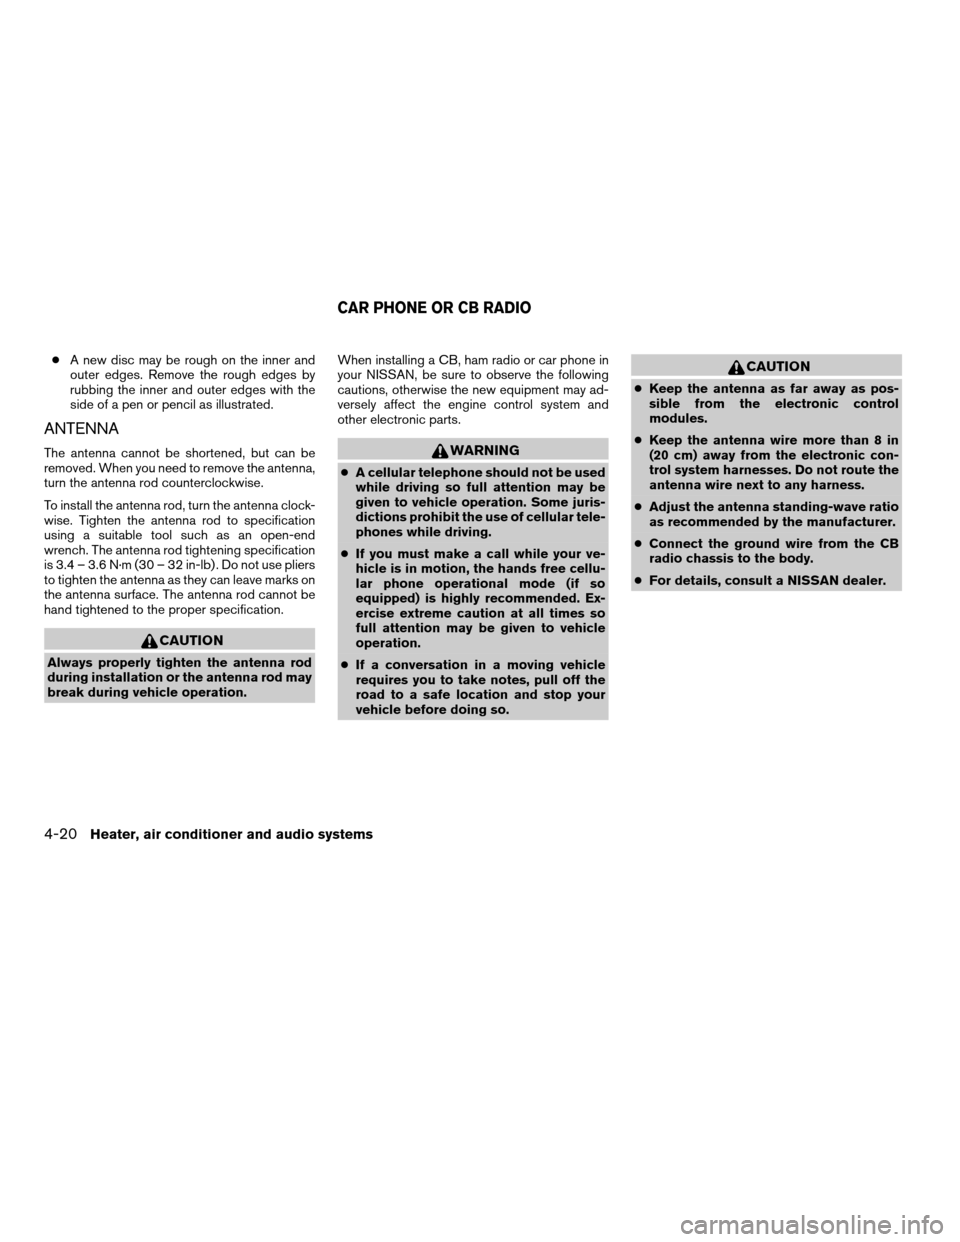
cA new disc may be rough on the inner and
outer edges. Remove the rough edges by
rubbing the inner and outer edges with the
side of a pen or pencil as illustrated.
ANTENNA
The antenna cannot be shortened, but can be
removed. When you need to remove the antenna,
turn the antenna rod counterclockwise.
To install the antenna rod, turn the antenna clock-
wise. Tighten the antenna rod to specification
using a suitable tool such as an open-end
wrench. The antenna rod tightening specification
is 3.4 – 3.6 N·m (30 – 32 in-lb) . Do not use pliers
to tighten the antenna as they can leave marks on
the antenna surface. The antenna rod cannot be
hand tightened to the proper specification.
CAUTION
Always properly tighten the antenna rod
during installation or the antenna rod may
break during vehicle operation.When installing a CB, ham radio or car phone in
your NISSAN, be sure to observe the following
cautions, otherwise the new equipment may ad-
versely affect the engine control system and
other electronic parts.
WARNING
cA cellular telephone should not be used
while driving so full attention may be
given to vehicle operation. Some juris-
dictions prohibit the use of cellular tele-
phones while driving.
cIf you must make a call while your ve-
hicle is in motion, the hands free cellu-
lar phone operational mode (if so
equipped) is highly recommended. Ex-
ercise extreme caution at all times so
full attention may be given to vehicle
operation.
cIf a conversation in a moving vehicle
requires you to take notes, pull off the
road to a safe location and stop your
vehicle before doing so.
CAUTION
cKeep the antenna as far away as pos-
sible from the electronic control
modules.
cKeep the antenna wire more than 8 in
(20 cm) away from the electronic con-
trol system harnesses. Do not route the
antenna wire next to any harness.
cAdjust the antenna standing-wave ratio
as recommended by the manufacturer.
cConnect the ground wire from the CB
radio chassis to the body.
cFor details, consult a NISSAN dealer.
CAR PHONE OR CB RADIO
4-20Heater, air conditioner and audio systems
ZREVIEW COPYÐ2006 Sentra(b15)
Owners ManualÐUSA_English(nna)
09/01/05Ðdebbie
X
Page 243 of 256
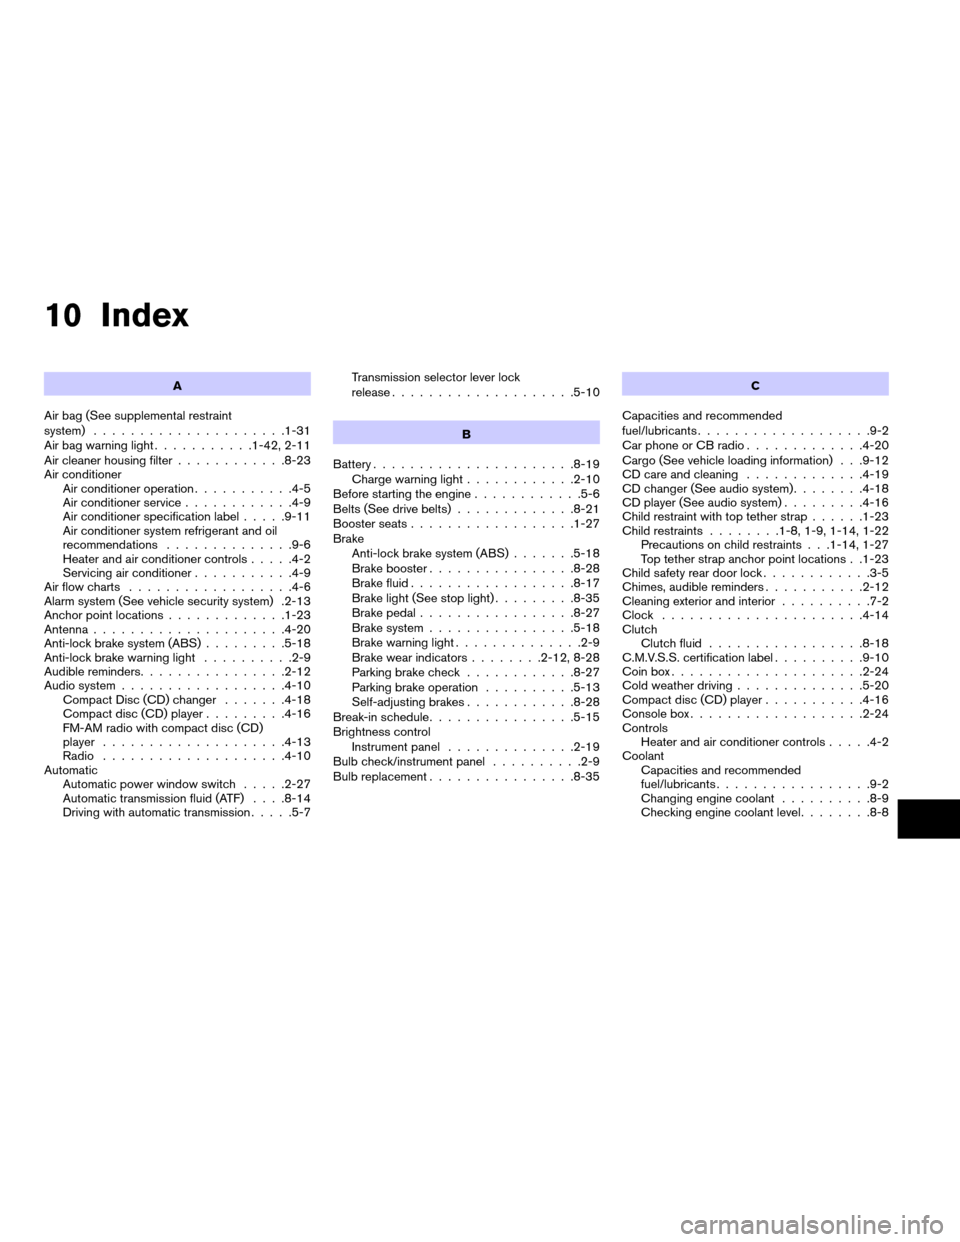
10 Index
A
Air bag (See supplemental restraint
system).....................1-31
Air bag warning light...........1-42, 2-11
Air cleaner housing filter............8-23
Air conditioner
Air conditioner operation...........4-5
Air conditioner service............4-9
Air conditioner specification label.....9-11
Air conditioner system refrigerant and oil
recommendations..............9-6
Heater and air conditioner controls.....4-2
Servicing air conditioner...........4-9
Air flow charts..................4-6
Alarm system (See vehicle security system) .2-13
Anchor point locations.............1-23
Antenna.....................4-20
Anti-lock brake system (ABS).........5-18
Anti-lock brake warning light..........2-9
Audible reminders................2-12
Audio system..................4-10
Compact Disc (CD) changer.......4-18
Compact disc (CD) player.........4-16
FM-AM radio with compact disc (CD)
player....................4-13
Radio....................4-10
Automatic
Automatic power window switch.....2-27
Automatic transmission fluid (ATF). . . .8-14
Driving with automatic transmission.....5-7Transmission selector lever lock
release....................5-10
B
Battery......................8-19
Charge warning light............2-10
Before starting the engine............5-6
Belts (See drive belts).............8-21
Booster seats..................1-27
Brake
Anti-lock brake system (ABS).......5-18
Brake booster................8-28
Brake fluid..................8-17
Brake light (See stop light).........8-35
Brake pedal.................8-27
Brake system................5-18
Brake warning light..............2-9
Brake wear indicators........2-12, 8-28
Parking brake check............8-27
Parking brake operation..........5-13
Self-adjusting brakes............8-28
Break-in schedule................5-15
Brightness control
Instrument panel..............2-19
Bulb check/instrument panel..........2-9
Bulb replacement................8-35C
Capacities and recommended
fuel/lubricants...................9-2
Car phone or CB radio.............4-20
Cargo (See vehicle loading information) . . .9-12
CD care and cleaning.............4-19
CD changer (See audio system)........4-18
CD player (See audio system).........4-16
Child restraint with top tether strap......1-23
Child restraints........1-8, 1-9, 1-14, 1-22
Precautions on child restraints . . .1-14, 1-27
Top tether strap anchor point locations . .1-23
Child safety rear door lock............3-5
Chimes, audible reminders...........2-12
Cleaning exterior and interior..........7-2
Clock......................4-14
Clutch
Clutch fluid.................8-18
C.M.V.S.S. certification label..........9-10
Coin box.....................2-24
Cold weather driving..............5-20
Compact disc (CD) player...........4-16
Console box...................2-24
Controls
Heater and air conditioner controls.....4-2
Coolant
Capacities and recommended
fuel/lubricants.................9-2
Changing engine coolant..........8-9
Checking engine coolant level........8-8
ZREVIEW COPYÐ2006 Sentra(b15)
Owners ManualÐUSA_English(nna)
09/01/05Ðdebbie
X