2006 NISSAN SENTRA check engine light
[x] Cancel search: check engine lightPage 132 of 256
cMake sure the area around the vehicle is
clear.
cCheck fluid levels such as engine oil, cool-
ant, brake and clutch fluid, and window
washer fluid as frequently as possible, or at
least whenever you refuel.
cCheck that all windows and lights are clean.
cVisually inspect tires for their appearance
and condition. Also check tires for proper
inflation.
cLock all doors.
cPosition seat and adjust head restraints.
cAdjust inside and outside mirrors.
cFasten seat belts and ask all passengers to
do likewise.
cCheck the operation of warning lights when
the key is turned to the ON (3) position. See
“Warning/indicator lights and audible re-
minders” in the “Instruments and controls”
section of this manual.1. Apply the parking brake.
2.Automatic transmission:
Move the shift selector lever to P (Park) or N
(Neutral) . P (Park) is recommended.
The shift selector lever cannot be
moved out of P (Park) and into any of
the other gear positions if the ignition
key is turned to the OFF position or if
the key is removed from the ignition
switch.
The starter is designed not to operate if
the shift selector lever is in any of the
driving positions.
Manual transmission:
Move the shift lever to N (Neutral) . Depress
the clutch pedal to the floor while cranking
the engine.
The starter is designed not to operate
unless the clutch pedal is fully de-
pressed.
3. Crank the enginewith your foot off the
accelerator pedalby turning the ignition
key to START. Release the key when the
engine starts. If the engine starts, but fails to
run, repeat the above procedure.cIf the engine is very hard to start in ex-
tremely cold weather or when restarting,
depress the accelerator pedal a little (ap-
proximately 1/3 to the floor) and hold it
and then crank the engine. Release the
key and the accelerator pedal when the
engine starts.
cIf the engine is very hard to start because
it is flooded, depress the accelerator
pedal all the way to the floor and hold it.
Crank the engine for 5-6 seconds. After
cranking the engine, release the accel-
erator pedal. Crank the enginewith your
foot off the accelerator pedalby turn-
ing the ignition key to START. Release the
key when the engine starts. If the engine
starts, but fails to run, repeat the above
procedure.
CAUTION
Do not operate the starter for more than
15 seconds at a time. If the engine does
not start, turn the key off and wait 10
seconds before cranking again, otherwise
the starter could be damaged.
BEFORE STARTING THE ENGINE STARTING THE ENGINE
5-6Starting and driving
ZREVIEW COPYÐ2006 Sentra(b15)
Owners ManualÐUSA_English(nna)
09/01/05Ðdebbie
X
Page 140 of 256
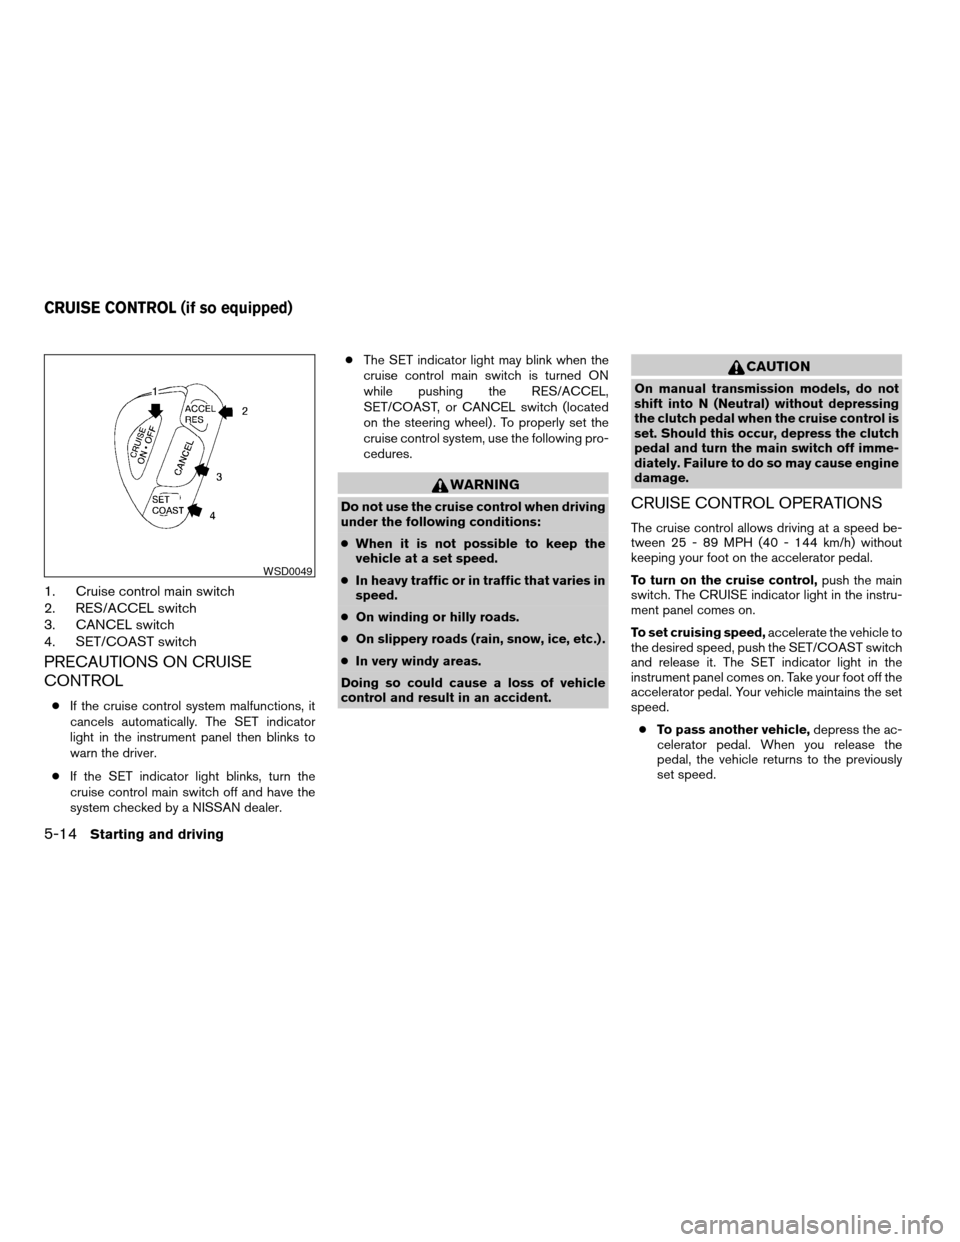
1. Cruise control main switch
2. RES/ACCEL switch
3. CANCEL switch
4. SET/COAST switch
PRECAUTIONS ON CRUISE
CONTROL
cIf the cruise control system malfunctions, it
cancels automatically. The SET indicator
light in the instrument panel then blinks to
warn the driver.
cIf the SET indicator light blinks, turn the
cruise control main switch off and have the
system checked by a NISSAN dealer.cThe SET indicator light may blink when the
cruise control main switch is turned ON
while pushing the RES/ACCEL,
SET/COAST, or CANCEL switch (located
on the steering wheel) . To properly set the
cruise control system, use the following pro-
cedures.
WARNING
Do not use the cruise control when driving
under the following conditions:
cWhen it is not possible to keep the
vehicle at a set speed.
cIn heavy traffic or in traffic that varies in
speed.
cOn winding or hilly roads.
cOn slippery roads (rain, snow, ice, etc.) .
cIn very windy areas.
Doing so could cause a loss of vehicle
control and result in an accident.
CAUTION
On manual transmission models, do not
shift into N (Neutral) without depressing
the clutch pedal when the cruise control is
set. Should this occur, depress the clutch
pedal and turn the main switch off imme-
diately. Failure to do so may cause engine
damage.
CRUISE CONTROL OPERATIONS
The cruise control allows driving at a speed be-
tween 25 - 89 MPH (40 - 144 km/h) without
keeping your foot on the accelerator pedal.
To turn on the cruise control,push the main
switch. The CRUISE indicator light in the instru-
ment panel comes on.
To set cruising speed,accelerate the vehicle to
the desired speed, push the SET/COAST switch
and release it. The SET indicator light in the
instrument panel comes on. Take your foot off the
accelerator pedal. Your vehicle maintains the set
speed.
cTo pass another vehicle,depress the ac-
celerator pedal. When you release the
pedal, the vehicle returns to the previously
set speed.
WSD0049
CRUISE CONTROL (if so equipped)
5-14Starting and driving
ZREVIEW COPYÐ2006 Sentra(b15)
Owners ManualÐUSA_English(nna)
09/01/05Ðdebbie
X
Page 169 of 256

8 Maintenance and do-it-yourself
Maintenance requirements..........................8-2
General maintenance..............................8-2
Explanation of general maintenance items.........8-2
Maintenance precautions...........................8-5
Engine compartment check locations................8-6
Engine cooling system.............................8-8
Checking engine coolant level...................8-8
Changing engine coolant........................8-9
Engine oil........................................8-11
Checking engine oil level.......................8-11
Changing engine oil...........................8-12
Changing engine oil filter.......................8-13
Automatic transmission fluid.......................8-14
Temperature conditions for checking.............8-15
Power steering fluid...............................8-17
Brake and clutch fluid.............................8-17
Brake fluid....................................8-17
Clutch fluid...................................8-18
Window washer fluid.............................8-18
Window washer fluid reservoir..................8-18
Battery..........................................8-19
Jump starting.................................8-20
Drive belts.......................................8-21
Spark plugs......................................8-22Replacing spark plugs.........................8-22
Air cleaner.......................................8-23
In-cabin Microfilter (if so equipped)..............8-23
Windshield wiper blades..........................8-26
Cleaning.....................................8-26
Replacing....................................8-26
Parking brake and brake pedal.....................8-27
Checking parking brake........................8-27
Checking brake pedal..........................8-27
Brake booster.................................8-28
Fuses...........................................8-29
Engine compartment...........................8-29
Passenger compartment.......................8-30
Battery replacement..............................8-31
Lights...........................................8-33
Headlights....................................8-33
Fog lights (if so equipped)......................8-34
Exterior and interior lights.......................8-35
Wheels and tires.................................8-39
Tire pressure..................................8-39
Tire labeling...................................8-42
Types of tires..................................8-44
Tire chains....................................8-45
Changing wheels and tires.....................8-45
ZREVIEW COPYÐ2006 Sentra(b15)
Owners ManualÐUSA_English(nna)
09/01/05Ðdebbie
X
Page 182 of 256
CAUTION
Be careful not to burn yourself. The engine
oil may be hot.
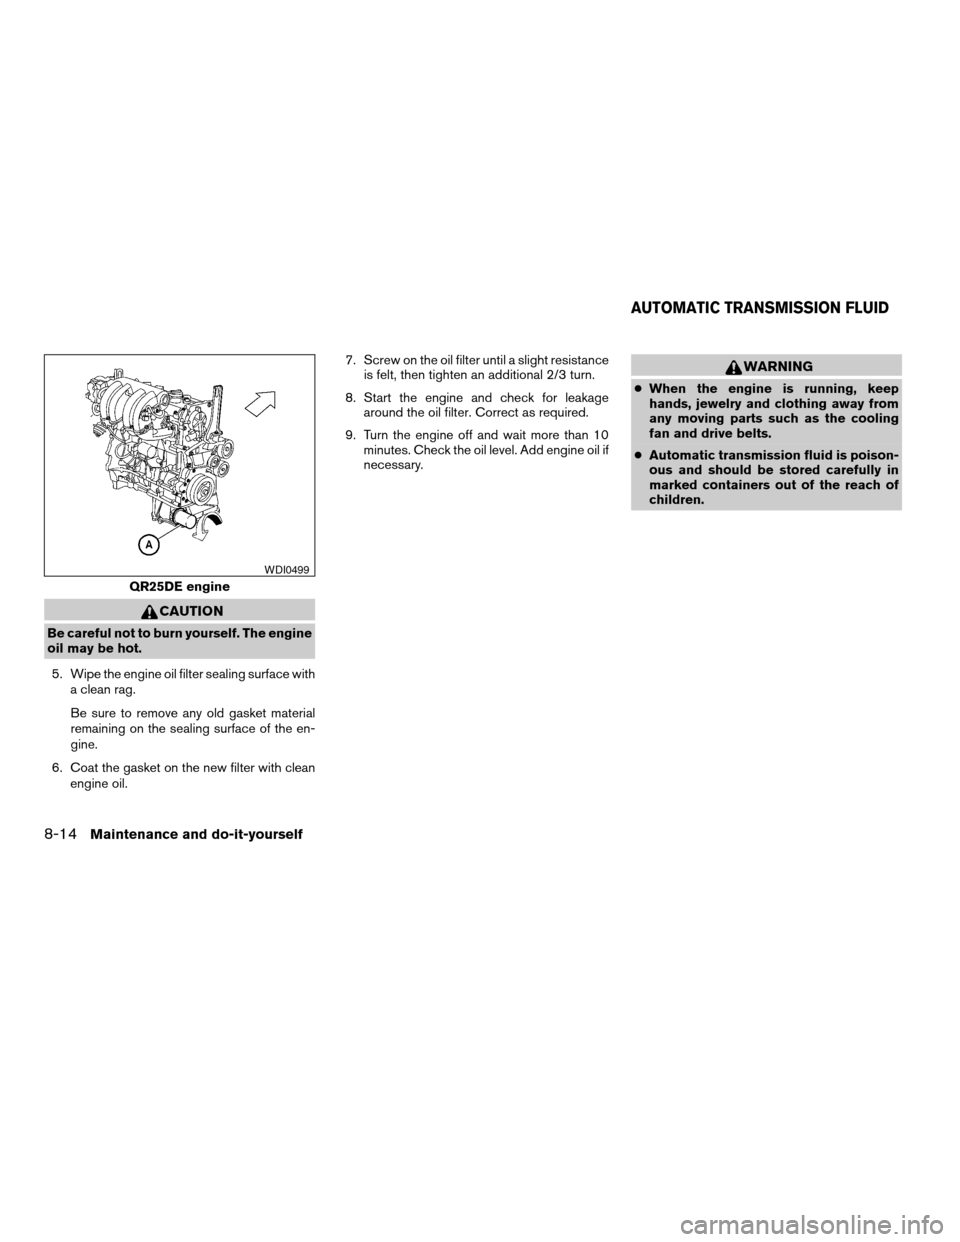
5. Wipe the engine oil filter sealing surface with
a clean rag.
Be sure to remove any old gasket material
remaining on the sealing surface of the en-
gine.
6. Coat the gasket on the new filter with clean
engine oil.7. Screw on the oil filter until a slight resistance
is felt, then tighten an additional 2/3 turn.
8. Start the engine and check for leakage
around the oil filter. Correct as required.
9. Turn the engine off and wait more than 10
minutes. Check the oil level. Add engine oil if
necessary.
WARNING
cWhen the engine is running, keep
hands, jewelry and clothing away from
any moving parts such as the cooling
fan and drive belts.
cAutomatic transmission fluid is poison-
ous and should be stored carefully in
marked containers out of the reach of
children.
QR25DE engine
WDI0499
AUTOMATIC TRANSMISSION FLUID
8-14Maintenance and do-it-yourself
ZREVIEW COPYÐ2006 Sentra(b15)
Owners ManualÐUSA_English(nna)
09/01/05Ðdebbie
X
Page 186 of 256
CLUTCH FLUID
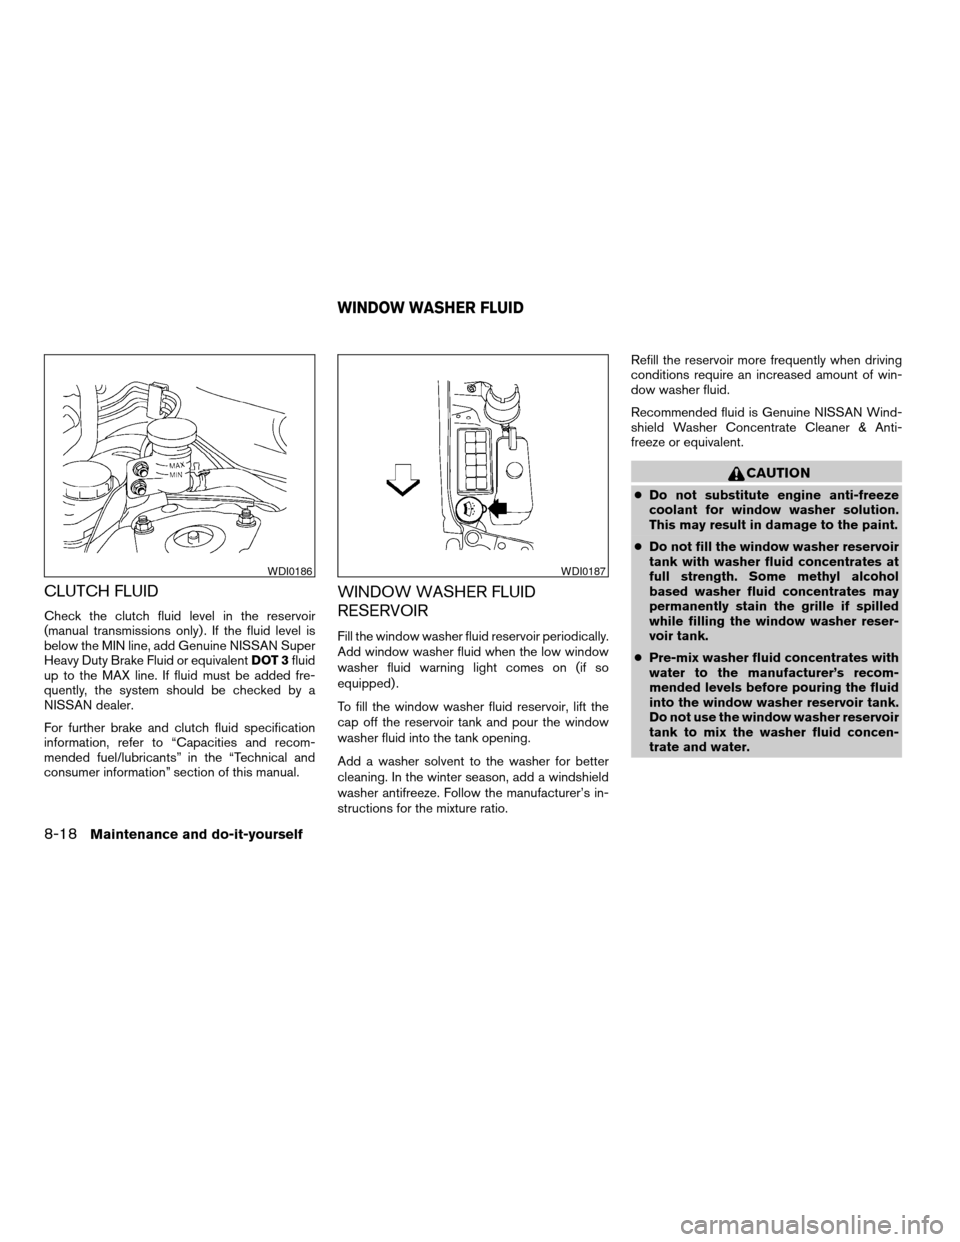
Check the clutch fluid level in the reservoir
(manual transmissions only) . If the fluid level is
below the MIN line, add Genuine NISSAN Super
Heavy Duty Brake Fluid or equivalentDOT 3fluid
up to the MAX line. If fluid must be added fre-
quently, the system should be checked by a
NISSAN dealer.
For further brake and clutch fluid specification
information, refer to “Capacities and recom-
mended fuel/lubricants” in the “Technical and
consumer information” section of this manual.
WINDOW WASHER FLUID
RESERVOIR
Fill the window washer fluid reservoir periodically.
Add window washer fluid when the low window
washer fluid warning light comes on (if so
equipped) .
To fill the window washer fluid reservoir, lift the
cap off the reservoir tank and pour the window
washer fluid into the tank opening.
Add a washer solvent to the washer for better
cleaning. In the winter season, add a windshield
washer antifreeze. Follow the manufacturer’s in-
structions for the mixture ratio.Refill the reservoir more frequently when driving
conditions require an increased amount of win-
dow washer fluid.
Recommended fluid is Genuine NISSAN Wind-
shield Washer Concentrate Cleaner & Anti-
freeze or equivalent.
CAUTION
cDo not substitute engine anti-freeze
coolant for window washer solution.
This may result in damage to the paint.
cDo not fill the window washer reservoir
tank with washer fluid concentrates at
full strength. Some methyl alcohol
based washer fluid concentrates may
permanently stain the grille if spilled
while filling the window washer reser-
voir tank.
cPre-mix washer fluid concentrates with
water to the manufacturer’s recom-
mended levels before pouring the fluid
into the window washer reservoir tank.
Do not use the window washer reservoir
tank to mix the washer fluid concen-
trate and water.
WDI0186WDI0187
WINDOW WASHER FLUID
8-18Maintenance and do-it-yourself
ZREVIEW COPYÐ2006 Sentra(b15)
Owners ManualÐUSA_English(nna)
09/01/05Ðdebbie
X
Page 196 of 256
Self-adjusting brakes
Your vehicle is equipped with self-adjusting
brakes.
The front (and rear, if so equipped) disc-type
brakes self-adjust every time the brake pedal is
applied. The rear drum-type brakes also self-
adjust every time the brake pedal is applied.
If the brake pedal goes down farther than normal,
it may be due to a lack of adjustment of the rear
drum brakes. To adjust, apply the parking brake
several times.
WARNING
See a NISSAN dealer for a brake system
check if the brake pedal height does not
return to normal.
Brake pad wear indicators
The disc brake pads on your vehicle have audible
wear indicators. When a brake pad requires re-
placement, a high pitched scraping or screech-
ing sound will be heard when the vehicle is in
motion. The noise will be heard whether or not the
brake pedal is depressed. Have the brakes
checked as soon as possible if the wear indicator
sound is heard.
Under some driving or climate conditions, occa-
sional brake squeak, squeal or other noise maybe heard. Occasional brake noise during light to
moderate stops is normal and does not affect the
function or performance of the brake system.
The rear drum brakes (if so equipped) do not
have audible wear indicators. Should you ever
hear an unusually loud noise from the rear drum
brakes, have them inspected as soon as possible
by a NISSAN dealer.
Proper brake inspection intervals should
be followed.For more information regarding
brake inspections, see the appropriate mainte-
nance schedule information in the “NISSAN Ser-
vice and Maintenance Guide”.
BRAKE BOOSTER
Check the brake booster function as follows:
1. With the engine off, press and release the
brake pedal several times. When brake
pedal movement (distance of travel) remains
the same from one pedal application to the
next, continue on to the next step.
2. While depressing the brake pedal, start the
engine. The pedal height should drop a little.
3. With the brake pedal depressed, stop the
engine. Keep the pedal depressed for about
30 seconds. The pedal height should not
change.4. Run the engine for one minute without de-
pressing the brake pedal, then turn it off.
Depress the brake pedal several times. The
pedal travel distance will decrease gradually
with each depression as the vacuum is re-
leased from the booster.
If the brakes do not operate properly, have the
brakes checked by a NISSAN dealer.
8-28Maintenance and do-it-yourself
ZREVIEW COPYÐ2006 Sentra(b15)
Owners ManualÐUSA_English(nna)
09/01/05Ðdebbie
X
Page 197 of 256
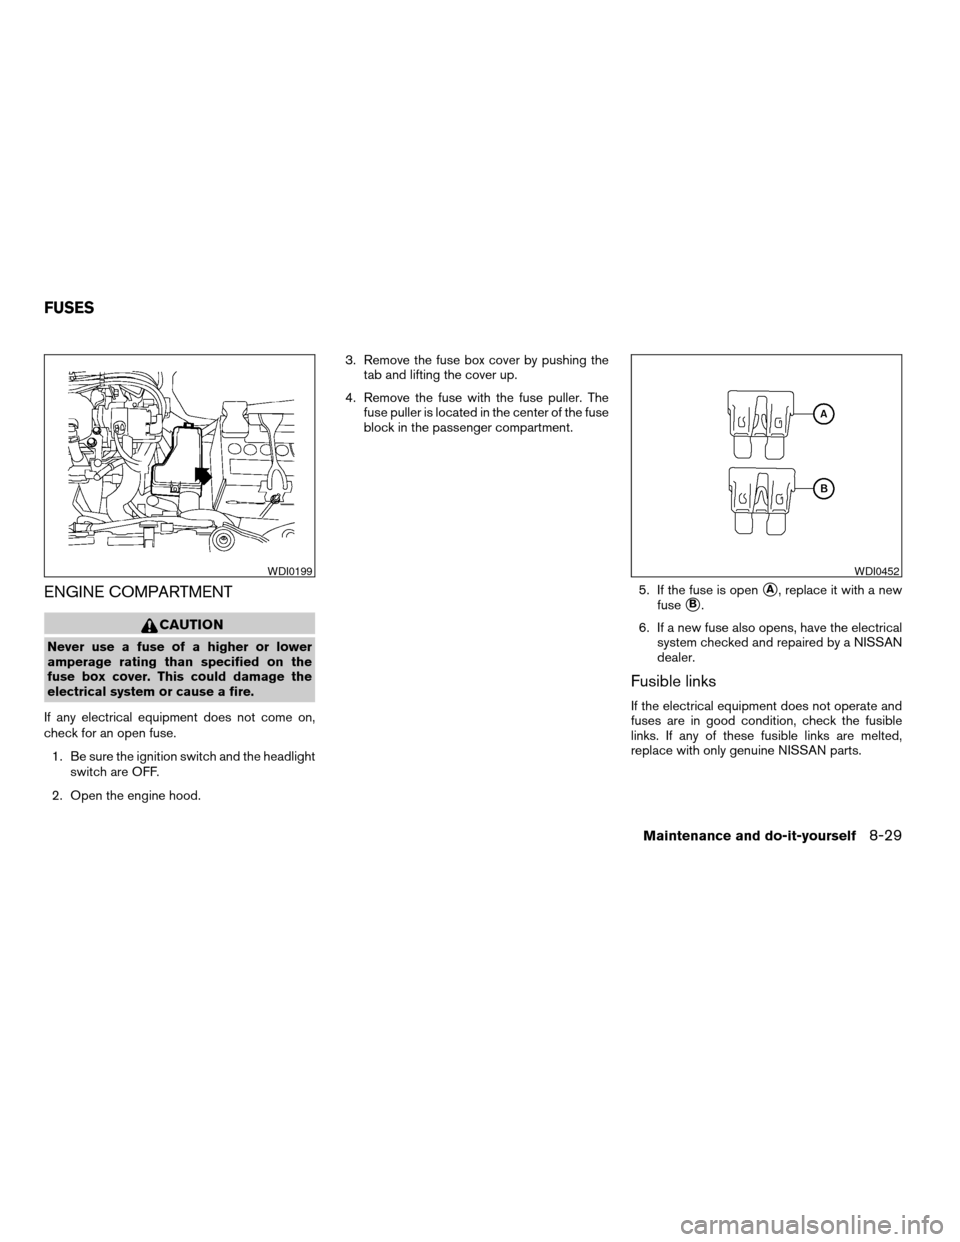
ENGINE COMPARTMENT
CAUTION
Never use a fuse of a higher or lower
amperage rating than specified on the
fuse box cover. This could damage the
electrical system or cause a fire.
If any electrical equipment does not come on,
check for an open fuse.
1. Be sure the ignition switch and the headlight
switch are OFF.
2. Open the engine hood.3. Remove the fuse box cover by pushing the
tab and lifting the cover up.
4. Remove the fuse with the fuse puller. The
fuse puller is located in the center of the fuse
block in the passenger compartment.
5. If the fuse is open
sA, replace it with a new
fuse
sB.
6. If a new fuse also opens, have the electrical
system checked and repaired by a NISSAN
dealer.
Fusible links
If the electrical equipment does not operate and
fuses are in good condition, check the fusible
links. If any of these fusible links are melted,
replace with only genuine NISSAN parts.
WDI0199WDI0452
FUSES
Maintenance and do-it-yourself8-29
ZREVIEW COPYÐ2006 Sentra(b15)
Owners ManualÐUSA_English(nna)
09/01/05Ðdebbie
X
Page 201 of 256
HEADLIGHTS
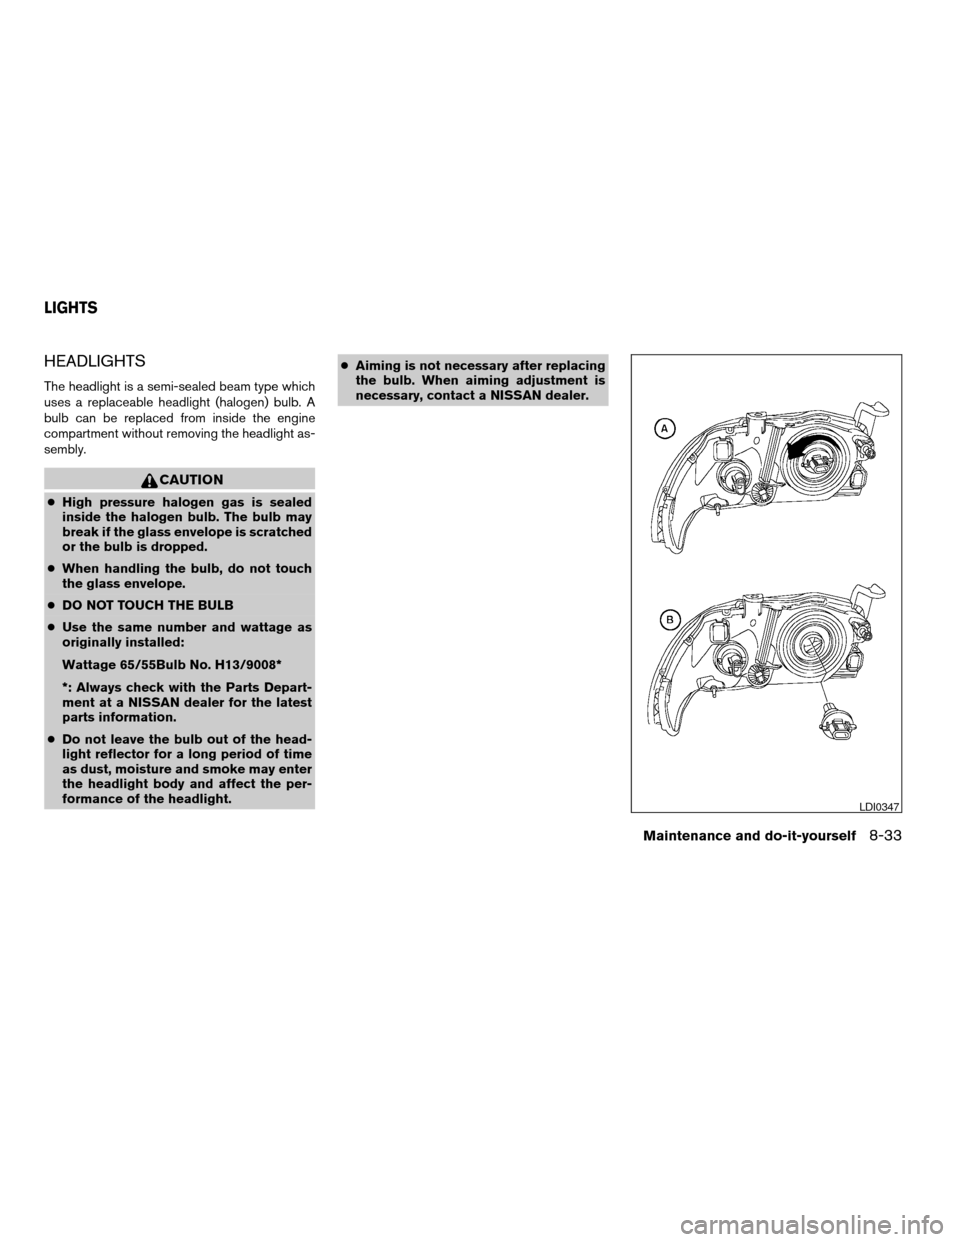
The headlight is a semi-sealed beam type which
uses a replaceable headlight (halogen) bulb. A
bulb can be replaced from inside the engine
compartment without removing the headlight as-
sembly.
CAUTION
cHigh pressure halogen gas is sealed
inside the halogen bulb. The bulb may
break if the glass envelope is scratched
or the bulb is dropped.
cWhen handling the bulb, do not touch
the glass envelope.
cDO NOT TOUCH THE BULB
cUse the same number and wattage as
originally installed:
Wattage 65/55Bulb No. H13/9008*
*: Always check with the Parts Depart-
ment at a NISSAN dealer for the latest
parts information.
cDo not leave the bulb out of the head-
light reflector for a long period of time
as dust, moisture and smoke may enter
the headlight body and affect the per-
formance of the headlight.cAiming is not necessary after replacing
the bulb. When aiming adjustment is
necessary, contact a NISSAN dealer.
LDI0347
LIGHTS
Maintenance and do-it-yourself8-33
ZREVIEW COPYÐ2006 Sentra(b15)
Owners ManualÐUSA_English(nna)
09/01/05Ðdebbie
X