2006 NISSAN QUEST remote control
[x] Cancel search: remote controlPage 142 of 352
CAUTION
Listed below are conditions or occur-
rences which will damage the keyfob:
cDo not allow the keyfob to become wet.
cDo not drop the keyfob.
cDo not strike the keyfob sharply against
another object.
cDo not place the keyfob for an extended
period in an area where temperatures
exceed 140°F (60°C) .
If a keyfob is lost or stolen, NISSAN rec-
ommends erasing the ID code of that key-
fob. This will prevent the keyfob from un-
authorized use to unlock the vehicle. For
information regarding the erasing proce-
dure, please contact a NISSAN dealer.
HOW TO USE REMOTE KEYLESS
ENTRY SYSTEM
Locking doors
1. Close all windows.
2. Remove the key from the ignition switch.
3. Close the hood and all doors.
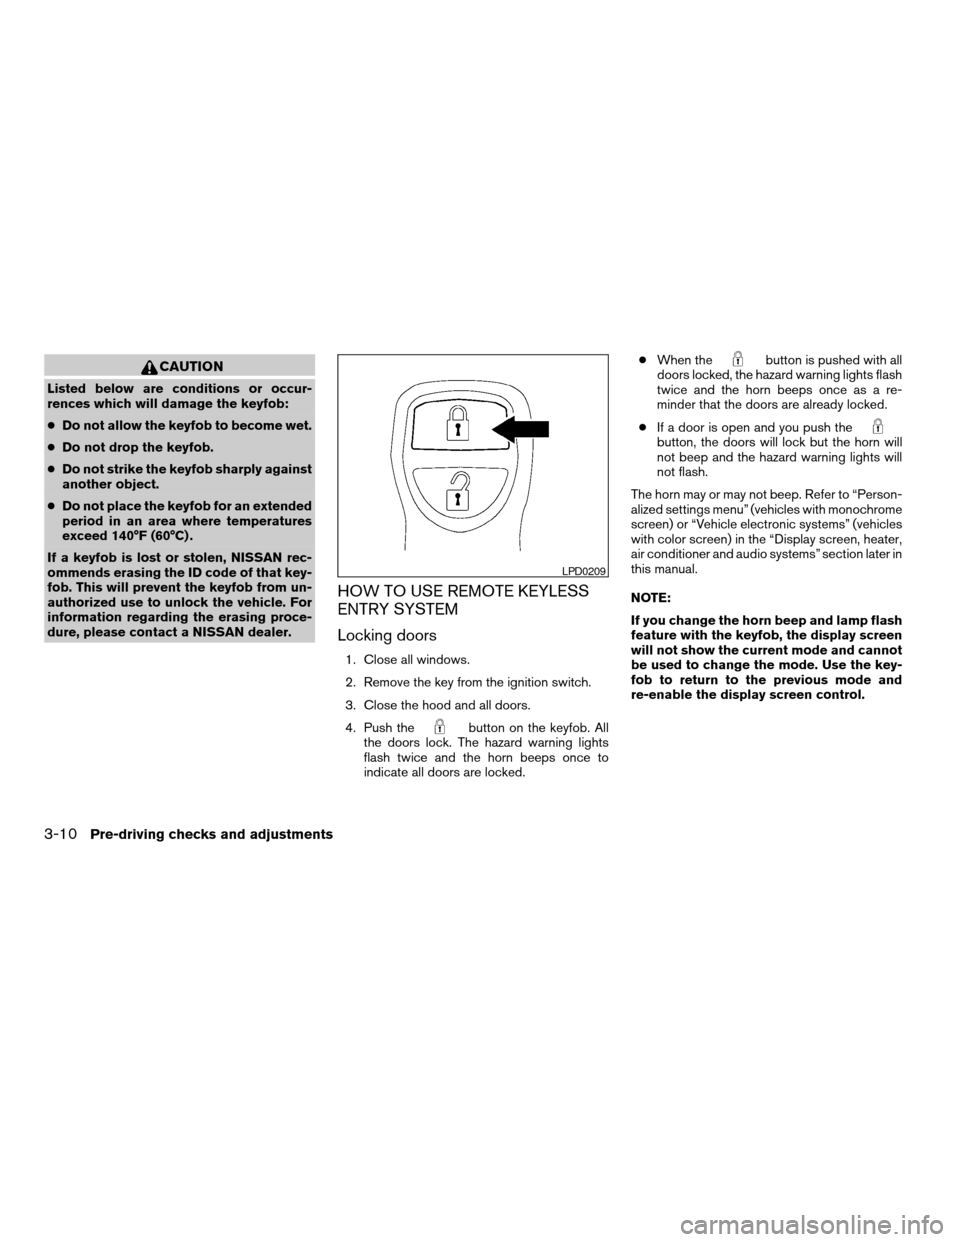
4. Push the
button on the keyfob. All
the doors lock. The hazard warning lights
flash twice and the horn beeps once to
indicate all doors are locked.cWhen the
button is pushed with all
doors locked, the hazard warning lights flash
twice and the horn beeps once as a re-
minder that the doors are already locked.
cIf a door is open and you push the
button, the doors will lock but the horn will
not beep and the hazard warning lights will
not flash.
The horn may or may not beep. Refer to “Person-
alized settings menu” (vehicles with monochrome
screen) or “Vehicle electronic systems” (vehicles
with color screen) in the “Display screen, heater,
air conditioner and audio systems” section later in
this manual.
NOTE:
If you change the horn beep and lamp flash
feature with the keyfob, the display screen
will not show the current mode and cannot
be used to change the mode. Use the key-
fob to return to the previous mode and
re-enable the display screen control.
LPD0209
3-10Pre-driving checks and adjustments
ZREVIEW COPYÐ2006 Quest(van)
Owners ManualÐUSA_English(nna)
05/27/05Ðtbrooks
X
Page 155 of 352
For information on HomeLinkTUniversal Trans-
ceiver operation, see the “HomeLinkTUniversal
Transceiver” in the “Instrument and controls” sec-
tion of this manual.
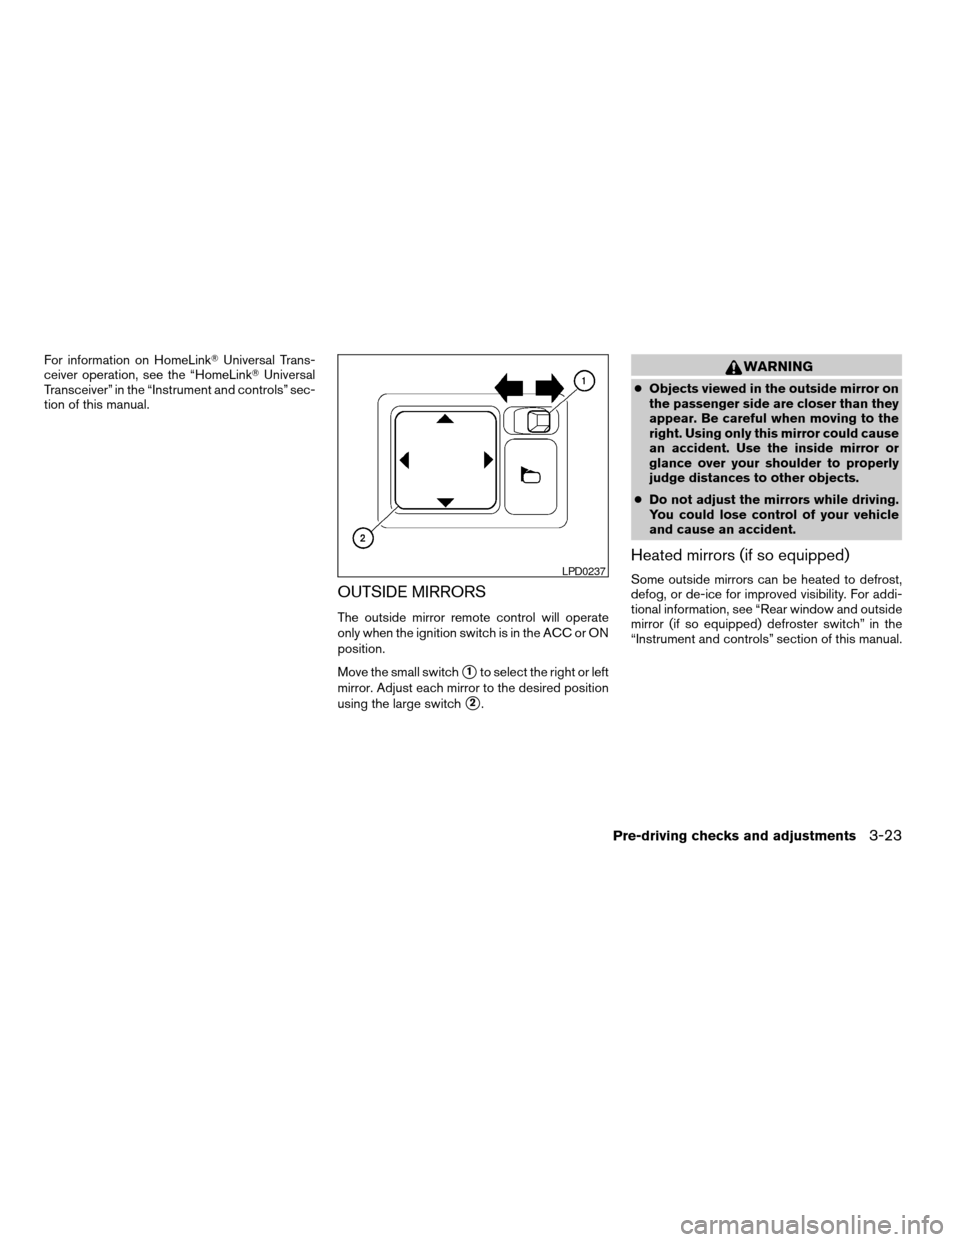
OUTSIDE MIRRORS
The outside mirror remote control will operate
only when the ignition switch is in the ACC or ON
position.
Move the small switch
s1to select the right or left
mirror. Adjust each mirror to the desired position
using the large switch
s2.
WARNING
cObjects viewed in the outside mirror on
the passenger side are closer than they
appear. Be careful when moving to the
right. Using only this mirror could cause
an accident. Use the inside mirror or
glance over your shoulder to properly
judge distances to other objects.
cDo not adjust the mirrors while driving.
You could lose control of your vehicle
and cause an accident.
Heated mirrors (if so equipped)
Some outside mirrors can be heated to defrost,
defog, or de-ice for improved visibility. For addi-
tional information, see “Rear window and outside
mirror (if so equipped) defroster switch” in the
“Instrument and controls” section of this manual.LPD0237
Pre-driving checks and adjustments3-23
ZREVIEW COPYÐ2006 Quest(van)
Owners ManualÐUSA_English(nna)
05/27/05Ðtbrooks
X
Page 161 of 352

Rear seat air conditioner..........................4-40
Controls......................................4-40
Servicing air conditioner...........................4-40
Audio system....................................4-41
Radio........................................4-41
FM radio reception............................4-41
AM radio reception............................4-41
Satellite radio reception (if so equipped).........4-41
Audio operation precautions....................4-42
FM-AM-SAT radio with compact disc (CD)
player (Type A)/CD changer (Type B)............4-44
CD care and cleaning..........................4-51Steering wheel switch for audio control
(if so equipped)...............................4-51
Rear audio controls (if so equipped).............4-53
Antenna......................................4-54
DVD entertainment system (if so equipped)..........4-54
Digital video disc (DVD) player controls..........4-55
Remote control................................4-56
Flip-down screen..............................4-56
Playing a digital video disc (DVD)...............4-58
Care and maintenance.........................4-61
How to handle the DVD........................4-61
Car phone or CB radio............................4-64
ZREVIEW COPYÐ2006 Quest(van)
Owners ManualÐUSA_English(nna)
05/27/05Ðtbrooks
X
Page 166 of 352
In case of low tire pressure, a message (FLAT
TIRE or CHECK ALL TIRE) is displayed on the
screen:
FLAT TIRE — Check All Tires.
WARNING
When a spare tire is mounted or a wheel is
replaced, tire pressure will not be indi-
cated and the low tire pressure warning
system will not function. Contact your
NISSAN dealer as soon as possible for tire
replacement and/or system resetting.
HOW TO USE THE “SETTING”
BUTTON
Pushing the“SETTING”button will change the
settings menu as follows:
DISPLAY ON/OFF
LANGUAGE
BEEP SET
SERVICE ALERT
PERSONALIZED SETTINGS MENU
Display ON/OFF
To turn off the screen, select the OFF key of the
“Display ON/OFF” using the joystick.The screen will change to “CONFIRM DISPLAY
OFF YES or NO”.
If YES key is selected using the joystick, the
screen will turn off after a 2 beep sound and
approximately 1 second.
To turn on the screen, push the“SETTING”, trip
control, air conditioner (except rear window de-
fogger button) or audio button.
Language
The language can be changed to “English” or
“Français” using the joystick.
Beep set
If the beep set “OFF” key is selected using the
joystick, the beep sound will not operate (except
some caution beep sounds) .
Service alert
If the service alert “ON” key is selected, the
information will be displayed when the engine oil
and the tire rotation periods reach the preset
driving distance.
Personalized settings menu
You can set the following electronic systems
operating conditions using the joystick.Slide back DR (driver’s) seat on exit:
The driver’s seat automatically moves back and
returns to the original position for exceptional
ease of exit and entry.
Remote unlock door logic:
This option allows you to select which doors will
unlock first during an unlocking operation:
Only the driver’s doorÃ!All the doors
Horn chirp with remote:
This option allows you to select the horn chirp
mode that occurs when the LOCK or UNLOCK
button on the keyfob is pressed.
NOTE:
If you change the horn beep or the lamp
flash feature with the keyfob, the display
screen will not show the current mode. Use
the keyfob to return to the previous mode
and re-enable the display screen control.
Lamps flash with remote:
This option allows you to select the hazard indi-
cator flash mode that occurs when the LOCK or
UNLOCK button on the keyfob is pressed.
4-6Display screen, heater, air conditioner and audio systems
ZREVIEW COPYÐ2006 Quest(van)
Owners ManualÐUSA_English(nna)
05/27/05Ðtbrooks
X
Page 173 of 352

Vehicle electronic systems
The VEHICLE ELECTRONIC SYSTEMS screen
will appear when selecting the“Vehicle Elec-
tronic Systems”key with the joystick and push-
ing the“ENTER”button.
To set the various electronic systems operating
conditions, select the applicable item using the
joystick, and push the“ENTER”button. The
indicator light, box at left of selected item, alter-
nately turns on and off each time the“ENTER”
button is pressed.
Indicator light is illuminated — ON
Indicator light is not illuminated — OFFRemote unlock driver’s door first:
This option allows you to select which doors will
unlock first during an unlocking operation:
Only the driver’s doorÃ!All the doors
Keyless remote response — horn:
This key allows you to change the horn chirp
mode that occurs when pressing the LOCK or
UNLOCK button on the keyfob.NOTE:
If you change the horn beep or the lamp
flash feature with the keyfob, the display
screen will not show the current mode. Use
the keyfob to return to the previous mode
and re-enable the display screen control.
Keyless remote response — lights:
This key allows you to change the hazard indica-
tor flash mode that occurs when pressing the
LOCK or UNLOCK button on the keyfob.
NOTE:
If you change the horn beep or the lamp
flash feature with the keyfob, the mode will
not be changed with the display. Use the
keyfob to return to the previous mode and
re-enable the display control.
Auto re-lock time:
This key allows you to set the length of time
before doors auto re-lock.
LHA0601LHA0560
Display screen, heater, air conditioner and audio systems4-13
ZREVIEW COPYÐ2006 Quest(van)
Owners ManualÐUSA_English(nna)
05/27/05Ðtbrooks
X
Page 182 of 352
NOTE:
If you change the horn beep or the lamp
flash feature with the keyfob, the display
screen will not show the current mode. Use
the keyfob to return to the previous mode
and re-enable the display screen control.Keyless remote response — lights:
This key allows you to change the hazard indica-
tor flash mode that occurs when pressing the
LOCK or UNLOCK button on the keyfob.
NOTE:
If you change the horn beep or the lamp
flash feature with the keyfob, the mode will
not be changed with the display. Use the
keyfob to return to the previous mode and
re-enable the display control.
Auto re-lock time:
This key allows you to set the length of time
before doors auto re-lock.
Sensitivity of automatic headlights:
This key allows you to set the sensitivity of the
automatic headlights:
cLower- less sensitive, automatic headlights
will take longer to come on when the head-
light sensor senses less ambient light.
cHigher- more sensitive, automatic head-
lights will come on quicker when the head-
light sensor senses less ambient light.Automatic headlights off delay:
This key allows you to set the length of time
before the automatic headlights turn off after
exiting the vehicle.
Speed dependent wiper:
This key allows you to turn on or turn off the
driving speed dependent intermittent wiper func-
tion.
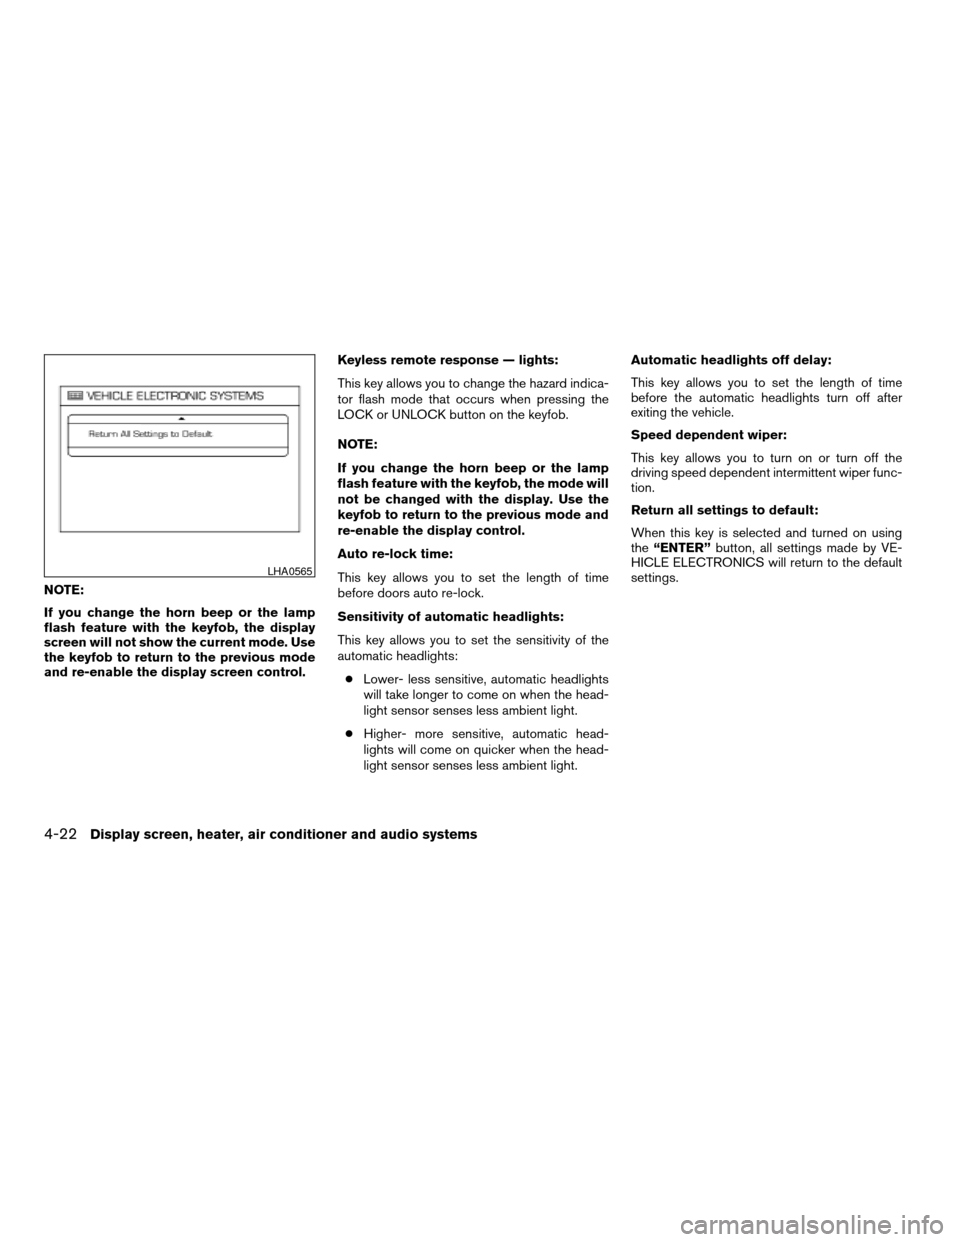
Return all settings to default:
When this key is selected and turned on using
the“ENTER”button, all settings made by VE-
HICLE ELECTRONICS will return to the default
settings.
LHA0565
4-22Display screen, heater, air conditioner and audio systems
ZREVIEW COPYÐ2006 Quest(van)
Owners ManualÐUSA_English(nna)
05/27/05Ðtbrooks
X
Page 216 of 352

1. POWER button
2. STOP button
3. NEXT TRACK/CHAPTER and PREVI-
OUS TRACK/CHAPTER button
4. TITLE button
5. ENTER button6. DISPLAY button
7. MODE button
8. SUBTITLE button
9. AUDIO button
10. ANGLE button
11. CLEAR button
12. PAUSE button
13. PLAY button
14. FAST FORWARD/FAST REVERSE
button
15. MENU button
16. NAVIGATION keys
17. BACK button
18. NUMERIC KEYPAD
REMOTE CONTROL
Refer to “Playing a digital video disc (DVD)” later
in this section for the function of each button.
FLIP-DOWN SCREEN
The flip-down screen has a wireless remote con-
trol receiver
s1located at the bottom of the
screen.
On vehicles equipped with 2 screens for second
and third row passengers, both screens will have
a remote control receiver.
LHA0317
LHA0315
4-56Display screen, heater, air conditioner and audio systems
ZREVIEW COPYÐ2006 Quest(van)
Owners ManualÐUSA_English(nna)
05/27/05Ðtbrooks
X
Page 218 of 352
PLAYING A DIGITAL VIDEO DISC
(DVD)
CAUTION
cOnly operate the DVD while the vehicle
engine is running. Operating the DVD
for extended periods of time with the
engine OFF can discharge the vehicle
battery.
cDo not allow the system to get wet.
Excessive moisture such as spilled liq-
uids may cause the system to
malfunction.
cThe driver must not attempt to wear the
headphones while the vehicle is in mo-
tion so that full attention may be given
to vehicle operation.
cWhile playing video CD media, this DVD
player does not guarantee complete
functionality of all video CD formats.
With the DVD player, you can hear DVD videos,
video CDs and CDs using headphones. Passen-
gers in the rear seat can enjoy the sound inde-
pendently of the front seat.
Press the REAR AV button located on the front
controls for more than 1.5 seconds to hear the
sound of the DVD player through the speakers.Pushing the
button on the front controls
turns the rear speakers on and off.
It is possible to operate the DVD player by remote
control.
Headphones are a wireless type and no cables
are necessary. You can use them in almost all the
ranges in the rear seat. (It is not possible to use
the headphones in the front seat.)
POWER on/off button:
With the ignition switch turned to the ACC or ON
position, push the POWER button to turn the
DVD player on or off.
Insert the DVD into the slot with the label side
facing up. The DVD will be guided automatically
into the slot.
If the DVD player is off and a DVD is inserted, the
DVD player will automatically turn on.
CAUTION
Do not force the compact disc into the
slot. This could damage the player.
MODE select button:
Push the Mode button to select Audio/Video
source between DVD and AUX input (input jackson the faceplate, Red = right channel audio input,
White = left channel audio input, and Yellow =
Video input) .
The display will show the “AUX” in the upper left
corner of the display for 4 seconds once the
Mode is changed to AUX.
To use the input jacks, refer to “Auxiliary input
jacks” in this section.
orPLAY:
When the PLAY/PAUSE button on the player or
the PLAY button on the remote control is pushed,
the player will play.
In play mode, the display will briefly show
on the upper left corner of the display.
FF (Fast Forward) , REW
(Remote control only):
Push FAST FORWARD/FAST REVERSE but-
tons to carry out the fast forward or fast reverse
presentation at 5 times normal play speed.
Push FAST FORWARD/FAST REVERSE but-
tons again or PLAY button to resume the normal
play speed.
4-58Display screen, heater, air conditioner and audio systems
ZREVIEW COPYÐ2006 Quest(van)
Owners ManualÐUSA_English(nna)
05/27/05Ðtbrooks
X