2006 NISSAN QUEST manual radio set
[x] Cancel search: manual radio setPage 186 of 352

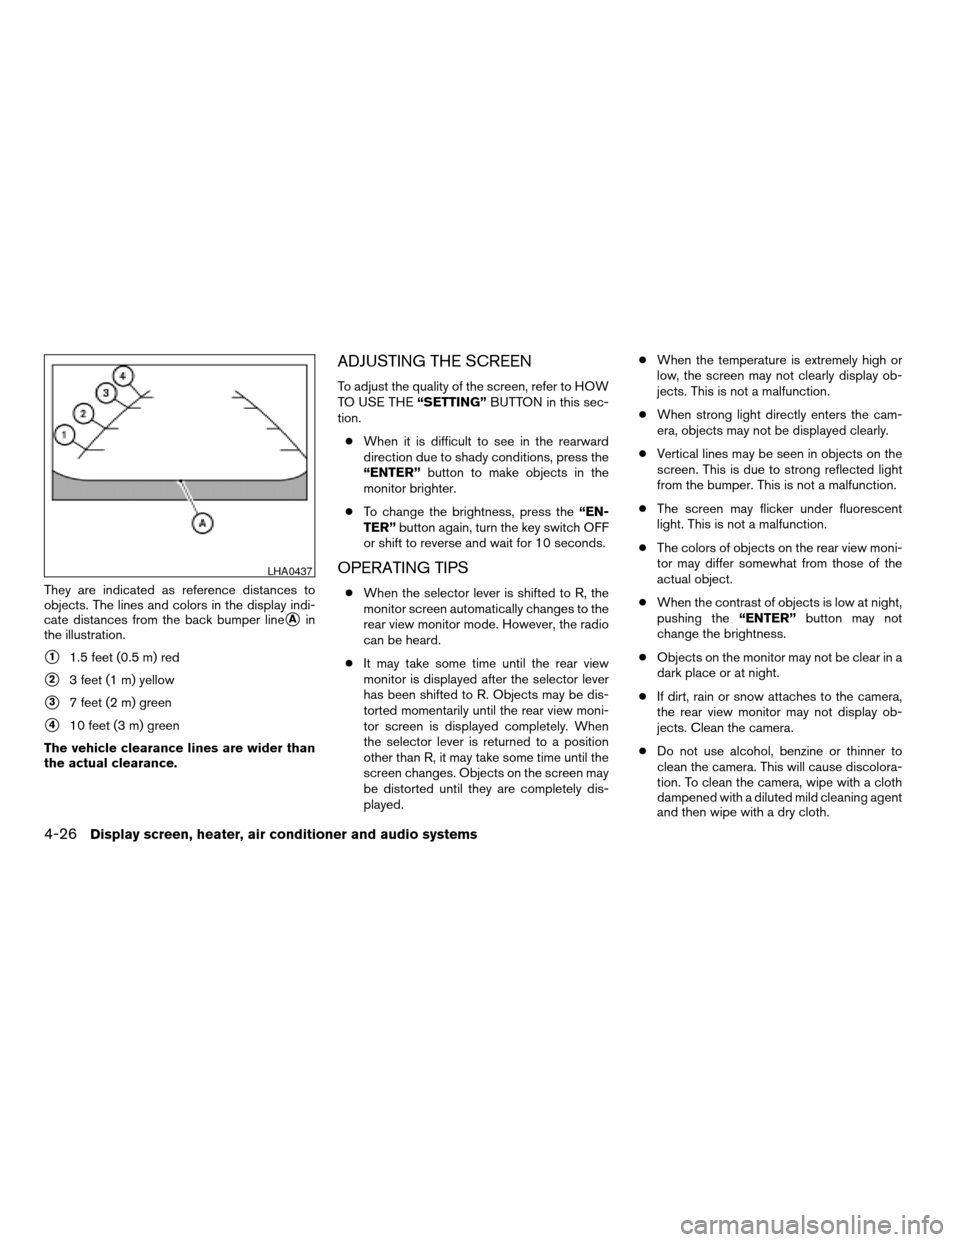
They are indicated as reference distances to
objects. The lines and colors in the display indi-
cate distances from the back bumper line
sAin
the illustration.
s11.5 feet (0.5 m) red
s23 feet (1 m) yellow
s37 feet (2 m) green
s410 feet (3 m) green
The vehicle clearance lines are wider than
the actual clearance.
ADJUSTING THE SCREEN
To adjust the quality of the screen, refer to HOW
TO USE THE“SETTING”BUTTON in this sec-
tion.
cWhen it is difficult to see in the rearward
direction due to shady conditions, press the
“ENTER”button to make objects in the
monitor brighter.
cTo change the brightness, press the“EN-
TER”button again, turn the key switch OFF
or shift to reverse and wait for 10 seconds.
OPERATING TIPS
cWhen the selector lever is shifted to R, the
monitor screen automatically changes to the
rear view monitor mode. However, the radio
can be heard.
cIt may take some time until the rear view
monitor is displayed after the selector lever
has been shifted to R. Objects may be dis-
torted momentarily until the rear view moni-
tor screen is displayed completely. When
the selector lever is returned to a position
other than R, it may take some time until the
screen changes. Objects on the screen may
be distorted until they are completely dis-
played.cWhen the temperature is extremely high or
low, the screen may not clearly display ob-
jects. This is not a malfunction.
cWhen strong light directly enters the cam-
era, objects may not be displayed clearly.
cVertical lines may be seen in objects on the
screen. This is due to strong reflected light
from the bumper. This is not a malfunction.
cThe screen may flicker under fluorescent
light. This is not a malfunction.
cThe colors of objects on the rear view moni-
tor may differ somewhat from those of the
actual object.
cWhen the contrast of objects is low at night,
pushing the“ENTER”button may not
change the brightness.
cObjects on the monitor may not be clear in a
dark place or at night.
cIf dirt, rain or snow attaches to the camera,
the rear view monitor may not display ob-
jects. Clean the camera.
cDo not use alcohol, benzine or thinner to
clean the camera. This will cause discolora-
tion. To clean the camera, wipe with a cloth
dampened with a diluted mild cleaning agent
and then wipe with a dry cloth.
LHA0437
4-26Display screen, heater, air conditioner and audio systems
ZREVIEW COPYÐ2006 Quest(van)
Owners ManualÐUSA_English(nna)
05/27/05Ðtbrooks
X
Page 203 of 352

1. SEEK/TRACK change button
2. TUNE/REW/FF button
3. DISP button
4. PROG/RPT button
5. ON·OFF/VOLUME control knob6. PRESET A-B-C select button
7. Station select buttons (1 - 6)
8. CD play button
9. FM-AM band select button
10. SAT (satellite) radio select button*11. REAR ON·OFF button
12.
Rear speaker control button
13. Tuning and AUDIO control knob
[BASS, TREBLE, FADE BALANCE and
SSV (if so equipped)]
14. CD insert slot
15. CD eject button
*No satellite radio reception is available
and “NO SAT” is displayed when the
SAT button is pressed unless optional
satellite receiver and antenna are
installed, and an XMTor SIRIUS™ satel-
lite radio service subscription is active.
Satellite radio not available in Alaska,
Hawaii and Guam.
Type A
LHA0591
Display screen, heater, air conditioner and audio systems4-43
ZREVIEW COPYÐ2006 Quest(van)
Owners ManualÐUSA_English(nna)
05/27/05Ðtbrooks
X
Page 204 of 352

1. SEEK/TRACK change button
2. TUNE/REW/FF button
3. DISP button
4. PROG/RPT button
5. ON·OFF/VOLUME control knob6. PRESET A-B-C select button
7. Station and CD select buttons (1 - 6)
8. CD play button
9. FM-AM band select button
10. SAT (satellite) radio select button*11. REAR ON·OFF button
12.
Rear speaker control button
13. Tuning and AUDIO control knob
[BASS, TREBLE, FADE BALANCE and
SSV (if so equipped)]
14. CD load button
15. CD insert slot
16. CD eject button
*No satellite radio reception is available
and “NO SAT” is displayed when the
SAT button is pressed unless optional
satellite receiver and antenna are
installed, and an XMTor SIRIUS™ satel-
lite radio service subscription is active.
Satellite radio not available in Alaska,
Hawaii and Guam.
FM-AM-SAT RADIO WITH
COMPACT DISC (CD) PLAYER
(Type A)/CD CHANGER (Type B)
No satellite radio reception is available and “NO
SAT” is displayed when the SAT button is
pressed unless optional satellite receiver and
antenna are installed, and an XMTor SIRIUS™
satellite radio service subscription is active. Sat-
ellite radio not available in Alaska, Hawaii and
Guam.Type B
LHA0590
4-44Display screen, heater, air conditioner and audio systems
ZREVIEW COPYÐ2006 Quest(van)
Owners ManualÐUSA_English(nna)
05/27/05Ðtbrooks
X
Page 205 of 352

Audio main operation
ON·OFF/Volume control:
Turn the ignition key to ACC or ON, and then
push the ON·OFF/Volume control knob while the
system is off to call up the mode (radio or CD)
which was playing immediately before the system
was turned off.
To turn the system off, press the ON·OFF/Volume
control knob.
Turn the ON·OFF/Volume control knob to adjust
the volume.
This vehicle may be equipped with speed sensi-
tive control volume (SSV) for audio. The audio
volume changes as the driving speed changes.
AUDIO knob (BASS, TREBLE, FADE, BAL-
ANCE and SSV if so equipped):
Press the AUDIO knob to change the mode as
follows:
BASS!TREBLE!FADE!BALANCE!
SSV (if so equipped)
To adjust Bass, Treble, Fade and Balance, press
the AUDIO knob until the desired mode appears
in the display. Turn the Tuning knob to adjust
Bass and Treble to the desired level. You can also
use the Tuning knob to adjust Fader and Balance
modes. Fader adjusts the sound level betweenthe front and rear speakers and Balance adjusts
the sound between the right and left speakers.
To change the SSV mode to OFF, LOW, MID or
HIGH, turn the Tuning knob to the right or left.
Once you have adjusted the sound quality to the
desired level, press the AUDIO knob repeatedly
until the radio or CD display reappears. Other-
wise, the radio or CD display will automatically
reappear after about 10 seconds.
DISP (display) button:
This DISP (display) button will show text about
CD or SAT information in the audio display.
CD display mode
To change the text displayed while playing a CD
with text, press the DISP button. The DISP button
will allow you to scroll through CD text as follows:
Disc titleÃ!Track title.
To change the default display mode push the
tune knob to display mode and rotate the knob to
select the following display mode: Disc titleÃ!
Track titleÃ!Track number.
Once the display mode is selected press the tune
knob to store your selection. If the tuning knob is
not pressed after 8 seconds the display will re-
fresh with the last selected display mode setting.cTrack title mode displays the title of the se-
lected CD track.
cDisc title mode displays the title of the CD
being played.
cTrack number mode displays the number
selected disc and the track that is currently
being played on the disc.
Display satellite radio display mode (if so
equipped)
To change the text displayed when listening to
satellite radio (if so equipped) press the DISP
button. The DISP button will scroll through the
broadcasted information as follows: NameÃ!
TitleÃ!Current display mode.
To change the default display mode push the
tune knob to display mode and rotate the knob to
select the following display modes: Channel
numberÃ!Channel nameÃ!NameÃ!
Title. Once the display mode is selected press
the tune knob again to store the setting. If the
tuning knob is not pressed after 8 seconds the
display will refresh with the last selected display
mode setting.
cChannel number mode displays the channel
number of the selected satellite radio sta-
tion.
Display screen, heater, air conditioner and audio systems4-45
ZREVIEW COPYÐ2006 Quest(van)
Owners ManualÐUSA_English(nna)
05/27/05Ðtbrooks
X
Page 206 of 352

cChannel name mode displays the channel
name of the selected satellite radio station.
cName mode displays the name of the artist,
host or weather condition of the selected
satellite radio station.
cTitle mode displays the song title, show
name, or temperature of the selected satel-
lite radio station.
FM/AM/SAT radio operation
FM/AM/SAT band select:
Pushing the FM-AM or SAT radio select button
will change the band as follows:
AMÃ!FM or SAT (Satellite- if so equipped)
When FM-AM or SAT radio select button is
pushed while the ignition switch is in the ACC or
ON, the radio will come on at the station last
played.
The last station played will also come on when
the ON·OFF/Volume control knob is depressed
to ON.
No satellite radio reception is available and “NO
SAT” is displayed when the SAT button is
pressed unless optional satellite receiver and
antenna are installed, and an XMTor SIRIUS™
satellite radio service subscription is active.If a compact disc is playing when the FM-AM or
SAT radio select button is pushed, the compact
disc will automatically be turned off and the last
radio station played will come on.
The FM stereo indicator ST will glow during FM
stereo reception. When the stereo broadcast
signal is weak, the radio will automatically change
from stereo to monaural reception.
TUNE (Tuning):
WARNING
The radio should not be tuned while driv-
ing so full attention may be given to ve-
hicle operation.
To manually tune the radio, push the TUNE button
(
or) or turn the tuning knob to right
or left.
To move quickly through the channels, hold either
the
orbutton down for more than
1.5 seconds.
SEEK tuning:
Push the SEEK/TRACK button (
or)
for less than 1.5 seconds to tune from high to low
or low to high frequencies and stop at the next
broadcasting station.SCAN tuning:
Push the
orbutton for more than
1.5 seconds to stop at each broadcasting station
for 5 seconds. Pushing the button again during
this 5 second period will stop SCAN tuning and
the radio will remain tuned to that station. If
the
orbutton is not pushed within 5
seconds, SCAN tuning moves to the next station.
Station memory operations:
18 stations can be set for the FM, AM and SAT
radio to the A, B and C preset button in any
combination of AM, FM or SAT* stations.
1. Press the PRESET ABC button to change
between storage banks. The radio displays
the icon A, B or C to indicate which set of
presets are active.
2. Tune to the desired station using manual,
SEEK or SCAN tuning. Push and hold any of
the desired station memory buttons (1 – 6)
until a beep sound is heard. (The radio mutes
when the select button is pushed.)
3. The channel indicator will then come on and
the sound will resume. Memorizing is now
complete.
4.
Other buttons can be set in the same manner.
* SAT presets are only available on SAT equipped
vehicles.
4-46Display screen, heater, air conditioner and audio systems
ZREVIEW COPYÐ2006 Quest(van)
Owners ManualÐUSA_English(nna)
05/27/05Ðtbrooks
X
Page 207 of 352

If the battery cable is disconnected, or if the fuse
opens, the radio memory will be canceled. In that
case, reset the desired stations.
Radio data system (RDS):
RDS stands for Radio Data System, and is a data
information service transmitted by some radio
stations on the FM band (not AM band) and/or
SAT radio encoded within a regular radio broad-
cast. Currently, most RDS stations are in large
cities, but many stations are now considering
broadcasting RDS data.
Program type (PTY):
PTY can be used to search for a certain program
type. Certain areas have a limited number of
stations that transmit RDS. Many stations trans-
mit call letters and frequencies only.
Searching or scanning by program type may yield
a limited number of selections.
When PROG/RPT button is pressed for more
than 1.5 seconds during FM or SAT (if so
equipped) mode, the PTY name of the current
tuned station is displayed. During this time if the
PTY data code is zero or the data is unreadable,
the display will show NONE.
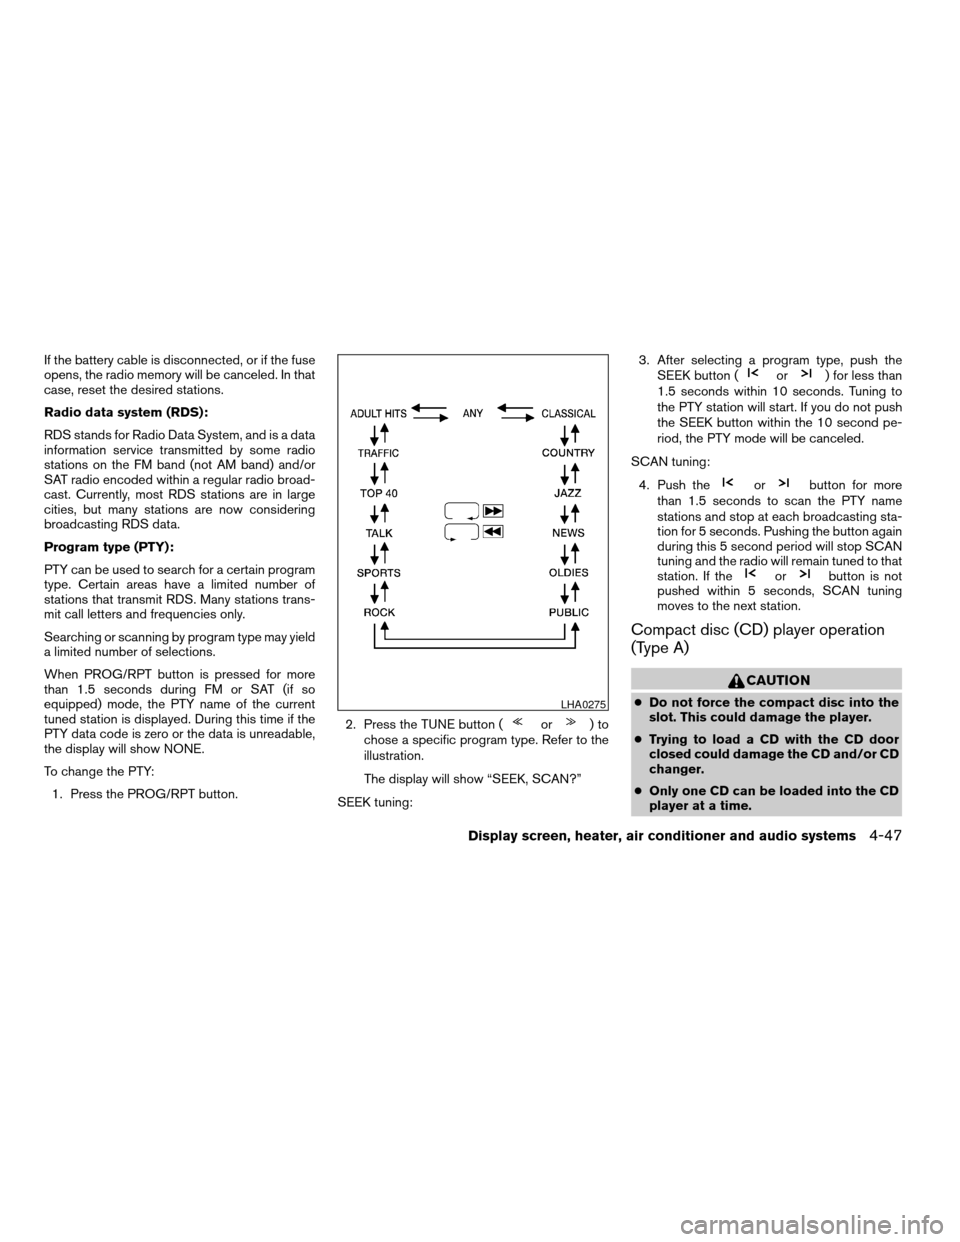
To change the PTY:
1. Press the PROG/RPT button.2. Press the TUNE button (
or)to
chose a specific program type. Refer to the
illustration.
The display will show “SEEK, SCAN?”
SEEK tuning:3. After selecting a program type, push the
SEEK button (
or) for less than
1.5 seconds within 10 seconds. Tuning to
the PTY station will start. If you do not push
the SEEK button within the 10 second pe-
riod, the PTY mode will be canceled.
SCAN tuning:
4. Push the
orbutton for more
than 1.5 seconds to scan the PTY name
stations and stop at each broadcasting sta-
tion for 5 seconds. Pushing the button again
during this 5 second period will stop SCAN
tuning and the radio will remain tuned to that
station. If the
orbutton is not
pushed within 5 seconds, SCAN tuning
moves to the next station.
Compact disc (CD) player operation
(Type A)
CAUTION
cDo not force the compact disc into the
slot. This could damage the player.
cTrying to load a CD with the CD door
closed could damage the CD and/or CD
changer.
cOnly one CD can be loaded into the CD
player at a time.LHA0275
Display screen, heater, air conditioner and audio systems4-47
ZREVIEW COPYÐ2006 Quest(van)
Owners ManualÐUSA_English(nna)
05/27/05Ðtbrooks
X
Page 212 of 352

MODE select switch
Push the mode select switch to change the mode
in the following sequence: PRESET A!PRE-
SET B!PRESET C!CD!DVD (if so
equipped) .
While in one of the preset radio station banks (A,
B or C) , use the SEEK tuning switch (
or) to select one of the preset radio sta-
tions (1-6) .
Volume control switch
Push the volume control switch up or down to
increase or decrease the volume.
Tuning
Memory change (radio):
While in one of the preset radio station banks (A,
B or C) , push the tuning switch
orfor less than 1.5 seconds to change to the next
preset station in memory.
Seek tuning (radio):
Push the tuning switch
orfor more
than 1.5 seconds to seek the next or previous
radio station.Next/Previous track (CD):
Push the tuning switch
orfor less
than 1.5 seconds to return to the beginning of the
present track or skip to the next track. Push
several times to skip back or skip through tracks.
This system searches for the blank intervals be-
tween selections. If there is a blank interval within
1 program or there is no interval between pro-
grams, the system may not stop in the desired or
expected location.
Change disc (CD) (if so equipped):
Push the tuning switch
orfor more
than 1.5 seconds to change the playing disc up
or down.
4-52Display screen, heater, air conditioner and audio systems
ZREVIEW COPYÐ2006 Quest(van)
Owners ManualÐUSA_English(nna)
05/27/05Ðtbrooks
X
Page 213 of 352

1. VOL (volume) control button
2. MODE select button
3.
speaker control button
4. NEXT button
5. SEEK button
6. Headphone jacks7. Infrared headphone transmitter lens*
*Red transmitters will be visible when
infrared headphones are on.
REAR AUDIO CONTROLS (if so
equipped)
Push the REAR ON·OFF button on the front radio
control panel to turn the rear controls on. Push
the button again to turn rear controls off.
The headphones symbol illuminates on the front
display when the rear audio controls are on. Two
headphone jacks are provided so two rear seat
passengers may listen to the audio system pri-
vately.
The rear volume controls can only increase the
volume to the level at which the front radio volume
control is set.
One or two (if so equipped) infrared headphones
are included if the vehicle is equipped with the
DVD entertainment system. Most portable radio
headphones work with the rear audio controls.
For vehicles equipped with the FM/AM/SAT radio
with compact disc player, if the rear passengers
turn off the rear speakers and are using head-
phones they may choose to listen to a different
media than the front passengers. The rear pas-
sengers can listen to the radio along with the
front passengers or they can listen to a CD or
SAT radio (if so equipped) .
LHA0322
Display screen, heater, air conditioner and audio systems4-53
ZREVIEW COPYÐ2006 Quest(van)
Owners ManualÐUSA_English(nna)
05/27/05Ðtbrooks
X