2006 NISSAN QUEST height
[x] Cancel search: heightPage 20 of 352

Seat lifter (if so equipped for driver’s
seat)
Turn either dial to adjust the angle and height of
the seat cushion to the desired position.
Lumbar support (driver’s seat)
The lumbar support feature provides lower back
support to the driver. Move the lever up or down
to adjust the seat lumbar area.
WRS0131WRS0518
1-4Safety—Seats, seat belts and supplemental restraint system
ZREVIEW COPYÐ2006 Quest(van)
Owners ManualÐUSA_English(nna)
05/27/05Ðtbrooks
X
Page 22 of 352

Seat lifter (if so equipped for driver’s
seat)
Push the front or rear end of the switch up or
down to adjust the angle and height of the seat
cushion.
Lumbar support (driver’s seat)
The lumbar support feature provides lower back
support to the driver. Move the lever up or down
to adjust the seat lumbar area.
2ND ROW CAPTAIN’S CHAIR
ADJUSTMENT
Forward and backward
Push the levers1and hold it while you slides2the
seat forward or backward to the desired position.
Release the lever to lock the seat in position.
WRS0523WRS0518LRS0614
1-6Safety—Seats, seat belts and supplemental restraint system
ZREVIEW COPYÐ2006 Quest(van)
Owners ManualÐUSA_English(nna)
05/27/05Ðtbrooks
X
Page 26 of 352
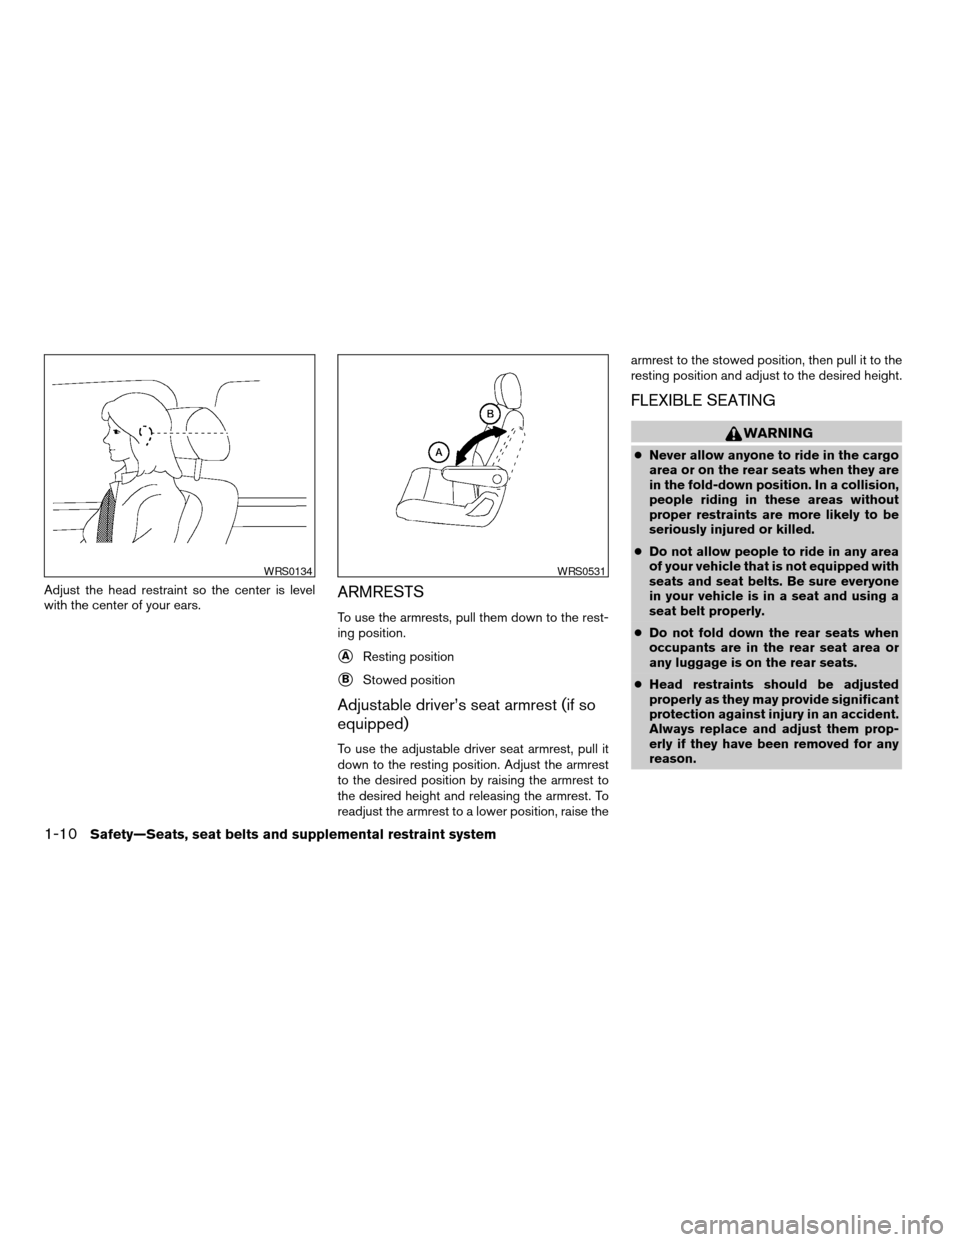
Adjust the head restraint so the center is level
with the center of your ears.ARMRESTS
To use the armrests, pull them down to the rest-
ing position.
sAResting position
sBStowed position
Adjustable driver’s seat armrest (if so
equipped)
To use the adjustable driver seat armrest, pull it
down to the resting position. Adjust the armrest
to the desired position by raising the armrest to
the desired height and releasing the armrest. To
readjust the armrest to a lower position, raise thearmrest to the stowed position, then pull it to the
resting position and adjust to the desired height.
FLEXIBLE SEATING
WARNING
cNever allow anyone to ride in the cargo
area or on the rear seats when they are
in the fold-down position. In a collision,
people riding in these areas without
proper restraints are more likely to be
seriously injured or killed.
cDo not allow people to ride in any area
of your vehicle that is not equipped with
seats and seat belts. Be sure everyone
in your vehicle is in a seat and using a
seat belt properly.
cDo not fold down the rear seats when
occupants are in the rear seat area or
any luggage is on the rear seats.
cHead restraints should be adjusted
properly as they may provide significant
protection against injury in an accident.
Always replace and adjust them prop-
erly if they have been removed for any
reason.
WRS0134WRS0531
1-10Safety—Seats, seat belts and supplemental restraint system
ZREVIEW COPYÐ2006 Quest(van)
Owners ManualÐUSA_English(nna)
05/27/05Ðtbrooks
X
Page 34 of 352
There are three basic types of child restraint
systems:
cRear facing child restraint
cFront facing child restraint
cBooster seat
The proper restraint depends on the child’s size.
Generally, infants up to about 1 year and less
than 20 pounds (9 kg) should be placed in rear
facing child restraints. Front facing child re-
straints are available for children who outgrow
rear facing child restraints and are at least 1 year
old. Booster seats are used to help position a
vehicle lap/shoulder belt on a child who can no
longer use a front facing child restraint.
WARNING
Infants and children need special protec-
tion. The vehicle’s seat belts may not fit
them properly. The shoulder belt may
come too close to the face or neck. The
lap belt may not fit over their small hip
bones. In an accident, an improperly fit-
ting seat belt could cause serious or fatal
injury. Always use appropriate child
restraints.
All U.S. states and Canadian provinces or terri-
tories require the use of approved child restraintsfor infants and small children. See “Child Re-
straints” later in this section.
Also, there are other types of child restraints
available for larger children for additional protec-
tion.
NISSAN recommends that all pre-teens
and children be restrained in the rear seat.
According to accident statistics, children
are safer when properly restrained in the
rear seat than in the front seat.
This is especially important because your
vehicle has a supplemental restraint sys-
tem (Air bag system) for the front passen-
ger. See “Supplemental restraint system”
later in this section.
Infants
Infants up to at least 1 year old should be placed
in a rear facing child restraint. NISSAN recom-
mends that infants be placed in child restraints
that comply with Federal Motor Vehicle Safety
Standards or Canadian Motor Vehicle Safety
Standards. You should choose a child restraint
that fits your vehicle and always follow the manu-
facturer’s instructions for installation and use.
Small Children
Children that are over one year old and weigh
between 20 lbs (9 kg) and 40 lbs (18 kgs) can beplaced in a forward facing child restraint. Refer to
the manufacturer’s instructions for minimum and
maximum weight and height recommendations.
NISSAN recommends that small children be
placed in child restraints that comply with Federal
Motor Vehicle Safety Standards or Canadian Mo-
tor Vehicle Safety Standards. You should choose
a child restraint that fits your vehicle and always
follow the manufacturer’s instructions for instal-
lation and use.
Larger children
Children who are too large for child restraints
should be seated and restrained by the seat belts
which are provided. The seat belt may not fit
properly if the child is less than 4 feet 9 inches
(142.5 cm) tall and weighs between 40 lbs (18
kg) and 80 lbs (36 kg) . A booster seat should be
used to obtain proper seat belt fit.
NISSAN recommends that a child be placed in a
commercially available booster seat if the shoul-
der belt in the child’s seating position fits close to
the face or neck or if the lap portion of the seat
belt goes across the abdomen. The booster seat
should raise the child so that the shoulder belt is
properly positioned across the top, middle por-
tion of the shoulder and the lap belt is low on the
hips. A booster seat can only be used in seating
positions that have a three-point type seat belt.
The booster seat should fit the vehicle seat and
1-18Safety—Seats, seat belts and supplemental restraint system
ZREVIEW COPYÐ2006 Quest(van)
Owners ManualÐUSA_English(nna)
05/27/05Ðtbrooks
X
Page 40 of 352
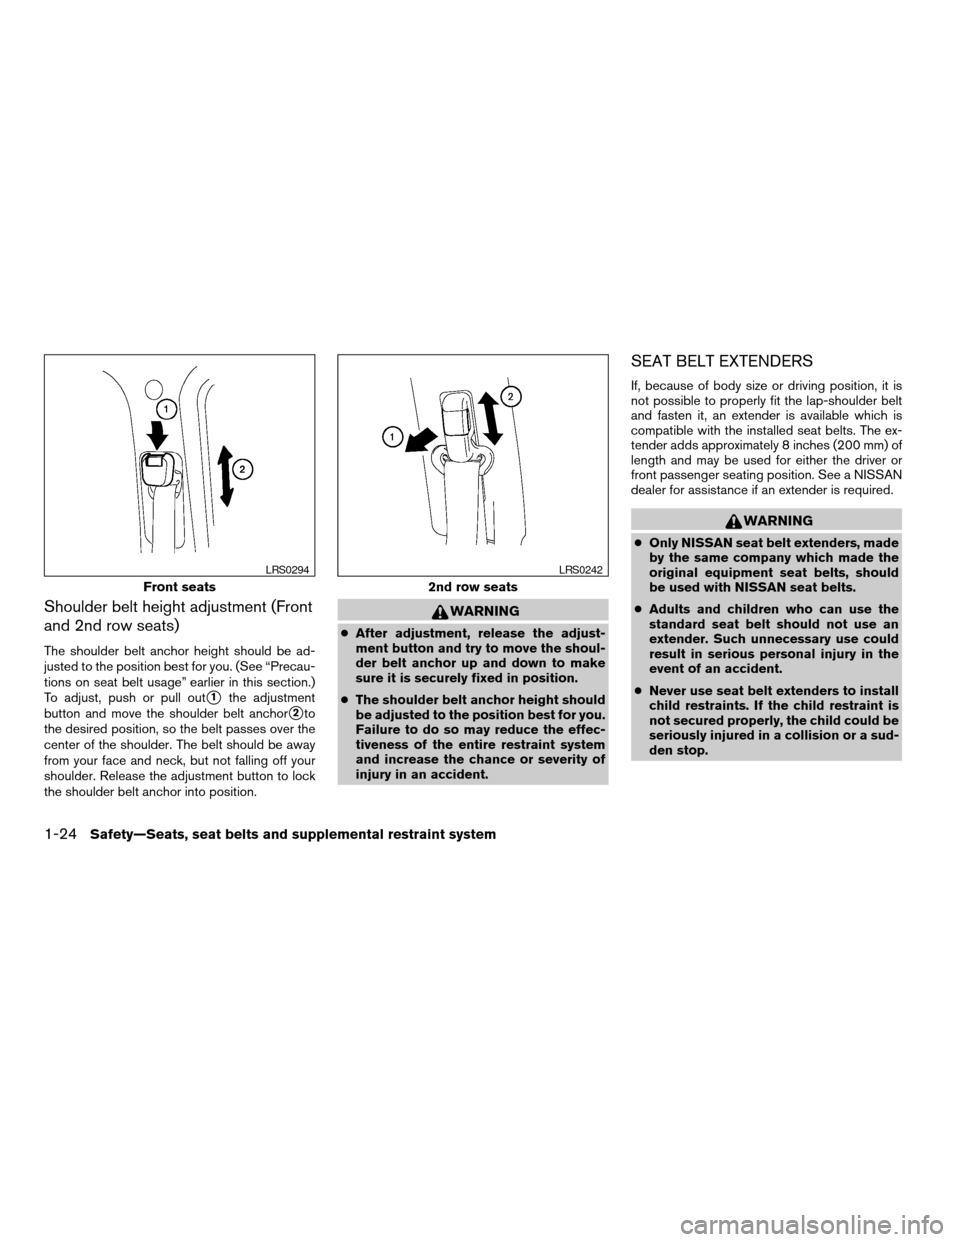
Shoulder belt height adjustment (Front
and 2nd row seats)
The shoulder belt anchor height should be ad-
justed to the position best for you. (See “Precau-
tions on seat belt usage” earlier in this section.)
To adjust, push or pull out
s1the adjustment
button and move the shoulder belt anchor
s2to
the desired position, so the belt passes over the
center of the shoulder. The belt should be away
from your face and neck, but not falling off your
shoulder. Release the adjustment button to lock
the shoulder belt anchor into position.
WARNING
cAfter adjustment, release the adjust-
ment button and try to move the shoul-
der belt anchor up and down to make
sure it is securely fixed in position.
cThe shoulder belt anchor height should
be adjusted to the position best for you.
Failure to do so may reduce the effec-
tiveness of the entire restraint system
and increase the chance or severity of
injury in an accident.
SEAT BELT EXTENDERS
If, because of body size or driving position, it is
not possible to properly fit the lap-shoulder belt
and fasten it, an extender is available which is
compatible with the installed seat belts. The ex-
tender adds approximately 8 inches (200 mm) of
length and may be used for either the driver or
front passenger seating position. See a NISSAN
dealer for assistance if an extender is required.
WARNING
cOnly NISSAN seat belt extenders, made
by the same company which made the
original equipment seat belts, should
be used with NISSAN seat belts.
cAdults and children who can use the
standard seat belt should not use an
extender. Such unnecessary use could
result in serious personal injury in the
event of an accident.
cNever use seat belt extenders to install
child restraints. If the child restraint is
not secured properly, the child could be
seriously injured in a collision or a sud-
den stop.
Front seats
LRS0294
2nd row seats
LRS0242
1-24Safety—Seats, seat belts and supplemental restraint system
ZREVIEW COPYÐ2006 Quest(van)
Owners ManualÐUSA_English(nna)
05/27/05Ðtbrooks
X
Page 42 of 352
cEven with the NISSAN Advanced Air
Bag System, never install a rear-facing
child restraint in the front seat. An in-
flating supplemental front air bag could
seriously injure or kill your child. A rear-
facing child restraint must only be used
in the rear seat.
cNISSAN recommends that the child re-
straint be installed in the rear seat. Ac-
cording to accident statistics, children
are safer when properly restrained in
the rear seat than in the front seat.
cAn improperly installed child restraint
could lead to serious injury or death in
an accident.
In general, child restraints are designed to be
installed with the lap portion of a lap/shoulder
seat belt. In addition, this vehicle is equipped with
a universal child restraint lower anchor system,
referred to as the LATCH (Lower Anchors and
Tethers for CHildren) system. Some child re-
straints include two rigid or webbing-mounted
attachments that can be connected to these
lower anchors. For details, see the “LATCH
(Lower Anchors and Tethers for CHildren) sys-
tem” later in this section.
Child restraints for infants and small children of
various sizes are offered by several manufactur-ers. When selecting any child restraint, keep the
following points in mind:
cChoose only a restraint with a label certifying
that it complies with Federal Motor Vehicle
Safety Standard 213 or Canadian Motor
Vehicle Safety Standard 213.
cCheck the child restraint in your vehicle to be
sure it is compatible with the vehicle’s seat
and seat belt system.
cIf the child restraint is compatible with your
vehicle, place your child in the child restraint
and check the various adjustments to be
sure the child restraint is compatible with
your child. Choose a child restraint that is
designed for your child’s height and weight.
Always follow all recommended procedures.
All U.S. states and Canadian provinces or
territories require that infants and small
children be restrained in an approved child
restraint at all times while the vehicle is
being operated.
WARNING
cImproper use of a child restraint can
increase the risk or severity of injury for
both the child and other occupants of
the vehicle.cFollow all of the child restraint manu-
facturer’s instructions for installation
and use. When purchasing a child re-
straint, be sure to select one which will
fit your child and vehicle. It may not be
possible to properly install some types
of child restraints in your vehicle.
cIf the child restraint is not anchored
properly, the risk of a child being in-
jured in a collision or a sudden stop
greatly increases.
cAdjustable seatbacks should be posi-
tioned to fit the child restraint, but as
upright as possible.
cAfter attaching the child restraint, test it
before you place the child in it. Push it
from side to side. Try to tug it forward
and check to see if the belt holds the
restraint in place. The child restraint
should not move more than 1 inch (25
mm) . If the restraint is not secure,
tighten the belt as necessary, or put the
restraint in another seat and test it
again. You may need to try a different
child restraint. Not all child restraints fit
in all types of vehicles.
1-26Safety—Seats, seat belts and supplemental restraint system
ZREVIEW COPYÐ2006 Quest(van)
Owners ManualÐUSA_English(nna)
05/27/05Ðtbrooks
X
Page 292 of 352
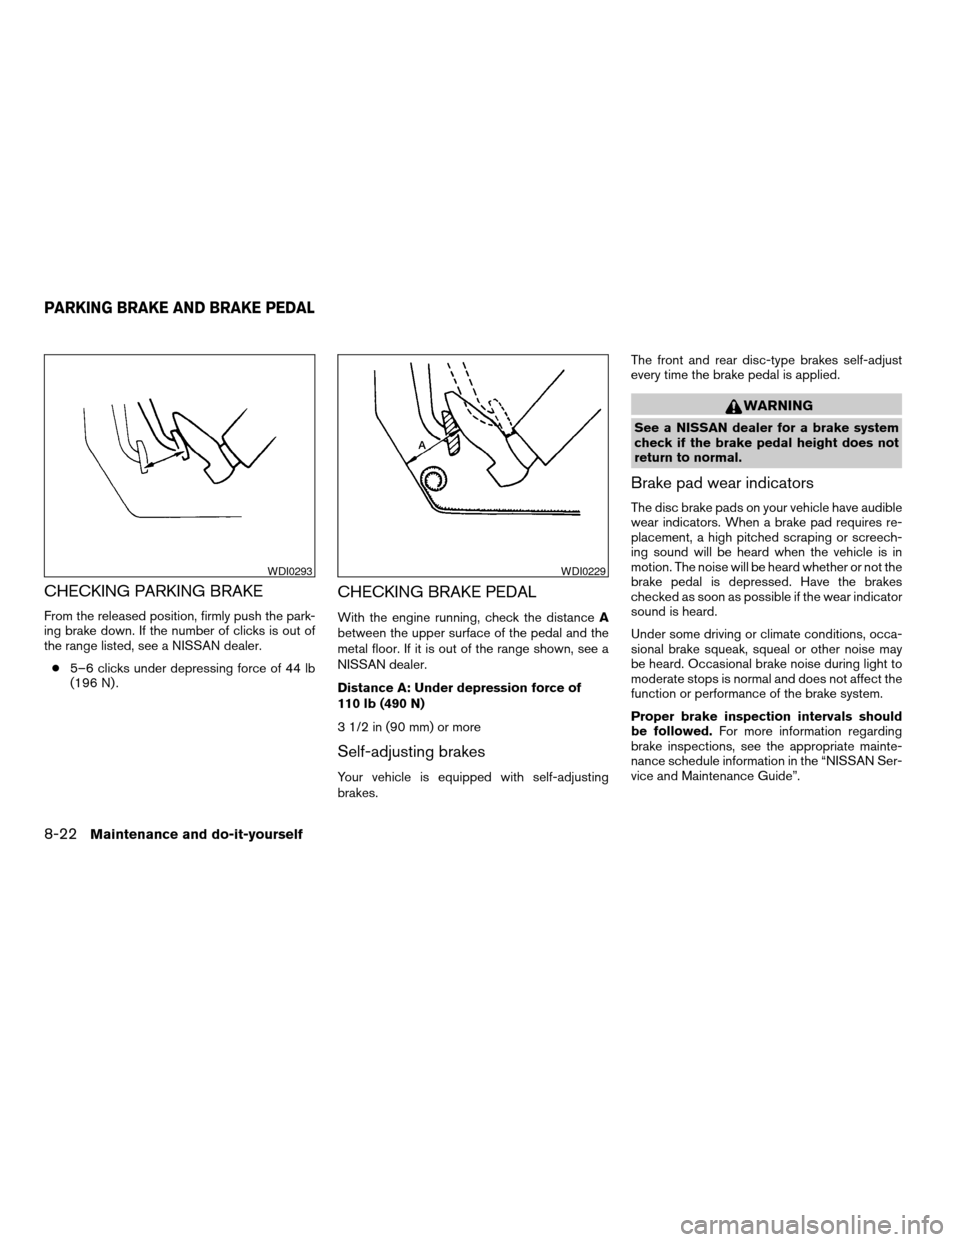
CHECKING PARKING BRAKE
From the released position, firmly push the park-
ing brake down. If the number of clicks is out of
the range listed, see a NISSAN dealer.
c5–6 clicks under depressing force of 44 lb
(196 N) .
CHECKING BRAKE PEDAL
With the engine running, check the distanceA
between the upper surface of the pedal and the
metal floor. If it is out of the range shown, see a
NISSAN dealer.
Distance A: Under depression force of
110 lb (490 N)
3 1/2 in (90 mm) or more
Self-adjusting brakes
Your vehicle is equipped with self-adjusting
brakes.The front and rear disc-type brakes self-adjust
every time the brake pedal is applied.
WARNING
See a NISSAN dealer for a brake system
check if the brake pedal height does not
return to normal.
Brake pad wear indicators
The disc brake pads on your vehicle have audible
wear indicators. When a brake pad requires re-
placement, a high pitched scraping or screech-
ing sound will be heard when the vehicle is in
motion. The noise will be heard whether or not the
brake pedal is depressed. Have the brakes
checked as soon as possible if the wear indicator
sound is heard.
Under some driving or climate conditions, occa-
sional brake squeak, squeal or other noise may
be heard. Occasional brake noise during light to
moderate stops is normal and does not affect the
function or performance of the brake system.
Proper brake inspection intervals should
be followed.For more information regarding
brake inspections, see the appropriate mainte-
nance schedule information in the “NISSAN Ser-
vice and Maintenance Guide”.
WDI0293WDI0229
PARKING BRAKE AND BRAKE PEDAL
8-22Maintenance and do-it-yourself
ZREVIEW COPYÐ2006 Quest(van)
Owners ManualÐUSA_English(nna)
05/27/05Ðtbrooks
X
Page 293 of 352
BRAKE BOOSTER
Check the brake booster function as follows:
1. With the engine off, press and release the
brake pedal several times. When brake
pedal movement (distance of travel) remains
the same from one pedal application to the
next, continue on to the next step.
2. While depressing the brake pedal, start the
engine. The pedal height should drop a little.
3. With the brake pedal depressed, stop the
engine. Keep the pedal depressed for about
30 seconds. The pedal height should not
change.
4. Run the engine for one minute without de-
pressing the brake pedal, then turn it off.
Depress the brake pedal several times. The
pedal travel distance will decrease gradually
with each depression as the vacuum is re-
leased from the booster.
If the brakes do not operate properly, have the
brakes checked by a NISSAN dealer.
ENGINE COMPARTMENT
CAUTION
Never use a fuse of a higher or lower
amperage rating than specified on the
fuse box cover. This could damage the
electrical system or cause a fire.
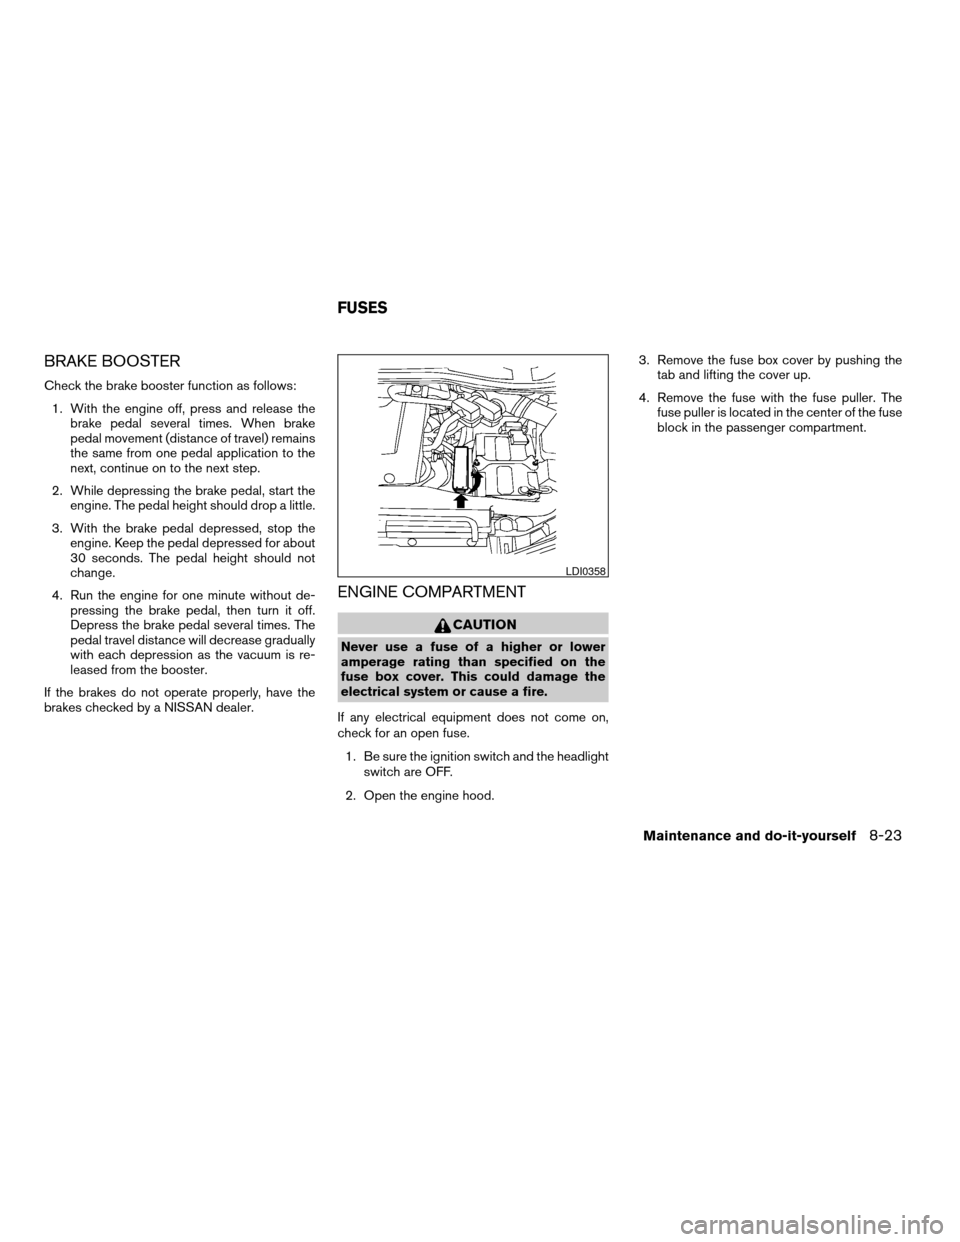
If any electrical equipment does not come on,
check for an open fuse.
1. Be sure the ignition switch and the headlight
switch are OFF.
2. Open the engine hood.3. Remove the fuse box cover by pushing the
tab and lifting the cover up.
4. Remove the fuse with the fuse puller. The
fuse puller is located in the center of the fuse
block in the passenger compartment.
LDI0358
FUSES
Maintenance and do-it-yourself8-23
ZREVIEW COPYÐ2006 Quest(van)
Owners ManualÐUSA_English(nna)
05/27/05Ðtbrooks
X