2006 NISSAN QUEST ECO mode
[x] Cancel search: ECO modePage 130 of 352

PROGRAMMING HOMELINKT
1. To begin, press and hold the two outer
HomeLinkTbuttons (to clear the memory)
until the indicator light
s1blinks (after 20
seconds) . Release both buttons.
2. Position the end of the hand-held transmitter
1 - 3 inches (26 - 76 mm) away from the
HomeLinkTsurface.3. Using both hands, simultaneously press and
hold both the HomeLinkTbutton you want to
program and the hand-held transmitter but-
ton.
DO NOT release the buttons until step 4 has
been completed.4. Hold down both buttons until the indicator
light on the HomeLinkTflashes, changing
from a “slow blink” to a “rapidly flashing
blink”. This could take up to 90 seconds.
When the indicator light flashes rapidly, both
buttons may be released. The rapidly flash-
ing light indicates successful programming.
To activate the garage door or other pro-
grammed device, press and hold the pro-
grammed HomeLinkTbutton — releasing
when the device begins to activate.
5. If the indicator light on the HomeLinkTblinks
rapidly for 2 seconds and then turns solid,
HomeLinkThas picked up a “rolling code”
garage door opener signal. You will need to
proceed with the next steps to train the
HomeLinkTto complete the programming
which may require a ladder and another per-
son for convenience.
6. Press and release the “smart” or “learn” pro-
gram button located on the garage door
opener’s motor to activate the “training
mode”. This button is usually located near
the antenna wire that hangs down from the
motor. If the wire originates from under a
light lens, you will need to remove the lens to
access the program button.
LIC0526LIC0527
2-48Instruments and controls
ZREVIEW COPYÐ2006 Quest(van)
Owners ManualÐUSA_English(nna)
05/27/05Ðtbrooks
X
Page 140 of 352
warning chime will sound if an open operation is
attempted. The door can be opened manually
part way.
Power Close:
The door automatically moves from the fully open
position to the secondary position. When the
sliding door reaches the secondary position, the
cinching motor engages and pulls the door to its
primary latch position. Power close takes ap-
proximately4–7seconds. The power close
feature can be activated by the switches on the
keyfob, the overhead console and the door pillar.
cIf the inside or outside handle is activated
while the cinching motor is engaged, the
cinching motor will disengage and release
the latch.
cThe keyfob button must be held for 0.5 sec-
ond before the door closes.
cThe switch on the door pillar can only be
used to close the door if the main ON/OFF
switch is ON.
Reverse:
The door will reverse direction immediately dur-
ing power open or power close if the keyfob,
overhead console or door pillar switch is
pressed. A chime will sound to announce the
reversal.Auto Reverse:
If an obstacle is detected during power open or
power close, a warning chime will sound and the
door will reverse direction and return to the full
open or full close position. If a second obstacle is
detected, the door motion will stop and the clutch
mode will be engaged.
WARNING
There are some small distances immedi-
ately before the closed position which
cannot be detected. Make sure that all
passengers have their hands, etc., inside
the vehicle before closing the door.
Clutch Mode:
To help prevent unexpected slams due to gravity,
the clutch mode is engaged intermittently for
approximately5–8seconds when power open
or close is interrupted due to multiple obstacles,
low battery voltage or the main ON/OFF switch
turned to OFF. The door must then be opened or
closed manually.
Restarting the power sliding door
Some power sliding door functions will become
disabled after the battery terminal is discon-
nected and/or the electrical supply is interrupted.The following procedure must be used to restart
each power sliding door so that all functions are
enabled.
1. Turn the main on/off switch to OFF.
2. Manually open the power sliding door to its
fully open position.
3. Turn the main on/off switch to ON.
4. Press and hold the power sliding door
switch on the overhead console until the
door closes.
5. Release the switch.
6. Press and hold the power sliding door
switch on the overhead console until the
door opens as far as it can.
7. Release the switch.
8. Press and hold the power sliding door
switch on the overhead console until the
door closes.
9. Release the switch.
The power sliding door should now work properly.
NOTE:
The restarting procedure must be com-
pleted for both the left-hand and right-
hand power sliding doors (if so equipped) .
3-8Pre-driving checks and adjustments
ZREVIEW COPYÐ2006 Quest(van)
Owners ManualÐUSA_English(nna)
05/27/05Ðtbrooks
X
Page 142 of 352
CAUTION
Listed below are conditions or occur-
rences which will damage the keyfob:
cDo not allow the keyfob to become wet.
cDo not drop the keyfob.
cDo not strike the keyfob sharply against
another object.
cDo not place the keyfob for an extended
period in an area where temperatures
exceed 140°F (60°C) .
If a keyfob is lost or stolen, NISSAN rec-
ommends erasing the ID code of that key-
fob. This will prevent the keyfob from un-
authorized use to unlock the vehicle. For
information regarding the erasing proce-
dure, please contact a NISSAN dealer.
HOW TO USE REMOTE KEYLESS
ENTRY SYSTEM
Locking doors
1. Close all windows.
2. Remove the key from the ignition switch.
3. Close the hood and all doors.
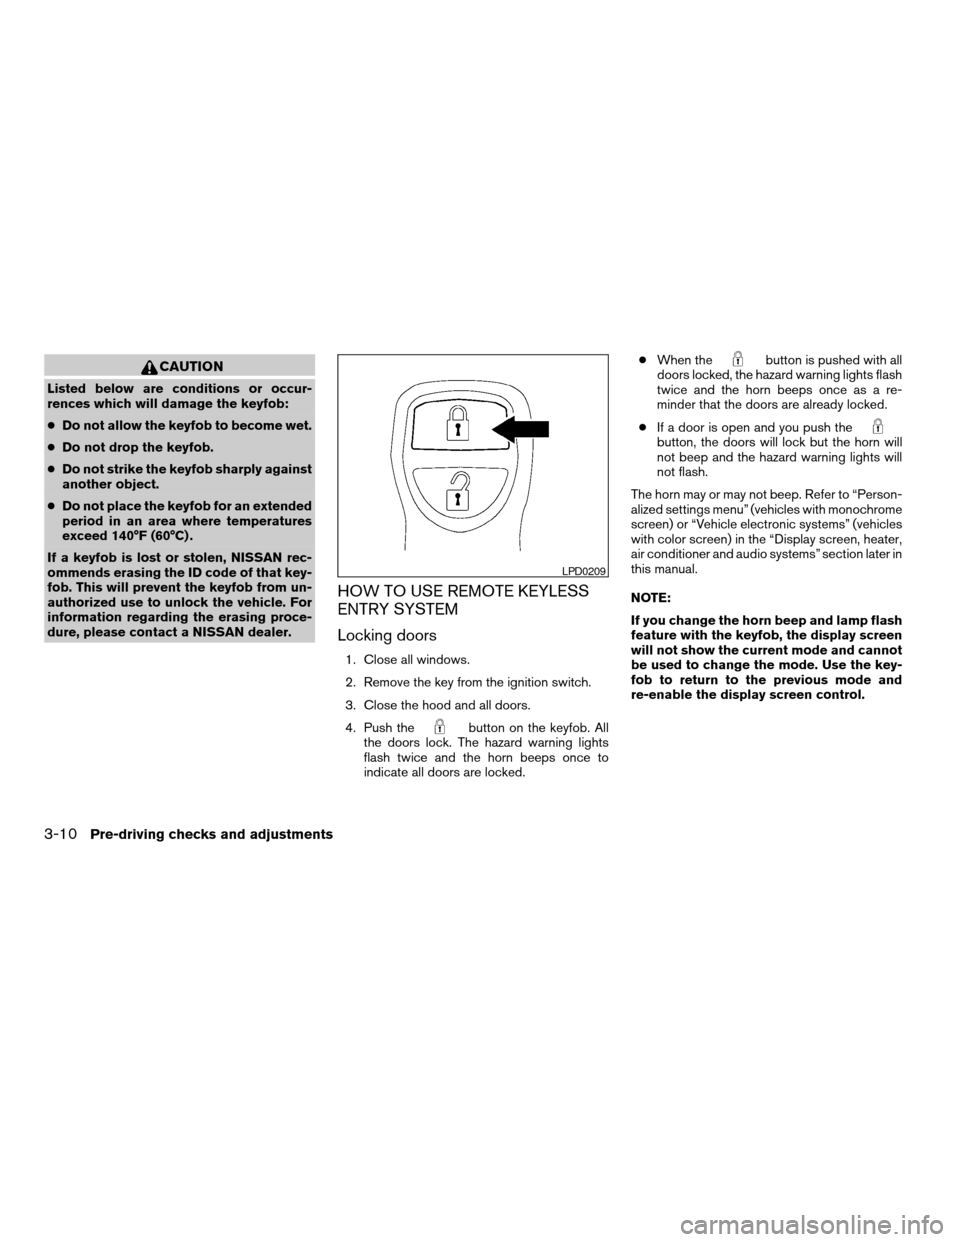
4. Push the
button on the keyfob. All
the doors lock. The hazard warning lights
flash twice and the horn beeps once to
indicate all doors are locked.cWhen the
button is pushed with all
doors locked, the hazard warning lights flash
twice and the horn beeps once as a re-
minder that the doors are already locked.
cIf a door is open and you push the
button, the doors will lock but the horn will
not beep and the hazard warning lights will
not flash.
The horn may or may not beep. Refer to “Person-
alized settings menu” (vehicles with monochrome
screen) or “Vehicle electronic systems” (vehicles
with color screen) in the “Display screen, heater,
air conditioner and audio systems” section later in
this manual.
NOTE:
If you change the horn beep and lamp flash
feature with the keyfob, the display screen
will not show the current mode and cannot
be used to change the mode. Use the key-
fob to return to the previous mode and
re-enable the display screen control.
LPD0209
3-10Pre-driving checks and adjustments
ZREVIEW COPYÐ2006 Quest(van)
Owners ManualÐUSA_English(nna)
05/27/05Ðtbrooks
X
Page 147 of 352
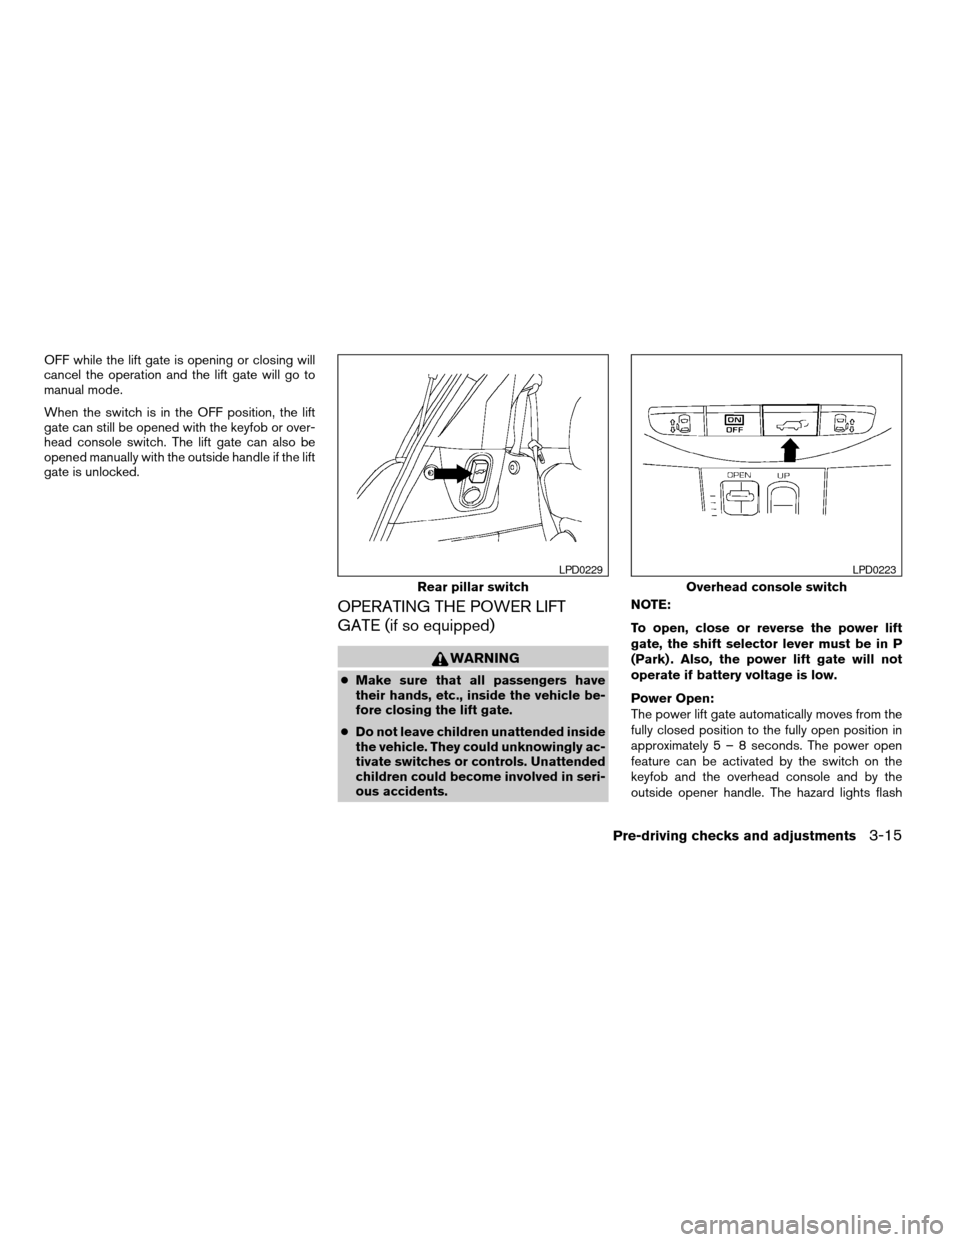
OFF while the lift gate is opening or closing will
cancel the operation and the lift gate will go to
manual mode.
When the switch is in the OFF position, the lift
gate can still be opened with the keyfob or over-
head console switch. The lift gate can also be
opened manually with the outside handle if the lift
gate is unlocked.
OPERATING THE POWER LIFT
GATE (if so equipped)
WARNING
cMake sure that all passengers have
their hands, etc., inside the vehicle be-
fore closing the lift gate.
cDo not leave children unattended inside
the vehicle. They could unknowingly ac-
tivate switches or controls. Unattended
children could become involved in seri-
ous accidents.NOTE:
To open, close or reverse the power lift
gate, the shift selector lever must be in P
(Park) . Also, the power lift gate will not
operate if battery voltage is low.
Power Open:
The power lift gate automatically moves from the
fully closed position to the fully open position in
approximately5–8seconds. The power open
feature can be activated by the switch on the
keyfob and the overhead console and by the
outside opener handle. The hazard lights flash
Rear pillar switch
LPD0229
Overhead console switch
LPD0223
Pre-driving checks and adjustments3-15
ZREVIEW COPYÐ2006 Quest(van)
Owners ManualÐUSA_English(nna)
05/27/05Ðtbrooks
X
Page 148 of 352
and a chime sounds to indicate the power open
sequence has been started.
cThe lift gate can be opened by the overhead
console switch and the keyfob even if the
vehicle is locked. The lift gate will individually
unlock and open. Once the lift gate is
closed, its lock will align to the vehicle’s lock
or unlock status.
cThe keyfob button must be held for 0.5 sec-
ond before the lift gate opens.
cThe lift gate must be unlocked to open it with
the outside opener handle.
cThe switch on the rear pillar cannot be used
to open the lift gate.
A warning chime will sound if the shift selector
lever is moved out of P (Park) during a power
open operation.
Power Close:
The power lift gate automatically moves from the
fully open position to the secondary position.
When the lift gate reaches the secondary posi-
tion, the cinching motor engages and pulls the lift
gate to its primary latch position. Power close
takes approximately7–10seconds. The power
close feature can be activated by the switch on
the keyfob, the overhead console and the rearpillar. The hazard lights flash and a chime sounds
to indicate the power close sequence has been
started.
cIf the outside opener handle is activated
while the cinching motor is engaged, the
cinching motor will disengage and release
the latch.
cThe keyfob button must be held for 0.5 sec-
ond before the lift gate closes.
cThe switch on the rear pillar can only be used
to close the lift gate if the main ON/OFF
switch is ON.
Reverse:
The power lift gate will reverse direction immedi-
ately during power open or power close if the
keyfob, overhead console or rear pillar switch is
pressed. A chime will sound to announce the
reversal.
Auto Reverse:
If an obstacle is detected during power open or
power close, a warning chime will sound and the
lift gate will reverse direction and return to the full
open or full close position. If a second obstacle is
detected, the lift gate motion will stop and the
drive motor will disengage. The lift gate will enter
manual mode.A pinch strip is mounted on each side of the lift
gate. If an obstacle is detected by a pinch strip
during power close, the lift gate will reverse di-
rection and return to the full open position.
NOTE:
If the pinch strip is damaged or removed,
the power close function will not operate.
WARNING
There are some small distances immedi-
ately before the closed position which
cannot be detected. Make sure that all
passengers have their hands, etc., inside
the vehicle before closing the lift gate.
Manual Mode:
If power operation is not available, the lift gate
may be operated manually. Power operation may
not be available if the main ON/OFF switch is in
the OFF position, if multiple obstacles have been
detected in a single power cycle, or if battery
voltage is low.
3-16Pre-driving checks and adjustments
ZREVIEW COPYÐ2006 Quest(van)
Owners ManualÐUSA_English(nna)
05/27/05Ðtbrooks
X
Page 163 of 352

NAMES OF COMPONENTS
1.brightness control button (P. 4-7)
2. BACK (previous) button (P. 4-16)
3. Joystick and ENTER push button (P. 4-3)
4. SETTING button (P. 4-6)
5.
(maintenance) button (P. 4-5)
6. TRIP drive computer button (P. 4-3)
7. E/M (English/Metric) button (P. 4-4)
8. FUEL ECON button (P. 4-4)
9. TRIP RESET button (P. 4-3)
10. Clock adjust button (hours/minutes) (P. 4-4)
To turn off the screen, push the
button for
more than approximately 1.5 seconds. The
screen will change to “CONFIRM DISPLAY OFF
YES or NO”.
HOW TO USE JOYSTICK AND
“ENTER” BUTTON
Choose an item on the display using the joystick.
Push the“ENTER”button only when the use of it
is instructed on the display.
HOW TO USE “BACK” BUTTON
This button has two functions.
cGo back to the previous display (cancel) .
If you press the“BACK”button during setup, the
setup will be canceled and/or the display will
return to the previous screen.
cFinish setup.
If you press the“BACK”button after the setup is
completed, the setup will start over.
HOW TO USE “TRIP” BUTTON
When the“TRIP”button is pushed, the following
modes will display on the screen.
TRIP 1 (TIME, DIST, AVG)!TRIP 2 (TIME, DIST,
AVG)!OFF
TRIP 1 and TRIP 2 record journey time (TIME —
max 99 hours 59 minutes) , trip odometer (DIST
— mile or km) and average speed (AVG — MPH
or km/h) .
To reset the TRIP 1 or TRIP 2, push the“TRIP”
button or the“TRIP RESET”button for more
than approximately 1.5 seconds.
LHA0252
Display screen, heater, air conditioner and audio systems4-3
ZREVIEW COPYÐ2006 Quest(van)
Owners ManualÐUSA_English(nna)
05/27/05Ðtbrooks
X
Page 164 of 352

HOW TO USE “FUEL ECON”
BUTTON
The average fuel consumption (MPG or L/100
km) and the distance to empty (dte — mi or km)
will appear on the screen when the“FUEL
ECON”button is pushed.
Average fuel consumption (MPG or
L/100 km)
The average fuel consumption mode shows the
average fuel consumption since the last reset.
Resetting is done by pressing the“TRIP RE-
SET”or“FUEL ECON”button for more than
approximately 1.5 seconds.The display is updated every 30 seconds. For
approximately the first 30 seconds and 1/3 miles
(500 m) after a reset or connecting the battery
cables, the display will show (----) .
Distance to empty (dte — mile or km)
The distance to empty (dte) mode provides you
with an estimation of the distance that can be
driven before refueling. The dte is constantly be-
ing calculated based on the amount of fuel in the
fuel tank and the actual fuel consumption.
The display is updated every 30 seconds.
When the fuel level is low, the dte display will
change to (*) .
NOTE:
cIf the amount of fuel added while the ignition
switch is OFF is small, the display just before
the ignition switch is turned OFF may con-
tinue to be displayed.
cWhen driving uphill or rounding curves, the
fuel in the tank shifts, which may momentarily
change the display.
CLOCK
The digital clock displays time when the ignition
key is in ACC or ON.
If the power supply is disconnected, the
clock will not indicate the correct time.
Readjust the time.
Adjusting the time
To adjust the time, push the“H”or“M”button
for more than approximately 1.5 seconds. The
time indicator will flash.
Touch the“H”button to adjust the hour.
Touch the“M”button to adjust the minute.
To finish the adjusting, press the“BACK”button
or the screen will return to normal after 10 sec-
onds.
HOW TO USE “E/M” (English/Metric)
BUTTON
You can change the unit as follows using the
“E/M”button.
Unit: US — mile, °F, MPG
Metric — km, °C, L/100 km
LHA0253
4-4Display screen, heater, air conditioner and audio systems
ZREVIEW COPYÐ2006 Quest(van)
Owners ManualÐUSA_English(nna)
05/27/05Ðtbrooks
X
Page 166 of 352
In case of low tire pressure, a message (FLAT
TIRE or CHECK ALL TIRE) is displayed on the
screen:
FLAT TIRE — Check All Tires.
WARNING
When a spare tire is mounted or a wheel is
replaced, tire pressure will not be indi-
cated and the low tire pressure warning
system will not function. Contact your
NISSAN dealer as soon as possible for tire
replacement and/or system resetting.
HOW TO USE THE “SETTING”
BUTTON
Pushing the“SETTING”button will change the
settings menu as follows:
DISPLAY ON/OFF
LANGUAGE
BEEP SET
SERVICE ALERT
PERSONALIZED SETTINGS MENU
Display ON/OFF
To turn off the screen, select the OFF key of the
“Display ON/OFF” using the joystick.The screen will change to “CONFIRM DISPLAY
OFF YES or NO”.
If YES key is selected using the joystick, the
screen will turn off after a 2 beep sound and
approximately 1 second.
To turn on the screen, push the“SETTING”, trip
control, air conditioner (except rear window de-
fogger button) or audio button.
Language
The language can be changed to “English” or
“Français” using the joystick.
Beep set
If the beep set “OFF” key is selected using the
joystick, the beep sound will not operate (except
some caution beep sounds) .
Service alert
If the service alert “ON” key is selected, the
information will be displayed when the engine oil
and the tire rotation periods reach the preset
driving distance.
Personalized settings menu
You can set the following electronic systems
operating conditions using the joystick.Slide back DR (driver’s) seat on exit:
The driver’s seat automatically moves back and
returns to the original position for exceptional
ease of exit and entry.
Remote unlock door logic:
This option allows you to select which doors will
unlock first during an unlocking operation:
Only the driver’s doorÃ!All the doors
Horn chirp with remote:
This option allows you to select the horn chirp
mode that occurs when the LOCK or UNLOCK
button on the keyfob is pressed.
NOTE:
If you change the horn beep or the lamp
flash feature with the keyfob, the display
screen will not show the current mode. Use
the keyfob to return to the previous mode
and re-enable the display screen control.
Lamps flash with remote:
This option allows you to select the hazard indi-
cator flash mode that occurs when the LOCK or
UNLOCK button on the keyfob is pressed.
4-6Display screen, heater, air conditioner and audio systems
ZREVIEW COPYÐ2006 Quest(van)
Owners ManualÐUSA_English(nna)
05/27/05Ðtbrooks
X