2006 NISSAN QUEST CD player
[x] Cancel search: CD playerPage 215 of 352
CAUTION
cThe glass screen on the liquid crystal
display may break if hit with a hard or
sharp object. If the glass breaks, do not
touch the liquid crystalline material,
which contains a small amount of mer-
cury. In case of contact with skin, wash
immediately with soap and water.
cUse a damp, soft cloth when cleaning
the DVD Entertainment System compo-
nents. Do not use solvents or cleaning
solutions.
cDo not attempt to use the system in
extreme temperature conditions [below
-4°F (-20°C) or above 158°F (70°C)].
cTo avoid draining the vehicle battery, do
not operate the system more than 15
minutes without starting the engine.
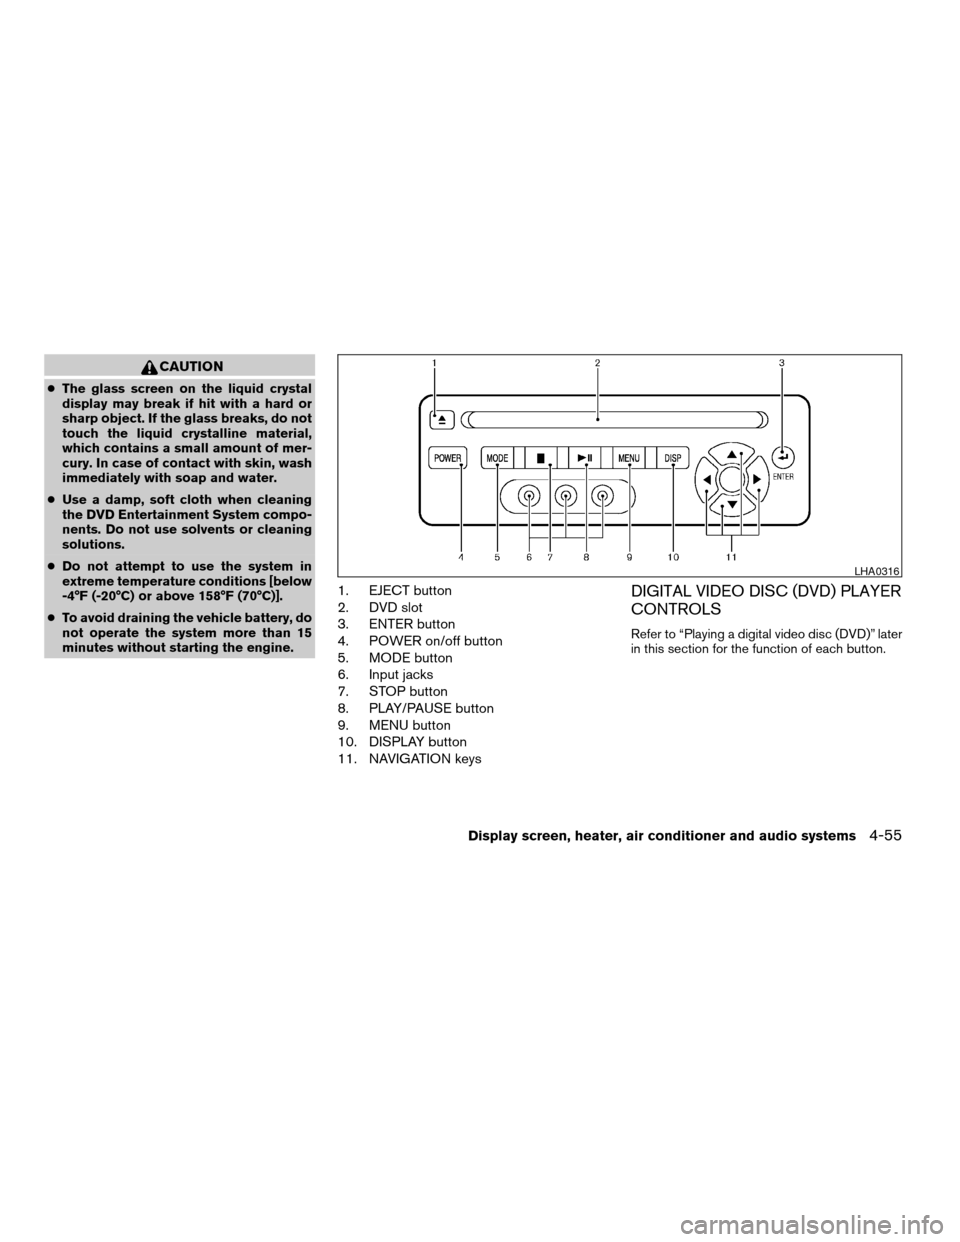
1. EJECT button
2. DVD slot
3. ENTER button
4. POWER on/off button
5. MODE button
6. Input jacks
7. STOP button
8. PLAY/PAUSE button
9. MENU button
10. DISPLAY button
11. NAVIGATION keysDIGITAL VIDEO DISC (DVD) PLAYER
CONTROLS
Refer to “Playing a digital video disc (DVD)” later
in this section for the function of each button.
LHA0316
Display screen, heater, air conditioner and audio systems4-55
ZREVIEW COPYÐ2006 Quest(van)
Owners ManualÐUSA_English(nna)
05/27/05Ðtbrooks
X
Page 218 of 352
PLAYING A DIGITAL VIDEO DISC
(DVD)
CAUTION
cOnly operate the DVD while the vehicle
engine is running. Operating the DVD
for extended periods of time with the
engine OFF can discharge the vehicle
battery.
cDo not allow the system to get wet.
Excessive moisture such as spilled liq-
uids may cause the system to
malfunction.
cThe driver must not attempt to wear the
headphones while the vehicle is in mo-
tion so that full attention may be given
to vehicle operation.
cWhile playing video CD media, this DVD
player does not guarantee complete
functionality of all video CD formats.
With the DVD player, you can hear DVD videos,
video CDs and CDs using headphones. Passen-
gers in the rear seat can enjoy the sound inde-
pendently of the front seat.
Press the REAR AV button located on the front
controls for more than 1.5 seconds to hear the
sound of the DVD player through the speakers.Pushing the
button on the front controls
turns the rear speakers on and off.
It is possible to operate the DVD player by remote
control.
Headphones are a wireless type and no cables
are necessary. You can use them in almost all the
ranges in the rear seat. (It is not possible to use
the headphones in the front seat.)
POWER on/off button:
With the ignition switch turned to the ACC or ON
position, push the POWER button to turn the
DVD player on or off.
Insert the DVD into the slot with the label side
facing up. The DVD will be guided automatically
into the slot.
If the DVD player is off and a DVD is inserted, the
DVD player will automatically turn on.
CAUTION
Do not force the compact disc into the
slot. This could damage the player.
MODE select button:
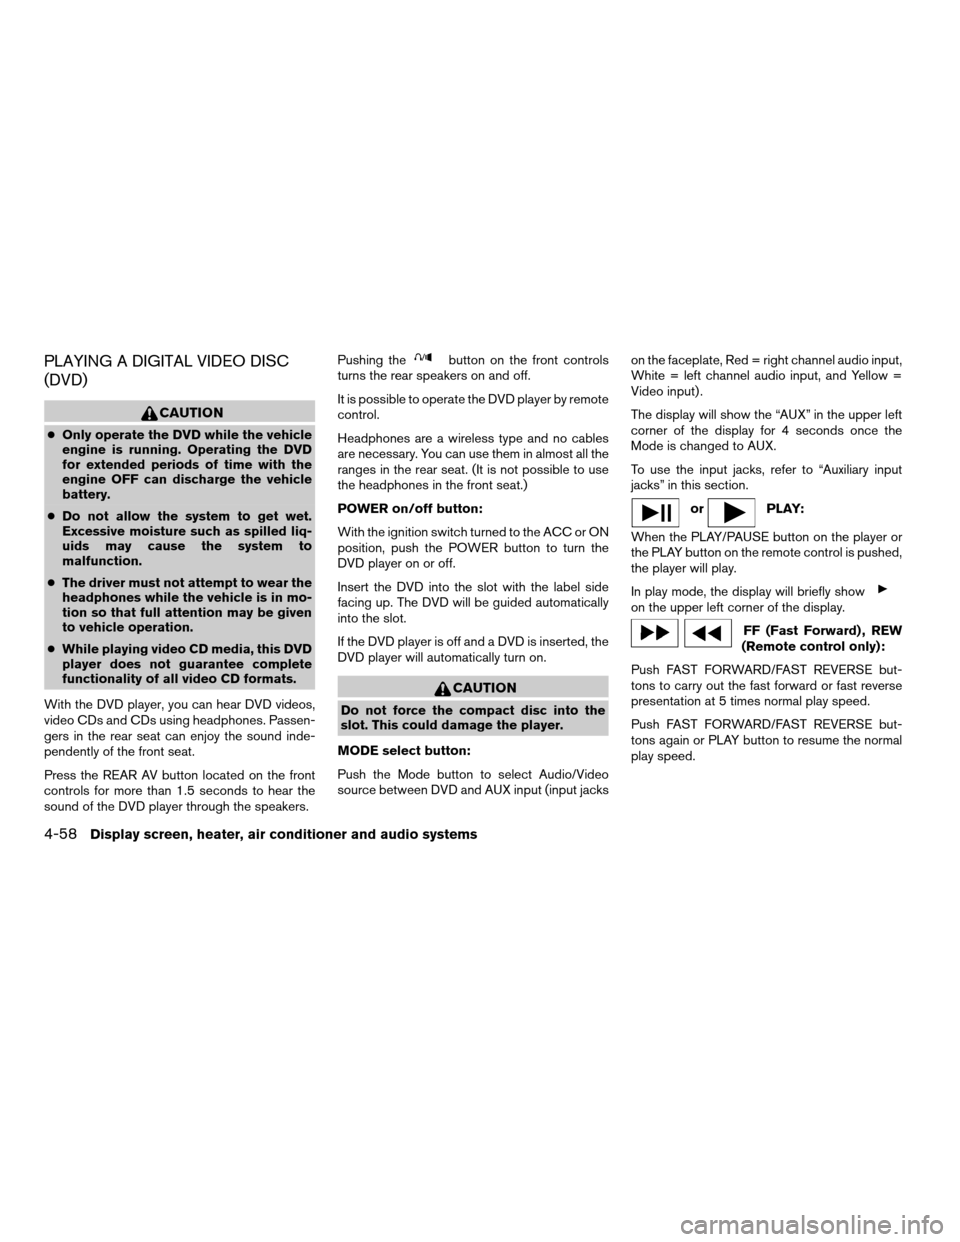
Push the Mode button to select Audio/Video
source between DVD and AUX input (input jackson the faceplate, Red = right channel audio input,
White = left channel audio input, and Yellow =
Video input) .
The display will show the “AUX” in the upper left
corner of the display for 4 seconds once the
Mode is changed to AUX.
To use the input jacks, refer to “Auxiliary input
jacks” in this section.
orPLAY:
When the PLAY/PAUSE button on the player or
the PLAY button on the remote control is pushed,
the player will play.
In play mode, the display will briefly show
on the upper left corner of the display.
FF (Fast Forward) , REW
(Remote control only):
Push FAST FORWARD/FAST REVERSE but-
tons to carry out the fast forward or fast reverse
presentation at 5 times normal play speed.
Push FAST FORWARD/FAST REVERSE but-
tons again or PLAY button to resume the normal
play speed.
4-58Display screen, heater, air conditioner and audio systems
ZREVIEW COPYÐ2006 Quest(van)
Owners ManualÐUSA_English(nna)
05/27/05Ðtbrooks
X
Page 219 of 352

NEXT CHAPTER/
PREVIOUS CHAPTER
(Remote control only):
When the
(NEXT CHAPTER) button is
pushed while the DVD is being played, the pro-
gram next to the present one will start to play from
its beginning. Push several times to skip through
programs. The DVD will advance the number of
times the button is pushed. When
the
(PREVIOUS CHAPTER) button is
pushed, the program being played returns to its
beginning. Push several times to skip back
through programs. The DVD will go back the
number of times the button is pushed.
orPAUSE:
When the PLAY/PAUSE button on the player or
the PAUSE button on the remote control is
pushed, the player will pause playing of the me-
dia. In pause mode, the player will show
on
the upper left corner of the display until the player
is changed to another mode.
STOP:
Push the STOP button once to stop playing the
media. The display will show
in the upper
left corner of the display for 4 seconds, and the
last disc position will be stored. When the PLAY
button is pushed again, it will resume at the
stored disc track and time position.If the STOP button is pushed again when the
player is already in Stop mode, it will reinitialize
the pointer to the beginning of the disc. In effect it
will ignore the last stored disc position and upon
receipt of the next play message it will begin at
the Title Menu, or at “the beginning of the disc”.
EJECT:
When the EJECT button is pushed with the DVD
loaded, it will be ejected.
The display will show the EJECT symbol
in
the upper left corner of the display for 4 seconds
once the EJECT button is pushed.
If the DVD is not loaded, the display will show
“NO DISC”.
If the DVD comes out and is not removed within
25 seconds, it will be pulled back into the slot to
protect it.
DISPLAY:
If the DISPLAY control is pushed for less than 2
seconds, the display menu will appear on the
screen.
cThe display menu will remain on the screen
for 10 seconds if no subsequent control
activations occur.cUse NAVIGATION KEYS to navigate within
the display menu, and use ENTER to select
the item.
cHolding the DISPLAY control on the face-
plate for longer than approximately 2 sec-
onds while in the display menu will reset the
display characteristics to their nominal val-
ues. (Faceplate feature only)
If the DISPLAY control button on the faceplate is
pushed for more than 2 seconds, the media
track/time information will be displayed along the
bottom of the display. Pushing the DISPLAY con-
trol for more than 2 seconds will remove the
media track/time information from the display.
(Faceplate feature only)
NAVIGATION KEYS:
If media is in PLAY mode, activation of the NAVI-
GATION KEYS (Up, Down, Left, and Right) will
perform the following functions: next
chapter/track, previous chapter/track, fast re-
verse and fast forward, and the display will
show
,,andrespec-
tively in the upper left corner of the display for 4
seconds. (Faceplate feature only)
If media is in PAUSE mode, activation of the
NAVIGATION KEYS (Up, Down and Right) will
perform the following functions: next
chapter/track, previous chapter/track and slow
Display screen, heater, air conditioner and audio systems4-59
ZREVIEW COPYÐ2006 Quest(van)
Owners ManualÐUSA_English(nna)
05/27/05Ðtbrooks
X
Page 221 of 352
Auxiliary input jacks
The auxiliary input jacks are located on the control
panel. Compatible devices such as video games
camcorders and portable video players can be
connected to the auxiliary jacks.
The auxiliary jacks are color coded for identifica-
tion purposes.
cYellow - video input
cWhite - left channel audio input
cRed - right channel audio input
CARE AND MAINTENANCE
Use a lightly dampened, lint free cloth to clean the
surfaces of your DVD Entertainment System.
(DVD player face, screen, remote control, etc.)
CAUTION
cDo not use any solvents or cleaning
solutions when cleaning the video
system.
cDo not use excessive force on the moni-
tor screen.
cAvoid touching or scratching the moni-
tor screen as it may become dirty or
damaged.cDo not attempt to use the system in
extreme temperature conditions [below
-4°F (-20°C) or above 158°F (70°C)].
cDo not attempt to operate the system in
extreme humidity conditions (less than
10% or more than 75%) .
HOW TO HANDLE THE DVD
CAUTION
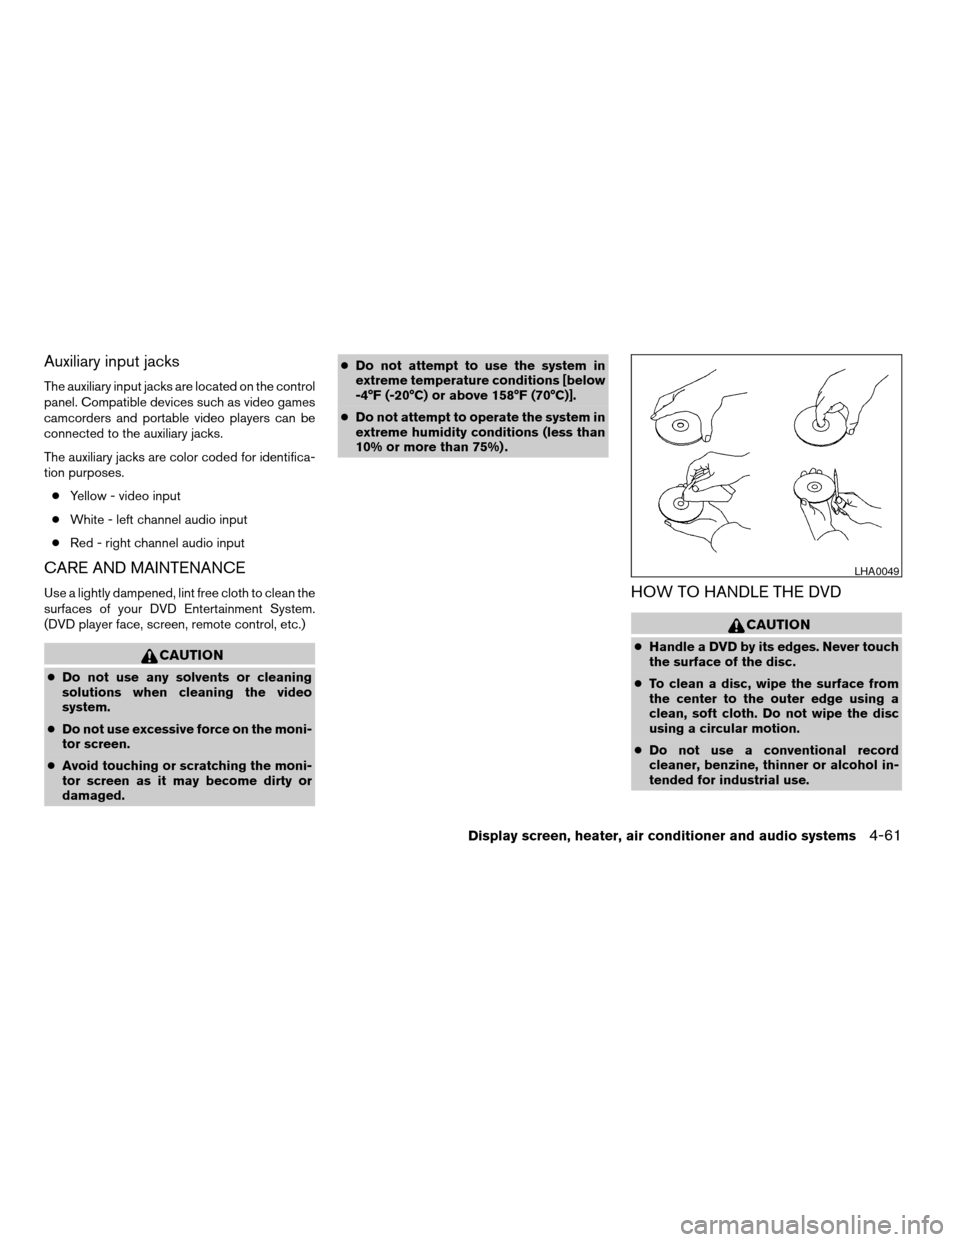
cHandle a DVD by its edges. Never touch
the surface of the disc.
cTo clean a disc, wipe the surface from
the center to the outer edge using a
clean, soft cloth. Do not wipe the disc
using a circular motion.
cDo not use a conventional record
cleaner, benzine, thinner or alcohol in-
tended for industrial use.
LHA0049
Display screen, heater, air conditioner and audio systems4-61
ZREVIEW COPYÐ2006 Quest(van)
Owners ManualÐUSA_English(nna)
05/27/05Ðtbrooks
X
Page 222 of 352
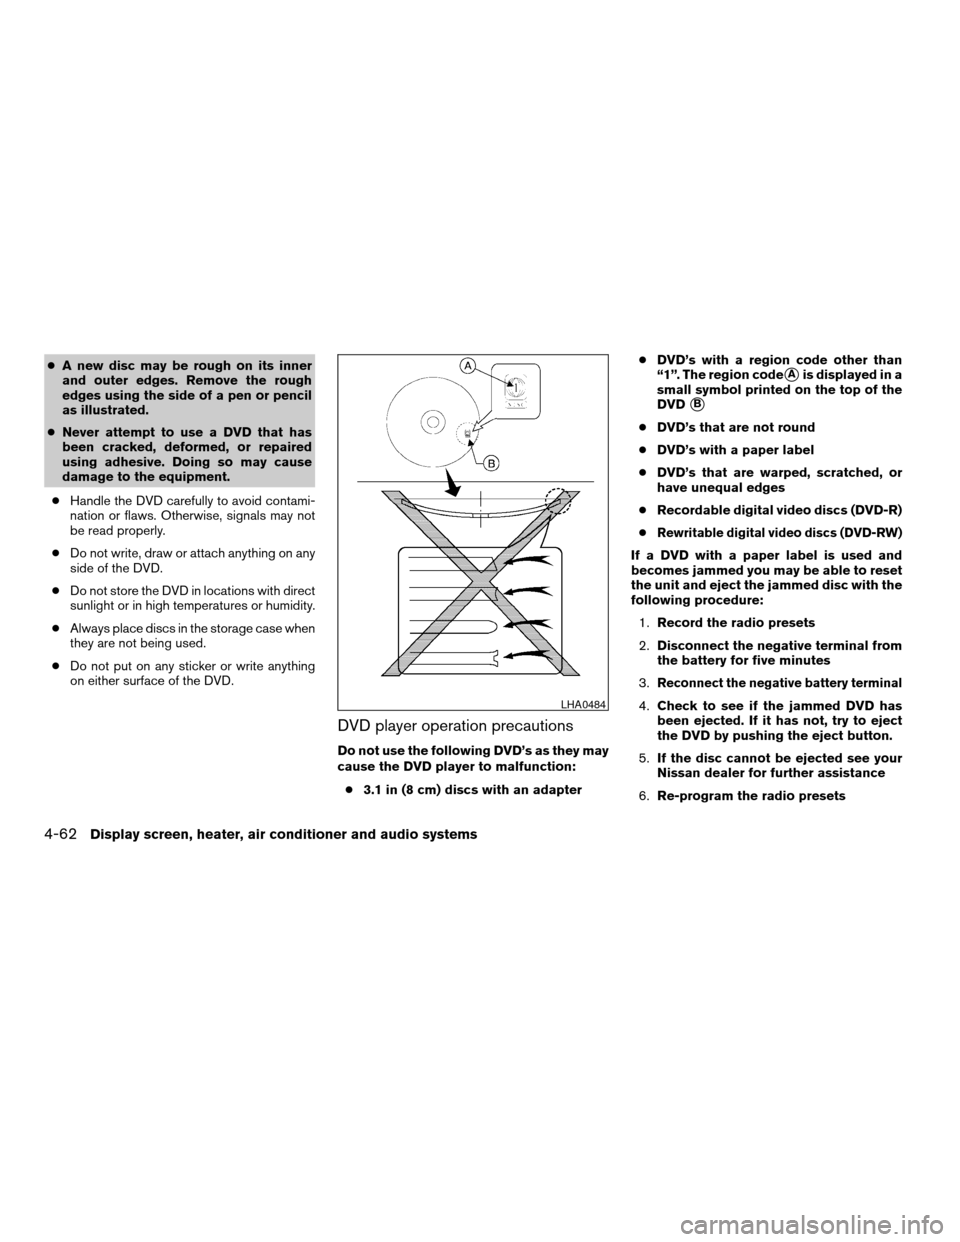
cA new disc may be rough on its inner
and outer edges. Remove the rough
edges using the side of a pen or pencil
as illustrated.
cNever attempt to use a DVD that has
been cracked, deformed, or repaired
using adhesive. Doing so may cause
damage to the equipment.
cHandle the DVD carefully to avoid contami-
nation or flaws. Otherwise, signals may not
be read properly.
cDo not write, draw or attach anything on any
side of the DVD.
cDo not store the DVD in locations with direct
sunlight or in high temperatures or humidity.
cAlways place discs in the storage case when
they are not being used.
cDo not put on any sticker or write anything
on either surface of the DVD.
DVD player operation precautions
Do not use the following DVD’s as they may
cause the DVD player to malfunction:
c3.1 in (8 cm) discs with an adaptercDVD’s with a region code other than
“1”. The region code
sAis displayed in a
small symbol printed on the top of the
DVD
sB
cDVD’s that are not round
cDVD’s with a paper label
cDVD’s that are warped, scratched, or
have unequal edges
cRecordable digital video discs (DVD-R)
c
Rewritable digital video discs (DVD-RW)
If a DVD with a paper label is used and
becomes jammed you may be able to reset
the unit and eject the jammed disc with the
following procedure:
1.Record the radio presets
2.Disconnect the negative terminal from
the battery for five minutes
3.
Reconnect the negative battery terminal
4.Check to see if the jammed DVD has
been ejected. If it has not, try to eject
the DVD by pushing the eject button.
5.If the disc cannot be ejected see your
Nissan dealer for further assistance
6.Re-program the radio presetsLHA0484
4-62Display screen, heater, air conditioner and audio systems
ZREVIEW COPYÐ2006 Quest(van)
Owners ManualÐUSA_English(nna)
05/27/05Ðtbrooks
X
Page 223 of 352

Remote control and headphones
battery replacement
Replace the battery as follows:
1. Open the lid.
2. Replace batteries with new ones.
cSize AA (remote control)
cSize AAA (headphones)
Make sure that the
andends on
the batteries match the markings inside the
compartment.
3. Close the lid securely.If the battery is removed for any reason
other than replacement close the lid se-
curely.
cIf you will not be using the remote control for
long periods of time, remove the batteries.
cReplacement of the batteries is needed
when the remote control only functions at
extremely close distances to the DVD player
or not at all.
cBe careful not to touch the battery terminal.
cAn improperly disposed battery can harm
the environment. Always confirm local regu-
lations for battery disposal.cWhen changing batteries, do not let dust or
oil get on the remote control and head-
phones.
FCC Notice:
Changes or modifications not expressly ap-
proved by the party responsible for compli-
ance could void the user’s authority to op-
erate the equipment. This device complies
with Part 15 of the FCC Rules and RSS-210
of Industry Canada. Operation is subject to
the following two conditions: (1) This de-
vice may not cause harmful interference,
and (2) this device must accept any inter-
ference received, including interference
that may cause undesired operation of the
device.
LHA0318SAA0723
Display screen, heater, air conditioner and audio systems4-63
ZREVIEW COPYÐ2006 Quest(van)
Owners ManualÐUSA_English(nna)
05/27/05Ðtbrooks
X
Page 339 of 352
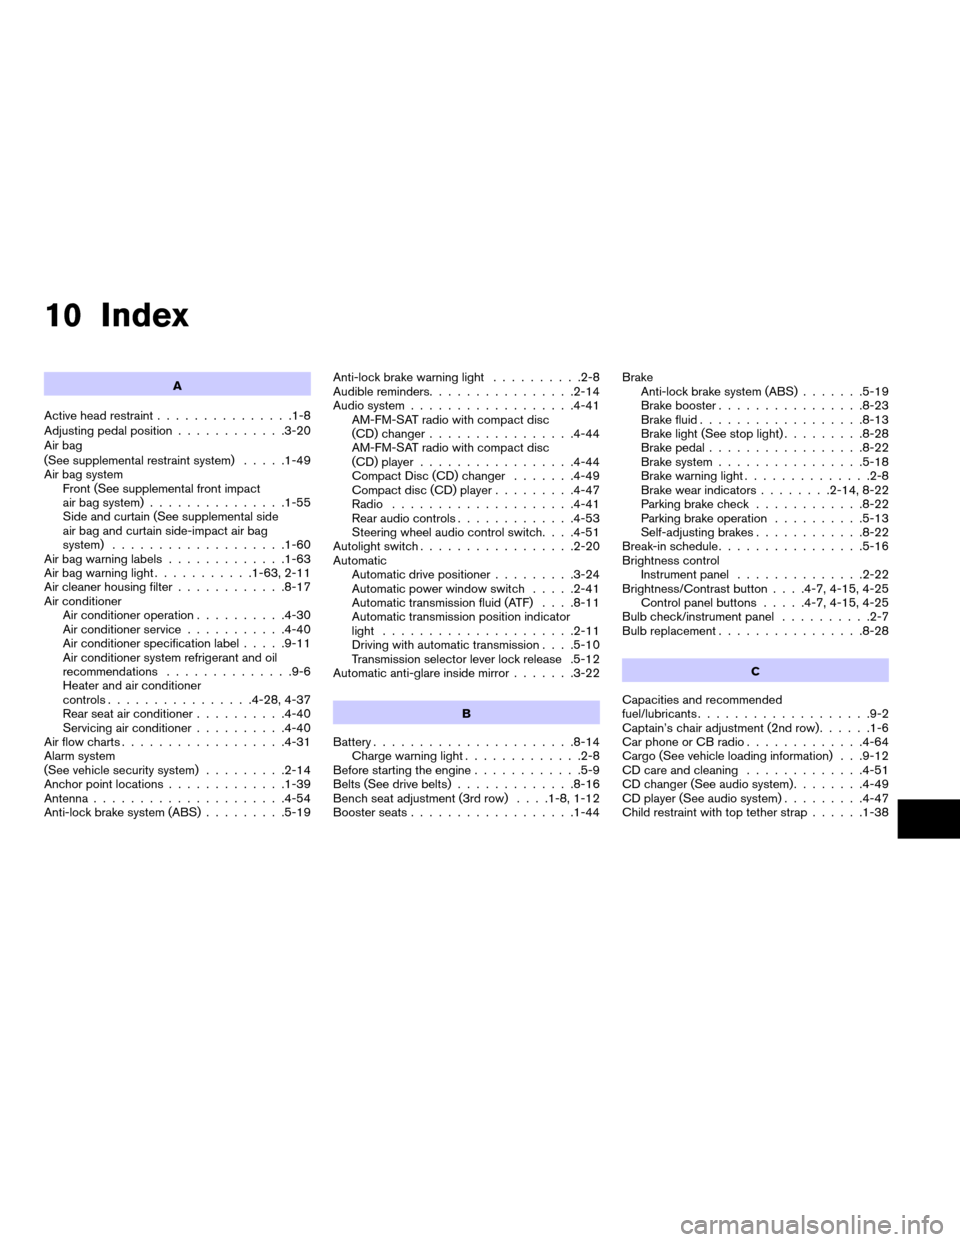
10 Index
A
Active head restraint...............1-8
Adjusting pedal position............3-20
Air bag
(See supplemental restraint system).....1-49
Air bag system
Front (See supplemental front impact
air bag system)...............1-55
Side and curtain (See supplemental side
air bag and curtain side-impact air bag
system)...................1-60
Air bag warning labels.............1-63
Air bag warning light...........1-63, 2-11
Air cleaner housing filter............8-17
Air conditioner
Air conditioner operation..........4-30
Air conditioner service...........4-40
Air conditioner specification label.....9-11
Air conditioner system refrigerant and oil
recommendations..............9-6
Heater and air conditioner
controls................4-28, 4-37
Rear seat air conditioner..........4-40
Servicing air conditioner..........4-40
Air flow charts..................4-31
Alarm system
(See vehicle security system).........2-14
Anchor point locations.............1-39
Antenna.....................4-54
Anti-lock brake system (ABS).........5-19Anti-lock brake warning light..........2-8
Audible reminders................2-14
Audio system..................4-41
AM-FM-SAT radio with compact disc
(CD) changer................4-44
AM-FM-SAT radio with compact disc
(CD) player.................4-44
Compact Disc (CD) changer.......4-49
Compact disc (CD) player.........4-47
Radio....................4-41
Rear audio controls.............4-53
Steering wheel audio control switch. . . .4-51
Autolight switch.................2-20
Automatic
Automatic drive positioner.........3-24
Automatic power window switch.....2-41
Automatic transmission fluid (ATF). . . .8-11
Automatic transmission position indicator
light.....................2-11
Driving with automatic transmission. . . .5-10
Transmission selector lever lock release .5-12
Automatic anti-glare inside mirror.......3-22
B
Battery......................8-14
Charge warning light.............2-8
Before starting the engine............5-9
Belts (See drive belts).............8-16
Bench seat adjustment (3rd row). . . .1-8, 1-12
Booster seats..................1-44Brake
Anti-lock brake system (ABS).......5-19
Brake booster................8-23
Brake fluid..................8-13
Brake light (See stop light).........8-28
Brake pedal.................8-22
Brake system................5-18
Brake warning light..............2-8
Brake wear indicators........2-14, 8-22
Parking brake check............8-22
Parking brake operation..........5-13
Self-adjusting brakes............8-22
Break-in schedule................5-16
Brightness control
Instrument panel..............2-22
Brightness/Contrast button. . . .4-7, 4-15, 4-25
Control panel buttons.....4-7, 4-15, 4-25
Bulb check/instrument panel..........2-7
Bulb replacement................8-28
C
Capacities and recommended
fuel/lubricants...................9-2
Captain’s chair adjustment (2nd row)......1-6
Car phone or CB radio.............4-64
Cargo (See vehicle loading information) . . .9-12
CD care and cleaning.............4-51
CD changer (See audio system)........4-49
CD player (See audio system).........4-47
Child restraint with top tether strap......1-38
ZREVIEW COPYÐ2006 Quest(van)
Owners ManualÐUSA_English(nna)
05/27/05Ðtbrooks
X
Page 340 of 352

Child restraints.......1-17, 1-18, 1-25, 1-37
Precautions on child restraints . . .1-25, 1-44
Top tether strap anchor point locations . .1-39
Child safety sliding door lock..........3-9
Chimes, audible reminders...........2-14
Cleaning exterior and interior..........7-2
Clock
(models with navigation system) . .4-14, 4-23
(models without navigation system).....4-4
Clock set
Control panel buttons.....4-4, 4-14, 4-23
C.M.V.S.S. certification label..........9-10
Cold weather driving..............5-23
Compact disc (CD) player...........4-47
Control panel buttons
With navigation system........4-8, 4-16
Without navigation system..........4-2
Controls
Audio controls (steering wheel)......4-51
Heater and air conditioner
controls................4-28, 4-37
Rear audio controls.............4-53
Rear seat air conditioner..........4-40
Coolant
Capacities and recommended
fuel/lubricants.................9-2
Changing engine coolant..........8-8
Checking engine coolant level........8-7
Engine coolant temperature gauge.....2-5
Cornering light.................2-23
Corrosion protection...............7-5
Cruise control..................5-14
Cup holders...............2-34, 2-36
Curtain side-impact air bag system
(See supplemental side air bag and curtain
side-impact air bag system)..........1-60D
Daytime running light system
(Canada only)..................2-21
Defroster switch
Rear window and outside mirror defroster
switch....................2-18
Digital video disc DVD.............4-54
Dimensions and weights.............9-8
Display controls
(see control panel buttons).....4-2, 4-8, 4-16
Door locks....................3-3
Door open warning light.............2-8
Drive belts....................8-16
Drive positioner, Automatic...........3-24
Driving
Cold weather driving............5-23
Driving with automatic transmission. . . .5-10
Precautions when starting and driving . . .5-2
DVD entertainment system...........4-54
E
Economy - fuel.................5-16
Emission control information label.......9-10
Emission control system warranty.......9-20
Engine
Before starting the engine..........5-9
Capacities and recommended
fuel/lubricants.................9-2
Changing engine coolant..........8-8
Changing engine oil.............8-9
Changing engine oil filter..........8-10
Checking engine coolant level........8-7Checking engine oil level..........8-8
Engine compartment check locations. . . .8-7
Engine coolant temperature gauge.....2-5
Engine cooling system............8-7
Engine oil...................8-8
Engine oil and oil filter recommendation . .9-5
Engine oil pressure warning light......2-8
Engine oil viscosity..............9-5
Engine serial number............9-10
Engine specifications.............9-7
Starting the engine..............5-9
English/Metric button.......4-4, 4-14, 4-23
Control panel buttons.....4-4, 4-14, 4-23
ENTER button.........4-2, 4-3, 4-8, 4-16
Enter button
Control panel buttons . . .4-2, 4-3, 4-8, 4-16
Event data recorders..............9-22
Exhaust gas (Carbon monoxide)........5-2
Eyeglass case..................2-31
F
Flashers
(See hazard warning flasher switch)......2-23
Flat tire......................6-2
Floor mat positioning aid.............7-4
Fluid
Automatic transmission fluid (ATF). . . .8-11
Brake fluid..................8-13
Capacities and recommended
fuel/lubricants.................9-2
Engine coolant................8-7
Engine oil...................8-8
Power steering fluid.............8-13
Window washer fluid............8-14
10-2
ZREVIEW COPYÐ2006 Quest(van)
Owners ManualÐUSA_English(nna)
05/27/05Ðtbrooks
X