2006 NISSAN PATHFINDER Gross weight
[x] Cancel search: Gross weightPage 122 of 344

ROOF RACK
Always distribute the luggage evenly on the roof
rack. Do not load more than 220 pounds (100
kg) . Be careful that your vehicle does not exceed
the Gross Vehicle Weight Rating (GVWR) or its
Gross Axle Weight Rating (GAWR front andrear) . The GVWR and GAWR are located on the
F.M.V.S.S. label (located on the driver’s door
pillar) . For more information regarding GVWR
and GAWR, refer to “Vehicle loading information”
in the “Technical and consumer information” sec-
tion later in this manual.The front and rear cross bars (if so equipped) can
be adjusted or removed.
To adjust:
1. Loosen the 2 TorxThead fasteners
sAon
both ends of the crossbar.
2. Remove the plugs at the desired position
(
sC).
3. Slide the crossbar
sBto the desired position
(
sC) so that the holes in the crossbar line up
with the holes in the sidebar.
4. Tighten the 2 TorxThead fasteners on both
ends of the crossbar.
5. Reinstall the plugs at the previous position
sA.
6. Position your luggage on the crossbars and
secure the luggage with rope.
7. Always check the tightness of the TorxT
head fasteners.
To remove:
1. Loosen the 2 TorxThead fasteners
sAon
both ends of the crossbar.
2. Remove the crossbar from the roof rack.
WIC0914
2-46Instruments and controls
ZREVIEW COPYÐ2006 Pathfinder(pat)
Owners ManualÐUSA_English(nna)
07/29/05Ðcathy
X
Page 296 of 344

If you have a flat tire, see the “In case of
emergency” section of this manual.
TIRE PRESSURE
Tire pressure monitoring system
This vehicle is equipped with the tire pressure
monitoring system. It monitors tire pressure of all
tires except the spare. When the low tire pres-
sure warning light is lit, one or more of your tires is
significantly underinflated.
The tire pressure monitoring system will activate
only when the vehicle is driven at speeds above
16 MPH (26 km/h) . Also, this system may not
detect a sudden drop in tire pressure (for ex-
ample a flat tire while driving) .
For more details, refer to “Low tire pressure warn-
ing light” in the “Instruments and controls” sec-
tion, ”Tire pressure information” in the “Display
screen, heater, air conditioner and audio sys-
tems” section, “Tire pressure monitoring system”
in the “Starting and driving” section, and “Flat
tire” in the “In case of emergency” section.
Tire inflation pressure
Check the tire pressures (including the spare)
often and always prior to long distance trips. The
recommended tire pressure specifications are
shown on the Tire Placard (if so equipped) or the
Tire and Loading Information label (if soequipped) under the9Recommended Cold Tire
Inflation Pressure9heading. This label is affixed to
the driver side center pillar. Tire pressures should
be checked regularly because:
cMost tires naturally lose air over time.
cTires can lose air suddenly when driven over
potholes or other objects or if the vehicle
strikes a curb while parking.
The tire pressures should be checked when the
tires are cold. The tires are considered COLD
after the vehicle has been parked for 3 or more
hours, or driven less than 1 mile (1.6 km) at
moderate speeds.
Incorrect tire pressure, including under in-
flation, may adversely affect tire life and
vehicle handling.
WARNING
cImproperly inflated tires can fail sud-
denly and cause an accident.cThe Gross Maximum Weight rating is
located on the FMVSS label. The ve-
hicle weight capacity is indicated on the
Tire and Loading Information label (if so
equipped) . Do not load your vehicle be-
yond this capacity. Overloading your ve-
hicle may result in reduced tire life, un-
safe operating conditions due to
premature tire failure, or unfavorable
handling characteristics and could also
lead to a serious accident. Loading be-
yond the specified capacity may also
result in failure of other vehicle
components.
cBefore taking a long trip, or whenever
you heavily load your vehicle, use a tire
pressure gauge to ensure that the tire
pressures are at the specified level.
cDo not drive your vehicle over 85 MPH
(137 km/h) unless it is equipped with
high speed rated tires. Driving faster
than 85 MPH (137 km/h) may result in
tire failure, loss of control and possible
injury.
cFor additional information regarding
tires, refer to “Important Tire Safety In-
formation” (US) or “Tire Safety Informa-
tion” (Canada) in the Warranty Informa-
tion Booklet.
WHEELS AND TIRES
8-30Maintenance and do-it-yourself
ZREVIEW COPYÐ2006 Pathfinder(pat)
Owners ManualÐUSA_English(nna)
08/01/05Ðcathy
X
Page 314 of 344

WHEELS AND TIRES
Wheels
16 x 7.0J
17 x 7.5J
Tires
P245/75R16
P265/70R16
P265/75R16
P265/65R17
Spare tire Full size
DIMENSIONS AND WEIGHTS
Overall length in (mm) 187.6(4765)
Overall width in (mm) 72.8(1849)
Overall height
2WD XE/SE with roof rack in (mm) 72.4(1838)
2WD SE-OR with roof rack in (mm) 72.9(1851)
2WD LE with roof rack in (mm) 72.5(1841)
4WD XE/SE with roof rack in (mm) 72.8(1849)
4WD SE-OR with roof rack in (mm) 73.3(1861)
4WD LE with roof rack in (mm) 72.9(1851)
2WD XE/SE without roof rack in (mm) 69.1(1755)
2WD SE-OR without roof rack in (mm) 69.7(1770)
2WD LE without roof rack in (mm) 69.2(1757)
4WD XE/SE without roof rack in (mm) 69.6(1767)
4WD SE-OR without roof rack in (mm) 70.1(1780)
4WD LE without roof rack in (mm) 69.7(1770)
Front tread in (mm) 61.8(1569)
Rear tread in (mm) 61.8(1569)
Wheelbase in (mm) 112.2(2850)
Gross vehicle weight rating
lb (kg)See the “F.M.V.S.S.
certification label”
on the center pillar
between the driv-
er’s side front and
side doors. Gross axle weight rating
Front lb (kg)
Rear lb (kg)
9-8Technical and consumer information
ZREVIEW COPYÐ2006 Pathfinder(pat)
Owners ManualÐUSA_English(nna)
08/01/05Ðcathy
X
Page 316 of 344

ENGINE SERIAL NUMBER
The number is stamped on the engine as shown.
F.M.V.S.S./C.M.V.S.S.
CERTIFICATION LABEL
The Federal/Canadian Motor Vehicle Safety
Standard (F.M.V.S.S./C.M.V.S.S.) certification la-
bel is affixed as shown. This label contains valu-
able vehicle information, such as: Gross Vehicle
Weight Ratings (GVWR) , Gross Axle Weight
Rating (GAWR) , month and year of manufacture,
Vehicle Identification Number (VIN) , etc. Review
it carefully.
EMISSION CONTROL
INFORMATION LABEL
The emission control information label is at-
tached as shown.
LTI0127WTI0099LTI0087
9-10Technical and consumer information
ZREVIEW COPYÐ2006 Pathfinder(pat)
Owners ManualÐUSA_English(nna)
08/01/05Ðcathy
X
Page 318 of 344

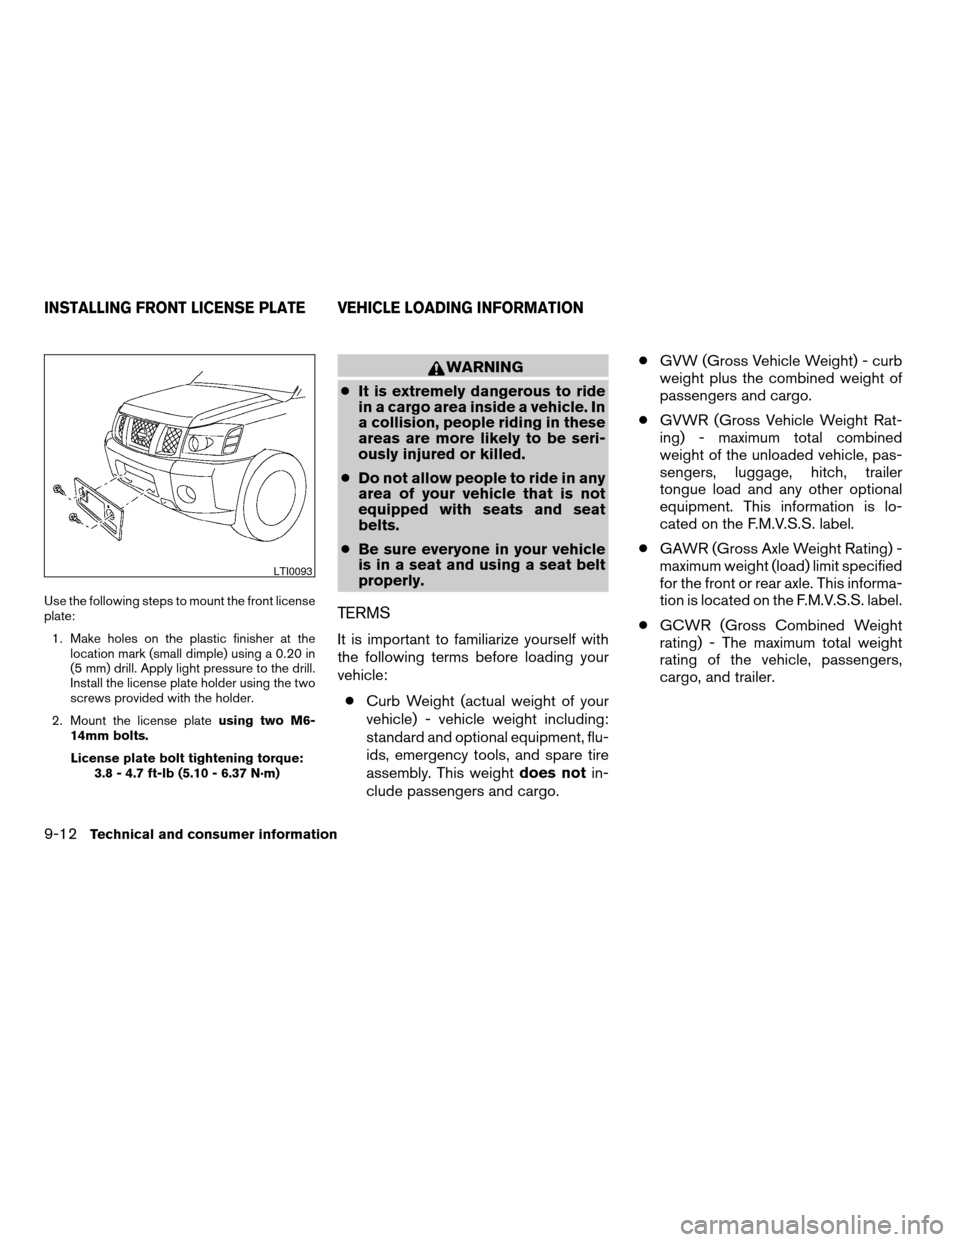
Use the following steps to mount the front license
plate:
1. Make holes on the plastic finisher at the
location mark (small dimple) using a 0.20 in
(5 mm) drill. Apply light pressure to the drill.
Install the license plate holder using the two
screws provided with the holder.
2. Mount the license plateusing two M6-
14mm bolts.
License plate bolt tightening torque:
3.8 - 4.7 ft-lb (5.10 - 6.37 N·m)
WARNING
cIt is extremely dangerous to ride
in a cargo area inside a vehicle. In
a collision, people riding in these
areas are more likely to be seri-
ously injured or killed.
cDo not allow people to ride in any
area of your vehicle that is not
equipped with seats and seat
belts.
cBe sure everyone in your vehicle
is in a seat and using a seat belt
properly.
TERMS
It is important to familiarize yourself with
the following terms before loading your
vehicle:
cCurb Weight (actual weight of your
vehicle) - vehicle weight including:
standard and optional equipment, flu-
ids, emergency tools, and spare tire
assembly. This weightdoes notin-
clude passengers and cargo.cGVW (Gross Vehicle Weight) - curb
weight plus the combined weight of
passengers and cargo.
cGVWR (Gross Vehicle Weight Rat-
ing) - maximum total combined
weight of the unloaded vehicle, pas-
sengers, luggage, hitch, trailer
tongue load and any other optional
equipment. This information is lo-
cated on the F.M.V.S.S. label.
cGAWR (Gross Axle Weight Rating) -
maximum weight (load) limit specified
for the front or rear axle. This informa-
tion is located on the F.M.V.S.S. label.
cGCWR (Gross Combined Weight
rating) - The maximum total weight
rating of the vehicle, passengers,
cargo, and trailer.
LTI0093
INSTALLING FRONT LICENSE PLATE VEHICLE LOADING INFORMATION
9-12Technical and consumer information
ZREVIEW COPYÐ2006 Pathfinder(pat)
Owners ManualÐUSA_English(nna)
08/01/05Ðcathy
X
Page 319 of 344

cVehicle Capacity Weight, Load limit,
Total load capacity - maximum total
weight limit specified of the load
(passengers and cargo) for the ve-
hicle. This is the maximum combined
weight of occupants and cargo that
can be loaded into the vehicle. If the
vehicle is used to tow a trailer, the
trailer tongue weight must be in-
cluded as part of the cargo load. This
information is located on the Tire and
Loading Information label (if so
equipped) .
cCargo capacity - permissible weight
of cargo, the subtracted weight of
occupants from the load limit.
VEHICLE LOAD CAPACITY
Before driving a loaded vehicle, confirm
that you do not exceed the Gross Vehicle
Weight Rating (GVWR) or the Gross Axle
Weight Rating (GAWR) for your vehicle.
Both the GVWR and GAWR are located
on the FMVSS label. See9Measurement
of Weights9later in this section.Do not exceed the load limit of your ve-
hicle shown as9The combined weight of
occupants and cargo9on the Tire and
Loading Information label (if so
equipped) . Do not exceed the number of
occupants shown as9Seating Capacity9
on Tire and Loading Information label (if
so equipped) .
To get9the combined weight of occu-
pants and cargo9, add the weight of all
occupants, then add the total luggage
weight. Examples are shown below.
Technical and consumer information9-13
ZREVIEW COPYÐ2006 Pathfinder(pat)
Owners ManualÐUSA_English(nna)
08/01/05Ðcathy
X
Page 321 of 344

5. Determine the combined weight of
luggage and cargo being loaded on
the vehicle. That weight may not
safely exceed the available cargo and
luggage load capacity calculated in
Step 4.
6. If your vehicle will be towing a trailer,
load from your trailer will be trans-
ferred to your vehicle. Consult this
manual to determine how this re-
duces the available cargo and lug-
gage load capacity of your vehicle.
Before driving a loaded vehicle, confirm
the you do not exceed the Gross Vehicle
Weight Rating (GVWR) or the Gross Axle
Weight Rating (GAWR) for your vehicle.
See “Measurement of Weights” later in
this section.
Also check tires for proper inflation pres-
sures. See the Tire and Loading label.
SECURING THE LOAD
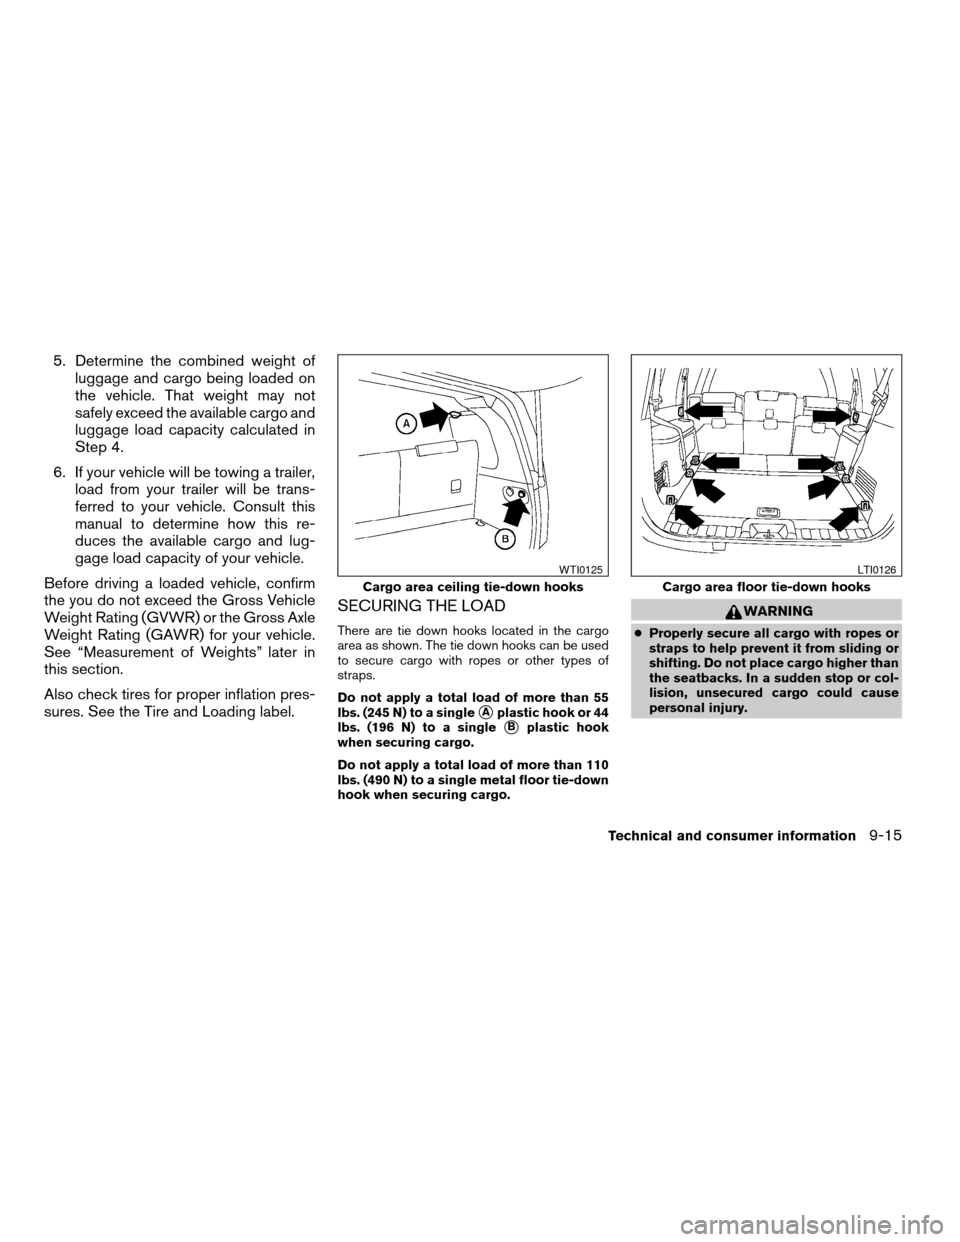
There are tie down hooks located in the cargo
area as shown. The tie down hooks can be used
to secure cargo with ropes or other types of
straps.
Do not apply a total load of more than 55
lbs. (245 N) to a single
sAplastic hook or 44
lbs. (196 N) to a single
sBplastic hook
when securing cargo.
Do not apply a total load of more than 110
lbs. (490 N) to a single metal floor tie-down
hook when securing cargo.
WARNING
cProperly secure all cargo with ropes or
straps to help prevent it from sliding or
shifting. Do not place cargo higher than
the seatbacks. In a sudden stop or col-
lision, unsecured cargo could cause
personal injury.
Cargo area ceiling tie-down hooks
WTI0125
Cargo area floor tie-down hooks
LTI0126
Technical and consumer information9-15
ZREVIEW COPYÐ2006 Pathfinder(pat)
Owners ManualÐUSA_English(nna)
08/01/05Ðcathy
X
Page 322 of 344

cDo not load your vehicle any heavier
than the GVWR or the maximum front
and rear GAWRs. If you do, parts of your
vehicle can break, tire damage could
occur, or it can change the way your
vehicle handles. This could result in
loss of control and cause personal
injury.
LOADING TIPS
cThe GVW must not exceed GVWR
or GAWR as specified on the F.M-
.V.S.S. certification label.
cDo not load the front and rear axle to
the GAWR. Doing so will exceed the
GVWR.
WARNING
cProperly secure all cargo with
ropes or straps to help prevent it
from sliding or shifting. Do not
place cargo higher than the seat-
backs. In a sudden stop or colli-
sion, unsecured cargo could
cause personal injury.cDo not load your vehicle any
heavier than the GVWR or the
maximum front and rear GAWRs.
If you do, parts of your vehicle
can break, tire damage could oc-
cur, or it can change the way your
vehicle handles. This could result
in loss of control and cause per-
sonal injury.
cOverloading not only can shorten
the life of your vehicle and the
tire, but can also cause unsafe
vehicle handling and longer brak-
ing distances. This may cause a
premature tire failure which
could result in a serious accident
and personal injury. Failures
caused by overloading are not
covered by the vehicle’s
warranty.
MEASUREMENT OF WEIGHTS
Secure loose items to prevent weight
shifts that could affect the balance of your
vehicle. When the vehicle is loaded, drive
to a scale and weigh the front and the rear
wheels separately to determine axle
loads. Individual axle loads should not ex-
ceed either of the gross axle weight rat-
ings (GAWR) . The total of the axle loads
should not exceed the gross vehicle
weight rating (GVWR) . These ratings are
given on the vehicle certification label. If
weight ratings are exceeded, move or re-
move items to bring all weights below the
ratings.
9-16
Technical and consumer information
ZREVIEW COPYÐ2006 Pathfinder(pat)
Owners ManualÐUSA_English(nna)
08/01/05Ðcathy
X