2006 NISSAN PATHFINDER automatic transmission
[x] Cancel search: automatic transmissionPage 232 of 344

4WD
Shift
Switch
PositionWheels
DrivenIndicator Light
Use Conditions 4WD Shift Procedure 4WD
shiftTransfer
4LO posi-
tion
2WDRear
wheels
For driving on dry, paved roads (Economy drive) or
state dynamometer I/M testingMove the 4WD switch.
2WD <—> 4H
4WD shift indicator light will indicate transfer shift position engaged.
IT IS NOT NECESSARY TO SHIFT THE TRANSMISSION SELEC-
TOR LEVER TO THE N POSITION IN THIS OPERATION. PER-
FORM THIS OPERATION WHEN DRIVING STRAIGHT.
4H4 wheels
For driving on rocky, sandy or snow-covered roads
Neutral
*1
May blinkNeutral disengages the automatic transmission
mechanical parking lock, which will allow the ve-
hicle to roll. Do not leave the transfer shift position
in Neutral.*21. Stop the vehicle.
2. Shift the transmission selector to the (N) position with the
brake pedal depressed.
3. Depress and turn the 4WD shift switch to 4LO or 4H with the
brake pedal depressed.
THE TRANSFER CASE DOES NOT ENGAGE BETWEEN 4H AND
4LO (OR 4LO TO 4H) UNLESS YOU HAVE FIRST STOPPED THE
VEHICLE, DEPRESSED THE BRAKE PEDAL AND MOVED THE
TRANSMISSION SELECTOR TO NEUTRAL. *3
4LO4 wheelsIllumi-
natedFor use when maximum power and traction is re-
quired (for example: on steep grades or rocky,
sandy, muddy roads)
*1: Before moving the transmission selector shift lever from neutral, wait until the 4LO indicator light stays on steady. This indicates that the 4WD shift procedure is completed and the transfer gear is correctly set in the
4LO position. If the vehicle is shifted into gear before the indicator is on steady, the transfer gear may grind, not engage correctly or stay in the neutral position.
- If the 4WD warning light illuminates, perform the following procedure to return the transfer case to correct operating condition.
1. Turn off the engine by turning the ignition switch9OFF9.
2. Start the engine.
- Check that the 4WD warning light turns off. If the 4WD light illuminates, have the system checked by a NISSAN dealer.
3. Apply the parking brake, depress the brake pedal and move the transmission selector lever to Neutral position.
4. With the brake pedal depressed, move the 4WD shift switch to desired mode.
- Be sure to wait until the transfer gear change completes before shifting the transmission selector lever from Neutral position.
*2: While changing in and out of 4LO, the ignition key must be ON and the vehicle’s engine must be running for a shift to take place and for the indicator lights (4WD shift and 4LO position indicator) to be operable.
Otherwise, the shift will not take place and no indicator lights will be on or flashing.
*3: Make sure the transfer 4LO position indicator light turns on when you shift the 4WD shift switch to 4LO. The
indicator light (if so equipped) will also turn on when 4LO is selected. See “Vehicle dynamic control
system” later in this section.
5-22Starting and driving
ZREVIEW COPYÐ2006 Pathfinder(pat)
Owners ManualÐUSA_English(nna)
08/01/05Ðcathy
X
Page 233 of 344
The transfer case 4WD shift switch is used to
select either 2WD or 4WD depending on the
driving conditions. There are three types of drive
modes available, 2WD, 4H and 4LO.
The 4WD shift switch electronically controls the
transfer case operation. Rotate the switch to
move between each mode, 2WD, 4H and 4LO.
To change into or out of 4LO, the vehicle
MUST be stationary, shift the transmission
selector to Neutral (N) , and depress the
brake pedal. The switch must be depressed
and turned when changing into or out of
4LO.
WARNING
cWhen parking, apply the parking brake
before stopping the engine and make
sure that the 4WD shift indicator light is
on and the ATP warning light goes off.
Otherwise, the vehicle could unexpect-
edly move even if the automatic trans-
mission is in the P position.cThe 4LO indicator light must stop blink-
ing and remain illuminated or turn off
before shifting the transmission into
gear. If the transmission selector is
shifted from the (N) position to any
other gear when the 4LO indicator light
is blinking, the vehicle may move
unexpectedly.
CAUTION
cNever shift the 4WD shift switch be-
tween 4LO and 4H while driving.
cThe 4H position provides greater trac-
tion. Avoid excessive speed, as it will
cause increased fuel consumption and
higher oil temperatures, and could
damage drivetrain components.
Speeds over 62.5 MPH (100 km/h) in 4H
is not recommended.
cThe 4LO position provides maximum
traction. Avoid raising vehicle speed ex-
cessively, as the maximum speed is ap-
proximately 31 MPH (50 km/h) .
cWhen driving straight, shift the 4WD
shift switch to the 2WD or 4H position.
Do not move the 4WD shift switch when
making a turn or reversing.cDo not shift the 4WD shift switch (be-
tween 2WD and 4H) while driving on
steep downhill grades. Use the engine
brake and low automatic transmission
gears (D1 or D2) for engine braking.
cDo not operate the 4WD shift switch
(between 2WD and 4H) with the rear
wheels spinning.
cDo not drive on dry hard surface roads
in the 4H or 4LO position. Driving on dry
hard surfaces in 4H or 4LO may cause
unnecessary noise and tire wear.
NISSAN recommends driving in the
2WD position under these conditions.
cThe 4WD transfer case may not be
shifted between 4H and 4LO at low am-
bient temperatures and the transfer
4LO position indicator light may blink
even when the 4WD shift switch is
shifted. After driving for a while you can
change the 4WD transfer case between
4H and 4LO.
When driving on rough roads,
cSet the 4WD shift switch to 4H or 4LO.
cDrive carefully according to the road surface
conditions.
Starting and driving5-23
ZREVIEW COPYÐ2006 Pathfinder(pat)
Owners ManualÐUSA_English(nna)
08/01/05Ðcathy
X
Page 235 of 344
CAUTION
cWhen driving straight, shift the 4WD
shift switch to the 2WD, AUTO or 4H
position. Do not move the 4WD shift
switch when making a turn or reversing.
cDo not shift the 4WD shift switch while
driving on steep downhill grades. Use
the engine brake and low automatic
transmission gears (D1 or D2) for en-
gine braking.
cDo not operate the 4WD shift switch
with the rear wheels spinning.
cBefore placing the 4WD shift switch in
the 4H position from 2WD or AUTO,
ensure the vehicle speed is less than
62.5 MPH (100 km/h) . Failure to do so
can damage the 4WD system.
cNever shift the 4WD shift switch be-
tween 4LO and 4H while driving.
cEngine idling speed is high while warm-
ing up the engine. Be especially careful
when starting or driving on slippery sur-
faces with the 4WD shift switch set in
AUTO.
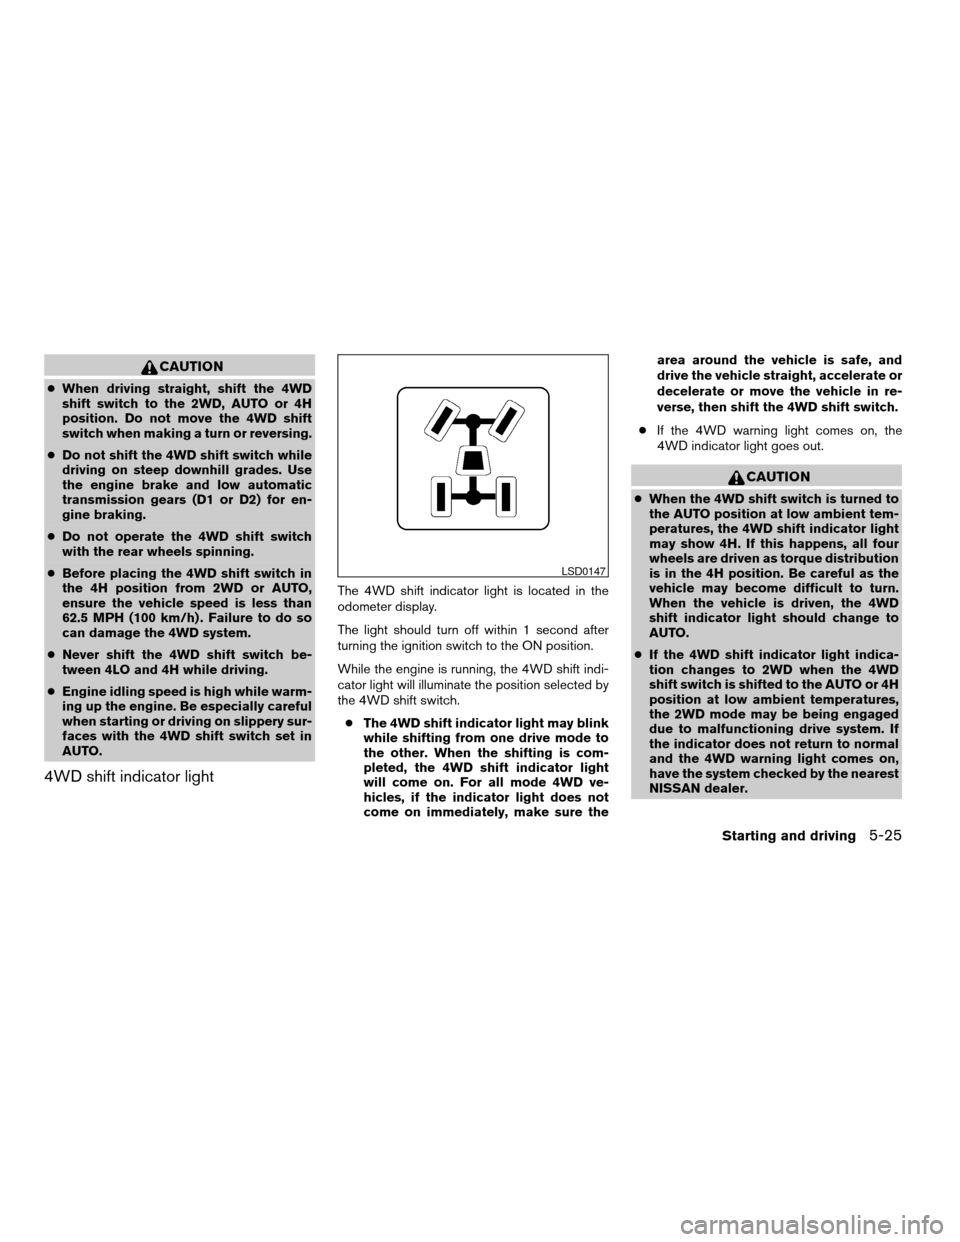
4WD shift indicator light
The 4WD shift indicator light is located in the
odometer display.
The light should turn off within 1 second after
turning the ignition switch to the ON position.
While the engine is running, the 4WD shift indi-
cator light will illuminate the position selected by
the 4WD shift switch.
cThe 4WD shift indicator light may blink
while shifting from one drive mode to
the other. When the shifting is com-
pleted, the 4WD shift indicator light
will come on. For all mode 4WD ve-
hicles, if the indicator light does not
come on immediately, make sure thearea around the vehicle is safe, and
drive the vehicle straight, accelerate or
decelerate or move the vehicle in re-
verse, then shift the 4WD shift switch.
cIf the 4WD warning light comes on, the
4WD indicator light goes out.
CAUTION
cWhen the 4WD shift switch is turned to
the AUTO position at low ambient tem-
peratures, the 4WD shift indicator light
may show 4H. If this happens, all four
wheels are driven as torque distribution
is in the 4H position. Be careful as the
vehicle may become difficult to turn.
When the vehicle is driven, the 4WD
shift indicator light should change to
AUTO.
cIf the 4WD shift indicator light indica-
tion changes to 2WD when the 4WD
shift switch is shifted to the AUTO or 4H
position at low ambient temperatures,
the 2WD mode may be being engaged
due to malfunctioning drive system. If
the indicator does not return to normal
and the 4WD warning light comes on,
have the system checked by the nearest
NISSAN dealer.
LSD0147
Starting and driving5-25
ZREVIEW COPYÐ2006 Pathfinder(pat)
Owners ManualÐUSA_English(nna)
08/01/05Ðcathy
X
Page 249 of 344
WARNING
cIf the low tire pressure warning light
illuminates while driving, avoid sudden
steering maneuvers or abrupt braking,
reduce vehicle speed, pull off the road
to a safe location and stop the vehicle
as soon as possible. Serious vehicle
damage could occur and may lead to an
accident and could result in serious
personal injury. Check the tire pressure
for all four tires. Adjust the tire pressure
to the recommended COLD tire pres-
sure shown on the Tire and Loading
Information label to turn the low tire
pressure warning light OFF. If you have
a flat tire, replace it with a spare tire as
soon as possible.
cWhen a spare tire is mounted or a wheel
is replaced, tire pressure will not be
indicated and the low tire pressure
warning system will not function. Con-
tact your NISSAN dealer as soon as
possible for tire replacement and/or
system resetting.
cDo not inject any tire liquid or aerosol
tire sealant into the tires, as this may
cause a malfunction of the tire pressure
sensors.
CHANGING A FLAT TIRE
If you have a flat tire, follow the instructions be-
low.
Stopping the vehicle
1. Safely move the vehicle off the road and
away from traffic.
2. Turn on the hazard warning flashers.
3. Park on a level surface and apply the parking
brake. Shift the transmission into P (Park) .
4. Turn off the engine.
5. Raise the hood to warn other traffic and to
signal professional road assistance person-
nel that you need assistance.
6. Have all passengers get out of the vehicle
and stand in a safe place, away from traffic
and clear of the vehicle.
WARNING
cMake sure the parking brake is securely
applied and the automatic transmission
is shifted into P (Park) .
cNever change tires when the vehicle is
on a slope, ice or slippery areas. This is
hazardous.cNever change tires if oncoming traffic is
close to your vehicle. Wait for profes-
sional road assistance.
cWhen a spare tire is mounted or a wheel
is replaced, tire pressure will not be
indicated and the low tire pressure
warning system will not function. Con-
tact your NISSAN dealer as soon as
possible for tire replacement and/or
system resetting.
In case of emergency6-3
ZREVIEW COPYÐ2006 Pathfinder(pat)
Owners ManualÐUSA_English(nna)
08/01/05Ðcathy
X
Page 255 of 344
WARNING
Always follow the instructions below.
Failure to do so could result in damage to
the charging system and cause personal
injury.
1. If the booster battery is in another vehicle,
position the two vehicles to bring their bat-
teries near each other.
Do not allow the two vehicles to touch.2. Apply the parking brake. Move the shift lever
to N (Neutral) (manual transmission) or to P
(Park) (automatic transmission) . Switch off
all unnecessary electrical systems (lights,
heater, air conditioner, etc.) .
3. Remove vent caps on the battery (if so
equipped) . Cover the battery with an old
cloth to reduce explosion hazard.
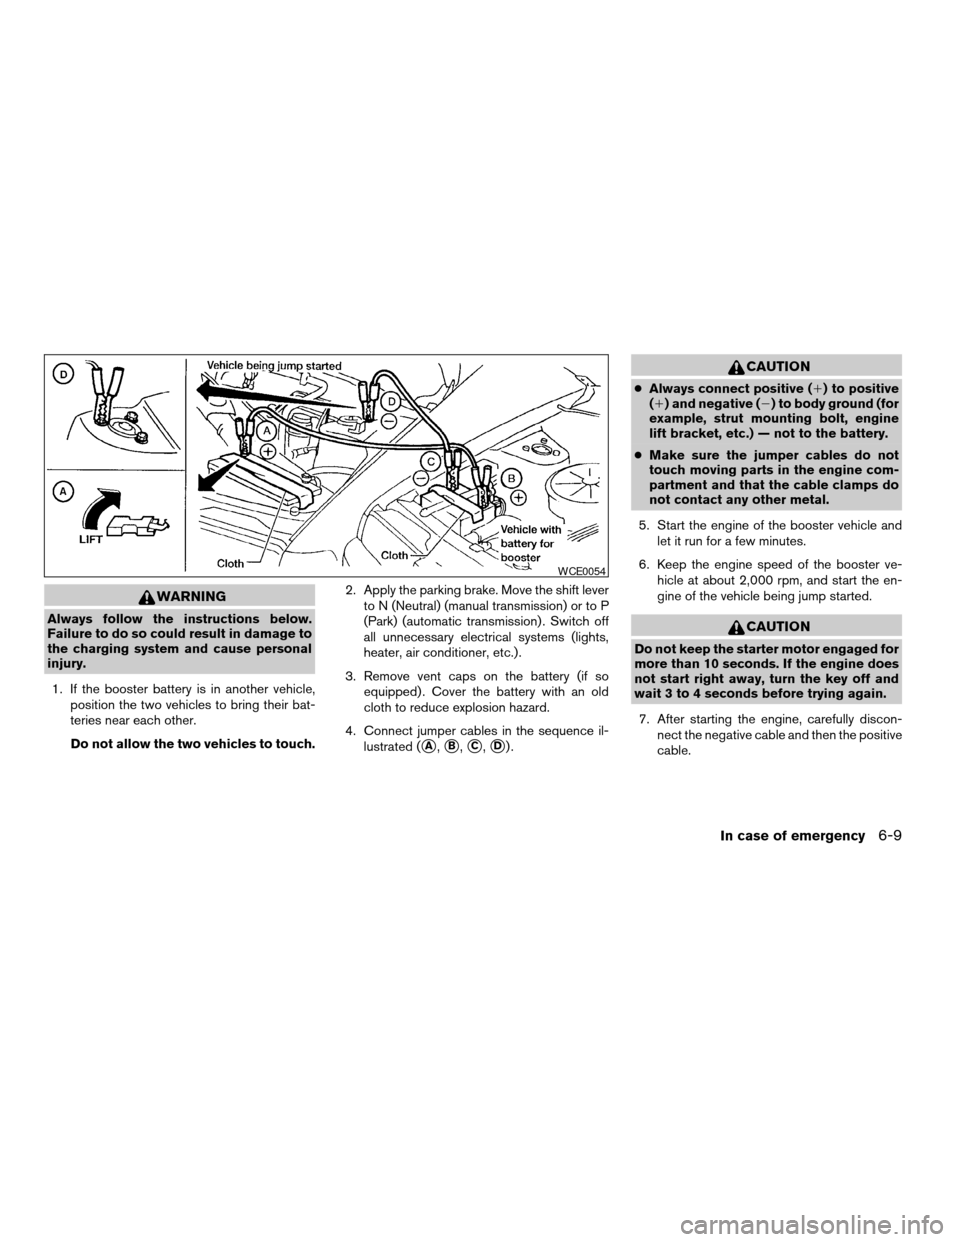
4. Connect jumper cables in the sequence il-
lustrated (
sA,sB,sC,sD).
CAUTION
cAlways connect positive (1) to positive
(1) and negative (2) to body ground (for
example, strut mounting bolt, engine
lift bracket, etc.) — not to the battery.
cMake sure the jumper cables do not
touch moving parts in the engine com-
partment and that the cable clamps do
not contact any other metal.
5. Start the engine of the booster vehicle and
let it run for a few minutes.
6. Keep the engine speed of the booster ve-
hicle at about 2,000 rpm, and start the en-
gine of the vehicle being jump started.
CAUTION
Do not keep the starter motor engaged for
more than 10 seconds. If the engine does
not start right away, turn the key off and
wait 3 to 4 seconds before trying again.
7. After starting the engine, carefully discon-
nect the negative cable and then the positive
cable.
WCE0054
In case of emergency6-9
ZREVIEW COPYÐ2006 Pathfinder(pat)
Owners ManualÐUSA_English(nna)
08/01/05Ðcathy
X
Page 256 of 344
8. Replace the vent caps (if so equipped) . Be
sure to dispose of the cloth used to cover
the vent holes as it may be contaminated
with corrosive acid.CAUTION
Automatic transmission models cannot
be push-started or tow-started. Attempt-
ing to do so may cause transmission
damage.
WARNING
cDo not continue to drive if your vehicle
overheats. Doing so could cause engine
damage or a vehicle fire.
cTo avoid the danger of being scalded,
never remove the radiator or coolant
reservoir cap while the engine is still
hot. When the radiator or coolant reser-
voir cap is removed, pressurized hot
water will spurt out, possibly causing
serious injury.
cDo not open the hood if steam is com-
ing out.
If your vehicle is overheating (indicated by an
extremely high temperature gauge reading and
the illumination of the engine oil pressure/engine
coolant temperature high indicator light) , or if you
feel a lack of engine power, detect abnormal
noise, etc. take the following steps.
1. Move the vehicle safely off the road, apply
the parking brake and move the shift lever to
P (Park) .
Do not stop the engine.
2. Turn off the air conditioner. Open all the
windows, move the heater or air conditioner
temperature control to maximum hot and fan
control to high speed.
PUSH STARTING IF YOUR VEHICLE OVERHEATS
6-10In case of emergency
ZREVIEW COPYÐ2006 Pathfinder(pat)
Owners ManualÐUSA_English(nna)
08/01/05Ðcathy
X
Page 258 of 344
For information about towing your vehicle behind
a recreational vehicle (RV) , refer to “Flat towing”
in the “Technical and consumer information” sec-
tion of this manual.
TOWING RECOMMENDED BY
NISSAN
Two-wheel drive models
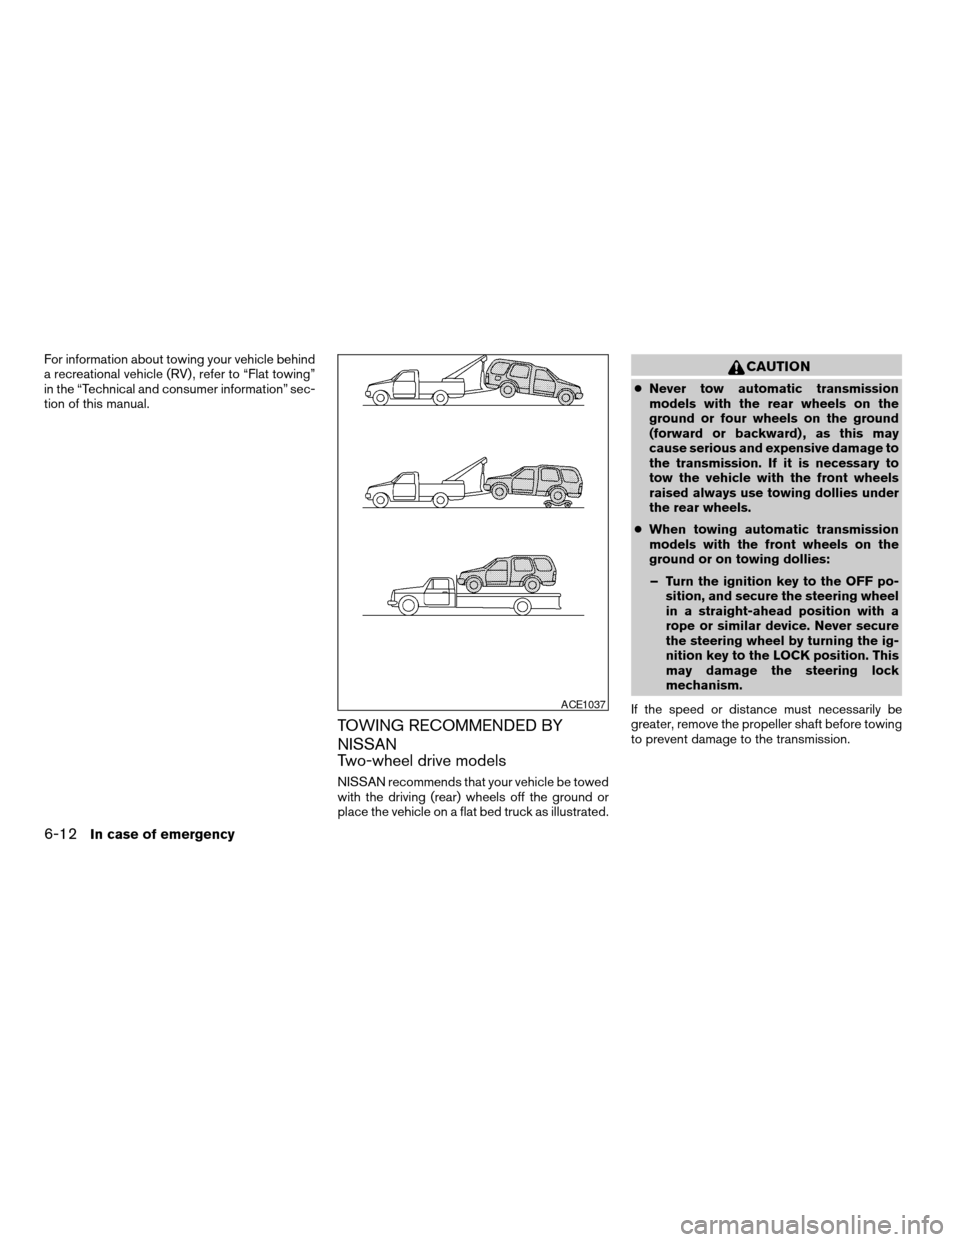
NISSAN recommends that your vehicle be towed
with the driving (rear) wheels off the ground or
place the vehicle on a flat bed truck as illustrated.
CAUTION
cNever tow automatic transmission
models with the rear wheels on the
ground or four wheels on the ground
(forward or backward) , as this may
cause serious and expensive damage to
the transmission. If it is necessary to
tow the vehicle with the front wheels
raised always use towing dollies under
the rear wheels.
cWhen towing automatic transmission
models with the front wheels on the
ground or on towing dollies:
– Turn the ignition key to the OFF po-
sition, and secure the steering wheel
in a straight-ahead position with a
rope or similar device. Never secure
the steering wheel by turning the ig-
nition key to the LOCK position. This
may damage the steering lock
mechanism.
If the speed or distance must necessarily be
greater, remove the propeller shaft before towing
to prevent damage to the transmission.
ACE1037
6-12In case of emergency
ZREVIEW COPYÐ2006 Pathfinder(pat)
Owners ManualÐUSA_English(nna)
08/01/05Ðcathy
X
Page 267 of 344

8 Maintenance and do-it-yourself
Maintenance requirements..........................8-2
General maintenance..............................8-2
Explanation of general maintenance items.........8-2
Maintenance precautions...........................8-5
Engine compartment check locations................8-6
Engine cooling system.............................8-7
Checking engine coolant level...................8-7
Changing engine coolant........................8-8
Engine oil.........................................8-8
Checking engine oil level........................8-8
Changing engine oil............................8-9
Changing engine oil filter.......................8-10
5-speed automatic transmission fluid...............8-11
Power steering fluid...............................8-11
Brake fluid.......................................8-12
Brake fluid....................................8-12
Window washer fluid.............................8-12
Window washer fluid reservoir..................8-12
Battery..........................................8-13
Jump starting.................................8-14
Variable Voltage Control System...................8-15
Drive belts.......................................8-15
Spark plugs......................................8-16Replacing spark plugs.........................8-16
Air cleaner.......................................8-17
In-cabin microfilter.............................8-17
Windshield wiper blades..........................8-18
Cleaning.....................................8-18
Replacing....................................8-19
Parking brake and brake pedal.....................8-21
Checking parking brake........................8-21
Checking brake pedal..........................8-21
Brake booster.................................8-22
Fuses...........................................8-22
Engine compartment...........................8-23
Passenger compartment.......................8-24
Keyfob battery replacement........................8-25
Lights...........................................8-26
Headlights....................................8-26
Exterior and interior lights.......................8-27
Wheels and tires.................................8-30
Tire pressure..................................8-30
Tire labeling...................................8-33
Types of tires..................................8-36
Tire chains....................................8-37
Changing wheels and tires.....................8-37
ZREVIEW COPYÐ2006 Pathfinder(pat)
Owners ManualÐUSA_English(nna)
08/01/05Ðcathy
X