2006 NISSAN MAXIMA ECO mode
[x] Cancel search: ECO modePage 2 of 312
This manual includes information for all options
available on this model. Therefore, you may find
some information that does not apply to your
vehicle.
All information, specifications and illustrations in
this manual are those in effect at the time of
printing. NISSAN reserves the right to change
specifications or design without notice and with-
out obligation.
IMPORTANT INFORMATION ABOUT
THIS MANUAL
You will see various symbols in this manual. They
are used in the following ways:
WARNING
This is used to indicate the presence of a
hazard that could cause death or serious
personal injury. To avoid or reduce the
risk, the procedures must be followed
precisely.
CAUTION
This is used to indicate the presence of a
hazard that could cause minor or moder-
ate personal injury or damage to your ve-
hicle. To avoid or reduce the risk, the pro-
cedures must be followed carefully.If you see this symbol, it means“Do not do this”
or“Do not let this happen.”
If you see a symbol similar to these in an illustra-
tion, it means the arrow points to the front of the
vehicle.
Arrows in an illustration that are similar to these
indicate movement or action.
Arrows in an illustration that are similar to these
call attention to an item in the illustration.
CALIFORNIA PROPOSITION 65
WARNING
WARNING
Engine exhaust, some of its constituents,
and certain vehicle components contain
or emit chemicals known to the State of
California to cause cancer and birth de-
fects or other reproductive harm. In addi-
tion, certain fluids contained in vehicles
and certain products of component wear
contain or emit chemicals known to the
State of California to cause cancer and
birth defects or other reproductive harm.
© 2005 NISSAN NORTH AMERICA, INC.
GARDENA, CALIFORNIA
All rights reserved. No part of this Owner’s
Manual may be reproduced or stored in a retrieval
system, or transmitted in any form, or by any
means, electronic, mechanical, photocopying,
recording or otherwise, without the prior written
permission of Nissan North America, Inc., Gar-
dena, California.
APD1005
WHEN READING THE MANUAL
ZREVIEW COPYÐ2006 Maxima(max)
Owners ManualÐUSA_English(nna)
06/22/05Ðtbrooks
X
Page 22 of 312
FOLDING REAR SEAT (if so
equipped)Interior trunk access
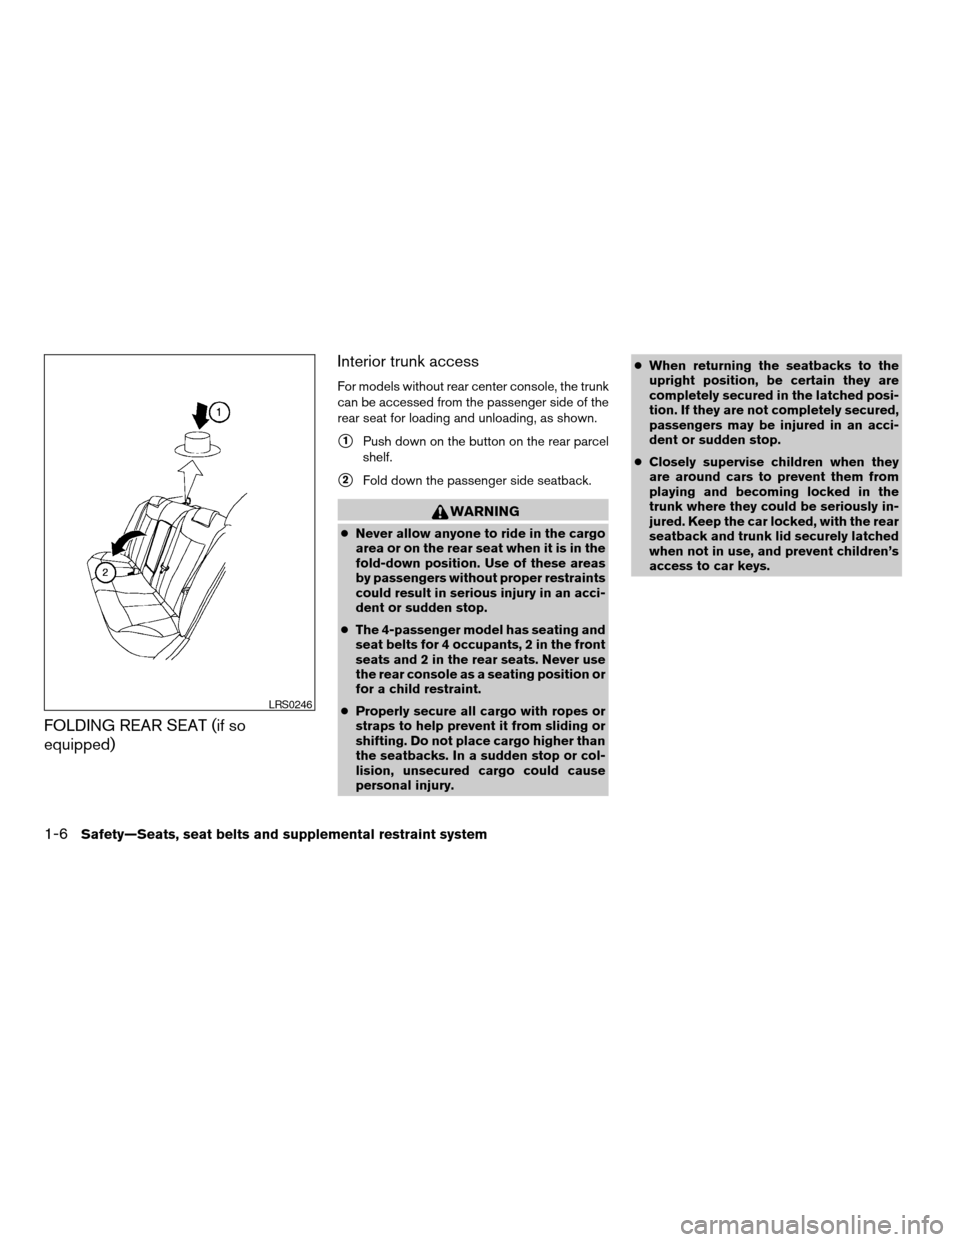
For models without rear center console, the trunk
can be accessed from the passenger side of the
rear seat for loading and unloading, as shown.
s1Push down on the button on the rear parcel
shelf.
s2Fold down the passenger side seatback.
WARNING
cNever allow anyone to ride in the cargo
area or on the rear seat when it is in the
fold-down position. Use of these areas
by passengers without proper restraints
could result in serious injury in an acci-
dent or sudden stop.
cThe 4-passenger model has seating and
seat belts for 4 occupants, 2 in the front
seats and 2 in the rear seats. Never use
the rear console as a seating position or
for a child restraint.
cProperly secure all cargo with ropes or
straps to help prevent it from sliding or
shifting. Do not place cargo higher than
the seatbacks. In a sudden stop or col-
lision, unsecured cargo could cause
personal injury.cWhen returning the seatbacks to the
upright position, be certain they are
completely secured in the latched posi-
tion. If they are not completely secured,
passengers may be injured in an acci-
dent or sudden stop.
cClosely supervise children when they
are around cars to prevent them from
playing and becoming locked in the
trunk where they could be seriously in-
jured. Keep the car locked, with the rear
seatback and trunk lid securely latched
when not in use, and prevent children’s
access to car keys.
LRS0246
1-6Safety—Seats, seat belts and supplemental restraint system
ZREVIEW COPYÐ2006 Maxima(max)
Owners ManualÐUSA_English(nna)
06/22/05Ðtbrooks
X
Page 28 of 312
WARNING
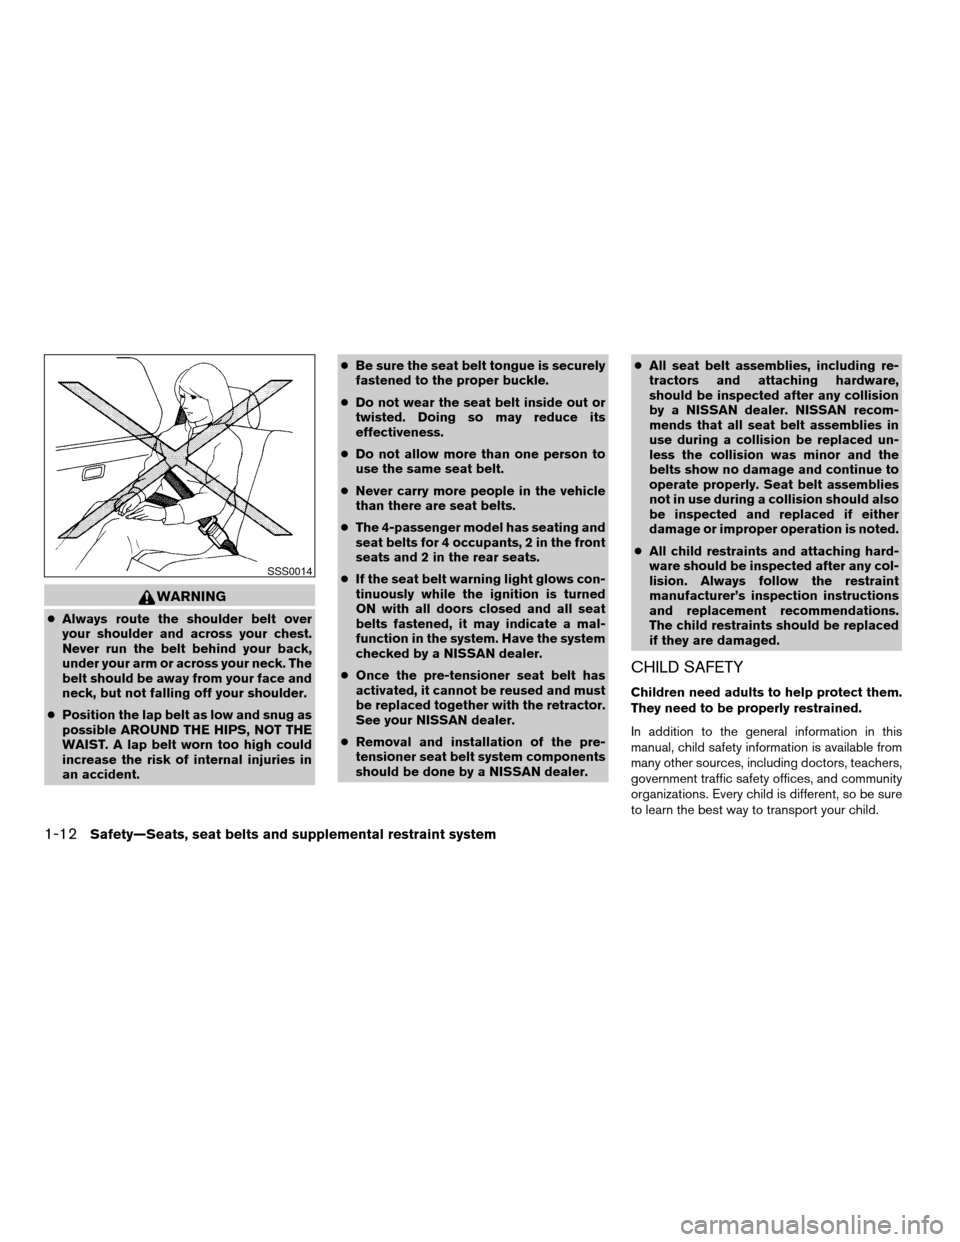
cAlways route the shoulder belt over
your shoulder and across your chest.
Never run the belt behind your back,
under your arm or across your neck. The
belt should be away from your face and
neck, but not falling off your shoulder.
cPosition the lap belt as low and snug as
possible AROUND THE HIPS, NOT THE
WAIST. A lap belt worn too high could
increase the risk of internal injuries in
an accident.cBe sure the seat belt tongue is securely
fastened to the proper buckle.
cDo not wear the seat belt inside out or
twisted. Doing so may reduce its
effectiveness.
cDo not allow more than one person to
use the same seat belt.
cNever carry more people in the vehicle
than there are seat belts.
cThe 4-passenger model has seating and
seat belts for 4 occupants, 2 in the front
seats and 2 in the rear seats.
cIf the seat belt warning light glows con-
tinuously while the ignition is turned
ON with all doors closed and all seat
belts fastened, it may indicate a mal-
function in the system. Have the system
checked by a NISSAN dealer.
cOnce the pre-tensioner seat belt has
activated, it cannot be reused and must
be replaced together with the retractor.
See your NISSAN dealer.
cRemoval and installation of the pre-
tensioner seat belt system components
should be done by a NISSAN dealer.cAll seat belt assemblies, including re-
tractors and attaching hardware,
should be inspected after any collision
by a NISSAN dealer. NISSAN recom-
mends that all seat belt assemblies in
use during a collision be replaced un-
less the collision was minor and the
belts show no damage and continue to
operate properly. Seat belt assemblies
not in use during a collision should also
be inspected and replaced if either
damage or improper operation is noted.
cAll child restraints and attaching hard-
ware should be inspected after any col-
lision. Always follow the restraint
manufacturer’s inspection instructions
and replacement recommendations.
The child restraints should be replaced
if they are damaged.
CHILD SAFETY
Children need adults to help protect them.
They need to be properly restrained.
In addition to the general information in this
manual, child safety information is available from
many other sources, including doctors, teachers,
government traffic safety offices, and community
organizations. Every child is different, so be sure
to learn the best way to transport your child.
SSS0014
1-12Safety—Seats, seat belts and supplemental restraint system
ZREVIEW COPYÐ2006 Maxima(max)
Owners ManualÐUSA_English(nna)
06/22/05Ðtbrooks
X
Page 44 of 312
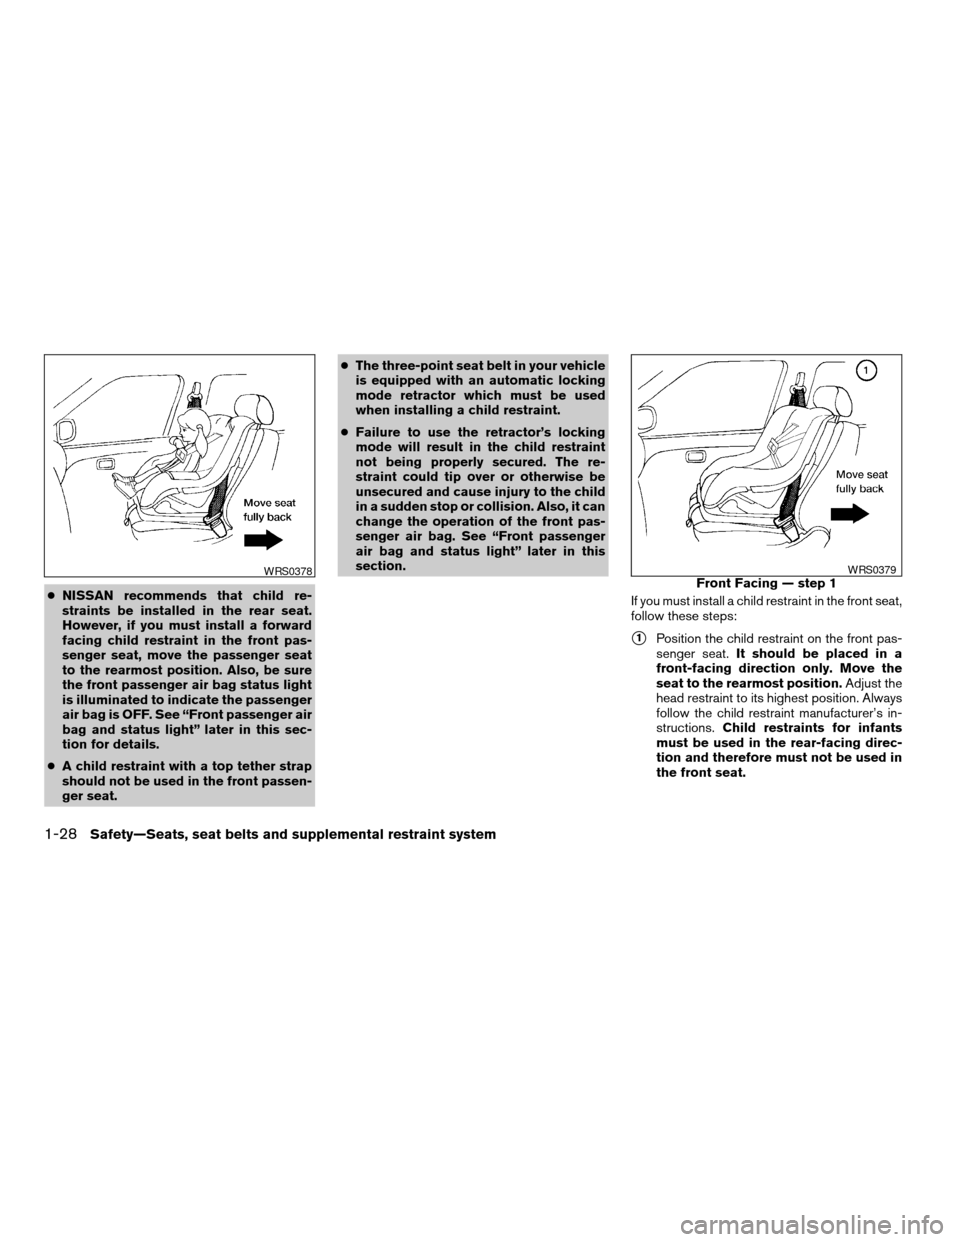
cNISSAN recommends that child re-
straints be installed in the rear seat.
However, if you must install a forward
facing child restraint in the front pas-
senger seat, move the passenger seat
to the rearmost position. Also, be sure
the front passenger air bag status light
is illuminated to indicate the passenger
air bag is OFF. See “Front passenger air
bag and status light” later in this sec-
tion for details.
cA child restraint with a top tether strap
should not be used in the front passen-
ger seat.cThe three-point seat belt in your vehicle
is equipped with an automatic locking
mode retractor which must be used
when installing a child restraint.
cFailure to use the retractor’s locking
mode will result in the child restraint
not being properly secured. The re-
straint could tip over or otherwise be
unsecured and cause injury to the child
in a sudden stop or collision. Also, it can
change the operation of the front pas-
senger air bag. See “Front passenger
air bag and status light” later in this
section.
If you must install a child restraint in the front seat,
follow these steps:
s1Position the child restraint on the front pas-
senger seat.It should be placed in a
front-facing direction only. Move the
seat to the rearmost position.Adjust the
head restraint to its highest position. Always
follow the child restraint manufacturer’s in-
structions.Child restraints for infants
must be used in the rear-facing direc-
tion and therefore must not be used in
the front seat.
WRS0378Front Facing — step 1WRS0379
1-28Safety—Seats, seat belts and supplemental restraint system
ZREVIEW COPYÐ2006 Maxima(max)
Owners ManualÐUSA_English(nna)
06/22/05Ðtbrooks
X
Page 49 of 312
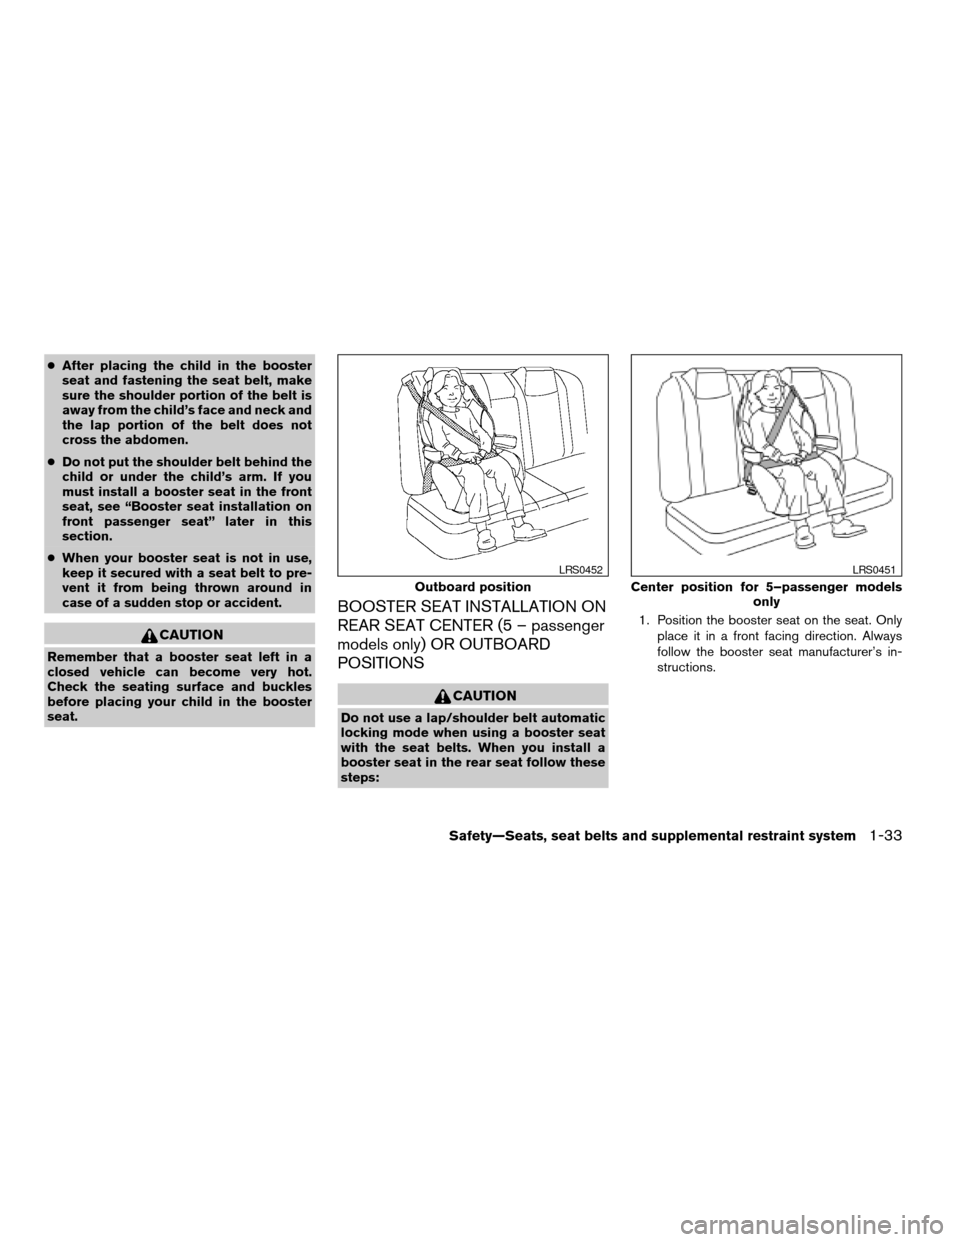
cAfter placing the child in the booster
seat and fastening the seat belt, make
sure the shoulder portion of the belt is
away from the child’s face and neck and
the lap portion of the belt does not
cross the abdomen.
cDo not put the shoulder belt behind the
child or under the child’s arm. If you
must install a booster seat in the front
seat, see “Booster seat installation on
front passenger seat” later in this
section.
cWhen your booster seat is not in use,
keep it secured with a seat belt to pre-
vent it from being thrown around in
case of a sudden stop or accident.
CAUTION
Remember that a booster seat left in a
closed vehicle can become very hot.
Check the seating surface and buckles
before placing your child in the booster
seat.
BOOSTER SEAT INSTALLATION ON
REAR SEAT CENTER (5 – passenger
models only) OR OUTBOARD
POSITIONS
CAUTION
Do not use a lap/shoulder belt automatic
locking mode when using a booster seat
with the seat belts. When you install a
booster seat in the rear seat follow these
steps:1. Position the booster seat on the seat. Only
place it in a front facing direction. Always
follow the booster seat manufacturer’s in-
structions.
Outboard position
LRS0452
Center position for 5–passenger models
only
LRS0451
Safety—Seats, seat belts and supplemental restraint system1-33
ZREVIEW COPYÐ2006 Maxima(max)
Owners ManualÐUSA_English(nna)
06/22/05Ðtbrooks
X
Page 61 of 312

Front passenger seat adult occupants who are
properly seated and using the seat belt as out-
lined in this manual should not cause the passen-
ger air bag to be automatically turned OFF. For
small adults it may be turned OFF; however if the
occupant takes his/her weight off the seat cush-
ion (for example, by not sitting upright, by sitting
on an edge of the seat, or by otherwise being out
of position) , this could cause the sensor to turn
the air bag OFF. In addition, if the occupant
improperly uses the seat belt in the automatic
locking mode (child restraint mode) , this could
cause the air bag to be turned OFF. Always be
sure to be seated and wearing the seat belt
properly for the most effective protection by the
seat belt and supplemental air bag.
NISSAN recommends that pre-teens and chil-
dren be properly restrained in a rear seat.
NISSAN also recommends that appropriate child
restraints and booster seats be properly installed
in a rear seat. If this is not possible, the occupant
classification sensor and seat belt sensors are
designed to operate as described above to turn
the front passenger air bag OFF for specified
child restraints as required by the regulations.
Failing to properly secure child restraints and to
use the automatic locking mode (child restraint
mode) may allow the restraint to tip or move in an
accident or sudden stop. This can also result in
the passenger air bag inflating in a crash insteadof being OFF. See “Child restraints” earlier in this
section for proper use and installation.
If the front passenger seat is not occupied the
passenger air bag is designed not to inflate in a
crash. However, heavy objects placed on the
seat could result in air bag inflation, because of
the object’s weight detected by the occupant
classification sensor. Other conditions could also
result in air bag inflation, such as if a child is
standing on the seat, or if two children are on the
seat, contrary to the instructions in this manual.
Always be sure that you and all vehicle occupants
are seated and restrained properly.
Using the passenger air bag status light, you can
monitor when the front passenger air bag is au-
tomatically turned OFF with the seat occupied.
The light will not illuminate when the front pas-
senger seat is unoccupied.
If an adult occupant is in the seat and the pas-
senger air bag status light is illuminated (indicat-
ing that the air bag is OFF) , it could be that the
person is a small adult, or is not sitting on the seat
properly or not using the seat belt properly.
If a child restraint must be used in the front seat,
the passenger air bag status light may or may not
be illuminated, depending on the size of the child
and the type of child restraint being used. If the
status light is not lit (indicating that the air bag
might inflate in a crash) , it could be that the childrestraint or seat belt is not being used properly. In
rare cases, the passenger air bag status light will
not illuminate even though the air bag is OFF.
If such situations happen, properly position and
restrain the occupant or child restraint. Other-
wise reposition the occupant or child restraint in
a rear seat. If you have any questions about
whether your passenger air bag is working as
designed, your dealer can use a special tool to
confirm that it is working properly.
The air bag system and passenger air bag status
light will take a few seconds to register a change
in the passenger seat status. For example, if a
large adult who is sitting in the front passenger
seat exits the vehicle, the passenger air bag
status light will go from OFF to ON for a few
seconds and then to OFF. This is normal system
operation and does not indicate a malfunction.
If a malfunction occurs in the front passenger air
bag system, the supplemental air bag warning
light
, located in the meter and gauges area
in the center of the instrument panel, will blink.
Have the system checked by a NISSAN dealer.
Safety—Seats, seat belts and supplemental restraint system1-45
ZREVIEW COPYÐ2006 Maxima(max)
Owners ManualÐUSA_English(nna)
06/22/05Ðtbrooks
X
Page 74 of 312
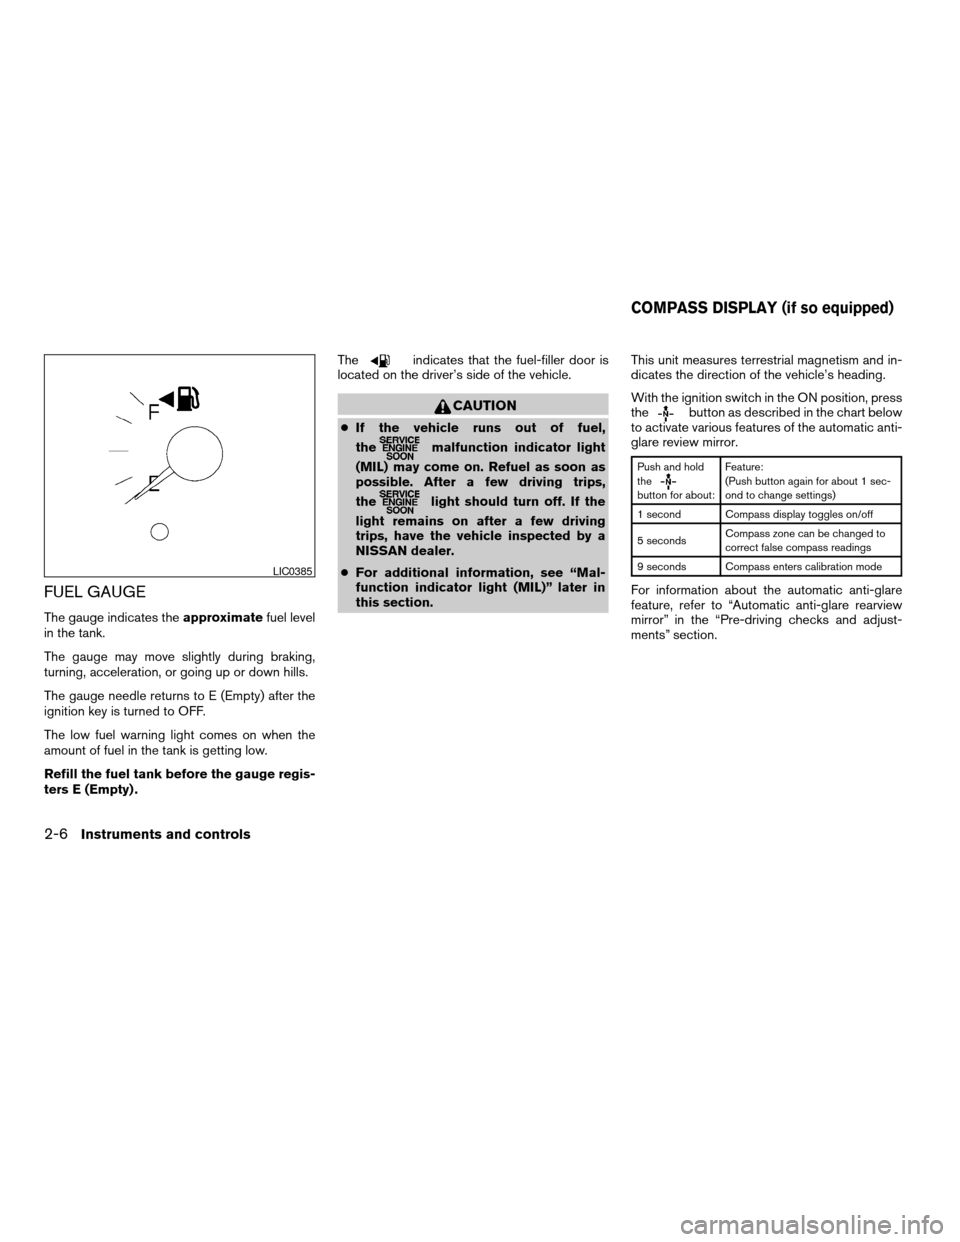
FUEL GAUGE
The gauge indicates theapproximatefuel level
in the tank.
The gauge may move slightly during braking,
turning, acceleration, or going up or down hills.
The gauge needle returns to E (Empty) after the
ignition key is turned to OFF.
The low fuel warning light comes on when the
amount of fuel in the tank is getting low.
Refill the fuel tank before the gauge regis-
ters E (Empty) .The
indicates that the fuel-filler door is
located on the driver’s side of the vehicle.
CAUTION
cIf the vehicle runs out of fuel,
the
malfunction indicator light
(MIL) may come on. Refuel as soon as
possible. After a few driving trips,
the
light should turn off. If the
light remains on after a few driving
trips, have the vehicle inspected by a
NISSAN dealer.
cFor additional information, see “Mal-
function indicator light (MIL)” later in
this section.This unit measures terrestrial magnetism and in-
dicates the direction of the vehicle’s heading.
With the ignition switch in the ON position, press
the
button as described in the chart below
to activate various features of the automatic anti-
glare review mirror.
Push and hold
the
button for about:Feature:
(Push button again for about 1 sec-
ond to change settings)
1 second Compass display toggles on/off
5 secondsCompass zone can be changed to
correct false compass readings
9 seconds Compass enters calibration mode
For information about the automatic anti-glare
feature, refer to “Automatic anti-glare rearview
mirror” in the “Pre-driving checks and adjust-
ments” section.
LIC0385
COMPASS DISPLAY (if so equipped)
2-6Instruments and controls
ZREVIEW COPYÐ2006 Maxima(max)
Owners ManualÐUSA_English(nna)
06/22/05Ðtbrooks
X
Page 81 of 312

Trunk lid open warning light
This light comes on when the trunk lid is not securely
closed while the ignition key is in the ON position.
INDICATOR LIGHTS
Automatic transmission
position indicator light (A/T
models only)
When the ignition key is turned to the ON posi-
tion, the indicator in the speedometer shows the
automatic transmission selector lever position.
See “Driving the vehicle” in the “Starting and
driving” section of this manual.
Cruise main switch indicator
light
The light comes on when the cruise control main
switch is pushed. The light goes out when the
main switch is pushed again. When the cruise
main switch indicator light comes on, the cruise
control system is operational.
Cruise set switch indicator
light
The light comes on while the vehicle speed is con-
trolled by the cruise control system. If the light blinks
while the engine is running, it may indicate the
cruise control system is not functioning properly.
Have the system checked by a NISSAN dealer.
Front passenger air bag
status light
The front passenger air bag status light ()
will be lit and the passenger front air bag will be
OFF depending on how the front passenger seat
is being used.
For front passenger air bag status light operation,
see “Front passenger air bag and status light” in
the “Safety — Seats, seat belts and supplemental
restraint system” section of this manual.
High beam indicator light
(Blue)
This blue light comes on when the headlight high
beams are on and goes out when the low beams
are selected.
The high beam indicator light also comes on
when the passing signal is activated.
Malfunction indicator light
(MIL)
If this indicator light comes on steady or blinks
while the engine is running, it may indicate a
potential emission control malfunction.
The malfunction indicator light may also come on
steady if the fuel filler cap is loose or missing, or if
the vehicle runs out of fuel. Check to make sure
the fuel filler cap is installed and closed tightly,and that the vehicle has at least 3 gallons (11.4
liters) of fuel in the fuel tank.
After a few driving trips, the
light should
turn off if no other potential emission control
system malfunction exists.
If this indicator light comes on steady for 20
seconds and then blinks for 10 seconds when
the engine is not running, it indicates that the
vehicle is not ready for an emission control sys-
tem inspection/maintenance test. See “Readi-
ness for inspection/maintenance (I/M) test” in the
“Technical and consumer information” section of
this manual.
Operation
The malfunction indicator light will come on in
one of two ways:
cMalfunction indicator light on steady — An
emission control system malfunction has
been detected. Check the fuel filler cap. If
the fuel filler cap is loose or missing, tighten
or install the cap and continue to drive the
vehicle. The
light should turn off after
a few driving trips. If thelight does not
turn off after a few driving trips, have the
vehicle inspected by a NISSAN dealer. You
do not need to have your vehicle towed to
the dealer.
Instruments and controls2-13
ZREVIEW COPYÐ2006 Maxima(max)
Owners ManualÐUSA_English(nna)
06/22/05Ðtbrooks
X