2006 NISSAN MAXIMA fuel
[x] Cancel search: fuelPage 82 of 312

cMalfunction indicator light blinking — An en-
gine misfire has been detected which may
damage the emission control system. To re-
duce or avoid emission control system dam-
age:
– do not drive at speeds above 45 MPH
(72 km/h) .
– avoid hard acceleration or deceleration.
– avoid steep uphill grades.
– if possible, reduce the amount of cargo
being hauled or towed.
The malfunction indicator light may stop blinking
and come on steady. Have the vehicle inspected
by a NISSAN dealer. You do not need to have
your vehicle towed to the dealer.
CAUTION
Continued vehicle operation without hav-
ing the emission control system checked
and repaired as necessary could lead to
poor driveability, reduced fuel economy,
and possible damage to the emission con-
trol system.
Slip indicator light (if so
equipped)
This indicator light will blink when the traction con-
trol system is limiting wheel spin. Slippery road
conditions may exist if the slip indicator blinks on. If
this happens, adjust your driving accordingly.
The slip indicator light also comes on when you
turn the ignition key to the ON position. The light
will turn off after about 2 seconds if the system is
operational. If the light does not come on or does
not go off, have the traction control system
checked by a NISSAN dealer.
Traction control system off
indicator light (if so equipped)
This indicator light comes on when the traction
control off switch is pushed to OFF. This indi-
cates the traction control system is not operating.
Push the traction control off switch again or re-
start the engine and the system will operate nor-
mally. See “Traction control system (TCS)” in the
“Starting and driving” section of this manual.
The traction control light also comes on when you
turn the ignition key to the ON position. The light
will turn off after about 2 seconds if the traction
control system (TCS) is operational. If the light
stays on or comes on along with the SLIP indica-
tor light while you are driving, have the traction
control system checked by a NISSAN dealer.While the traction control system is operating,
you might feel slight vibration or hear the system
working when starting the vehicle or accelerat-
ing, but this is normal.
Turn signal/hazard indicator
lights
The appropriate light flashes when the turn signal
switch is activated.
Both lights flash when the hazard switch is turned
on.
Vehicle dynamic control off
indicator light (if so equipped)
This indicator light comes on when the vehicle
dynamic control off switch is pushed to OFF. This
indicates the vehicle dynamic control system is
not operating.
Push the vehicle dynamic control off switch again
or restart the engine and the system will operate
normally. See “Vehicle dynamic control (VDC)
system” in the “Starting and driving” section of
this manual.
The vehicle dynamic control light also comes on
when you turn the ignition key to the ON position.
The light will turn off after about 2 seconds if the
system is operational. If the light stays on or
comes on along with the SLIP indicator light
2-14Instruments and controls
ZREVIEW COPYÐ2006 Maxima(max)
Owners ManualÐUSA_English(nna)
06/22/05Ðtbrooks
X
Page 117 of 312

3 Pre-driving checks and adjustments
Keys .............................................3-2
Nissan vehicle immobilizer system keys...........3-2
Doors............................................3-3
Locking with key................................3-3
Locking with inside lock knob....................3-4
Locking with power door lock switch.............3-4
Child safety rear door lock.......................3-5
Remote keyless entry system.......................3-5
How to use remote keyless entry system..........3-6
Hood............................................3-9
Trunk lid..........................................3-9
Opener operation...............................3-9
Secondary trunk lid release
(4-seat model only)............................3-10
Interior trunk lid release........................3-11
Fuel-filler door...................................3-11Opener operation..............................3-11
Fuel filler cap..................................3-12
Tilting telescopic steering column..................3-13
Automatic operation (if so equipped).............3-13
Manual operation..............................3-14
Sun visors.......................................3-15
Vanity mirrors.................................3-15
Mirrors..........................................3-16
Automatic anti-glare rearview mirror.............3-16
Outside mirrors...............................3-17
Automatic drive positioner (if so equipped)..........3-19
Memory storage function.......................3-19
Entry/exit function
(for automatic transmission model)..............3-21
System operation..............................3-22
ZREVIEW COPYÐ2006 Maxima(max)
Owners ManualÐUSA_English(nna)
06/23/05Ðtbrooks
X
Page 127 of 312

INTERIOR TRUNK LID RELEASE
WARNING
Closely supervise children when they are
around cars to prevent them from playing
and becoming locked in the trunk where
they could be seriously injured. Keep the
car locked, with the rear seatback and
trunk lid securely latched when not in use,
and prevent children’s access to car keys.
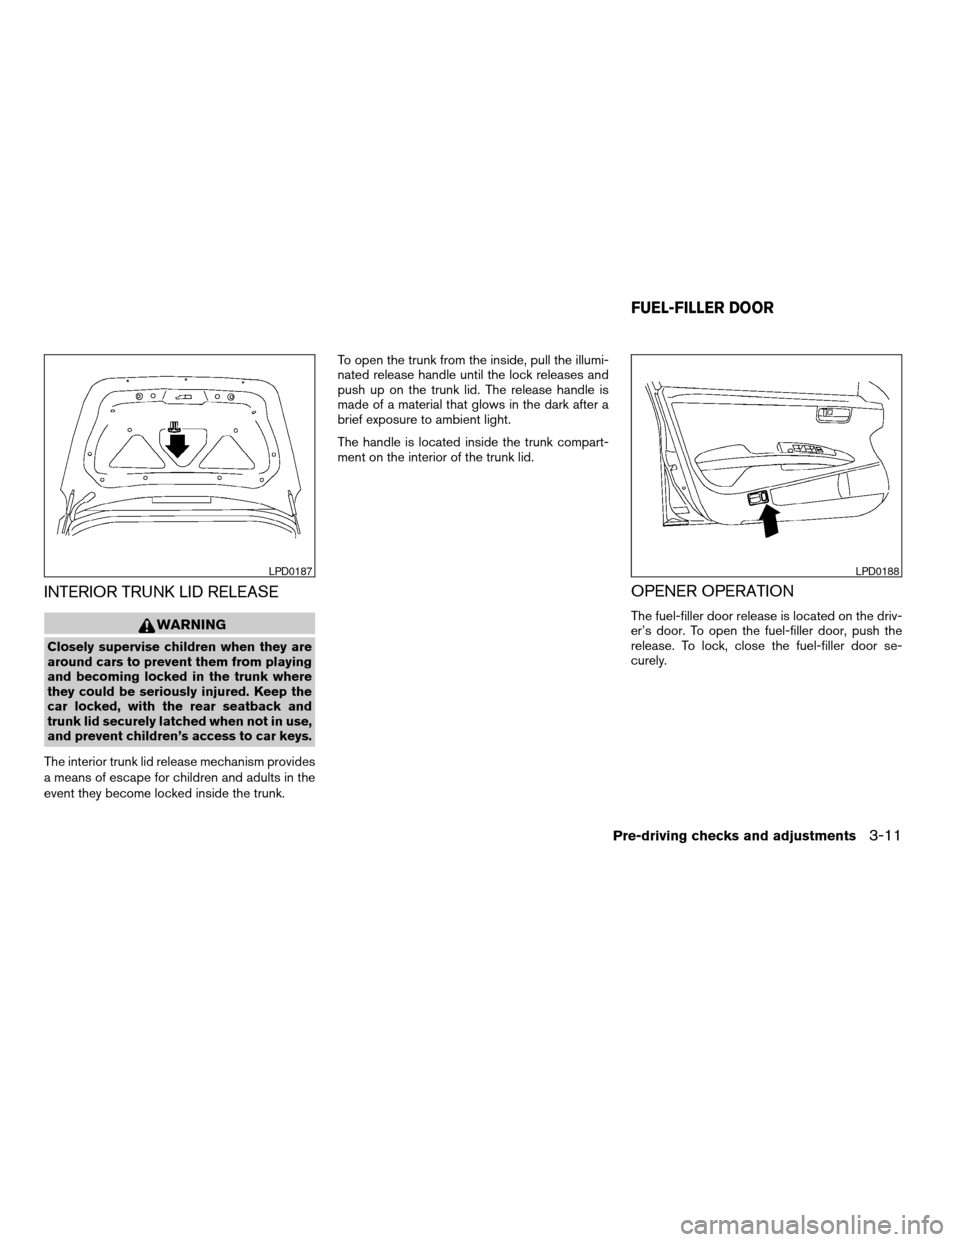
The interior trunk lid release mechanism provides
a means of escape for children and adults in the
event they become locked inside the trunk.To open the trunk from the inside, pull the illumi-
nated release handle until the lock releases and
push up on the trunk lid. The release handle is
made of a material that glows in the dark after a
brief exposure to ambient light.
The handle is located inside the trunk compart-
ment on the interior of the trunk lid.
OPENER OPERATION
The fuel-filler door release is located on the driv-
er’s door. To open the fuel-filler door, push the
release. To lock, close the fuel-filler door se-
curely.
LPD0187LPD0188
FUEL-FILLER DOOR
Pre-driving checks and adjustments3-11
ZREVIEW COPYÐ2006 Maxima(max)
Owners ManualÐUSA_English(nna)
06/22/05Ðtbrooks
X
Page 128 of 312

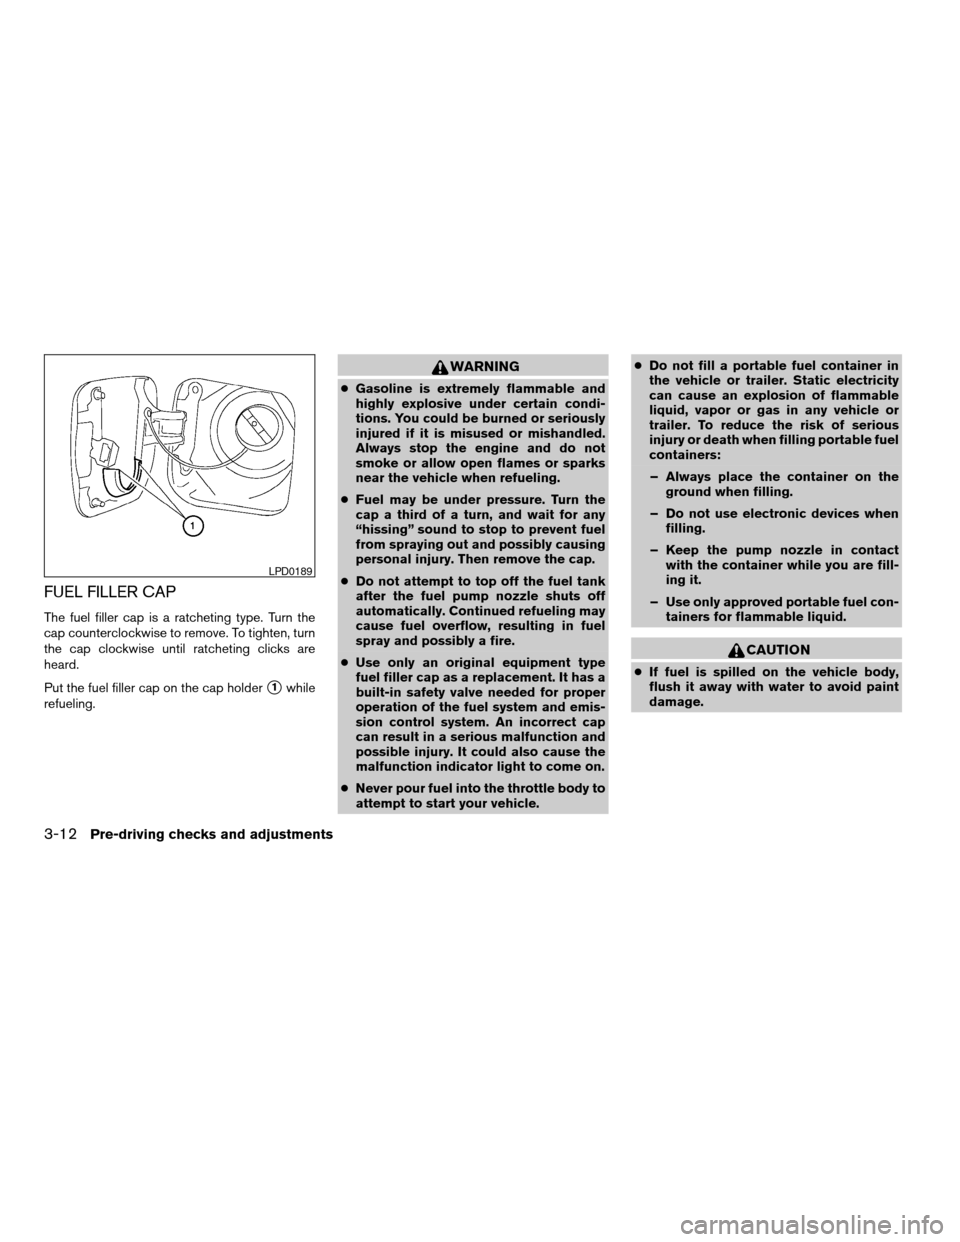
FUEL FILLER CAP
The fuel filler cap is a ratcheting type. Turn the
cap counterclockwise to remove. To tighten, turn
the cap clockwise until ratcheting clicks are
heard.
Put the fuel filler cap on the cap holder
s1while
refueling.
WARNING
cGasoline is extremely flammable and
highly explosive under certain condi-
tions. You could be burned or seriously
injured if it is misused or mishandled.
Always stop the engine and do not
smoke or allow open flames or sparks
near the vehicle when refueling.
cFuel may be under pressure. Turn the
cap a third of a turn, and wait for any
“hissing” sound to stop to prevent fuel
from spraying out and possibly causing
personal injury. Then remove the cap.
cDo not attempt to top off the fuel tank
after the fuel pump nozzle shuts off
automatically. Continued refueling may
cause fuel overflow, resulting in fuel
spray and possibly a fire.
cUse only an original equipment type
fuel filler cap as a replacement. It has a
built-in safety valve needed for proper
operation of the fuel system and emis-
sion control system. An incorrect cap
can result in a serious malfunction and
possible injury. It could also cause the
malfunction indicator light to come on.
cNever pour fuel into the throttle body to
attempt to start your vehicle.cDo not fill a portable fuel container in
the vehicle or trailer. Static electricity
can cause an explosion of flammable
liquid, vapor or gas in any vehicle or
trailer. To reduce the risk of serious
injury or death when filling portable fuel
containers:
– Always place the container on the
ground when filling.
– Do not use electronic devices when
filling.
– Keep the pump nozzle in contact
with the container while you are fill-
ing it.
– Use only approved portable fuel con-
tainers for flammable liquid.
CAUTION
cIf fuel is spilled on the vehicle body,
flush it away with water to avoid paint
damage.
LPD0189
3-12Pre-driving checks and adjustments
ZREVIEW COPYÐ2006 Maxima(max)
Owners ManualÐUSA_English(nna)
06/22/05Ðtbrooks
X
Page 129 of 312

cTighten until the fuel filler cap clicks.
Failure to tighten the fuel filler cap
properly may cause the
mal-
function indicator light (MIL) to illumi-
nate. If the
light illuminates be-
cause the fuel filler cap is loose or
missing, tighten or install the cap and
continue to drive the vehicle.
The
light should turn off after a
few driving trips. If the
light
does not turn off after a few driving
trips, have the vehicle inspected by a
NISSAN dealer.
cFor additional information, see the
“Malfunction indicator light (MIL)” in
the “Instruments and Controls” section
earlier in this manual.
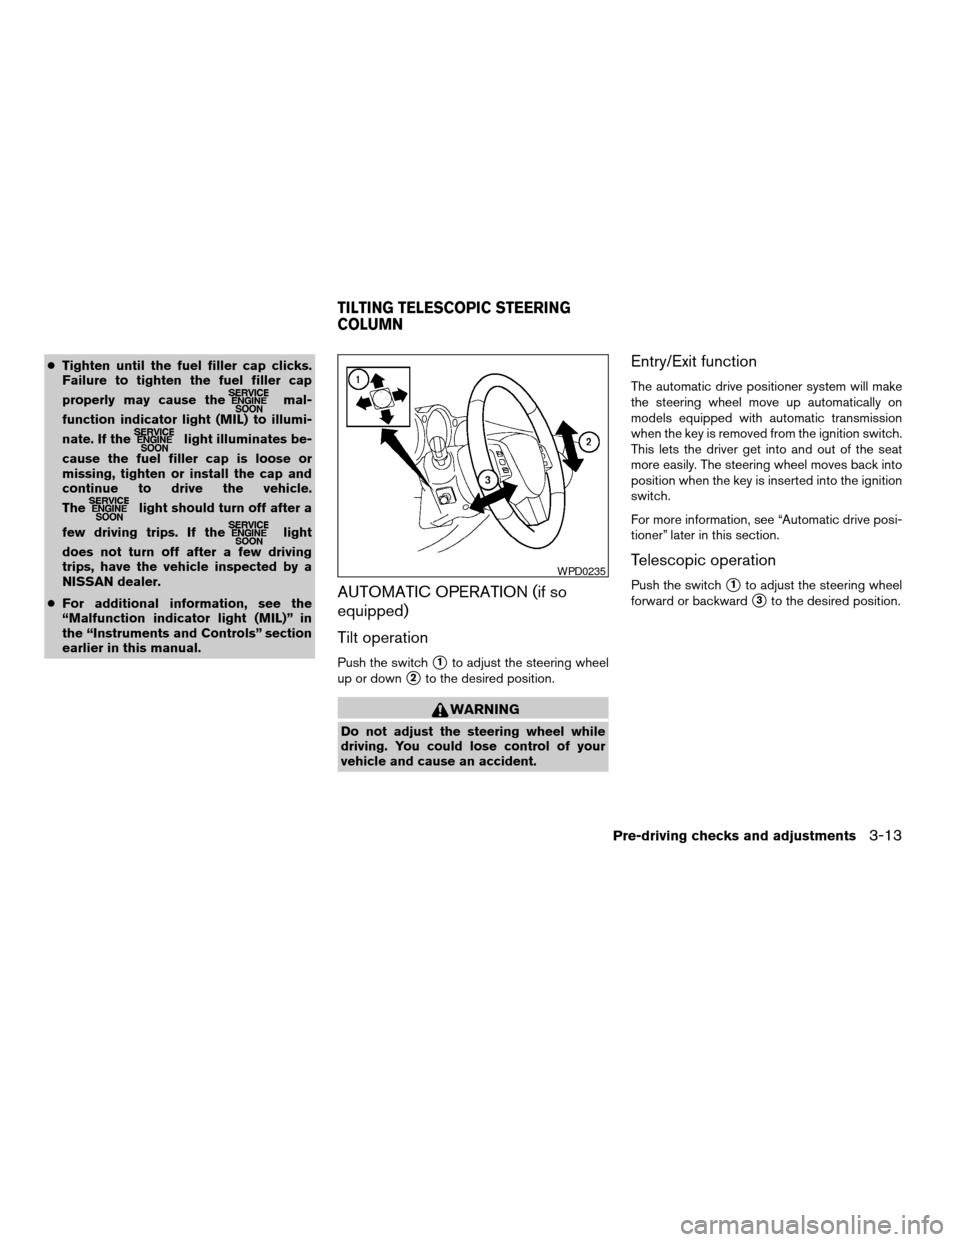
AUTOMATIC OPERATION (if so
equipped)
Tilt operation
Push the switchs1to adjust the steering wheel
up or down
s2to the desired position.
WARNING
Do not adjust the steering wheel while
driving. You could lose control of your
vehicle and cause an accident.
Entry/Exit function
The automatic drive positioner system will make
the steering wheel move up automatically on
models equipped with automatic transmission
when the key is removed from the ignition switch.
This lets the driver get into and out of the seat
more easily. The steering wheel moves back into
position when the key is inserted into the ignition
switch.
For more information, see “Automatic drive posi-
tioner” later in this section.
Telescopic operation
Push the switchs1to adjust the steering wheel
forward or backward
s3to the desired position.
WPD0235
TILTING TELESCOPIC STEERING
COLUMN
Pre-driving checks and adjustments3-13
ZREVIEW COPYÐ2006 Maxima(max)
Owners ManualÐUSA_English(nna)
06/22/05Ðtbrooks
X
Page 139 of 312

4 Display screen, heater, air conditioner,
audio and phone systems
Control panel buttons — without navigation system....4-2
Names of components..........................4-3
How to use JOYSTICK and “ENTER” button.......4-3
How to use “BACK” button......................4-3
How to use “TRIP” button.......................4-3
How to use “FUEL ECON” button................4-4
Clock.........................................4-4
How to use “E/M” (English/Metric) button.........4-4
How to use
(maintenance) button..........4-5
How to use the “SETTING” button................4-5
button...................................4-6
Control panel buttons — with navigation system.......4-7
Names of the components.......................4-8
How to use joystick and “ENTER” button..........4-8
How to use “BACK” button......................4-8
Setting up the start-up screen...................4-8
How to use the “TRIP” button....................4-9
How to use the “SETTING” button...............4-11
Setting the display (Audio or HVAC display):.....4-11
button..................................4-16
Ventilators.......................................4-16
Heater and air conditioner (automatic)..............4-17
Automatic operation...........................4-18Manual operation..............................4-19
Operating tips.................................4-19
Servicing air conditioner...........................4-20
Audio system....................................4-20
Radio........................................4-20
FM radio reception............................4-20
AM radio reception............................4-21
Satellite radio reception (if so equipped).........4-21
Audio operation precautions....................4-21
FM-AM-SAT radio with cassette player and
compact disc (CD) player (Type A)/CD
changer (Type B)..............................4-24
CD care and cleaning..........................4-32
Steering wheel switch for audio control..........4-33
Antenna......................................4-33
Car phone or CB radio............................4-34
BluetoothTHands-Free Phone System
(if so equipped)..................................4-35
Using the system..............................4-36
Control buttons...............................4-38
Getting started................................4-38
List of voice commands........................4-40
Speaker adaptation (SA) mode..................4-45
Troubleshooting guide.........................4-48
ZREVIEW COPYÐ2006 Maxima(max)
Owners ManualÐUSA_English(nna)
06/23/05Ðtbrooks
X
Page 141 of 312

NAMES OF COMPONENTS
1.brightness control button (P. 4-6)
2. BACK (previous) button (P. 4-3)
3. Joystick and ENTER push button (P. 4-3)
4. SETTING button (P. 4-5)
5.
(maintenance) button (P. 4-5)
6. TRIP drive computer button (P. 4-3)
7. FUEL ECON button (P. 4-4)
8. TRIP RESET button (P. 4-3)
9. E/M (English/metric) button (P. 4-4)
10. Clock adjust button (hours) (P. 4-4)
11. Clock adjust button (minutes) (P. 4-4)
To turn off the screen, push the
button for
more than approximately 1.5 seconds. The
screen will change to “CONFIRM DISPLAY OFF
YES or NO”.
HOW TO USE JOYSTICK AND
“ENTER” BUTTON
Choose an item on the display using the joystick.
Push the“ENTER”button only when the use of it
is instructed on the display.
HOW TO USE “BACK” BUTTON
This button has two functions.
cGo back to the previous display (cancel) .
If you press the“BACK”button during setup, the
setup will be canceled and/or the display will
return to the previous screen.
cFinish setup.
If you press the“BACK”button after the setup is
completed, the setup will start over.
HOW TO USE “TRIP” BUTTON
When the“TRIP”button is pushed, the following
modes will display on the screen.
TRIP 1 (TIME, DIST, AVG)!TRIP 2 (TIME, DIST,
AVG)!OFF
TRIP 1 and TRIP 2 record journey time (TIME —
max 99 hours 59 minutes) , trip odometer (DIST
— mile or km) and average speed (AVG — MPH
or km/h) .
To reset the TRIP 1 or TRIP 2, push the“TRIP”
button or the“TRIP RESET”button for more
than approximately 1.5 seconds.
LHA0252
Display screen, heater, air conditioner, audio and phone systems4-3
ZREVIEW COPYÐ2006 Maxima(max)
Owners ManualÐUSA_English(nna)
06/23/05Ðtbrooks
X
Page 142 of 312

HOW TO USE “FUEL ECON”
BUTTON
The average fuel consumption (MPG or L/100
km) and the distance to empty (dte — mi or km)
will appear on the screen when the“FUEL
ECON”button is pushed.
Average fuel consumption (MPG or
L/100 km)
The average fuel consumption mode shows the
average fuel consumption since the last reset.
Resetting is done by pressing the“TRIP RE-
SET”or“FUEL ECON”button for more than
approximately 1.5 seconds.The display is updated every 30 seconds. For
approximately the first 30 seconds and 1/3 miles
(500 m) after a reset or connecting the battery
cables, the display will show (----) .
Distance to empty (dte — mile or km)
The distance to empty (dte) mode provides you
with an estimation of the distance that can be
driven before refueling. The dte is constantly be-
ing calculated based on the amount of fuel in the
fuel tank and the actual fuel consumption.
The display is updated every 30 seconds.
When the fuel level is low, the dte display will
change to (*) .
NOTE:
cIf the amount of fuel added while the ignition
switch is OFF is small, the display just before
the ignition switch is turned OFF may con-
tinue to be displayed.
cWhen driving uphill or rounding curves, the
fuel in the tank shifts, which may momentarily
change the display.
CLOCK
The digital clock displays time when the ignition
key is in ACC or ON.
If the power supply is disconnected, the
clock will not indicate the correct time.
Readjust the time.
Adjusting the time
To adjust the time, push the“H”or“M”button
for more than approximately 1.5 seconds. The
time indicator will flash.
Touch the“H”button to adjust the hour.
Touch the“M”button to adjust the minute.
To finish the adjusting, press the“BACK”button
or the screen will return to normal after 10 sec-
onds.
HOW TO USE “E/M” (English/Metric)
BUTTON
You can change the unit as follows using the
“E/M”button.
Unit: US — mile, °F, MPG
Metric — km, °C, L/100 km
LHA0253
4-4Display screen, heater, air conditioner, audio and phone systems
ZREVIEW COPYÐ2006 Maxima(max)
Owners ManualÐUSA_English(nna)
06/22/05Ðtbrooks
X