Page 14 of 272
NAI0406
MENU SCREENS AND THEIR PUR-
POSESPush ,
,
,
or to display the corresponding
menu screen.How to select a menu itemExample: screen
1. Tilt the joystick up and down. An item is highlighted accordingly.
2. To select the preferred menu item, highlight the item and push .
INFO:
Some items in the menu contain further
details, which are displayed on the right side
of the screen when the menu item is
highlighted. This allows you to preview
details of the item. These details appear
only on the menu screen displayed by
pushing
.
MENU SCREEN TYPES AND HOW
TO OPERATE2-8
Getting started
Page 17 of 272

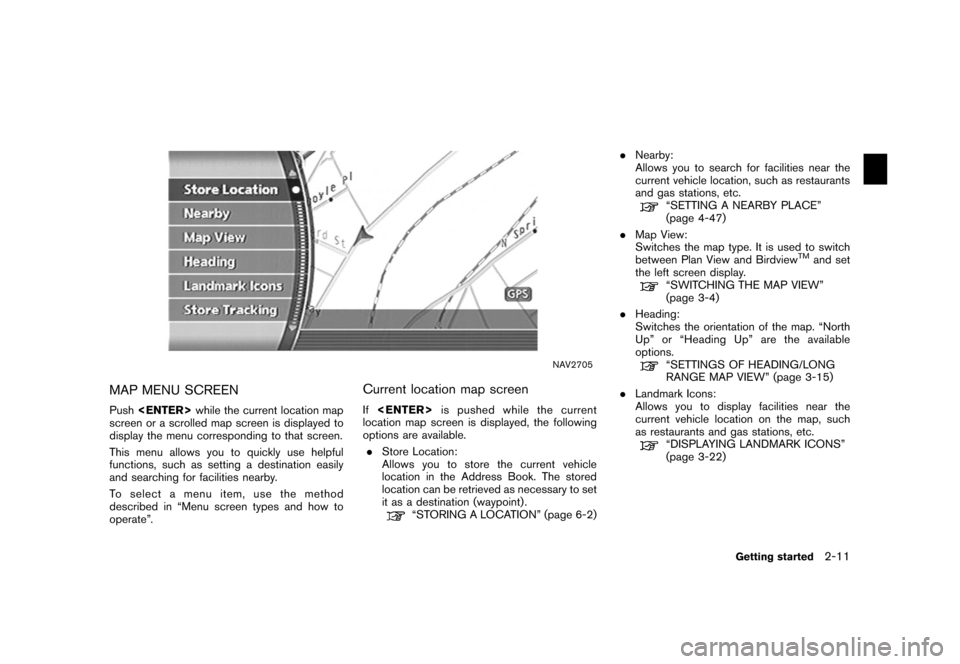
NAV2705
MAP MENU SCREENPush while the current location map
screen or a scrolled map screen is displayed to
display the menu corresponding to that screen.
This menu allows you to quickly use helpful
functions, such as setting a destination easily
and searching for facilities nearby.
To select a menu item, use the method
described in “Menu screen types and how to
operate”.
Current location map screenIf is pushed while the current
location map screen is displayed, the following
options are available.
. Store Location:
Allows you to store the current vehicle
location in the Address Book. The stored
location can be retrieved as necessary to set
it as a destination (waypoint) .
“STORING A LOCATION” (page 6-2) .
Nearby:
Allows you to search for facilities near the
current vehicle location, such as restaurants
and gas stations, etc.
“SETTING A NEARBY PLACE”
(page 4-47)
. Map View:
Switches the map type. It is used to switch
between Plan View and Birdview
TM
and set
the left screen display.
“SWITCHING THE MAP VIEW”
(page 3-4)
. Heading:
Switches the orientation of the map. “North
Up” or “Heading Up” are the available
options.“SETTINGS OF HEADING/LONG
RANGE MAP VIEW” (page 3-15)
. Landmark Icons:
Allows you to display facilities near the
current vehicle location on the map, such
as restaurants and gas stations, etc.“DISPLAYING LANDMARK ICONS”
(page 3-22)
Getting started
2-11
Page 19 of 272

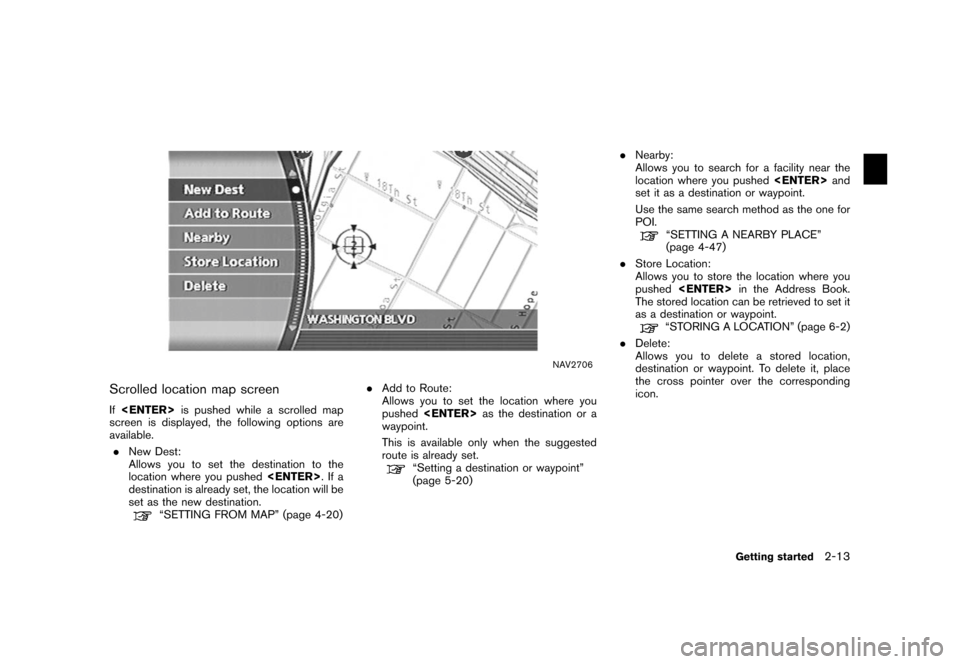
NAV2706
Scrolled location map screenIf is pushed while a scrolled map
screen is displayed, the following options are
available.
. New Dest:
Allows you to set the destination to the
location where you pushed
.Ifa
destination is already set, the location will be
set as the new destination.
“SETTING FROM MAP” (page 4-20) .
Add to Route:
Allows you to set the location where you
pushed as the destination or a
waypoint.
This is available only when the suggested
route is already set.
“Setting a destination or waypoint”
(page 5-20) .
Nearby:
Allows you to search for a facility near the
location where you pushed and
set it as a destination or waypoint.
Use the same search method as the one for
POI.
“SETTING A NEARBY PLACE”
(page 4-47)
. Store Location:
Allows you to store the location where you
pushed
in the Address Book.
The stored location can be retrieved to set it
as a destination or waypoint.“STORING A LOCATION” (page 6-2)
. Delete:
Allows you to delete a stored location,
destination or waypoint. To delete it, place
the cross pointer over the corresponding
icon.
Getting started
2-13
Page 25 of 272
NAI0408
MOVING AROUND WITHIN A MAPYou can manually move across the map to view
the surrounding areas or a preferred location.
1. Tilt the joystick corresponding to the direc-tion that you want to move across the map.
Keep tilting the joystick to continuously
move across the map in that direction. Once
you start moving on the map, the cross
pointer appears.
2. Returning to the current location map screen Push
Page 53 of 272
NAI0408
The operations for moving across the map are
different between Plan View and Birdview
TM.
PLAN VIEWTilt the joystick corresponding to the direction
that you want to move across the map. Keep
tilting the joystick to continuously move across
the map in that direction.
Once you start moving across the map, the
cross pointer appears.
MOVING A MAP
Map settings
3-7
Page 94 of 272

The following setting methods are available
when setting the destination to your home or
any location stored in the Address Book.. Setting your home
This allows you to set your home as the
destination and have the system calculate a
route. It is useful especially when you are
searching for a route to return to your home.
“STORING A LOCATION” (page 6-2)
. Setting from Address Book
This allows you to set the destination to a
location stored in the Address Book and
have the system calculate a route. To utilize
this function more effectively, destinations
that you often travel to should be stored in
advance.“STORING A LOCATION” (page 6-2)
. Setting a Previous Destination
This allows you to set the destination to a
location that you have previously set as the
destination and have the system calculate a
route. Up to 100 previous destinations will
be automatically stored.
If the number of previous destinations
exceeds 100, the oldest one will be
replaced by the new one. .
Setting the Previous Starting Point
This allows you to set the destination to the
starting point of the previous route guidance
and have the system calculate a route.
. Setting from Stored Routes
You can select a preferred route from the
stored routes.
SETTING A STORED LOCATION AS
THE DESTINATION4-22
Setting a destination
Page 126 of 272
STORING A LOCATIONA searched location can be stored in the
Address Book. Then it can be easily retrieved
and set as a destination (or waypoint) .
NAV2870
1. Set the destination using an appropriatemethod.
2. Highlight [Store Location] and push .
NAV2871
3. The location is stored in the Address Book.
The corresponding icon is displayed at the
set location on the map.
4-54
Setting a destination
Page 151 of 272
NAV2907
3. The system automatically recalculates aroute according to the conditions set.
The screen will automatically return to the
[Edit Route] screen after route calculation.
NAV2908
4. The icon corresponding to the set routecondition is displayed. Push