2006 NISSAN FRONTIER ignition
[x] Cancel search: ignitionPage 180 of 336

cTrying to load a CD with the CD door
closed could damage the CD and/or CD
changer.
Turn the ignition key to the ACC or ON position
and insert the compact disc into the slot with the
label side facing up. The compact disc will be
guided automatically into the slot and start play-
ing. To insert the disc, first push the LOAD button.
If the radio is already operating, it will automati-
cally turn off and the compact disc will play.
If the system has been turned off while the com-
pact disc was playing, pushing the
POWER/VOLUME control knob will start the
compact disc.
Do not use 3.1 in (8 cm) diameter compact discs
in the CD changer.
LOAD button:
To insert a CD in the CD changer, push the load
button
for less than 1.5 seconds. Select
the loading slot by pushing the CD insert select
button (1 – 6) , then insert the CD.
To insert 6 CDs to the CD changer, push the load
button for more than 1.5 seconds.
The slot numbers (1 – 6) will illuminate on the
display when CDs are loaded into the changer.CD button:
When the CD button is pushed with the system
off and the compact disc loaded, the system will
turn on and the compact disc will start to play.
When the CD button is pushed with the compact
disc loaded with the radio playing, the radio will
automatically be turned off and the compact disc
will start to play.
SEEK/TRACK:
When the
button is pushed for less than 1.5
seconds while a compact disc is playing, the
track being played returns to its beginning. Push
several times to skip back through tracks. The
compact disc will go back the number of times
the button is pushed.
When the
button is pushed for less than 1.5
seconds while the compact disc is playing, the
next track will start to play from its beginning.
Push several times to skip through tracks. The
compact disc will advance the number of times
the button is pushed. (When the last track on the
compact disc is skipped through, the first track
will be played.)
When the
orbutton is pushed for
more than 1.5 seconds while a CD is playing, the
CD plays at an increased speed while fast for-
warding or rewinding through the existing trackbeing played. When the button is released the
CD returns to normal play speed.
CAT FOLDER:
While playing an MP3, push the CAT FOLDER
button (
or) to scan backward or
forward through available folders.
CD select buttons:
To play another CD that has been loaded, push a
CD select button (1 – 6) .
SCAN/RPT:
When the SCAN/RPT play button is pushed
while the compact disc is played, the play pattern
can be changed as follows:
ALL DISC RPT!1 DISC RPT!1 TRACK RPT
!ALL DISC RDM!1 DISC RDM!ALL DISC
RPT
ALL DISC RPT: All discs loaded will be repeated.
1 DISC RPT: The disc that is currently playing will
be repeated.
1 TRACK RPT: The track that is currently playing
will be repeated
ALL DISC RDM: Tracks from all discs will be
played randomly
1 DISC RDM: Tracks from the disc that is cur-
rently playing will be played randomly
4-24Heater, air conditioner and audio systems
ZREVIEW COPYÐ2006 Truck/Frontier(d22)
Owners ManualÐUSA_English(nna)
10/17/05Ðdebbie
X
Page 182 of 336
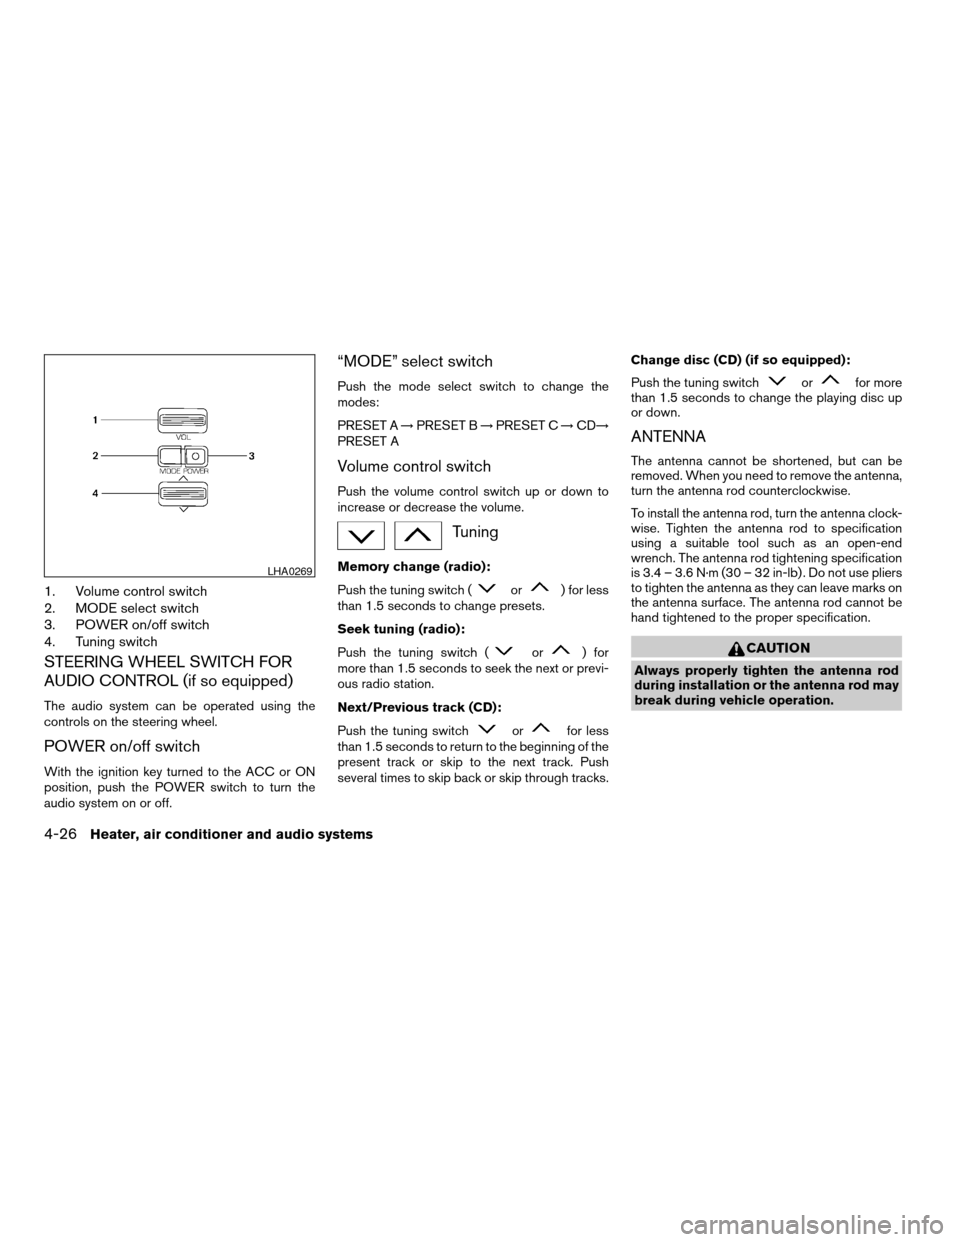
1. Volume control switch
2. MODE select switch
3. POWER on/off switch
4. Tuning switch
STEERING WHEEL SWITCH FOR
AUDIO CONTROL (if so equipped)
The audio system can be operated using the
controls on the steering wheel.
POWER on/off switch
With the ignition key turned to the ACC or ON
position, push the POWER switch to turn the
audio system on or off.
“MODE” select switch
Push the mode select switch to change the
modes:
PRESET A!PRESET B!PRESET C!CD!
PRESET A
Volume control switch
Push the volume control switch up or down to
increase or decrease the volume.
Tuning
Memory change (radio):
Push the tuning switch (
or) for less
than 1.5 seconds to change presets.
Seek tuning (radio):
Push the tuning switch (
or) for
more than 1.5 seconds to seek the next or previ-
ous radio station.
Next/Previous track (CD):
Push the tuning switch
orfor less
than 1.5 seconds to return to the beginning of the
present track or skip to the next track. Push
several times to skip back or skip through tracks.Change disc (CD) (if so equipped):
Push the tuning switch
orfor more
than 1.5 seconds to change the playing disc up
or down.
ANTENNA
The antenna cannot be shortened, but can be
removed. When you need to remove the antenna,
turn the antenna rod counterclockwise.
To install the antenna rod, turn the antenna clock-
wise. Tighten the antenna rod to specification
using a suitable tool such as an open-end
wrench. The antenna rod tightening specification
is 3.4 – 3.6 N·m (30 – 32 in-lb) . Do not use pliers
to tighten the antenna as they can leave marks on
the antenna surface. The antenna rod cannot be
hand tightened to the proper specification.
CAUTION
Always properly tighten the antenna rod
during installation or the antenna rod may
break during vehicle operation.
LHA0269
4-26Heater, air conditioner and audio systems
ZREVIEW COPYÐ2006 Truck/Frontier(d22)
Owners ManualÐUSA_English(nna)
10/17/05Ðdebbie
X
Page 185 of 336

5 Starting and driving
Precautions when starting and driving................5-2
Exhaust gas (carbon monoxide)..................5-2
Three-way catalyst..............................5-2
Tire pressure monitoring system (TPMS)..........5-3
On-pavement and off-road driving
precautions....................................5-5
Avoiding collision and rollover....................5-5
Drinking alcohol/drugs and driving................5-5
Driving safety precautions.......................5-6
Ignition switch.....................................5-7
Automatic transmission..........................5-7
Manual transmission............................5-8
Key positions..................................5-9
Nissan vehicle immobilizer system................5-9
Before starting the engine..........................5-9
Starting the engine...............................5-10
Driving the vehicle................................5-11
Automatic transmission.........................5-11
Manual transmission...........................5-14
Parking brake....................................5-17
Cruise control (if so equipped).....................5-18
Precautions on cruise control...................5-18
Cruise control operations.......................5-18
Break-in schedule................................5-19Increasing fuel economy...........................5-20Using four wheel drive (4WD).............5-20
Transfer case shifting procedures...............5-20
Electronic locking rear differential (E-Lock) system
(if so equipped)..................................5-25
Parking/parking on hills............................5-27
Power steering...................................5-28
Brake system....................................5-28
Brake precautions.............................5-28
Anti-lock brake system (ABS)...................5-29
Active brake limited slip (ABLS) system
(if so equipped)..................................5-30
Vehicle dynamic control (VDC) system
(if so equipped)..................................5-30
Hill descent control (HDC) system (if so equipped) . . . 5-32
Hill start assist (HSA) system (if so equipped).......5-32
Cold weather driving..............................5-33
Freeing a frozen door lock......................5-33
Anti-freeze....................................5-33
Battery.......................................5-33
Draining of coolant water.......................5-33
Tire equipment................................5-33
Special winter equipment.......................5-34
Driving on snow or ice.........................5-34
Engine block heater (if so equipped).............5-34
ZREVIEW COPYÐ2006 Truck/Frontier(d22)
Owners ManualÐUSA_English(nna)
10/17/05Ðdebbie
X
Page 187 of 336
cDo not stop or park the vehicle over
flammable materials such as dry grass,
waste paper or rags. They may ignite
and cause a fire.
CAUTION
cDo not use leaded gasoline. Deposits
from leaded gasoline will seriously re-
duce the three-way catalyst’s ability to
help reduce exhaust pollutants.
cKeep your engine tuned up. Malfunc-
tions in the ignition, fuel injection, or
electrical systems can cause overrich
fuel flow into the three-way catalyst,
causing it to overheat. Do not keep driv-
ing if the engine misfires, or if notice-
able loss of performance or other un-
usual operating conditions are
detected. Have the vehicle inspected
promptly by a NISSAN dealer.
cAvoid driving with an extremely low fuel
level. Running out of fuel could cause
the engine to misfire, damaging the
three-way catalyst.
cDo not race the engine while warming it
up.
cDo not push or tow your vehicle to start
the engine.
TIRE PRESSURE MONITORING
SYSTEM (TPMS)
Each tire, including the spare (if provided) ,
should be checked monthly when cold and in-
flated to the inflation pressure recommended by
the vehicle manufacturer on the vehicle placard
or tire inflation pressure label. (If your vehicle has
tires of a different size than the size indicated on
the vehicle placard or tire inflation pressure label,
you should determine the proper tire inflation
pressure for those tires.)
As an added safety feature, your vehicle has been
equipped with a Tire Pressure Monitoring System
(TPMS) that illuminates a low tire pressure telltale
when one or more of your tires is significantly
underinflated. Accordingly, when the low tire
pressure telltale illuminates, you should stop and
check your tires as soon as possible, and inflate
them to the proper pressure. Driving on a signifi-
cantly underinflated tire causes the tire to over-
heat and can lead to tire failure. Underinflation
also reduces fuel efficiency and tire tread life, and
may affect the vehicle’s handling and stopping
ability.
Please note that the TPMS is not a substitute for
proper tire maintenance, and it is the driver’s
responsibility to maintain correct tire pressure,even if underinflation has not reached the level to
trigger illumination of the TPMS low tire pressure
telltale.
Your vehicle has also been equipped with a
TPMS malfunction indicator to indicate when the
system is not operating properly. The TPMS mal-
function indicator is combined with the low tire
pressure telltale. When the system detects a
malfunction, the telltale will flash for approxi-
mately one minute and then remain continuously
illuminated. This sequence will continue upon
subsequent vehicle start-ups as long as the mal-
function exists. When the malfunction indicator is
illuminated, the system may not be able to detect
or signal low tire pressure as intended. TPMS
malfunctions may occur for a variety of reasons,
including the installation of replacement or alter-
nate tires or wheels on the vehicle that prevent
the TPMS from functioning properly. Always
check the TPMS malfunction telltale after replac-
ing one or more tires or wheels on your vehicle to
ensure that the replacement or alternate tires and
wheels allow the TPMS to continue to function
properly.
Additional information:
cThe TPMS does not monitor the tire pres-
sure of the spare tire.
Starting and driving5-3
ZREVIEW COPYÐ2006 Truck/Frontier(d22)
Owners ManualÐUSA_English(nna)
10/17/05Ðdebbie
X
Page 191 of 336
cLower your speed when encountering
strong crosswinds. With a higher center
of gravity, your NISSAN is more af-
fected by strong side winds. Slower
speeds ensure better vehicle control.
cDo not drive beyond the performance
capablity of the tires, even with 4WD
engaged.
cAccelerating quickly, sharp steering
maneuvers or sudden braking may
cause loss of control.
cIf at all possible, avoid sharp turning
maneuvers, particularly at high speeds.
Your NISSAN four-wheel drive vehicle
has a higher center of gravity than a
two-wheel drive vehicle. The vehicle is
not designed for cornering at the same
speeds as conventional two-wheel
drive vehicles. Failure to operate this
vehicle correctly could result in loss of
control and/or a rollover accident.
cAlways use tires of the same type, size,
brand, construction (bias, bias-belted,
or radial) , and tread pattern on all four
wheels. Install tire chains on the rear
wheels when driving on slippery roads
and drive carefully.cBe sure to check the brakes immedi-
ately after driving in mud or water. See
“Brake system” later in this section for
“Wet brakes”.
cAvoid parking your vehicle on steep
hills. If you get out of the vehicle and it
rolls forward, backward or sideways,
you could be injured.
cWhenever you drive off-road through
sand, mud or water as deep as the
wheel hub, more frequent maintenance
may be required. See “Periodic mainte-
nance” in the “NISSAN Service and
Maintenance Guide.”
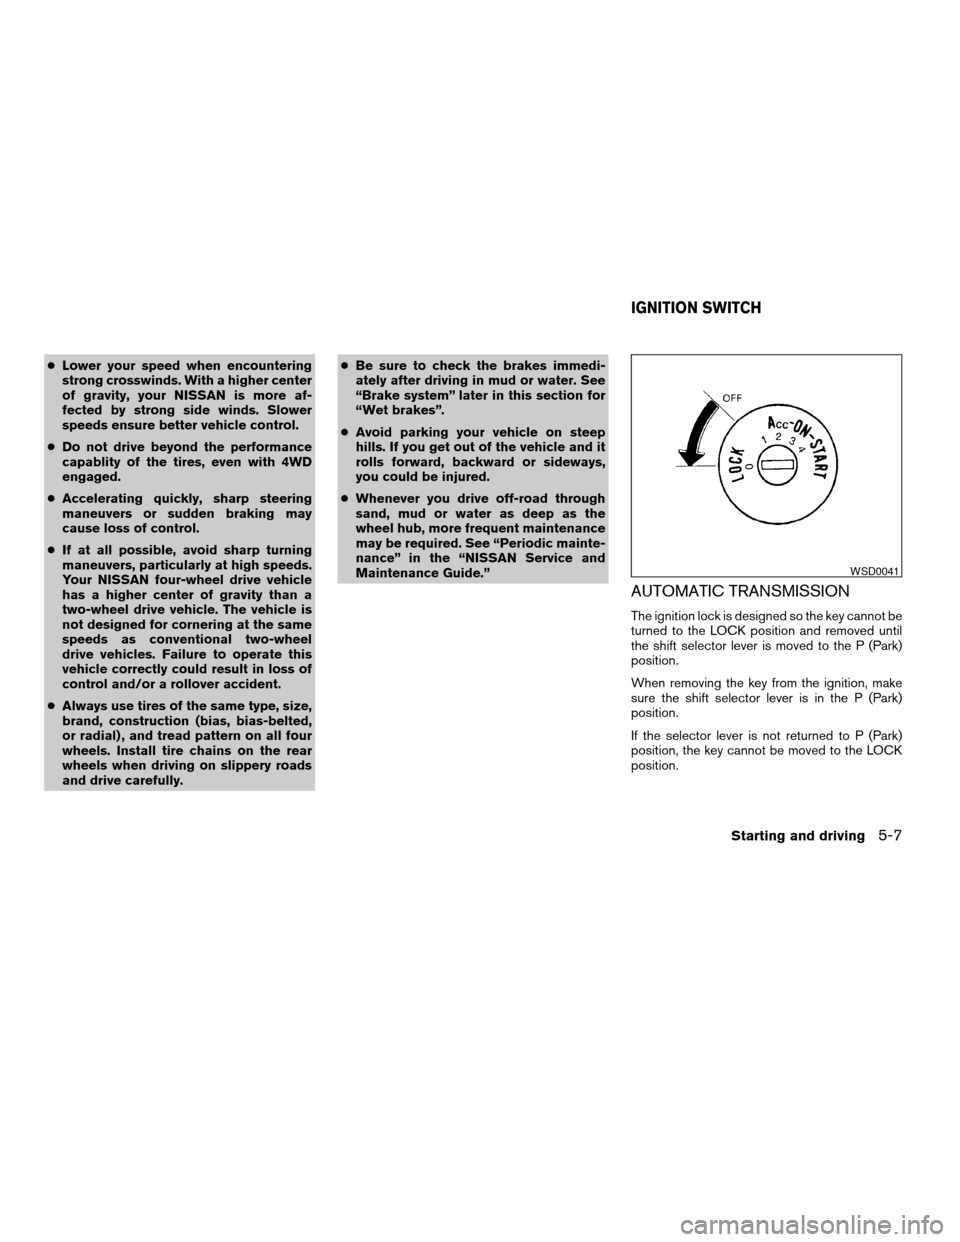
AUTOMATIC TRANSMISSION
The ignition lock is designed so the key cannot be
turned to the LOCK position and removed until
the shift selector lever is moved to the P (Park)
position.
When removing the key from the ignition, make
sure the shift selector lever is in the P (Park)
position.
If the selector lever is not returned to P (Park)
position, the key cannot be moved to the LOCK
position.
WSD0041
IGNITION SWITCH
Starting and driving5-7
ZREVIEW COPYÐ2006 Truck/Frontier(d22)
Owners ManualÐUSA_English(nna)
10/17/05Ðdebbie
X
Page 192 of 336
To remove the key from the ignition switch:
1. Shift the selector lever to the P (Park) posi-
tion with the key in the ON position.
2. Turn the key to the LOCK position.
3. Remove the key from the ignition.
If the selector lever is shifted to the P (Park)
position after the key is turned to the OFF posi-
tion or when the key cannot be turned to the
LOCK position, proceed as follows to remove the
key.
1. Move the shift selector lever into the P (Park)
position.
2. Turn the ignition key slightly toward the ON
position.
3. Turn the key to the LOCK position.
4. Remove the key.
The shift selector lever is designed so it cannot
moved out of P (Park) and into any of the other
gear positions if the ignition key is turned to OFF
position or if the key is removed from the switch.
The shift selector lever can be moved if the
ignition switch is in the ON position and the
foot brake pedal is depressed.There is an OFF position between the
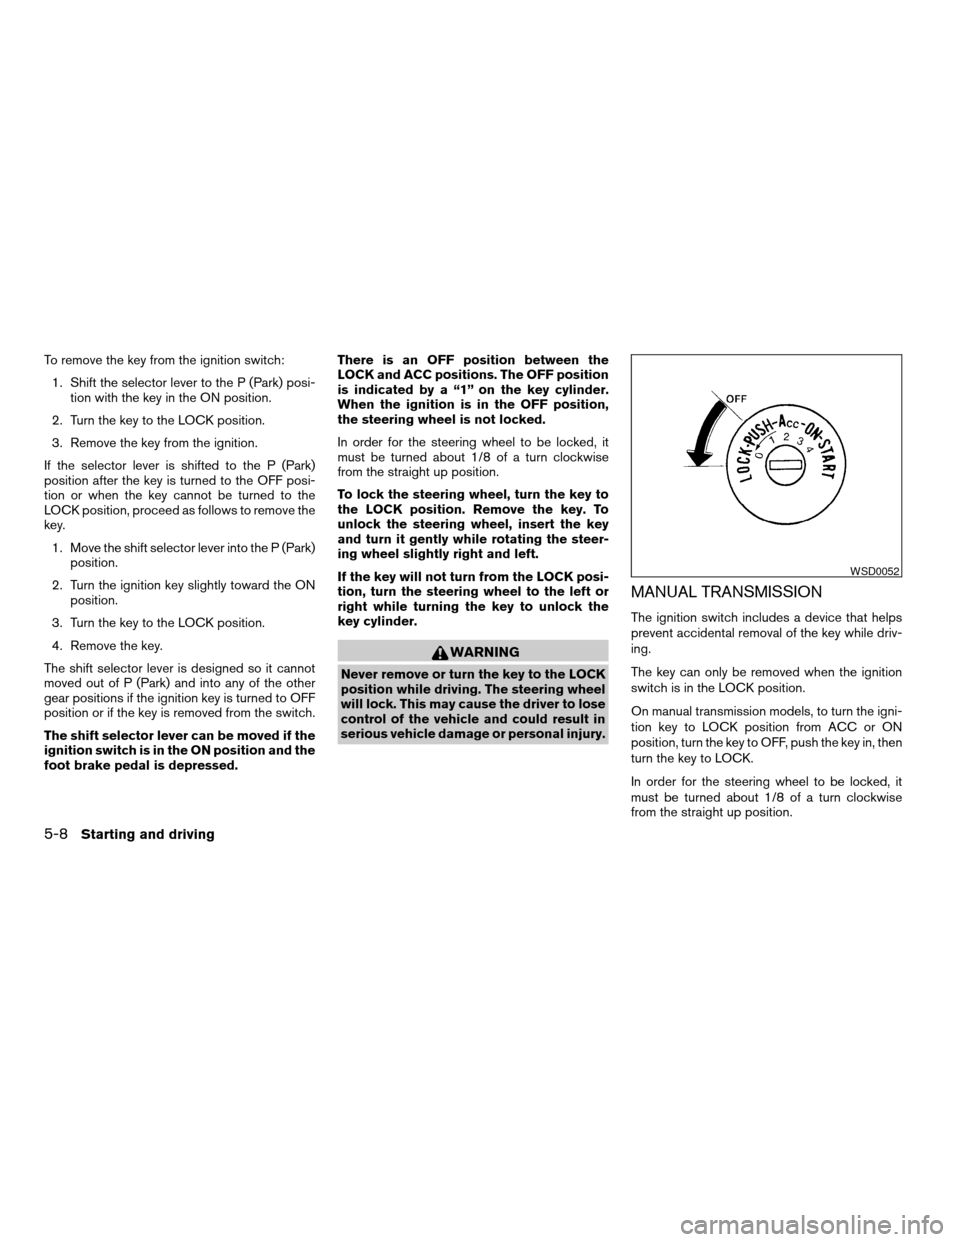
LOCK and ACC positions. The OFF position
is indicated by a “1” on the key cylinder.
When the ignition is in the OFF position,
the steering wheel is not locked.
In order for the steering wheel to be locked, it
must be turned about 1/8 of a turn clockwise
from the straight up position.
To lock the steering wheel, turn the key to
the LOCK position. Remove the key. To
unlock the steering wheel, insert the key
and turn it gently while rotating the steer-
ing wheel slightly right and left.
If the key will not turn from the LOCK posi-
tion, turn the steering wheel to the left or
right while turning the key to unlock the
key cylinder.
WARNING
Never remove or turn the key to the LOCK
position while driving. The steering wheel
will lock. This may cause the driver to lose
control of the vehicle and could result in
serious vehicle damage or personal injury.
MANUAL TRANSMISSION
The ignition switch includes a device that helps
prevent accidental removal of the key while driv-
ing.
The key can only be removed when the ignition
switch is in the LOCK position.
On manual transmission models, to turn the igni-
tion key to LOCK position from ACC or ON
position, turn the key to OFF, push the key in, then
turn the key to LOCK.
In order for the steering wheel to be locked, it
must be turned about 1/8 of a turn clockwise
from the straight up position.
WSD0052
5-8Starting and driving
ZREVIEW COPYÐ2006 Truck/Frontier(d22)
Owners ManualÐUSA_English(nna)
10/17/05Ðdebbie
X
Page 193 of 336
To lock the steering wheel, turn the key to
the LOCK position. Remove the key. To
unlock the steering wheel, insert the key
and turn it gently while rotating the steer-
ing wheel slightly right and left.
WARNING
Never remove or turn the key to the LOCK
position while driving. The steering wheel
will lock. This may cause the driver to lose
control of the vehicle and could result in
serious vehicle damage or personal injury.
KEY POSITIONS
LOCK: Normal parking position (0)
OFF: (Not used) (1)
ACC: (Accessories) (2)
This position activates electrical accessories
such as the radio when the engine is not running.
ON: Normal operating position (3)
This position turns on the ignition system and the
electrical accessories.
START: (4)
This position starts the engine. As soon as the
engine has started, release the key. It automati-
cally returns to the ON position.
NISSAN VEHICLE IMMOBILIZER
SYSTEM
The NISSAN Vehicle Immobilizer System will not
allow the engine to start without the use of the
registered key.
If the engine fails to start using a registered key
(for example, when interference is caused by
another registered key, an automated toll road
device or automatic payment device on the key
ring) , restart the engine using the following pro-
cedures:
1. Leave the ignition switch in the ON position
for approximately 5 seconds.
2. Turn the ignition switch to the OFF or LOCK
position, and wait approximately 10 sec-
onds.
3. Repeat steps 1 and 2.
4. Restart the engine while holding the device
(which may have caused the interference)
separate from the registered key.
If the no start condition re-occurs, NISSAN rec-
ommends placing the registered key on a sepa-
rate key ring to avoid interference from other
devices.cMake sure the area around the vehicle is
clear.
cCheck fluid levels such as engine oil, cool-
ant, brake fluid, and window washer fluid as
frequently as possible, or at least whenever
you refuel.
cCheck that all windows and lights are clean.
cVisually inspect tires for their appearance
and condition. Also check tires for proper
inflation.
cLock all doors.
cPosition seat and adjust head restraints.
cAdjust inside and outside mirrors.
cFasten seat belts and ask all passengers to
do likewise.
cCheck the operation of warning lights when
the key is turned to the ON (3) position. See
“Warning/indicator lights and audible re-
minders” in the “Instruments and controls”
section of this manual.
BEFORE STARTING THE ENGINE
Starting and driving5-9
ZREVIEW COPYÐ2006 Truck/Frontier(d22)
Owners ManualÐUSA_English(nna)
10/17/05Ðdebbie
X
Page 194 of 336
1. Apply the parking brake.
2.Automatic transmission:
Move the shift selector lever to P (Park) or N
(Neutral) . P (Park) is recommended.
The shift selector lever cannot be
moved out of P (Park) and into any of
the other gear positions if the ignition
key is turned to the OFF position or if
the key is removed from the ignition
switch.
The starter is designed not to operate if
the shift selector lever is in any of the
driving positions.
Manual transmission:
Move the shift lever to N (Neutral) . Depress
the clutch pedal to the floor while cranking
the engine.
The starter is designed not to operate
unless the clutch pedal is fully de-
pressed.
3. Crank the enginewith your foot off the
accelerator pedalby turning the ignition
key to START. Release the key when the
engine starts. If the engine starts, but fails to
run, repeat the above procedure.cIf the engine is very hard to start in ex-
tremely cold weather or when restarting,
depress the accelerator pedal a little (ap-
proximately 1/3 to the floor) and hold it
and then crank the engine. Release the
key and the accelerator pedal when the
engine starts.
cIf the engine is very hard to start because
it is flooded, depress the accelerator
pedal all the way to the floor and hold it.
Crank the engine for 5-6 seconds. After
cranking the engine, release the accel-
erator pedal. Crank the enginewith your
foot off the accelerator pedalby turn-
ing the ignition key to START. Release the
key when the engine starts. If the engine
starts, but fails to run, repeat the above
procedure.
CAUTION
Do not operate the starter for more than
15 seconds at a time. If the engine does
not start, turn the key off and wait 10
seconds before cranking again, otherwise
the starter could be damaged.4. Allow the engine to idle for at least 30 sec-
onds after starting. Do not race the engine
while warming it up. Drive at moderate
speed for a short distance first, especially in
cold weather.
STARTING THE ENGINE
5-10Starting and driving
ZREVIEW COPYÐ2006 Truck/Frontier(d22)
Owners ManualÐUSA_English(nna)
10/17/05Ðdebbie
X