2006 NISSAN FRONTIER check engine light
[x] Cancel search: check engine lightPage 205 of 336

4WD Shift
Switch PositionWheels
DrivenIndicator Light
Use Conditions 4WD Shift Procedure
4WD shift Transfer 4LO
position
2WDRear wheels
For driving on dry, paved roads (Economy
drive) or state dynamometer I/M testingMove the 4WD switch.
2WD <—> 4H
4WD shift indicator light will indicate transfer shift position engaged.
4H4 wheels
For driving on rocky, sandy or snow-
covered roads
Neutral
*1
May blinkNeutral disengages the automatic trans-
mission mechanical parking lock, which
will allow the vehicle to roll. Do not leave
the transfer shift position in Neutral.*21. Stop the vehicle.
2. For automatic transmission vehicles: Shift the transmission selector to the (N) position with
the brake pedal depressed.
For manual transmission vehicles: Shift the transmission shift lever to the (N) position with the
clutch depressed.
3. For automatic transmission vehicles: Depress and turn the 4WD shift switch to 4LO or 4H
with the brake pedal depressed.
For manual transmission vehicles: Depress and turn the 4WD switch to 4LO or 4H with the
clutch pedal depressed.
THE TRANSFER CASE DOES NOT ENGAGE BETWEEN 4H AND 4LO (OR 4LO TO 4H) UN-
LESS YOU HAVE FIRST STOPPED THE VEHICLE, DEPRESSED THE BRAKE PEDAL AND
MOVED THE TRANSMISSION SELECTOR TO NEUTRAL FOR AUTOMATIC TRANSMISSION
VEHICLES. FOR MANUAL TRANSMISSION VEHICLES YOU MUST MOVE THE TRANSMIS-
SION SHIFT LEVER TO NEUTRAL. *3
4LO
4 wheels
IlluminatedFor use when maximum power and trac-
tion is required (for example: on steep
grades or rocky, sandy, muddy roads)
*1: Before moving the transmission selector or shift lever from neutral, wait until the 4LO indicator light stays on steady. This indicates that the 4WD shift procedure is completed and the transfer gear is correctly set in
the 4LO position. If the vehicle is shifted into gear before the indicator is on steady, the transfer gear may grind, not engage correctly or stay in the neutral position.
- If the 4WD warning light illuminates, perform the following procedure to return the transfer case to correct operating condition.
1. Turn off the engine by turning the ignition switch9OFF9.
2. Start the engine.
- Check that the 4WD warning light turns off. If the 4WD warning light illuminates, have the system checked by a NISSAN dealer.
3. Apply the parking brake, for automatic transmission vehicles, depress the brake pedal and move the transmission selector to Neutral position. Formanual transmission vehicles, move the transmission shift lever to Neutral
position.
4. With the brake pedal depressed on automatic transmission vehicles or with the clutch pedal depressed on manual transmission vehicles, move the 4WDshift switch to desired mode.
- Be sure to wait until the transfer gear change completes before shifting the transmission selector or transmission shift lever from Neutral position.
*2: While changing in and out of 4LO, the ignition key must be ON and the vehicle’s engine must be running for a shift to take place and for the indicator lights (4WD shift and 4LO position indicator) to be operable.
Otherwise, the shift will not take place and no indicator lights will be on or flashing.
*3: Make sure the transfer 4LO position indicator light turns on when you shift the 4WD shift switch to 4LO. The
indicator light (if so equipped) will also turn on when 4LO is selected. See “Vehicle dynamic control
system” later in this section.
Starting and driving5-21
ZREVIEW COPYÐ2006 Truck/Frontier(d22)
Owners ManualÐUSA_English(nna)
10/17/05Ðdebbie
X
Page 208 of 336
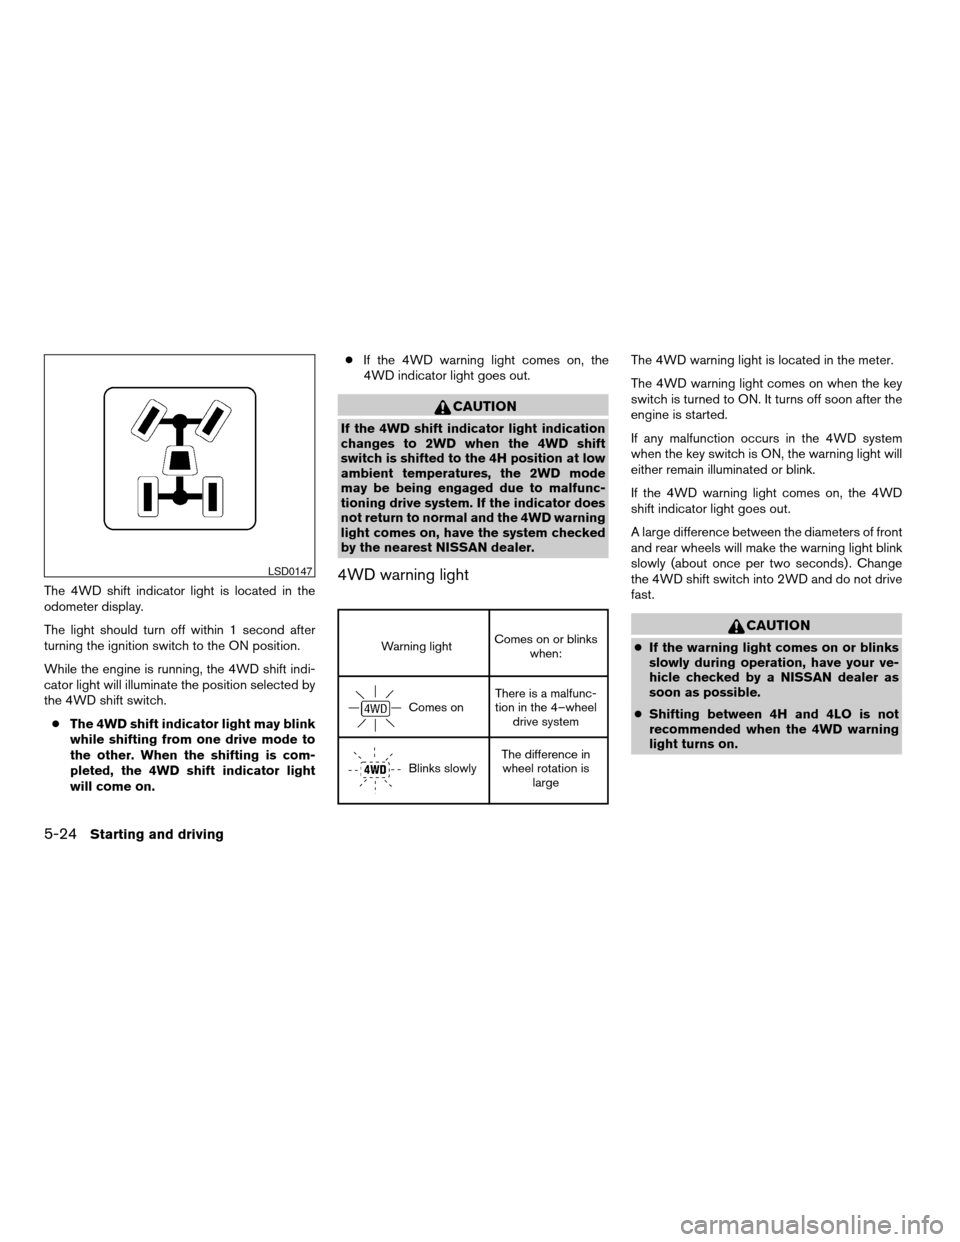
The 4WD shift indicator light is located in the
odometer display.
The light should turn off within 1 second after
turning the ignition switch to the ON position.
While the engine is running, the 4WD shift indi-
cator light will illuminate the position selected by
the 4WD shift switch.
cThe 4WD shift indicator light may blink
while shifting from one drive mode to
the other. When the shifting is com-
pleted, the 4WD shift indicator light
will come on.cIf the 4WD warning light comes on, the
4WD indicator light goes out.
CAUTION
If the 4WD shift indicator light indication
changes to 2WD when the 4WD shift
switch is shifted to the 4H position at low
ambient temperatures, the 2WD mode
may be being engaged due to malfunc-
tioning drive system. If the indicator does
not return to normal and the 4WD warning
light comes on, have the system checked
by the nearest NISSAN dealer.
4WD warning light
Warning lightComes on or blinks
when:
Comes onThere is a malfunc-
tion in the 4–wheel
drive system
Blinks slowlyThe difference in
wheel rotation is
large
The 4WD warning light is located in the meter.
The 4WD warning light comes on when the key
switch is turned to ON. It turns off soon after the
engine is started.
If any malfunction occurs in the 4WD system
when the key switch is ON, the warning light will
either remain illuminated or blink.
If the 4WD warning light comes on, the 4WD
shift indicator light goes out.
A large difference between the diameters of front
and rear wheels will make the warning light blink
slowly (about once per two seconds) . Change
the 4WD shift switch into 2WD and do not drive
fast.
CAUTION
cIf the warning light comes on or blinks
slowly during operation, have your ve-
hicle checked by a NISSAN dealer as
soon as possible.
cShifting between 4H and 4LO is not
recommended when the 4WD warning
light turns on.
LSD0147
5-24Starting and driving
ZREVIEW COPYÐ2006 Truck/Frontier(d22)
Owners ManualÐUSA_English(nna)
10/17/05Ðdebbie
X
Page 215 of 336
cDrive the vehicle at speeds above 10 mph
(15 km/h) for at least 10 minutes.
cThe VDC OFF indicator light should go off
indicating the traction control system is op-
erational.
cIf you interrupt the reset procedure by turn-
ing the ignition off, you will need to restart
the reset procedure.
If after driving the vehicle for more than 10 min-
utes and theSLIPand
lights remain illumi-
nated in the instrument panel, have the vehicle
dynamic control system checked by a NISSAN
dealer.
If the vehicle is operated with the vehicle dynamic
control system off using the VDC OFF switch,
most VDC functions will be turned off. The VDC
system will still try to transfer power from a slip-
ping drive wheel to one with more traction when
the VDC system switch is OFF. The Slip indicator
will flash if wheel spin is detected. The ABS will
still operate with the VDC system off.
When the VDC system is operating, you may feel
a pulsation in the brake pedal and hear a noise or
vibration from under the hood. This is normal and
indicates that the VDC system is working prop-
erly.The computer has a built in diagnostic feature
that tests the system each time you start the
engine and move the vehicle forward or in reverse
at a slow speed. When the self-test occurs, you
may hear a clunk noise and/or feel a pulsation in
the brake pedal. This is normal and is not an
indication of a malfunction.
WARNING
cThe vehicle dynamic control system is
designed to help improve driving stabil-
ity but does not prevent accidents due
to abrupt steering operation at high
speeds or by careless or dangerous
driving techniques. Reduce vehicle
speed and be especially careful when
driving and cornering on slippery sur-
faces and always drive carefully.
cIf brake related parts such as brake
pads, rotors and calipers are not stan-
dard equipment or are extremely dete-
riorated, the vehicle dynamic control
system may not operate properly and
the vehicle dynamic control off indica-
tor light may come on.c
Do not modify the vehicle’s suspension. If
suspension parts such as shock absorb-
ers, struts, springs, stabilizer bars and
bushings are not NISSAN approved for
your vehicle or are extremely deteriorated
the vehicle dynamic control system may
not operate properly. This could adversely
affect vehicle handling performance, and
the VDC OFF indicator light may come on.
cWhen driving on extremely inclined sur-
faces such as higher banked corners,
the vehicle dynamic control system may
not operate properly and the VDC OFF
indicator light may come on. Do not
drive on these types of roads.
cWhen driving on an unstable surface
such as a turntable, ferry, elevator or
ramp, the vehicle dynamic control off
indicator light may illuminate. This is
not a malfunction. Restart the engine
after driving onto a stable surface
cIf wheels or tires other than the recom-
mended ones are used, the vehicle dy-
namic control system may not operate
properly and the vehicle dynamic con-
trol off indicator light may come on.
cThe vehicle dynamic control system is
not a substitute for winter tires or tire
chains on a snow covered road.
Starting and driving5-31
ZREVIEW COPYÐ2006 Truck/Frontier(d22)
Owners ManualÐUSA_English(nna)
10/17/05Ðdebbie
X
Page 241 of 336

8 Maintenance and do-it-yourself
Maintenance requirements..........................8-2
General maintenance..............................8-2
Explanation of general maintenance items.........8-2
Maintenance precautions...........................8-5
Engine compartment check locations................8-6
Engine cooling system.............................8-8
Checking engine coolant level...................8-8
Changing engine coolant........................8-9
Engine oil.........................................8-9
Checking engine oil level........................8-9
Changing engine oil...........................8-10
Changing engine oil filter.......................8-12
5-speed automatic transmission fluid...............8-13
Power steering fluid...............................8-13
Brake and clutch fluid.............................8-14
Brake fluid....................................8-14
Clutch fluid...................................8-14
Window washer fluid.............................8-15
Window washer fluid reservoir..................8-15
Battery..........................................8-15
Jump starting.................................8-17
Variable Voltage Control System...................8-17
Drive belts.......................................8-18Spark plugs......................................8-19
Replacing spark plugs.........................8-19
Air cleaner.......................................8-19
In-cabin microfilter.............................8-20
Windshield wiper blades..........................8-21
Cleaning.....................................8-21
Replacing....................................8-22
Parking brake and brake pedal.....................8-23
Checking parking brake........................8-23
Checking brake pedal..........................8-23
Brake booster.................................8-24
Fuses...........................................8-24
Engine compartment...........................8-25
Passenger compartment.......................8-26
Keyfob battery replacement........................8-27
Lights...........................................8-28
Headlights....................................8-28
Exterior and interior lights.......................8-29
Wheels and tires.................................8-32
Tire pressure..................................8-32
Tire labeling...................................8-36
Types of tires..................................8-39
Tire chains....................................8-40
Changing wheels and tires.....................8-40
ZREVIEW COPYÐ2006 Truck/Frontier(d22)
Owners ManualÐUSA_English(nna)
10/17/05Ðdebbie
X
Page 252 of 336
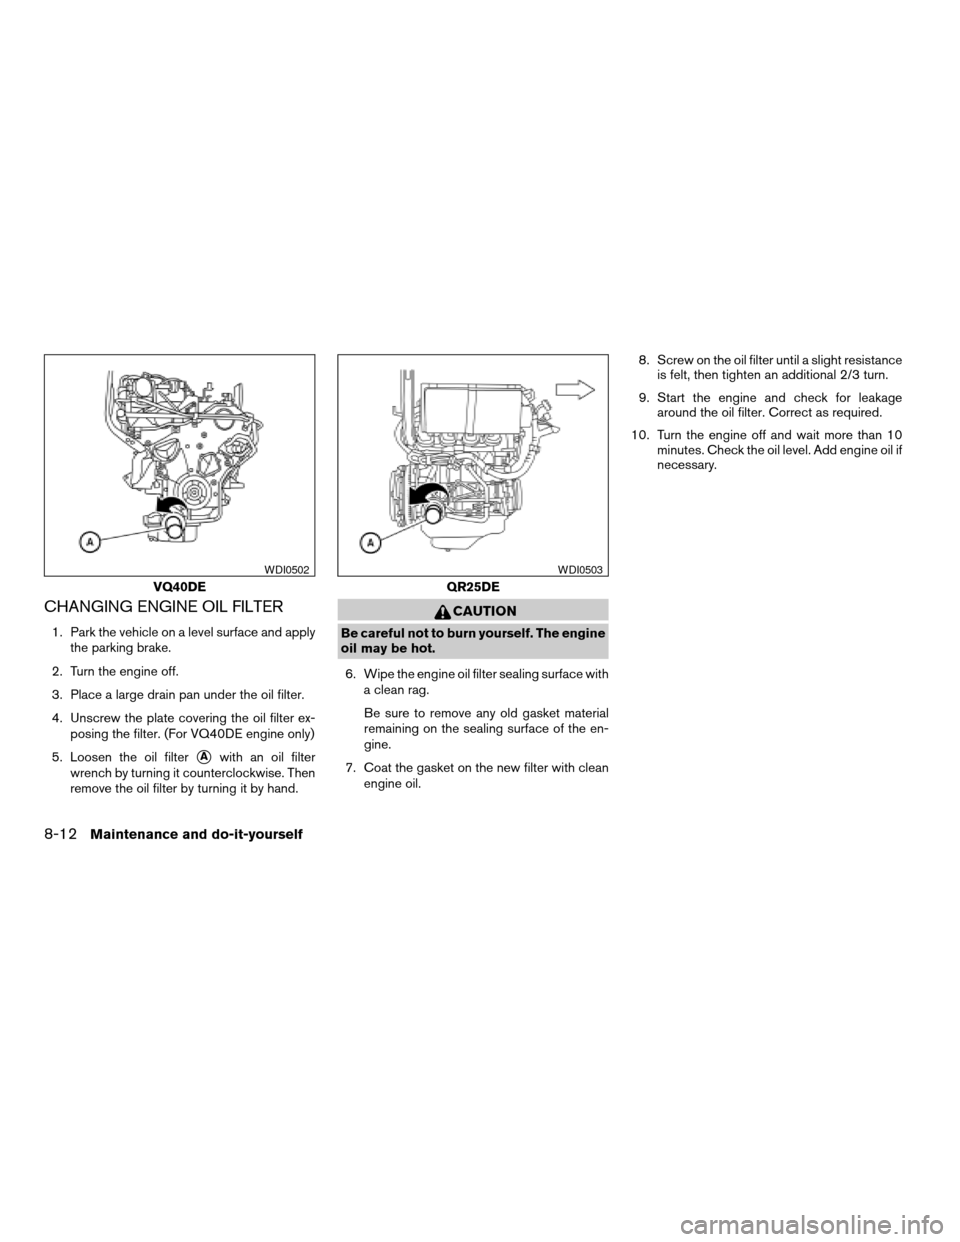
CHANGING ENGINE OIL FILTER
1. Park the vehicle on a level surface and apply
the parking brake.
2. Turn the engine off.
3. Place a large drain pan under the oil filter.
4. Unscrew the plate covering the oil filter ex-
posing the filter. (For VQ40DE engine only)
5. Loosen the oil filter
sAwith an oil filter
wrench by turning it counterclockwise. Then
remove the oil filter by turning it by hand.
CAUTION
Be careful not to burn yourself. The engine
oil may be hot.
6. Wipe the engine oil filter sealing surface with
a clean rag.
Be sure to remove any old gasket material
remaining on the sealing surface of the en-
gine.
7. Coat the gasket on the new filter with clean
engine oil.8. Screw on the oil filter until a slight resistance
is felt, then tighten an additional 2/3 turn.
9. Start the engine and check for leakage
around the oil filter. Correct as required.
10. Turn the engine off and wait more than 10
minutes. Check the oil level. Add engine oil if
necessary.
VQ40DE
WDI0502
QR25DE
WDI0503
8-12Maintenance and do-it-yourself
ZREVIEW COPYÐ2006 Truck/Frontier(d22)
Owners ManualÐUSA_English(nna)
10/17/05Ðdebbie
X
Page 263 of 336
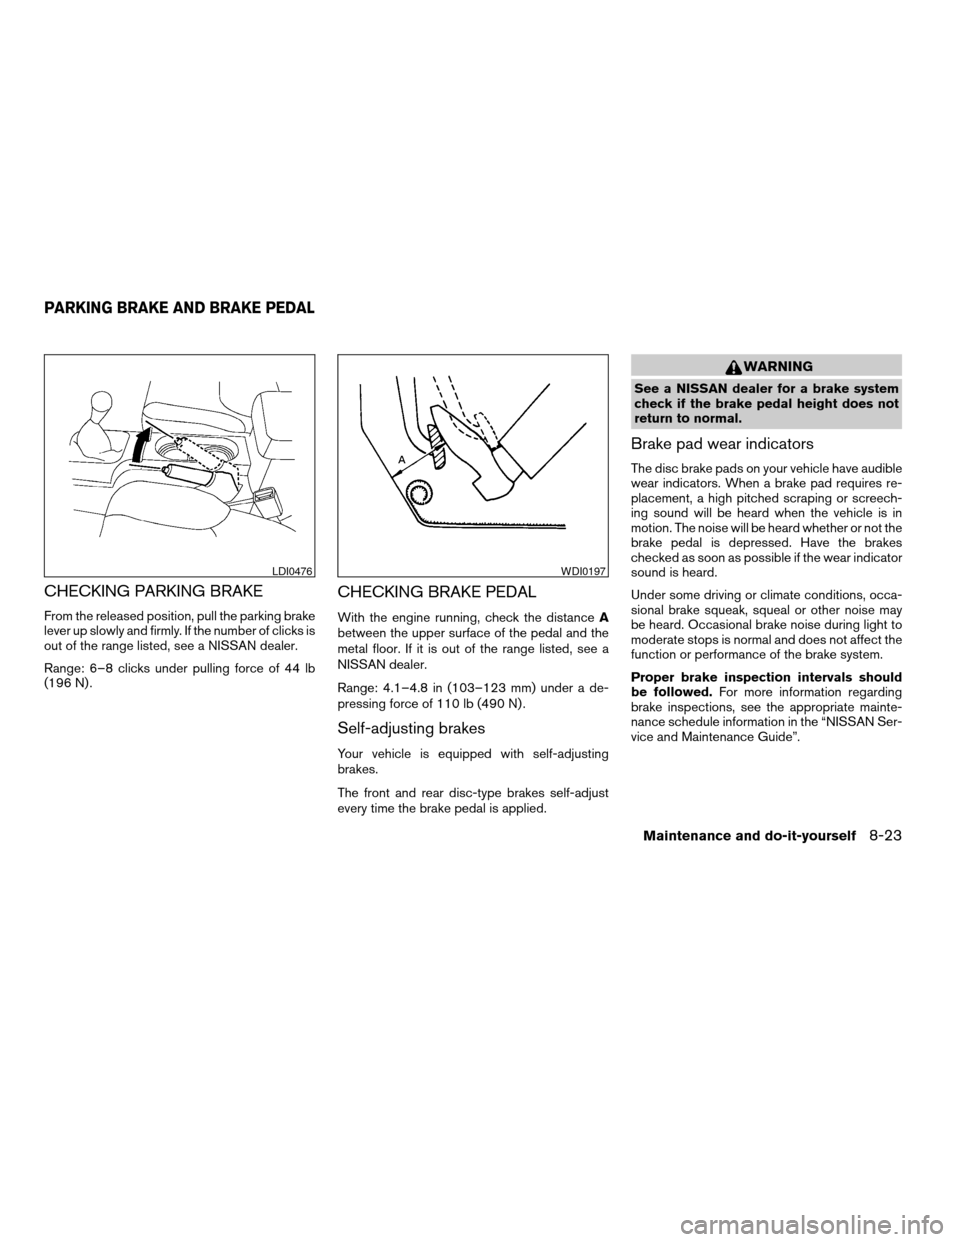
CHECKING PARKING BRAKE
From the released position, pull the parking brake
lever up slowly and firmly. If the number of clicks is
out of the range listed, see a NISSAN dealer.
Range: 6–8 clicks under pulling force of 44 lb
(196 N) .
CHECKING BRAKE PEDAL
With the engine running, check the distanceA
between the upper surface of the pedal and the
metal floor. If it is out of the range listed, see a
NISSAN dealer.
Range: 4.1–4.8 in (103–123 mm) under a de-
pressing force of 110 lb (490 N) .
Self-adjusting brakes
Your vehicle is equipped with self-adjusting
brakes.
The front and rear disc-type brakes self-adjust
every time the brake pedal is applied.
WARNING
See a NISSAN dealer for a brake system
check if the brake pedal height does not
return to normal.
Brake pad wear indicators
The disc brake pads on your vehicle have audible
wear indicators. When a brake pad requires re-
placement, a high pitched scraping or screech-
ing sound will be heard when the vehicle is in
motion. The noise will be heard whether or not the
brake pedal is depressed. Have the brakes
checked as soon as possible if the wear indicator
sound is heard.
Under some driving or climate conditions, occa-
sional brake squeak, squeal or other noise may
be heard. Occasional brake noise during light to
moderate stops is normal and does not affect the
function or performance of the brake system.
Proper brake inspection intervals should
be followed.For more information regarding
brake inspections, see the appropriate mainte-
nance schedule information in the “NISSAN Ser-
vice and Maintenance Guide”.
LDI0476WDI0197
PARKING BRAKE AND BRAKE PEDAL
Maintenance and do-it-yourself8-23
ZREVIEW COPYÐ2006 Truck/Frontier(d22)
Owners ManualÐUSA_English(nna)
10/17/05Ðdebbie
X
Page 265 of 336
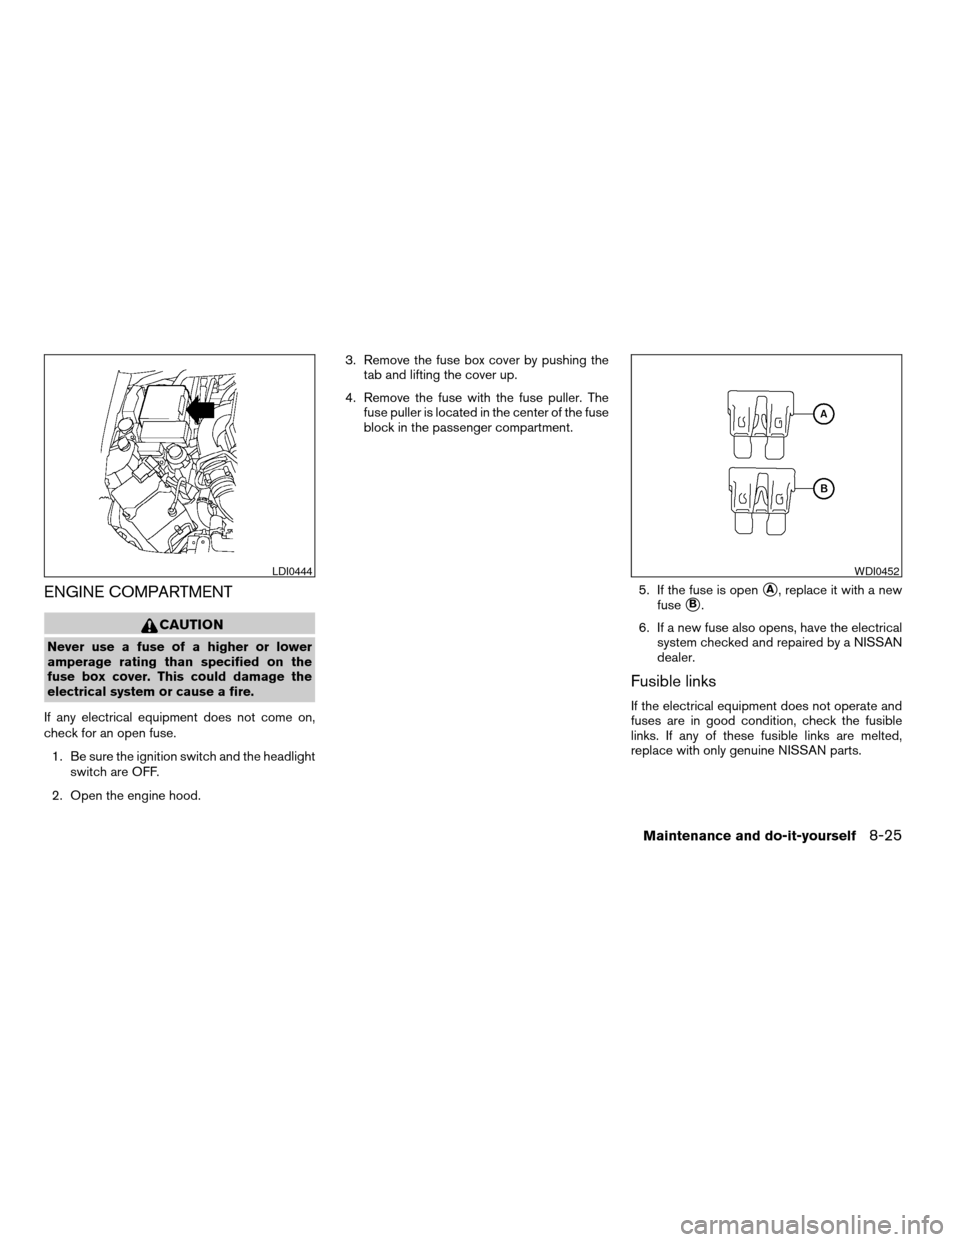
ENGINE COMPARTMENT
CAUTION
Never use a fuse of a higher or lower
amperage rating than specified on the
fuse box cover. This could damage the
electrical system or cause a fire.
If any electrical equipment does not come on,
check for an open fuse.
1. Be sure the ignition switch and the headlight
switch are OFF.
2. Open the engine hood.3. Remove the fuse box cover by pushing the
tab and lifting the cover up.
4. Remove the fuse with the fuse puller. The
fuse puller is located in the center of the fuse
block in the passenger compartment.
5. If the fuse is open
sA, replace it with a new
fuse
sB.
6. If a new fuse also opens, have the electrical
system checked and repaired by a NISSAN
dealer.
Fusible links
If the electrical equipment does not operate and
fuses are in good condition, check the fusible
links. If any of these fusible links are melted,
replace with only genuine NISSAN parts.
LDI0444WDI0452
Maintenance and do-it-yourself8-25
ZREVIEW COPYÐ2006 Truck/Frontier(d22)
Owners ManualÐUSA_English(nna)
10/17/05Ðdebbie
X
Page 268 of 336
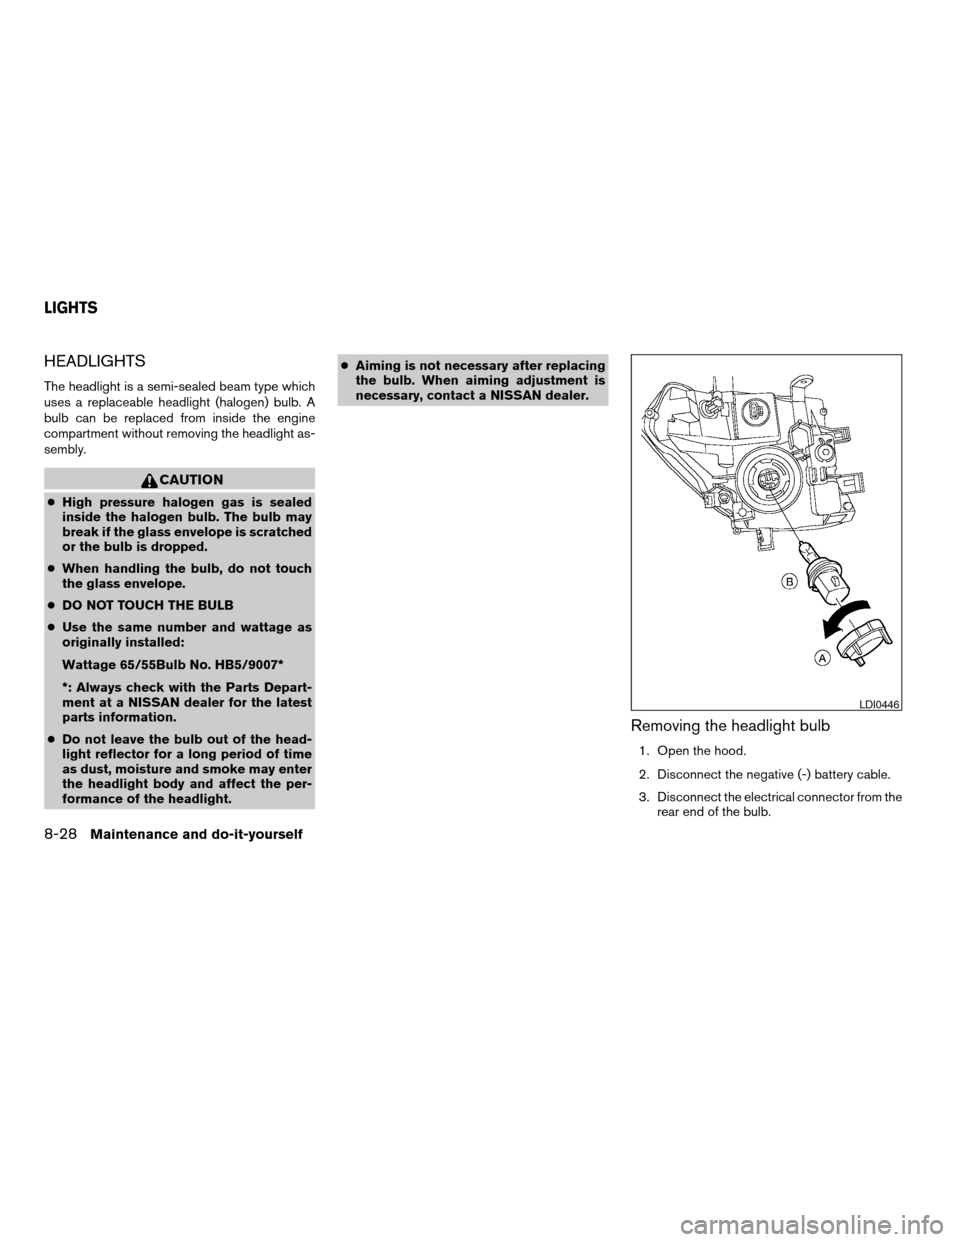
HEADLIGHTS
The headlight is a semi-sealed beam type which
uses a replaceable headlight (halogen) bulb. A
bulb can be replaced from inside the engine
compartment without removing the headlight as-
sembly.
CAUTION
cHigh pressure halogen gas is sealed
inside the halogen bulb. The bulb may
break if the glass envelope is scratched
or the bulb is dropped.
cWhen handling the bulb, do not touch
the glass envelope.
cDO NOT TOUCH THE BULB
cUse the same number and wattage as
originally installed:
Wattage 65/55Bulb No. HB5/9007*
*: Always check with the Parts Depart-
ment at a NISSAN dealer for the latest
parts information.
cDo not leave the bulb out of the head-
light reflector for a long period of time
as dust, moisture and smoke may enter
the headlight body and affect the per-
formance of the headlight.cAiming is not necessary after replacing
the bulb. When aiming adjustment is
necessary, contact a NISSAN dealer.
Removing the headlight bulb
1. Open the hood.
2. Disconnect the negative (-) battery cable.
3. Disconnect the electrical connector from the
rear end of the bulb.
LDI0446
LIGHTS
8-28Maintenance and do-it-yourself
ZREVIEW COPYÐ2006 Truck/Frontier(d22)
Owners ManualÐUSA_English(nna)
10/17/05Ðdebbie
X