2006 NISSAN FRONTIER fold seats
[x] Cancel search: fold seatsPage 44 of 336
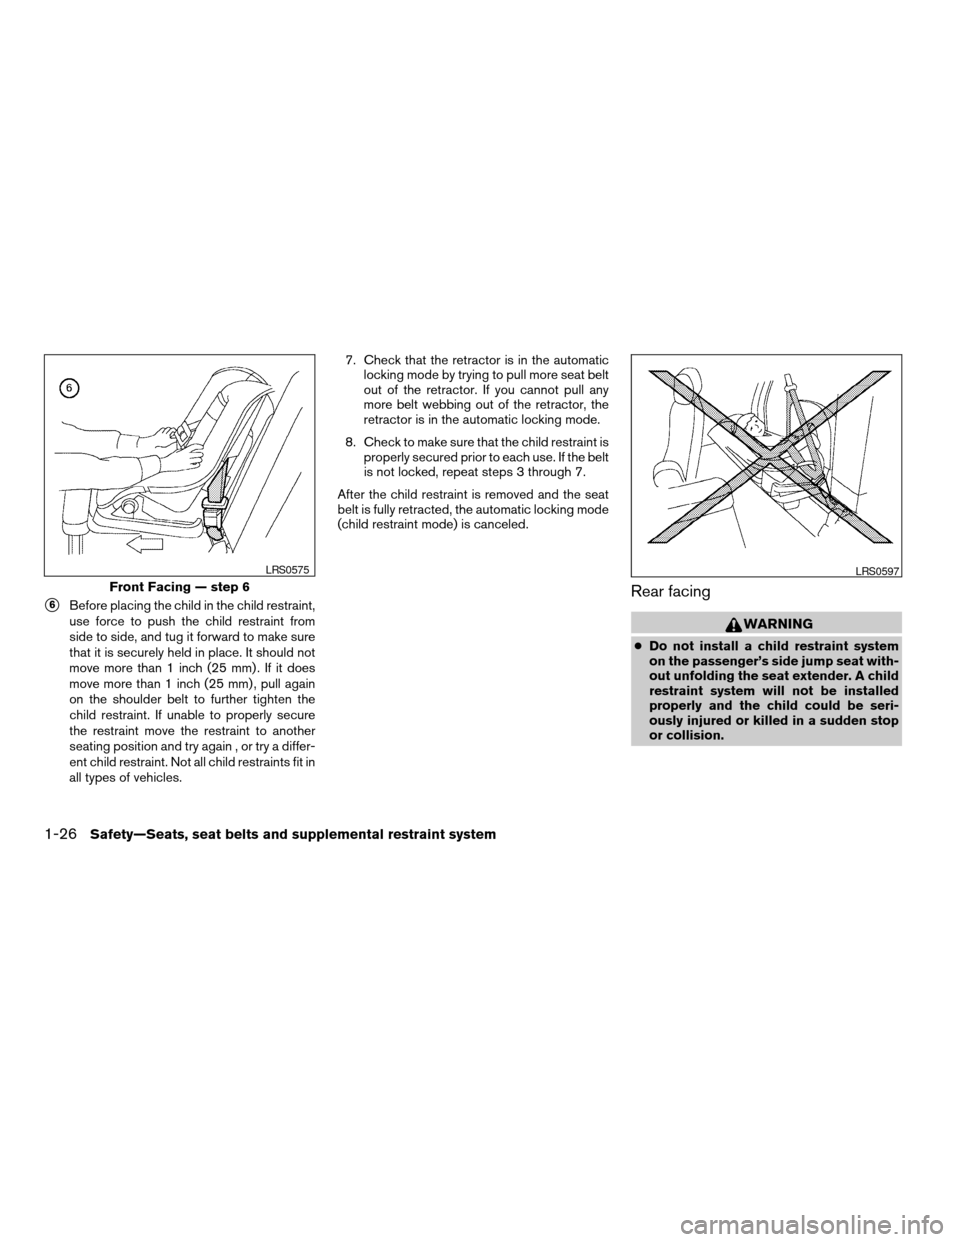
s6Before placing the child in the child restraint,
use force to push the child restraint from
side to side, and tug it forward to make sure
that it is securely held in place. It should not
move more than 1 inch (25 mm) . If it does
move more than 1 inch (25 mm) , pull again
on the shoulder belt to further tighten the
child restraint. If unable to properly secure
the restraint move the restraint to another
seating position and try again , or try a differ-
ent child restraint. Not all child restraints fit in
all types of vehicles.7. Check that the retractor is in the automatic
locking mode by trying to pull more seat belt
out of the retractor. If you cannot pull any
more belt webbing out of the retractor, the
retractor is in the automatic locking mode.
8. Check to make sure that the child restraint is
properly secured prior to each use. If the belt
is not locked, repeat steps 3 through 7.
After the child restraint is removed and the seat
belt is fully retracted, the automatic locking mode
(child restraint mode) is canceled.Rear facing
WARNING
cDo not install a child restraint system
on the passenger’s side jump seat with-
out unfolding the seat extender. A child
restraint system will not be installed
properly and the child could be seri-
ously injured or killed in a sudden stop
or collision.
Front Facing — step 6
LRS0575LRS0597
1-26Safety—Seats, seat belts and supplemental restraint system
ZREVIEW COPYÐ2006 Truck/Frontier(d22)
Owners ManualÐUSA_English(nna)
10/14/05Ðdebbie
X
Page 45 of 336

WARNING
cTo install a rear facing child restraint on
the passenger’s side jump seat, it will
be necessary to move the front passen-
ger’s seat fully forward and place the
front seatback upright or tilt it forward.
The front seat cannot be used. Attempt-
ing to do so could lead to serious injury
in a sudden stop or crash.When you install a child restraint on the passen-
ger’s side jump seat, follow these steps:
1. To access the jump seat extensions1on the
passenger’s side jump seat only pull up
s2
on the extension to unfold it to the open
position. Then unfold the two support legs
s3and lower the jump seat to the full open
s4seating position.
LRS0549LRS0559LRS0537
Safety—Seats, seat belts and supplemental restraint system1-27
ZREVIEW COPYÐ2006 Truck/Frontier(d22)
Owners ManualÐUSA_English(nna)
10/14/05Ðdebbie
X
Page 61 of 336

cA booster seat must only be installed in
a seating position that has a
lap/shoulder belt. Failure to use a
three-point type seat belt with a
booster seat can result in a serious in-
jury in sudden stop or collision.
cAn improperly installed booster seat
could lead to serious injury or death in
an accident.
cWhen installing a booster seat in the
passenger’s side jump seat position be
sure to unfold the seat extension on the
jump seat. If the jump seat extension is
not properly used, the booster seat will
not be installed correctly and a child
could be injured in a collision or sudden
stop.
cNever install a child restraint on the
driver’s side jump seat. A child restraint
can not be properly installed in the driv-
er’s side jump seat and the child could
be injured in a collision or sudden stop.
WARNING
cDo not use towels, books, pillows or
other items in place of a booster seat.
Items such as these may move during
normal driving or a collision and result
in serious injury or death. Booster seats
are designed to be used with a
lap/shoulder belt. Booster seats are de-
signed to properly route the lap and
shoulder portions of the seat belt over
the strongest portions of a child’s body
to provide the maximum protection dur-
ing a collision.Booster seats of various sizes are offered by
several manufacturers. When selecting any
booster seat, keep the following points in mind:
cChoose only a booster seat with a label
certifying that it complies with Federal Motor
Vehicle Safety Standard 213 or Canadian
Motor Vehicle Safety Standard 213.
cCheck the booster seat in your vehicle to be
sure it is compatible with the vehicle’s seat
and seat belt system.
LRS0455LRS0538
Safety—Seats, seat belts and supplemental restraint system1-43
ZREVIEW COPYÐ2006 Truck/Frontier(d22)
Owners ManualÐUSA_English(nna)
10/14/05Ðdebbie
X
Page 63 of 336
BOOSTER SEAT INSTALLATION ON
PASSENGER’S SIDE JUMP SEAT
ONLY (King cab, if so equipped)
WARNING
cWhen installing a booster seat in the
passenger’s side jump seat position be
sure to unfold the seat extension on the
jump seat. If the jump seat extension is
not properly used, the booster seat will
not be installed correctly and a child
could be injured in a collision or sudden
stop.
cNever install a booster seat on the driv-
er’s side jump seat. A child restraint can
not be properly installed in the driver’s
side jump seat and a child could be
injured in a collision or sudden stop.
CAUTION
Do not use the lap/shoulder belt auto-
matic locking mode when using a booster
seat with the seat belts. When you install a
booster seat on the jump seat follow
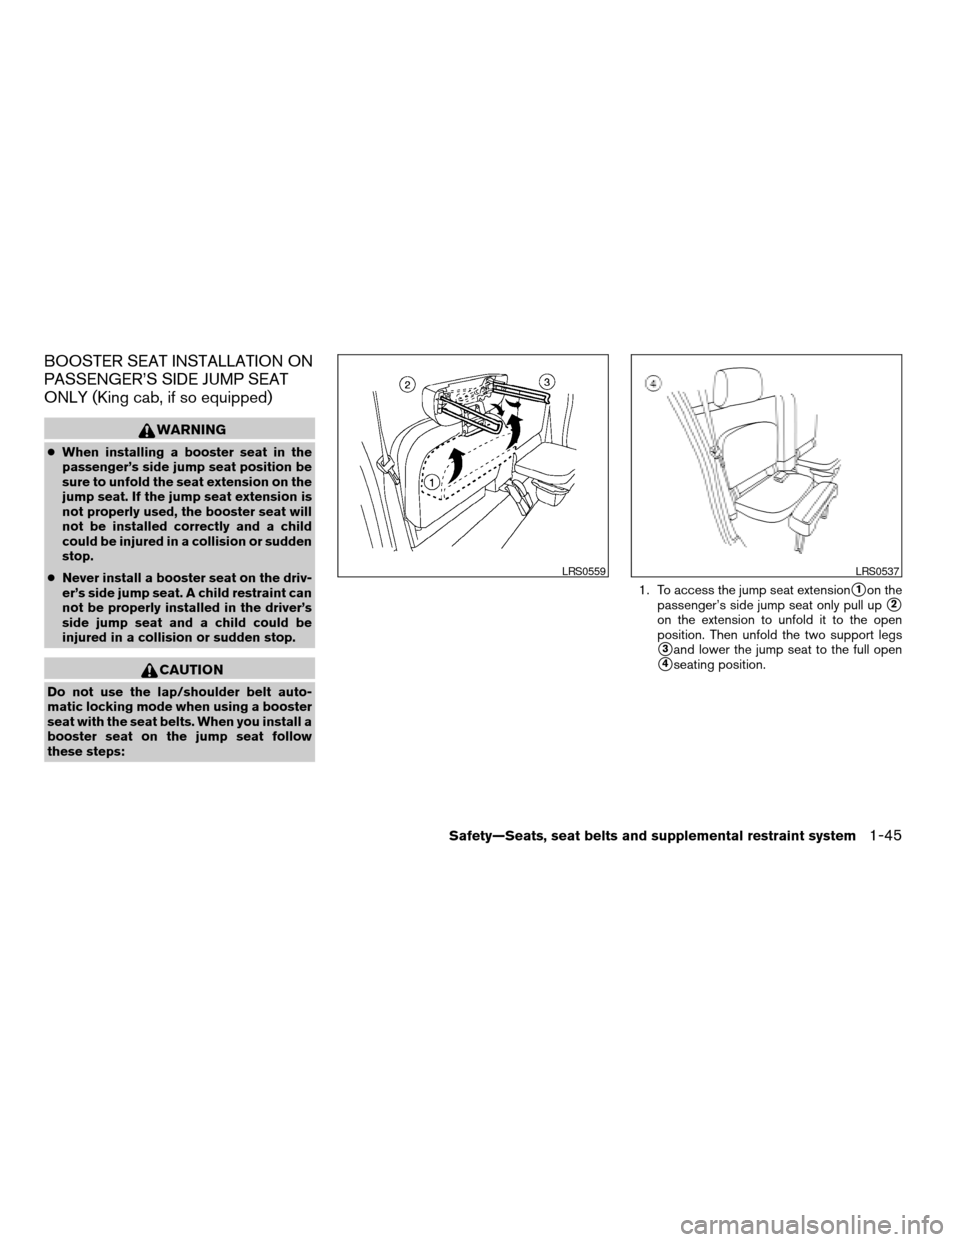
these steps:1. To access the jump seat extension
s1on the
passenger’s side jump seat only pull up
s2
on the extension to unfold it to the open
position. Then unfold the two support legs
s3and lower the jump seat to the full open
s4seating position.
LRS0559LRS0537
Safety—Seats, seat belts and supplemental restraint system1-45
ZREVIEW COPYÐ2006 Truck/Frontier(d22)
Owners ManualÐUSA_English(nna)
10/14/05Ðdebbie
X
Page 121 of 336
WARNING
cProperly secure all cargo with ropes or
straps to help prevent it from sliding or
shifting. In a sudden stop or collision,
unsecured cargo could cause personal
injury.
cThe cargo restrained in the under-seat
storage bins must not exceed the
weight limits listed below or the bins
may not stay secured. In a sudden stop
or collision, the unsecured bins could
cause personal inury.
King cab model: 16 lb (7.25 kg)
Crew cab model
Driver’s side: 16 lb (7.25 kg)
Passenger’s side: 25 lb (11.33 kg)
cIf the under-seat storage bins are re-
moved for any reason, they should be
securely stored to prevent them from
causing injury to passengers or damage
to the vehicle in case of sudden braking
or an accident.
cDo not place sharp objects in the under-
seat storage bins. Such objects may
become dangerous projectiles and
cause injury when the vehicle is moving
or if the vehicle is involved in a collision.To access the under-seat storage bins:
For King cab model, lift up the jump seat. Refer to
“Jump seat” in the “Safety—Seats, seat belts and
supplemental restraint system” section earlier in
this manual.
For Crew cab model, lift up the rear bench seat.
Refer to “Folding the rear bench seat” in the
“Safety—Seats, seat belts and supplemental re-
straint system” section earlier in this manual.
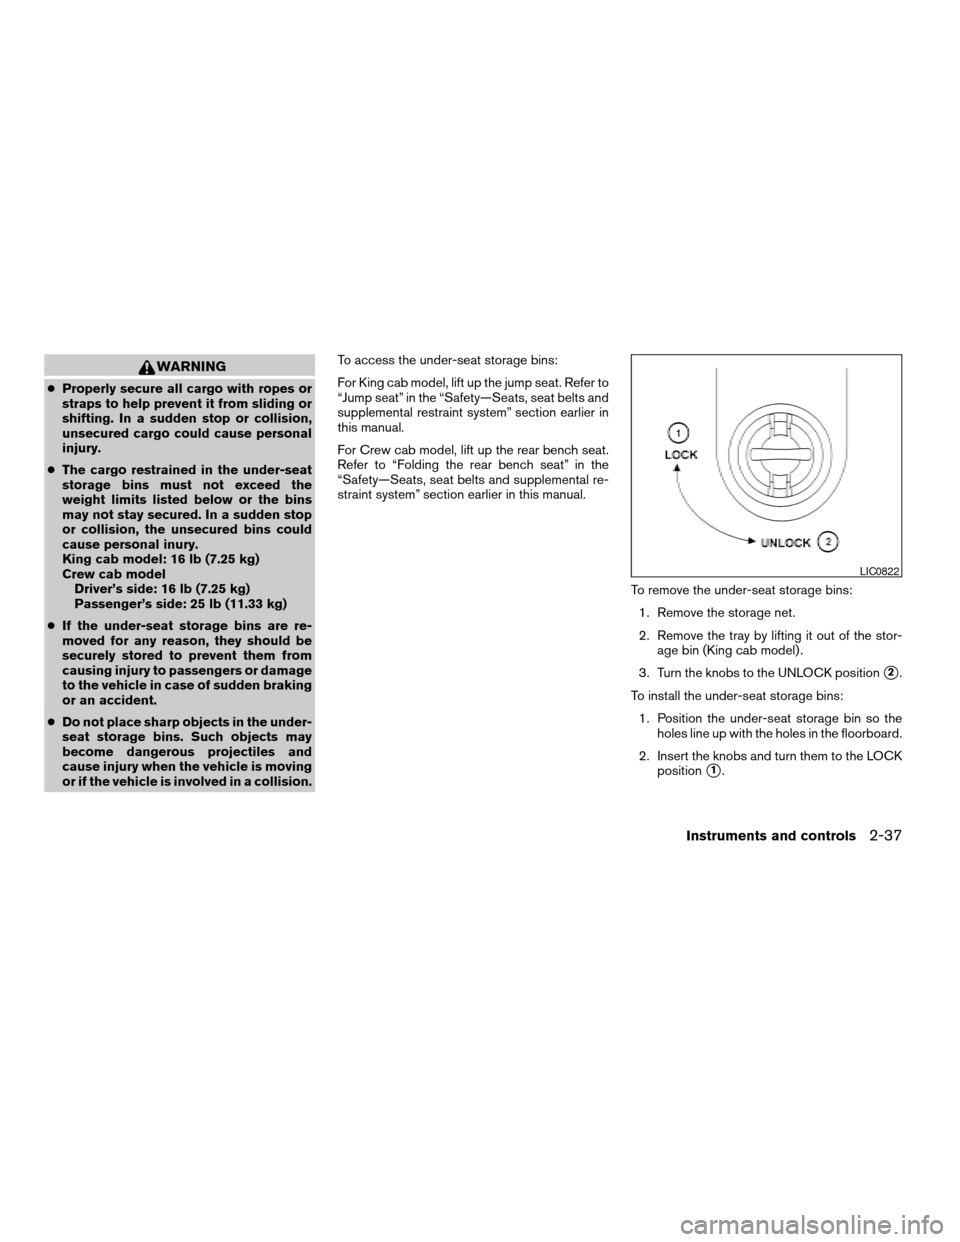
To remove the under-seat storage bins:
1. Remove the storage net.
2. Remove the tray by lifting it out of the stor-
age bin (King cab model) .
3. Turn the knobs to the UNLOCK position
s2.
To install the under-seat storage bins:
1. Position the under-seat storage bin so the
holes line up with the holes in the floorboard.
2. Insert the knobs and turn them to the LOCK
position
s1.
LIC0822
Instruments and controls2-37
ZREVIEW COPYÐ2006 Truck/Frontier(d22)
Owners ManualÐUSA_English(nna)
10/17/05Ðdebbie
X
Page 153 of 336
Foldable outside mirrors
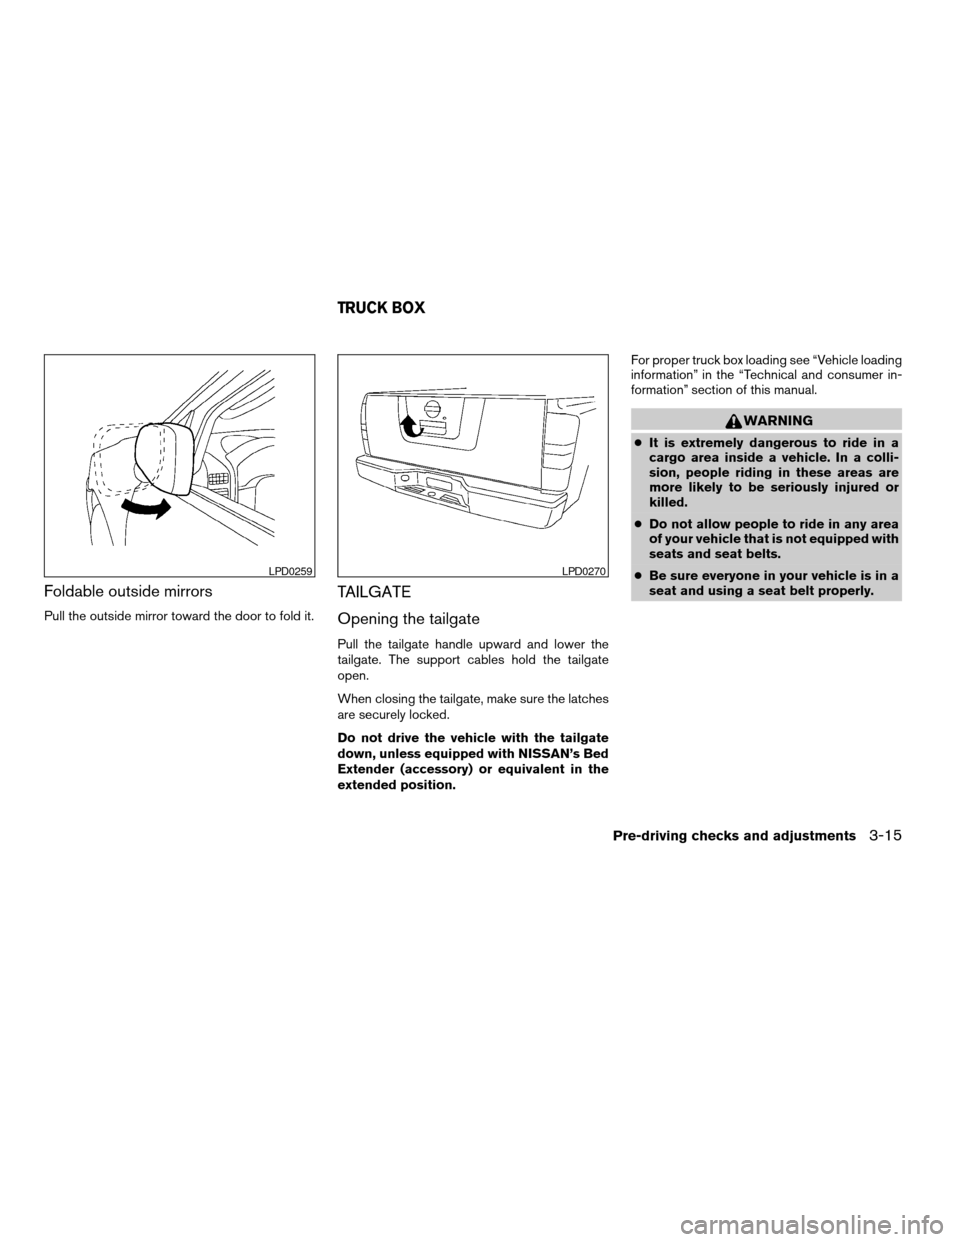
Pull the outside mirror toward the door to fold it.
TAILGATE
Opening the tailgate
Pull the tailgate handle upward and lower the
tailgate. The support cables hold the tailgate
open.
When closing the tailgate, make sure the latches
are securely locked.
Do not drive the vehicle with the tailgate
down, unless equipped with NISSAN’s Bed
Extender (accessory) or equivalent in the
extended position.For proper truck box loading see “Vehicle loading
information” in the “Technical and consumer in-
formation” section of this manual.
WARNING
cIt is extremely dangerous to ride in a
cargo area inside a vehicle. In a colli-
sion, people riding in these areas are
more likely to be seriously injured or
killed.
cDo not allow people to ride in any area
of your vehicle that is not equipped with
seats and seat belts.
cBe sure everyone in your vehicle is in a
seat and using a seat belt properly.
LPD0259LPD0270
TRUCK BOX
Pre-driving checks and adjustments3-15
ZREVIEW COPYÐ2006 Truck/Frontier(d22)
Owners ManualÐUSA_English(nna)
10/17/05Ðdebbie
X
Page 220 of 336
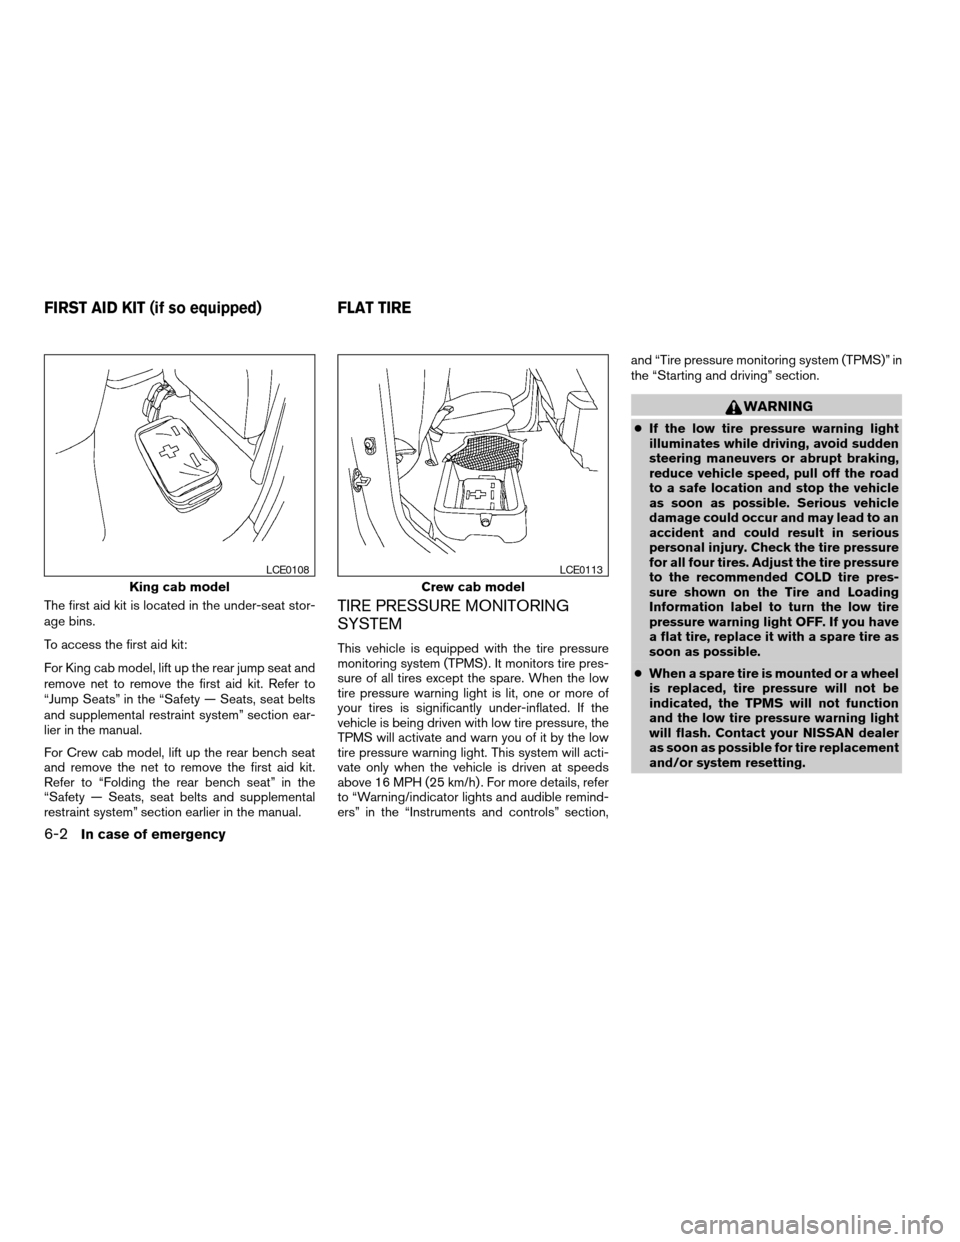
The first aid kit is located in the under-seat stor-
age bins.
To access the first aid kit:
For King cab model, lift up the rear jump seat and
remove net to remove the first aid kit. Refer to
“Jump Seats” in the “Safety — Seats, seat belts
and supplemental restraint system” section ear-
lier in the manual.
For Crew cab model, lift up the rear bench seat
and remove the net to remove the first aid kit.
Refer to “Folding the rear bench seat” in the
“Safety — Seats, seat belts and supplemental
restraint system” section earlier in the manual.TIRE PRESSURE MONITORING
SYSTEM
This vehicle is equipped with the tire pressure
monitoring system (TPMS) . It monitors tire pres-
sure of all tires except the spare. When the low
tire pressure warning light is lit, one or more of
your tires is significantly under-inflated. If the
vehicle is being driven with low tire pressure, the
TPMS will activate and warn you of it by the low
tire pressure warning light. This system will acti-
vate only when the vehicle is driven at speeds
above 16 MPH (25 km/h) . For more details, refer
to “Warning/indicator lights and audible remind-
ers” in the “Instruments and controls” section,and “Tire pressure monitoring system (TPMS)” in
the “Starting and driving” section.
WARNING
cIf the low tire pressure warning light
illuminates while driving, avoid sudden
steering maneuvers or abrupt braking,
reduce vehicle speed, pull off the road
to a safe location and stop the vehicle
as soon as possible. Serious vehicle
damage could occur and may lead to an
accident and could result in serious
personal injury. Check the tire pressure
for all four tires. Adjust the tire pressure
to the recommended COLD tire pres-
sure shown on the Tire and Loading
Information label to turn the low tire
pressure warning light OFF. If you have
a flat tire, replace it with a spare tire as
soon as possible.
cWhen a spare tire is mounted or a wheel
is replaced, tire pressure will not be
indicated, the TPMS will not function
and the low tire pressure warning light
will flash. Contact your NISSAN dealer
as soon as possible for tire replacement
and/or system resetting.
King cab model
LCE0108
Crew cab model
LCE0113
FIRST AID KIT (if so equipped) FLAT TIRE
6-2In case of emergency
ZREVIEW COPYÐ2006 Truck/Frontier(d22)
Owners ManualÐUSA_English(nna)
10/17/05Ðdebbie
X
Page 222 of 336
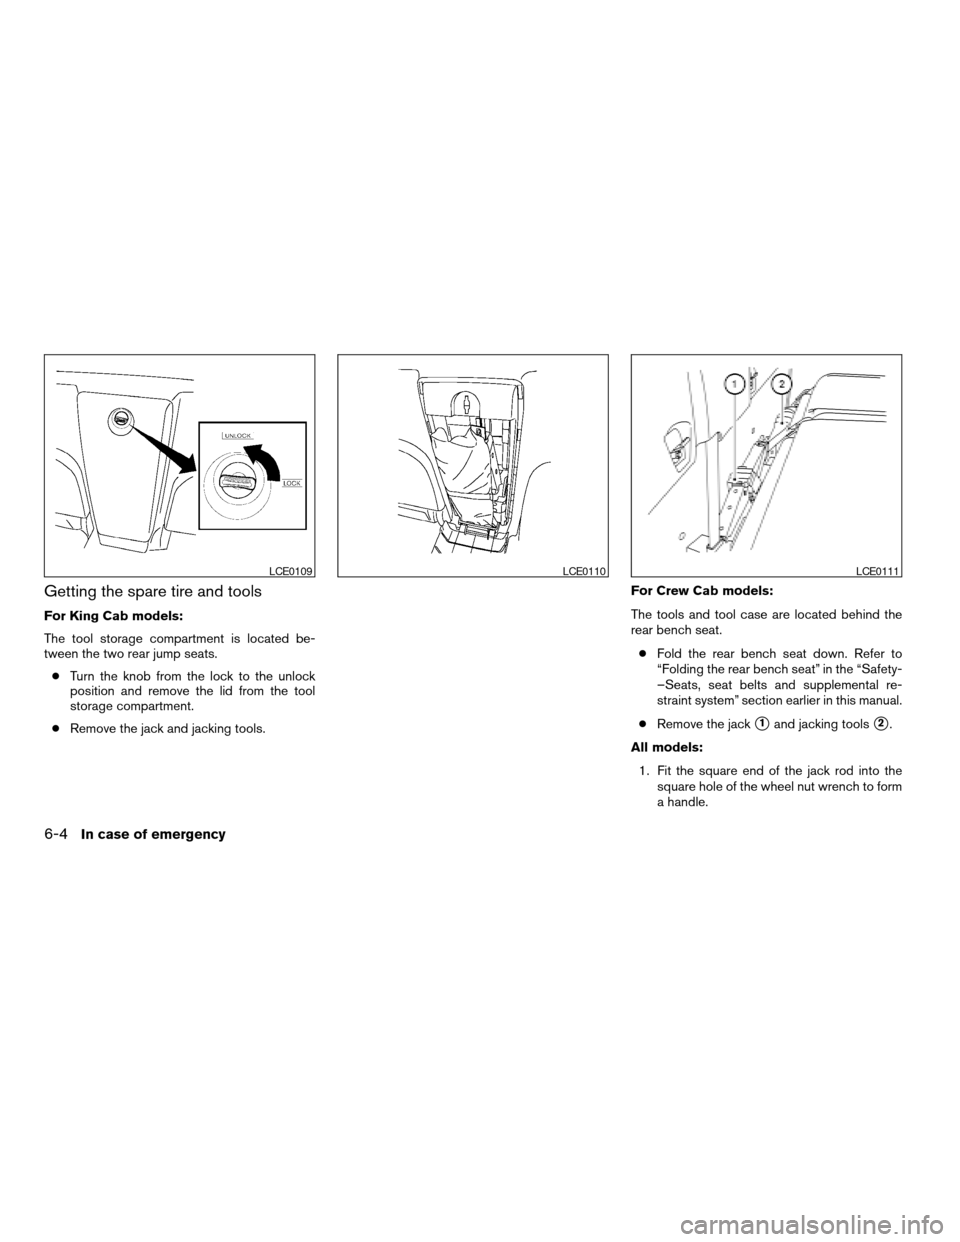
Getting the spare tire and tools
For King Cab models:
The tool storage compartment is located be-
tween the two rear jump seats.
cTurn the knob from the lock to the unlock
position and remove the lid from the tool
storage compartment.
cRemove the jack and jacking tools.For Crew Cab models:
The tools and tool case are located behind the
rear bench seat.
cFold the rear bench seat down. Refer to
“Folding the rear bench seat” in the “Safety-
–Seats, seat belts and supplemental re-
straint system” section earlier in this manual.
cRemove the jack
s1and jacking toolss2.
All models:
1. Fit the square end of the jack rod into the
square hole of the wheel nut wrench to form
a handle.
LCE0109LCE0110LCE0111
6-4In case of emergency
ZREVIEW COPYÐ2006 Truck/Frontier(d22)
Owners ManualÐUSA_English(nna)
10/17/05Ðdebbie
X