Page 263 of 336
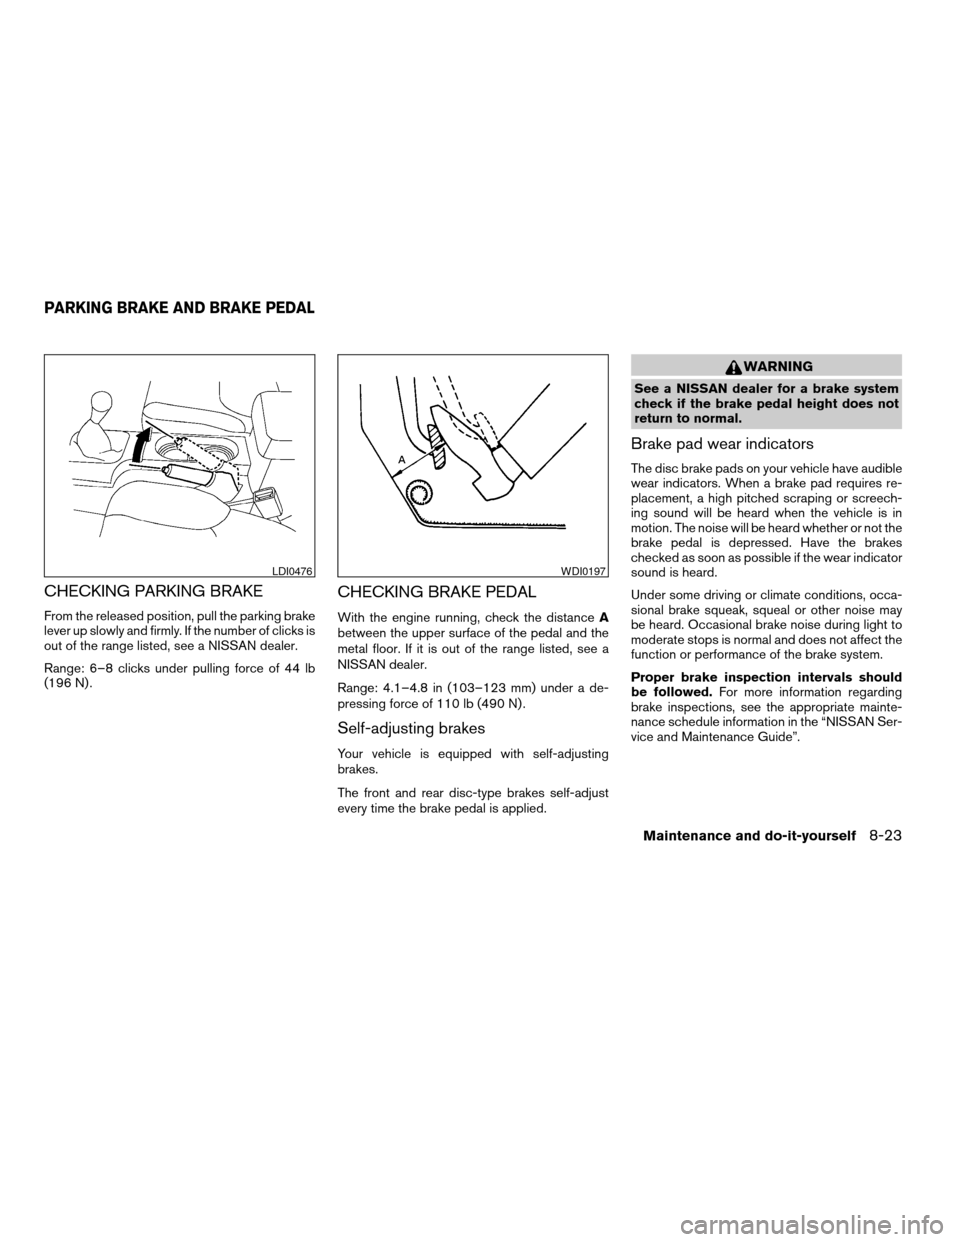
CHECKING PARKING BRAKE
From the released position, pull the parking brake
lever up slowly and firmly. If the number of clicks is
out of the range listed, see a NISSAN dealer.
Range: 6–8 clicks under pulling force of 44 lb
(196 N) .
CHECKING BRAKE PEDAL
With the engine running, check the distanceA
between the upper surface of the pedal and the
metal floor. If it is out of the range listed, see a
NISSAN dealer.
Range: 4.1–4.8 in (103–123 mm) under a de-
pressing force of 110 lb (490 N) .
Self-adjusting brakes
Your vehicle is equipped with self-adjusting
brakes.
The front and rear disc-type brakes self-adjust
every time the brake pedal is applied.
WARNING
See a NISSAN dealer for a brake system
check if the brake pedal height does not
return to normal.
Brake pad wear indicators
The disc brake pads on your vehicle have audible
wear indicators. When a brake pad requires re-
placement, a high pitched scraping or screech-
ing sound will be heard when the vehicle is in
motion. The noise will be heard whether or not the
brake pedal is depressed. Have the brakes
checked as soon as possible if the wear indicator
sound is heard.
Under some driving or climate conditions, occa-
sional brake squeak, squeal or other noise may
be heard. Occasional brake noise during light to
moderate stops is normal and does not affect the
function or performance of the brake system.
Proper brake inspection intervals should
be followed.For more information regarding
brake inspections, see the appropriate mainte-
nance schedule information in the “NISSAN Ser-
vice and Maintenance Guide”.
LDI0476WDI0197
PARKING BRAKE AND BRAKE PEDAL
Maintenance and do-it-yourself8-23
ZREVIEW COPYÐ2006 Truck/Frontier(d22)
Owners ManualÐUSA_English(nna)
10/17/05Ðdebbie
X
Page 265 of 336
ENGINE COMPARTMENT
CAUTION
Never use a fuse of a higher or lower
amperage rating than specified on the
fuse box cover. This could damage the
electrical system or cause a fire.
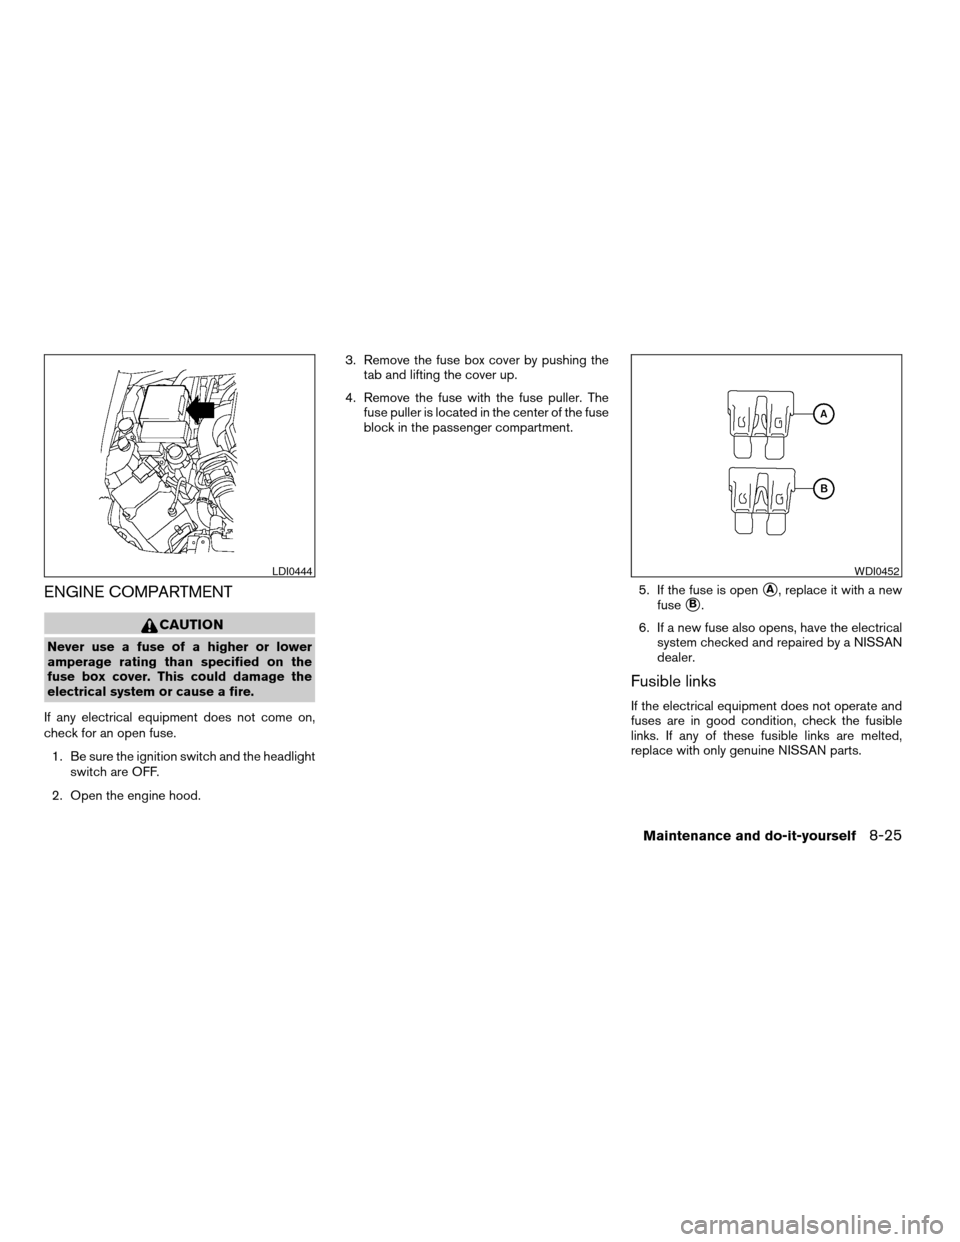
If any electrical equipment does not come on,
check for an open fuse.
1. Be sure the ignition switch and the headlight
switch are OFF.
2. Open the engine hood.3. Remove the fuse box cover by pushing the
tab and lifting the cover up.
4. Remove the fuse with the fuse puller. The
fuse puller is located in the center of the fuse
block in the passenger compartment.
5. If the fuse is open
sA, replace it with a new
fuse
sB.
6. If a new fuse also opens, have the electrical
system checked and repaired by a NISSAN
dealer.
Fusible links
If the electrical equipment does not operate and
fuses are in good condition, check the fusible
links. If any of these fusible links are melted,
replace with only genuine NISSAN parts.
LDI0444WDI0452
Maintenance and do-it-yourself8-25
ZREVIEW COPYÐ2006 Truck/Frontier(d22)
Owners ManualÐUSA_English(nna)
10/17/05Ðdebbie
X
Page 266 of 336
PASSENGER COMPARTMENT
CAUTION
Never use a fuse of a higher or lower
amperage rating than specified on the
fuse box cover. This could damage the
electrical system or cause a fire.
If any electrical equipment does not operate,
check for an open fuse.
1. Be sure the ignition switch and the headlight
switch are OFF.
2. Pull the fuse box cover to remove.
3. Remove the fuse with the fuse puller.4. If the fuse is open
sA, replace it with a known
good fuse
sB.
5. Push the fuse box cover to install.
6. If a new fuse also opens, have the electrical
system checked and repaired by a NISSAN
dealer.
LDI0445
Type A
WDI0452
Type B
LDI0456
8-26Maintenance and do-it-yourself
ZREVIEW COPYÐ2006 Truck/Frontier(d22)
Owners ManualÐUSA_English(nna)
10/17/05Ðdebbie
X
Page 268 of 336
HEADLIGHTS
The headlight is a semi-sealed beam type which
uses a replaceable headlight (halogen) bulb. A
bulb can be replaced from inside the engine
compartment without removing the headlight as-
sembly.
CAUTION
cHigh pressure halogen gas is sealed
inside the halogen bulb. The bulb may
break if the glass envelope is scratched
or the bulb is dropped.
cWhen handling the bulb, do not touch
the glass envelope.
cDO NOT TOUCH THE BULB
cUse the same number and wattage as
originally installed:
Wattage 65/55Bulb No. HB5/9007*
*: Always check with the Parts Depart-
ment at a NISSAN dealer for the latest
parts information.
cDo not leave the bulb out of the head-
light reflector for a long period of time
as dust, moisture and smoke may enter
the headlight body and affect the per-
formance of the headlight.cAiming is not necessary after replacing
the bulb. When aiming adjustment is
necessary, contact a NISSAN dealer.
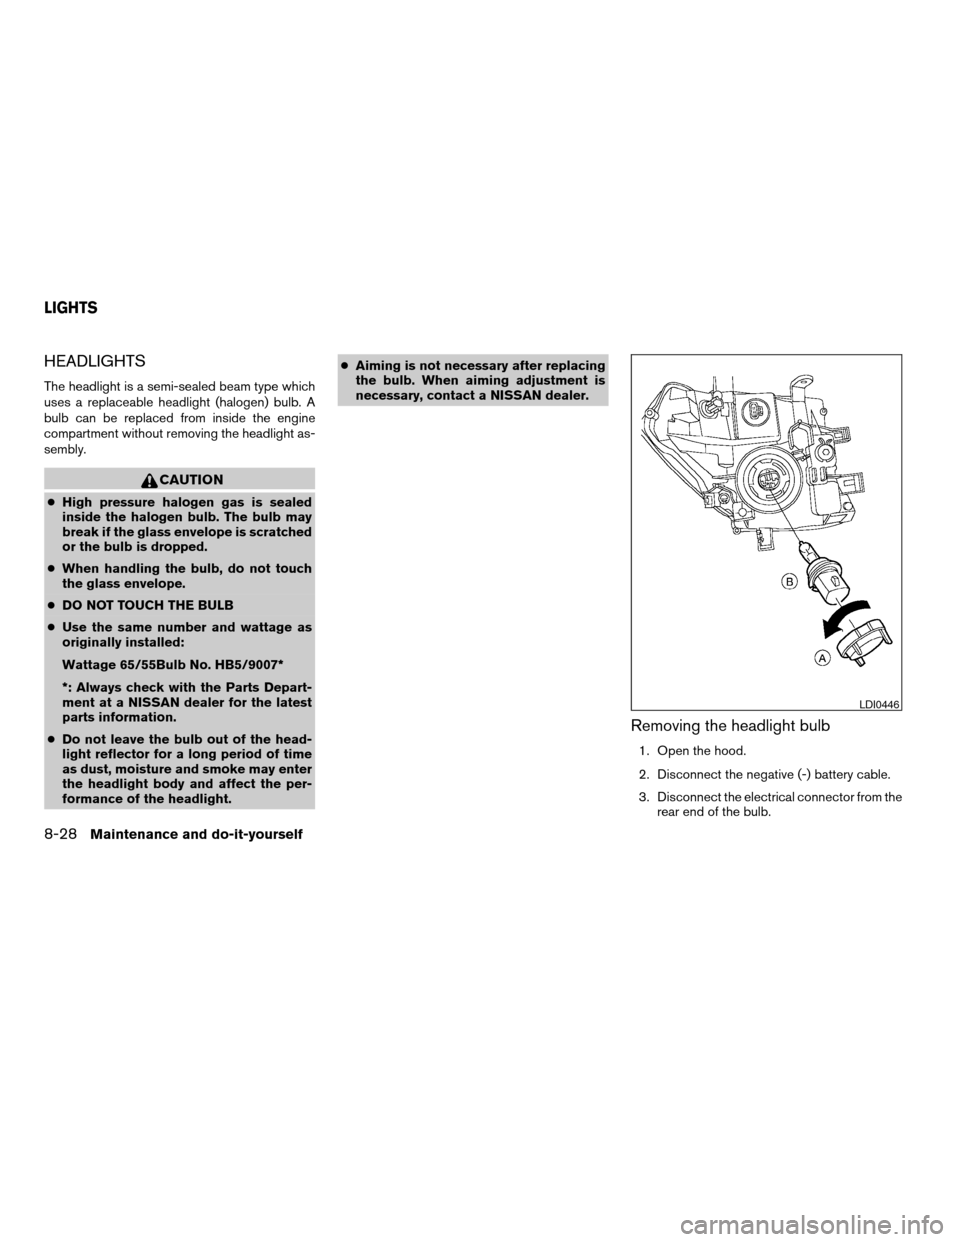
Removing the headlight bulb
1. Open the hood.
2. Disconnect the negative (-) battery cable.
3. Disconnect the electrical connector from the
rear end of the bulb.
LDI0446
LIGHTS
8-28Maintenance and do-it-yourself
ZREVIEW COPYÐ2006 Truck/Frontier(d22)
Owners ManualÐUSA_English(nna)
10/17/05Ðdebbie
X
Page 269 of 336
4. Turn the bulb retaining ring counterclock-
wise until it is free form the headlight reflec-
tor and then remove it
sA.
5. Carefully remove the headlight bulb. Do not
shake or rotate the bulb when removing it
sB.
Replacing the headlight bulb
1. Insert the bulb.
DO NOT TOUCH THE BULB.
2. Install and tighten the bulb retainer.
cBe sure the lip of the bulb socket con-
tacts the headlight body.
3. Push the electrical connector into the bulb
plastic base until it snaps and stops.
4. Connect the negative (-) battery cable.
5. Close the hood.
EXTERIOR AND INTERIOR LIGHTS
Item Wattage (W) Bulb No.*1
Headlight 65/55 9007 (HB5)
Turn signal light/Parking light 28/8 3457K
Side marker 3.8 194
Rear combination light
Turn signal 27 3156AK
Stop/Tail 27/8 3157K
Back-up 18 921
License plate light 5 2J6
Fog light*
2(if so equipped) 55 H11
Map lights/ personal lights 8 AL38
Room light 8 AL41
High-mounted stop light/cargo lights*
2——
*1Always check with the Parts Department at a NISSAN dealer for the latest parts information.
*2The bulb is not serviceable in-vehicle. See a NISSAN dealer for assistance.
Maintenance and do-it-yourself8-29
ZREVIEW COPYÐ2006 Truck/Frontier(d22)
Owners ManualÐUSA_English(nna)
10/17/05Ðdebbie
X
Page 270 of 336
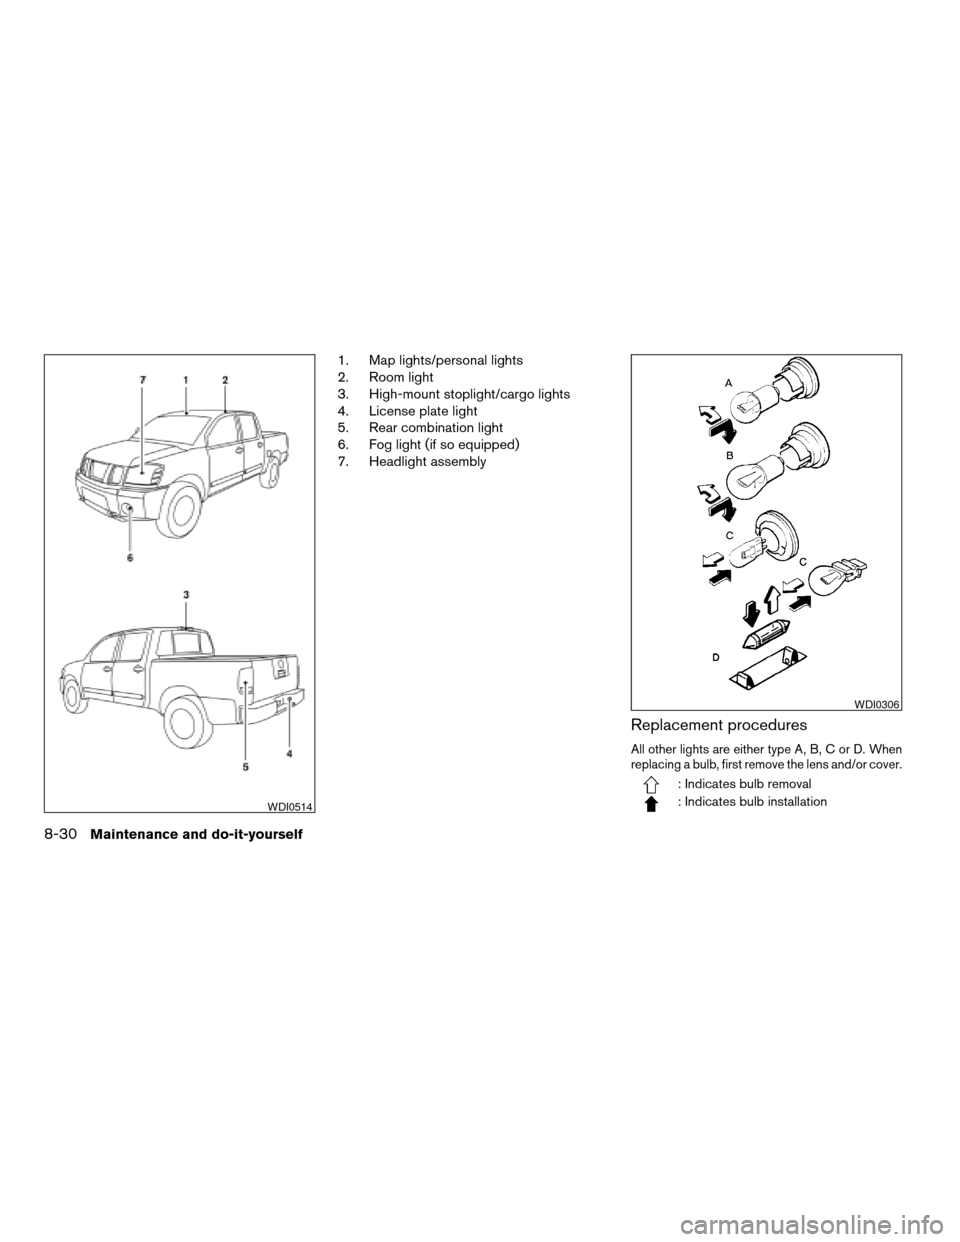
1. Map lights/personal lights
2. Room light
3. High-mount stoplight/cargo lights
4. License plate light
5. Rear combination light
6. Fog light (if so equipped)
7. Headlight assembly
Replacement procedures
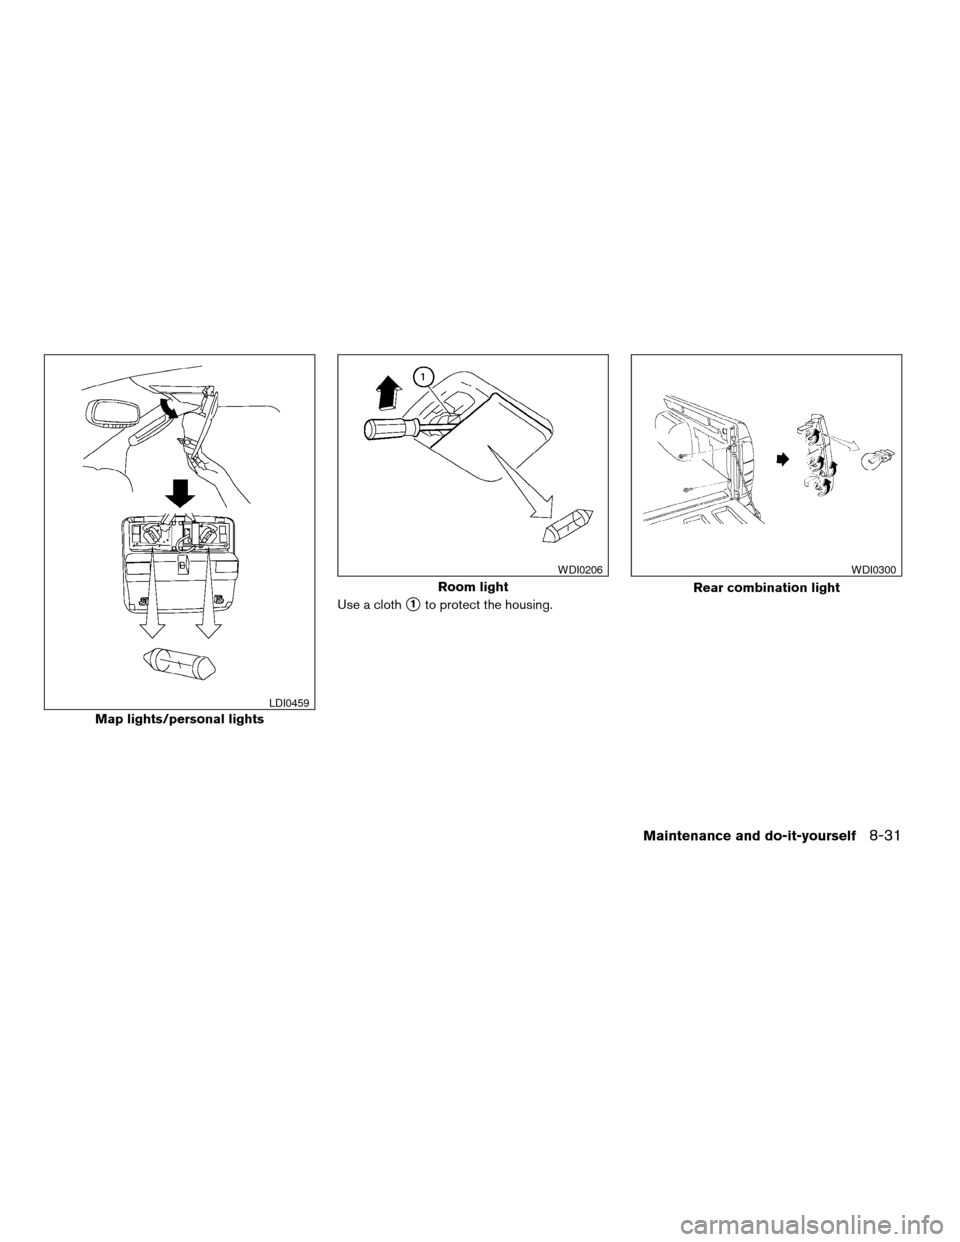
All other lights are either type A, B, C or D. When
replacing a bulb, first remove the lens and/or cover.
: Indicates bulb removal
: Indicates bulb installationWDI0514
WDI0306
8-30Maintenance and do-it-yourself
ZREVIEW COPYÐ2006 Truck/Frontier(d22)
Owners ManualÐUSA_English(nna)
10/26/05Ðtbrooks
X
Page 271 of 336
Use a cloths1to protect the housing.
Map lights/personal lights
LDI0459
Room light
WDI0206
Rear combination light
WDI0300
Maintenance and do-it-yourself8-31
ZREVIEW COPYÐ2006 Truck/Frontier(d22)
Owners ManualÐUSA_English(nna)
10/17/05Ðdebbie
X
Page 272 of 336
If you have a flat tire, see the “In case of
emergency” section of this manual.
TIRE PRESSURE
Tire pressure monitoring system
(TPMS)
This vehicle is equipped with the tire pres-
sure monitoring system (TPMS) . It moni-
tors tire pressure of all tires except the
spare. When the low tire pressure warn-
ing light is lit, one or more of your tires is
significantly underinflated.
The TPMS will activate only when the
vehicle is driven at speeds above 16 MPH
(25 km/h) . Also, this system may not de-
tect a sudden drop in tire pressure (for
example a flat tire while driving) .
For more details, refer to “Low tire pres-
sure warning light” in the “Instruments and
controls” section, “Tire pressure monitor-
ing system (TPMS)” in the “Starting and
driving” section, and “Flat tire” in the “In
case of emergency” section.
Tire inflation pressure
Check the tire pressures (including the
spare) often and always prior to long dis-
tance trips. The recommended tire pres-
sure specifications are shown on the
F.M.V.S.S./C.M.V.S.S. label or the Tire
and Loading Information label (if so
equipped) under the9Cold Tire Inflation
Pressure9heading. The Tire and Loading
Information label is affixed to the driver
side center pillar. Tire pressures should
be checked regularly because:
cMost tires naturally lose air over time.
cTires can lose air suddenly when
driven over potholes or other objects
or if the vehicle strikes a curb while
parking.
The tire pressures should be checked
when the tires are cold. The tires are
considered COLD after the vehicle has
been parked for 3 or more hours, or driven
less than 1 mile (1.6 km) at moderate
speeds.
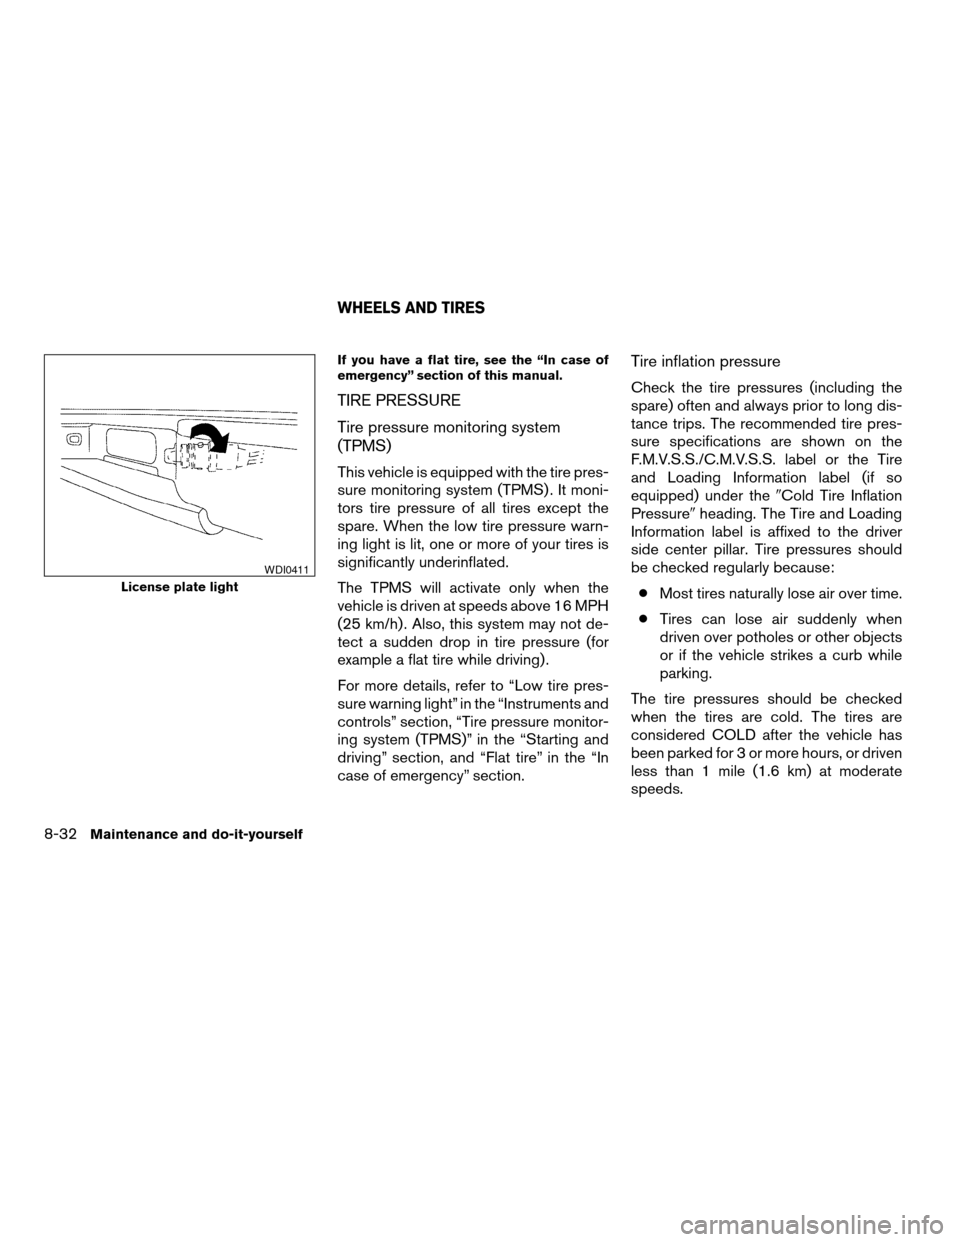
License plate light
WDI0411
WHEELS AND TIRES
8-32Maintenance and do-it-yourself
ZREVIEW COPYÐ2006 Truck/Frontier(d22)
Owners ManualÐUSA_English(nna)
10/17/05Ðdebbie
X