2006 NISSAN ARMADA lights
[x] Cancel search: lightsPage 168 of 352

Automatic anti-glare outside mirrors (if
so equipped)
The outside mirrors will automatically dim during
nighttime conditions to reduce the glare from the
headlights of trailing vehicles. The automatic anti-
glare feature operates only when the ignition
switch is in the ON position.
The automatic anti-glare feature will be on when
starting the vehicle. The indicator light on the
automatic anti-glare rearview mirror will illuminate
when the automatic anti-glare feature is operat-
ing.
To turn off the anti-glare feature, push the
button on the rearview mirror. The indicator light
will turn off.
To turn on the anti-glare feature again, push
the
button on the rearview mirror. The in-
dicator light will turn on.
For information on the automatic anti-glare rear-
view mirror, see “Automatic anti-glare rearview
mirror” earlier in this section.
Heated mirrors
The outside mirrors can be heated to defrost,
defog, or de-ice for improved visibility. For addi-
tional information, see “Rear window and outside
mirror defroster switch” in the “Instrument and
controls” section of this manual.The automatic drive positioner system has two
features:
cMemory storage function
cEntry/exit function
MEMORY STORAGE FUNCTION
Two positions for the driver’s seat, accelerator
and brake pedals, and outside mirrors can be
stored in the automatic drive positioner memory.
Follow these procedures to use the memory sys-
tem.
1. Set the automatic transmission selector le-
ver to the P (Park) position.
2. Turn the ignition ON.
LPD0260
AUTOMATIC DRIVE POSITIONER (if
so equipped)
3-20Pre-driving checks and adjustments
ZREVIEW COPYÐ2006 Armada(wzw)
Owners ManualÐUSA_English(nna)
06/16/05Ðdebbie
X
Page 178 of 352

Adjust driver seat when exiting vehicle:
With this option ON, the driver’s seat automati-
cally moves back and returns to the original po-
sition for ease of exit and entry.
Remote unlock driver’s door first:
This option allows you to select which doors will
unlock first during an unlocking operation:
Only the driver’s doorÃ!All the doors
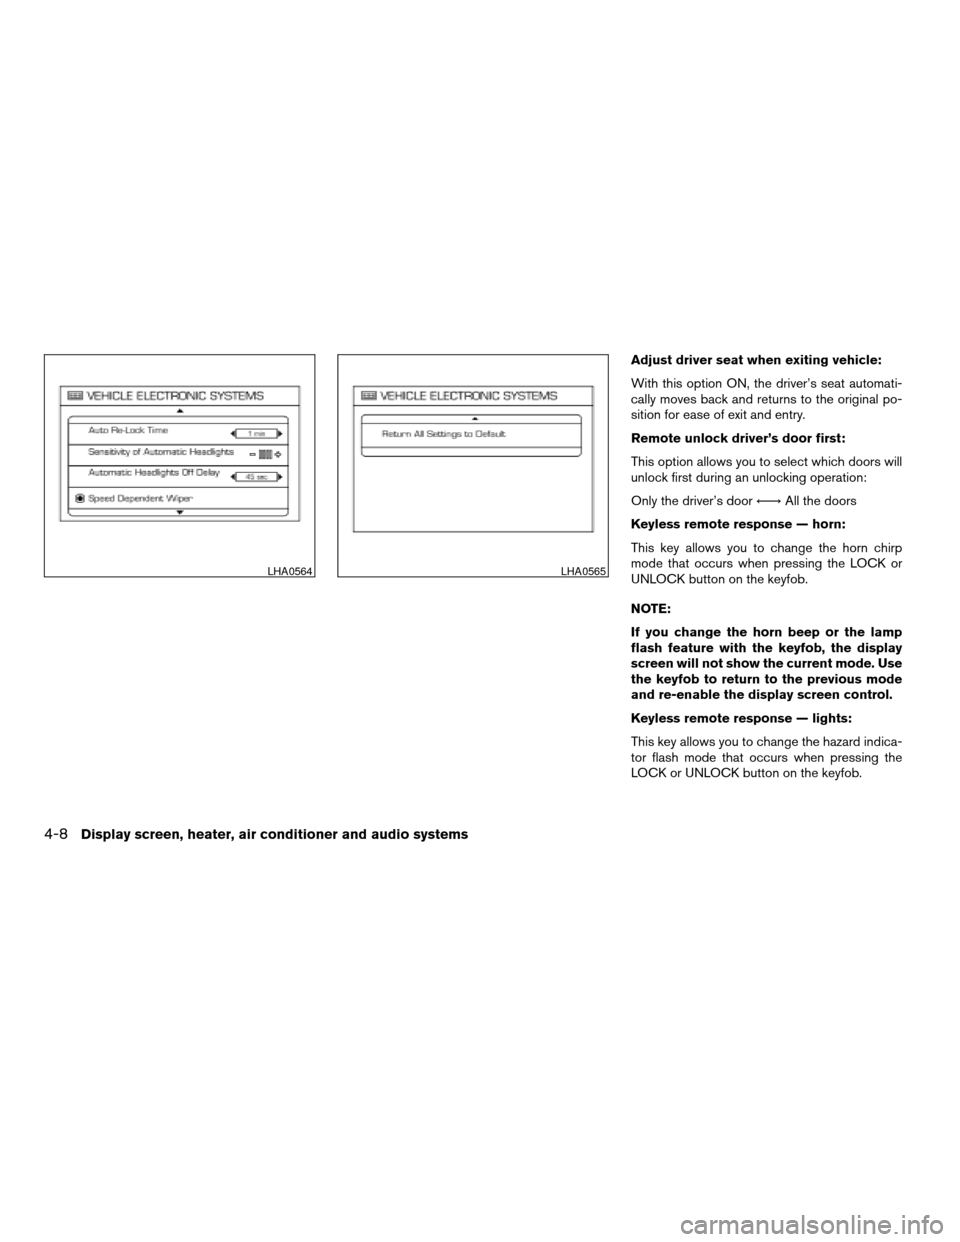
Keyless remote response — horn:
This key allows you to change the horn chirp
mode that occurs when pressing the LOCK or
UNLOCK button on the keyfob.
NOTE:
If you change the horn beep or the lamp
flash feature with the keyfob, the display
screen will not show the current mode. Use
the keyfob to return to the previous mode
and re-enable the display screen control.
Keyless remote response — lights:
This key allows you to change the hazard indica-
tor flash mode that occurs when pressing the
LOCK or UNLOCK button on the keyfob.
LHA0564LHA0565
4-8Display screen, heater, air conditioner and audio systems
ZREVIEW COPYÐ2006 Armada(wzw)
Owners ManualÐUSA_English(nna)
06/16/05Ðdebbie
X
Page 179 of 352

NOTE:
If you change the horn beep or the lamp
flash feature with the keyfob, the mode will
not be changed with the display. Use the
keyfob to return to the previous mode and
re-enable the display control.
Auto re-lock time:
This key allows you to set the length of time
before doors auto re-lock.
Sensitivity of automatic headlights:
This key allows you to set the sensitivity of the
automatic headlights:
cLower- less sensitive, automatic headlights
will take longer to come on when the head-
light sensor senses less ambient light.
cHigher- more sensitive, automatic head-
lights will come on quicker when the head-
light sensor senses less ambient light.
Automatic headlights off delay:
This key allows you to set the length of time
before the automatic headlights turn off after
exiting the vehicle.Speed dependent wiper:
This key allows you to turn on or turn off the
driving speed dependent intermittent wiper func-
tion.
Return all settings to default:
When this key is selected and turned on using
the“ENTER”button, all settings made by VE-
HICLE ELECTRONICS will return to the default
settings.
System settings
Language/Unit
The LANGUAGE/UNIT screen will appear when
selecting the“Language/Unit”key and push-
ing the“ENTER”button.
Language: English or French
Unit: US — mile, °F, MPG
Metric — km, °C, L/100 km
You can select the language and unit using the
joystick and“ENTER”button.
LHA0561
Display screen, heater, air conditioner and audio systems4-9
ZREVIEW COPYÐ2006 Armada(wzw)
Owners ManualÐUSA_English(nna)
06/16/05Ðdebbie
X
Page 189 of 352

Reception conditions will constantly change be-
cause of vehicle movement. Buildings, terrain,
signal distance and interference from other ve-
hicles can work against ideal reception. De-
scribed below are some of the factors that can
affect your radio reception.
FM RADIO RECEPTION
Range: FM range is normally limited to 25 – 30
miles (40 – 48 km) , with monaural (single chan-
nel) FM having slightly more range than stereo
FM. External influences may sometimes interfere
with FM station reception even if the FM station is
within 25 miles (40 km) . The strength of the FM
signal is directly related to the distance between
the transmitter and receiver. FM signals follow a
line-of-sight path, exhibiting many of the same
characteristics as light. For example they will
reflect off objects.
Fade and drift: As your vehicle moves away from
a station transmitter, the signals will tend to fade
and/or drift.
Static and flutter: During signal interference from
buildings, large hills or due to antenna position
(usually in conjunction with increased distance
from the station transmitter) static or flutter can
be heard. This can be reduced by adjusting the
treble control to reduce treble response.Multipath reception: Because of the reflective
characteristics of FM signals, direct and reflected
signals reach the receiver at the same time. The
signals may cancel each other, resulting in mo-
mentary flutter or loss of sound.
AM RADIO RECEPTION
AM signals, because of their low frequency, can
bend around objects and skip along the ground.
In addition, the signals can be bounced off the
ionosphere and bent back to earth. Because of
these characteristics, AM signals are also sub-
ject to interference as they travel from transmitter
to receiver.
Fading: Occurs while the vehicle is passing
through freeway underpasses or in areas with
many tall buildings. It can also occur for several
seconds during ionospheric turbulence even in
areas where no obstacles exist.
Static: Caused by thunderstorms, electrical
power lines, electric signs and even traffic lights.
SATELLITE RADIO RECEPTION (if so
equipped)
When the satellite radio is first installed or the
battery has been replaced, the satellite radio may
not work properly. This is not a malfunction. Wait
more than 10 minutes with satellite radio ON andthe vehicle outside of any metal or large building
for satellite radio to receive all of the necessary
data.
No satellite radio reception is available and “NO
SAT” is displayed when the SAT band option is
selected unless optional satellite receiver and
antenna are installed and an XMTor SIRIUS™
satellite radio service subscription is active. Sat-
ellite radio is not available in Alaska, Hawaii and
Guam.
Satellite radio performance may be affected if
cargo carried on the roof blocks the satellite radio
signal.
If possible, do not put cargo over the satellite
antenna.
Display screen, heater, air conditioner and audio systems4-19
ZREVIEW COPYÐ2006 Armada(wzw)
Owners ManualÐUSA_English(nna)
06/16/05Ðdebbie
X
Page 223 of 352

If the engine fails to start using a registered key
(for example, when interference is caused by
another registered key, an automated toll road
device or automatic payment device on the key
ring) , restart the engine using the following pro-
cedures:
1. Leave the ignition switch in the ON position
for approximately 5 seconds.
2. Turn the ignition switch to the OFF or LOCK
position, and wait approximately 10 sec-
onds.
3. Repeat steps 1 and 2.
4. Restart the engine while holding the device
(which may have caused the interference)
separate from the registered key.
If the no start condition re-occurs, NISSAN rec-
ommends placing the registered key on a sepa-
rate key ring to avoid interference from other
devices.cMake sure the area around the vehicle is
clear.
cCheck fluid levels such as engine oil, cool-
ant, brake fluid, and window washer fluid as
frequently as possible, or at least whenever
you refuel.
cCheck that all windows and lights are clean.
cVisually inspect tires for their appearance
and condition. Also check tires for proper
inflation.
cLock all doors.
cPosition seat and adjust head restraints.
cAdjust inside and outside mirrors.
cFasten seat belts and ask all passengers to
do likewise.
cCheck the operation of warning lights when
the key is turned to the ON (3) position. See
“Warning/indicator lights and audible re-
minders” in the “Instruments and controls”
section of this manual.1. Apply the parking brake.
2. Move the shift selector lever to P (Park) or N
(Neutral) . P (Park) is recommended.
The shift selector lever cannot be
moved out of P (Park) and into any of
the other gear positions if the ignition
key is turned to the OFF position or if
the key is removed from the ignition
switch.
The starter is designed not to operate if
the shift selector lever is in any of the
driving positions.
3. Crank the enginewith your foot off the
accelerator pedalby turning the ignition
key to START. Release the key when the
engine starts. If the engine starts, but fails to
run, repeat the above procedure.
cIf the engine is very hard to start in ex-
tremely cold weather or when restarting,
depress the accelerator pedal a little (ap-
proximately 1/3 to the floor) and hold it
and then crank the engine. Release the
key and the accelerator pedal when the
engine starts.
BEFORE STARTING THE ENGINE STARTING THE ENGINE
Starting and driving5-9
ZREVIEW COPYÐ2006 Armada(wzw)
Owners ManualÐUSA_English(nna)
06/16/05Ðdebbie
X
Page 224 of 352

cIf the engine is very hard to start because
it is flooded, depress the accelerator
pedal all the way to the floor and hold it.
Crank the engine for 5-6 seconds. After
cranking the engine, release the accel-
erator pedal. Crank the enginewith your
foot off the accelerator pedalby turn-
ing the ignition key to START. Release the
key when the engine starts. If the engine
starts, but fails to run, repeat the above
procedure.
CAUTION
Do not operate the starter for more than
15 seconds at a time. If the engine does
not start, turn the key off and wait 10
seconds before cranking again, otherwise
the starter could be damaged.
4. Allow the engine to idle for at least 30 sec-
onds after starting. Do not race the engine
while warming it up. Drive at moderate
speed for a short distance first, especially in
cold weather.
In cold weather, keep the engine running for
a minimum of 2–3 minutes before shutting it
off. Starting and stopping the engine over a
short period of time may make the vehicle
more difficult to start.
ENGINE PROTECTION MODE
The engine has an engine protection mode to
reduce the chance of damage if the coolant tem-
perature becomes too high (for example, when
climbing steep grades in high temperature with
heavy loads, such as when towing a trailer) .
When the engine temperature reaches a certain
level:
cThe engine coolant temperature gauge will
move toward the H position.
cEngine power may be reduced.
cThe air conditioning cooling function may be
automatically turned OFF for a short time
(the blower will continue to operate) .
Engine power and, under some conditions, ve-
hicle speed will decrease. Vehicle speed can be
controlled with the accelerator pedal, but the
vehicle may not accelerate at the desired speed.
The transmission will downshift or upshift as it
reaches prescribed shift points. You can also
shift manually.
As driving conditions change and engine coolant
temperature is reduced, vehicle speed can be
increased using the accelerator pedal, and air
conditioning cooling function will automatically
be turned back ON.If:
1. The engine coolant temperature is not re-
duced.
2. The air conditioning cooling function does
not turn back ON.
3. The engine oil pressure warning/engine
coolant temperature high indicator
il-
luminates, this may indicate a malfunction.
Move the vehicle off the road in a safe area
and allow the engine to cool. If after check-
ing the oil and coolant, the
remains
on, do not continue to drive and call a
NISSAN dealer.
The malfunction indicator lamp may also come
ON. Ifonlyit remains on, you do not need to have
your vehicle towed, but have it inspected soon by
a NISSAN dealer. See “Malfunction indicator
lamp” in the “Warning and indicator lights” sec-
tion of this manual.
DRIVING THE VEHICLE
5-10Starting and driving
ZREVIEW COPYÐ2006 Armada(wzw)
Owners ManualÐUSA_English(nna)
06/16/05Ðdebbie
X
Page 228 of 352

To push the shift lock release, complete the fol-
lowing procedure:
1. Turn the ignition key to the LOCK position
and remove the key
2. Apply the parking brake.
3. Remove the shift lock release cover as
shown.
4. Insert a small screwdriver in the shift lock
release slot and push down.
5. Move the shift selector lever to the N (Neu-
tral) position while holding down the shift
lock release.
6. Turn the key to the ON position to unlock the
steering wheel. Now the vehicle may be
moved to the desired location.
If the shift selector lever cannot be moved out of
P (Park) , have a NISSAN dealer check the auto-
matic transmission system as soon as possible.
WARNING
If the selector lever cannot be moved from
the P (Park) position while the engine is
running and the brake pedal is depressed,
the stop lights may not work. Malfunction-
ing stop lights could cause an accident
injuring yourself and others.
Accelerator downshift
— in D position —
For passing or hill climbing, depress the accel-
erator pedal to the floor. This shifts the transmis-
sion down into a lower gear, depending on the
vehicle speed.
Fail-safe
When the fail-safe operation occurs, please note
that the transmission will be locked in any of the
forward gears according to the condition.
If the vehicle is driven under extreme con-
ditions, such as excessive wheel spinning
and subsequent hard braking, the fail-safe
system may be activated. This will occur
even if all electrical circuits are functioning
properly. In this case, turn the ignition key
OFF and wait for 3 seconds. Then turn the
key back to the ON position. The vehicle
should return to its normal operating con-
dition. If it does not return to its normal
operating condition, have a NISSAN dealer
check the transmission and repair it if nec-
essary.
WARNING
cBe sure the parking brake is fully re-
leased before driving. Failure to do so
can cause brake failure and lead to an
accident.
cDo not release the parking brake from
outside the vehicle.
cDo not use the gear shift in place of the
parking brake. When parking, be sure
the parking brake is fully engaged.
cDo not leave children unattended in a
vehicle. They could release the parking
brake and cause an accident.
PARKING BRAKE
5-14Starting and driving
ZREVIEW COPYÐ2006 Armada(wzw)
Owners ManualÐUSA_English(nna)
06/16/05Ðdebbie
X
Page 233 of 352

4WD Shift
Switch
PositionWheels
DrivenIndicator Light
Use Conditions 4WD Shift Procedure
4WD shift Transfer 4LO
position
AUTORear
wheels
or 4
wheels
For driving on paved or slippery roadsMove the 4WD switch.
2WD <—> AUTO <—> 4H
4WD shift indicator light will indicate transfer shift position engaged.
IT IS NOT NECESSARY TO MOVE THE AUTOMATIC TRANSMIS-
SION SELECT LEVER TO THE N POSITION IN THIS OPERATION.
PERFORM THIS OPERATION WHEN DRIVING STRAIGHT.
2WDRear
wheels
For driving on dry, paved roads (Economy
drive) or state dynamometer I/M testing
4H4
wheels
For driving on rocky, sandy or snow-covered
roads
Neutral
*1
May blinkNeutral disengages the automatic transmis-
sion mechanical parking lock, which will
allow the vehicle to roll. Do not leave the
transfer shift position in Neutral.*21. Stop the vehicle.
2. Move the automatic transmission selector lever to the N position.
3. Push the 4WD shift switch and move it to 4LO or 4H with the
brake pedal depressed.
YOU CANNOT MOVE THE TRANSFER 4WD SHIFT SWITCH BE-
TWEEN 4H AND 4LO (OR 4LO TO 4H)UNLESS YOU HAVE FIRST
STOPPED THE VEHICLE, DEPRESSED THE BRAKE PEDAL AND
MOVED THE AUTOMATIC TRANSMISSION SHIFT LEVER TO NEU-
TRAL. *3
4LO4
wheelsIlluminatedFor use when maximum power and traction
is required (for example: on steep grades or
rocky, sandy, muddy roads)
*1: The transfer 4LO position indicator light may blink. Stop the vehicle. Be sure to shift the 4WD shift switch after the automatic transmission leverhas been shifted to the N position. If the indicator light
keeps blinking after the 4WD shift procedure in the previous page, drive slowly without abrupt maneuvers for a while. Then the light will turn on or off.
• Avoid making a turn or abrupt starts while shifting to 4LO. Otherwise gears may grind, damaging the drive system.
*2: While changing in and out of 4LO, the ignition key must be ON and the vehicle’s engine must be running for a shift to take place and for the indicator lights (4WD shift and 4LO position indicator) to
be operable. Otherwise, the shift will not take place and no indicator lights will be on or flashing.
*3: Make sure the transfer 4LO position indicator light turns on when you shift the 4WD shift switch to 4LO. The
indicator light (if so equipped) will also turn on when 4LO is selected. See “Vehicle
dynamic control system” later in this section.
Starting and driving5-19
ZREVIEW COPYÐ2006 Armada(wzw)
Owners ManualÐUSA_English(nna)
06/16/05Ðdebbie
X