2006 NISSAN ARMADA parking brake
[x] Cancel search: parking brakePage 276 of 352
7. Refill engine with recommended oil through
the oil filler opening, then install the oil filler
cap securely.
See “Capacities and recommended
fuel/lubricants” in the “Technical and con-
sumer information” section of this manual for
drain and refill capacity.
The drain and refill capacity depends on the
oil temperature and drain time. Use these
specifications for reference only. Always use
the dipstick to determine when the proper
amount of oil is in the engine.
8. Start the engine. Check for leakage around
the drain plug and oil filter. Correct as re-
quired.
9. Turn the engine off and wait more than 10
minutes. Check the oil level with the dipstick.
Add engine oil if necessary.
CHANGING ENGINE OIL FILTER
1. Park the vehicle on a level surface and apply
the parking brake.
2. Turn the engine off.
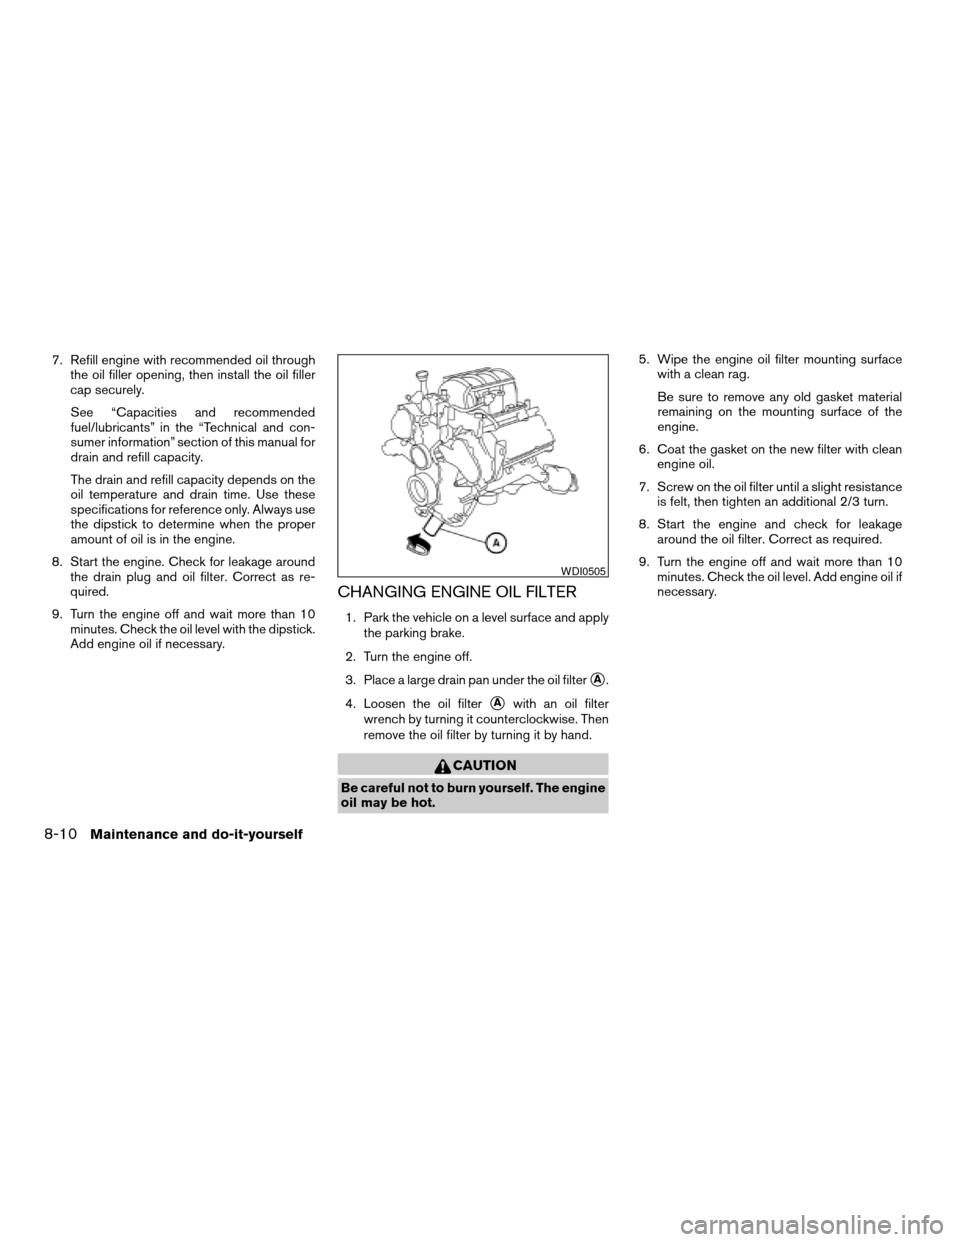
3. Place a large drain pan under the oil filter
sA.
4. Loosen the oil filter
sAwith an oil filter
wrench by turning it counterclockwise. Then
remove the oil filter by turning it by hand.
CAUTION
Be careful not to burn yourself. The engine
oil may be hot.5. Wipe the engine oil filter mounting surface
with a clean rag.
Be sure to remove any old gasket material
remaining on the mounting surface of the
engine.
6. Coat the gasket on the new filter with clean
engine oil.
7. Screw on the oil filter until a slight resistance
is felt, then tighten an additional 2/3 turn.
8. Start the engine and check for leakage
around the oil filter. Correct as required.
9. Turn the engine off and wait more than 10
minutes. Check the oil level. Add engine oil if
necessary.
WDI0505
8-10Maintenance and do-it-yourself
ZREVIEW COPYÐ2006 Armada(wzw)
Owners ManualÐUSA_English(nna)
06/16/05Ðdebbie
X
Page 281 of 352
1. Visually inspect the belt(s) for signs of un-
usual wear, cuts, fraying or looseness. If the
belt is in poor condition or is loose, have it
replaced or adjusted by a NISSAN dealer.
2. Have the belts checked regularly for condi-
tion and tension in accordance with the
maintenance schedule found in the
“NISSAN Service and Maintenance Guide”.
REPLACING SPARK PLUGS
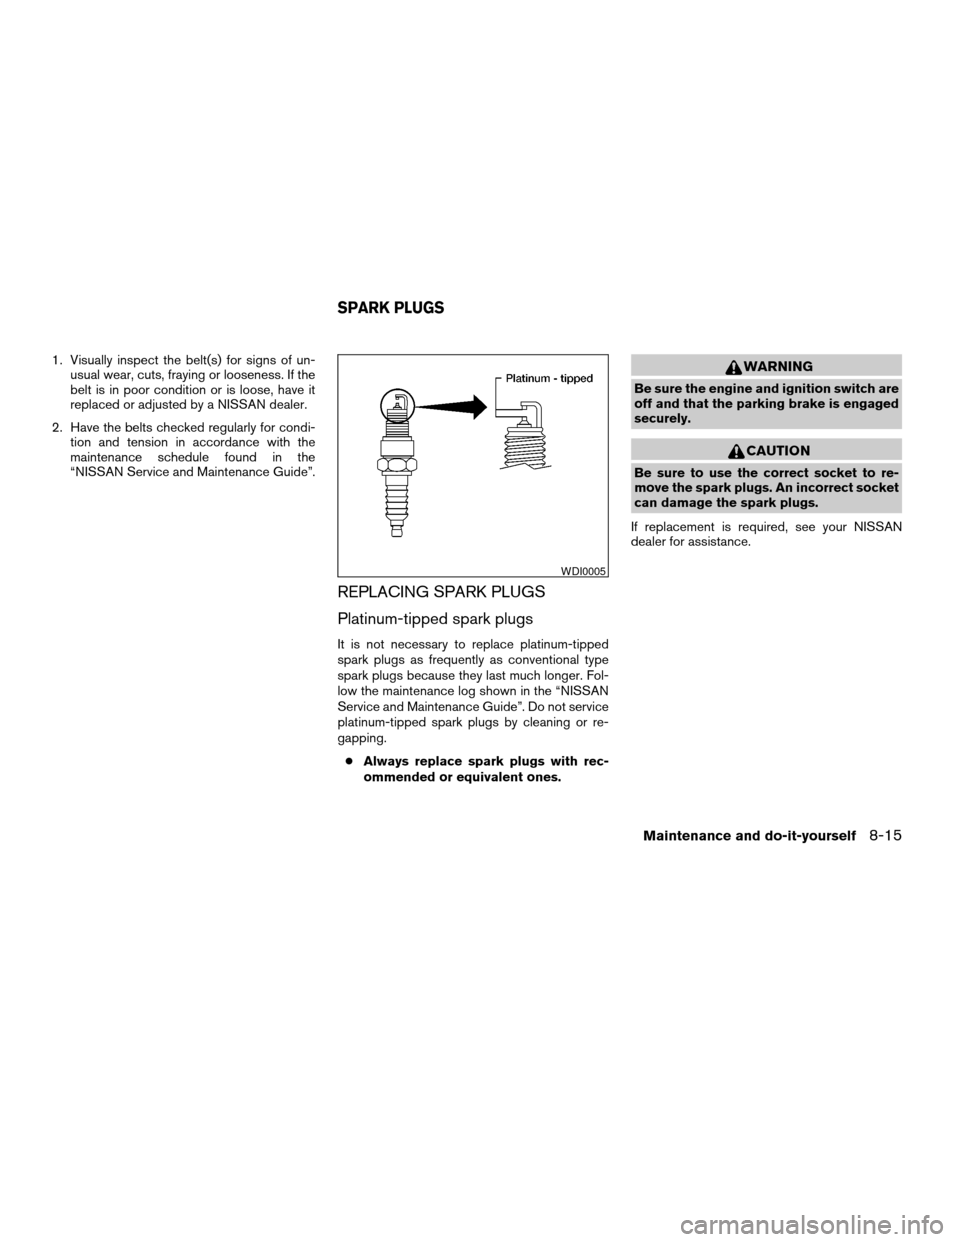
Platinum-tipped spark plugs
It is not necessary to replace platinum-tipped
spark plugs as frequently as conventional type
spark plugs because they last much longer. Fol-
low the maintenance log shown in the “NISSAN
Service and Maintenance Guide”. Do not service
platinum-tipped spark plugs by cleaning or re-
gapping.
cAlways replace spark plugs with rec-
ommended or equivalent ones.
WARNING
Be sure the engine and ignition switch are
off and that the parking brake is engaged
securely.
CAUTION
Be sure to use the correct socket to re-
move the spark plugs. An incorrect socket
can damage the spark plugs.
If replacement is required, see your NISSAN
dealer for assistance.
WDI0005
SPARK PLUGS
Maintenance and do-it-yourself8-15
ZREVIEW COPYÐ2006 Armada(wzw)
Owners ManualÐUSA_English(nna)
06/16/05Ðdebbie
X
Page 287 of 352
CHECKING PARKING BRAKE
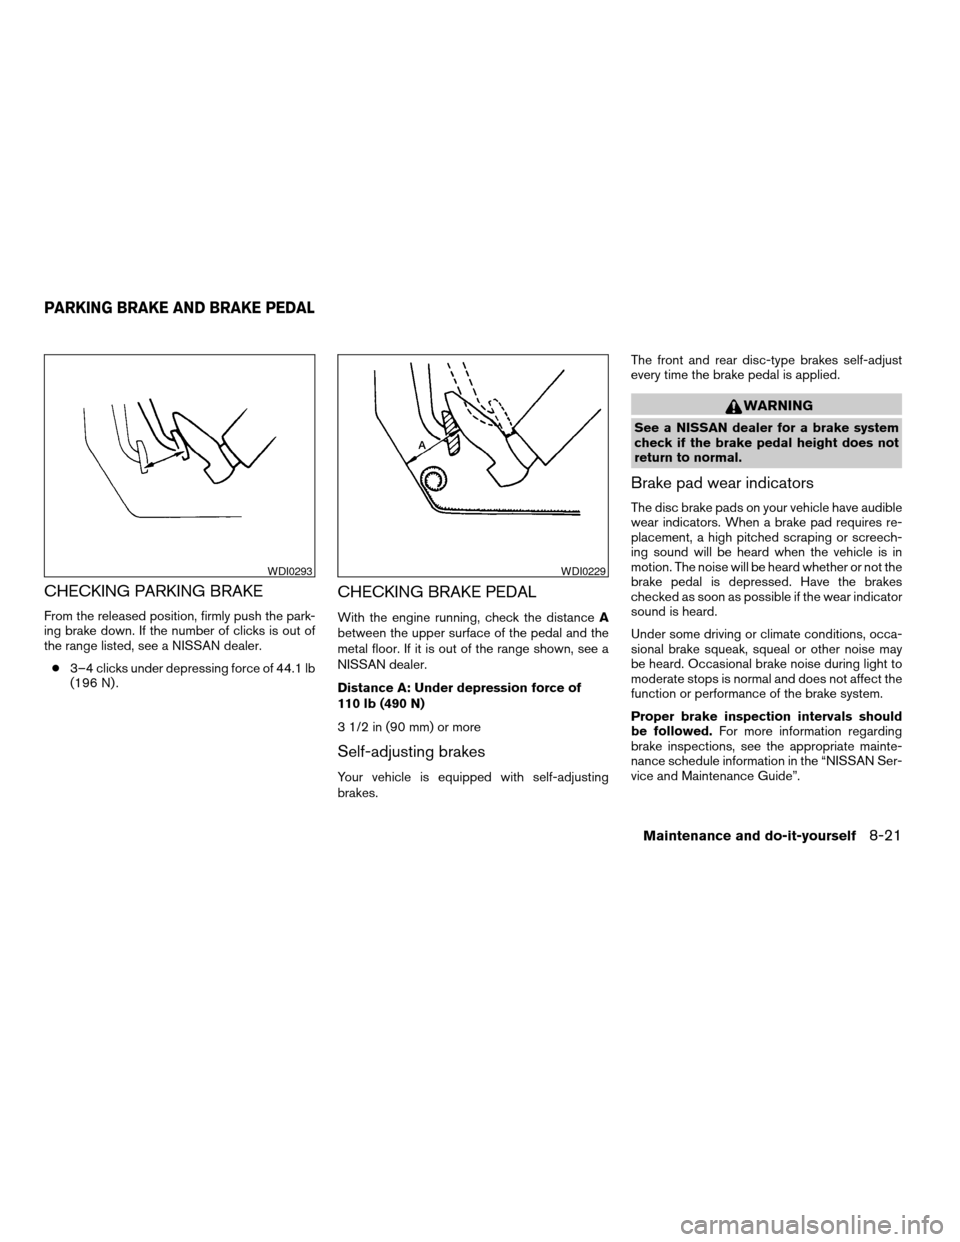
From the released position, firmly push the park-
ing brake down. If the number of clicks is out of
the range listed, see a NISSAN dealer.
c3–4 clicks under depressing force of 44.1 lb
(196 N) .
CHECKING BRAKE PEDAL
With the engine running, check the distanceA
between the upper surface of the pedal and the
metal floor. If it is out of the range shown, see a
NISSAN dealer.
Distance A: Under depression force of
110 lb (490 N)
3 1/2 in (90 mm) or more
Self-adjusting brakes
Your vehicle is equipped with self-adjusting
brakes.The front and rear disc-type brakes self-adjust
every time the brake pedal is applied.
WARNING
See a NISSAN dealer for a brake system
check if the brake pedal height does not
return to normal.
Brake pad wear indicators
The disc brake pads on your vehicle have audible
wear indicators. When a brake pad requires re-
placement, a high pitched scraping or screech-
ing sound will be heard when the vehicle is in
motion. The noise will be heard whether or not the
brake pedal is depressed. Have the brakes
checked as soon as possible if the wear indicator
sound is heard.
Under some driving or climate conditions, occa-
sional brake squeak, squeal or other noise may
be heard. Occasional brake noise during light to
moderate stops is normal and does not affect the
function or performance of the brake system.
Proper brake inspection intervals should
be followed.For more information regarding
brake inspections, see the appropriate mainte-
nance schedule information in the “NISSAN Ser-
vice and Maintenance Guide”.
WDI0293WDI0229
PARKING BRAKE AND BRAKE PEDAL
Maintenance and do-it-yourself8-21
ZREVIEW COPYÐ2006 Armada(wzw)
Owners ManualÐUSA_English(nna)
06/16/05Ðdebbie
X
Page 329 of 352
Trailer brakes
If your trailer is equipped with a braking system,
make sure it conforms to federal and/or local
regulations and that it is properly installed.
WARNING
Never connect a trailer brake system di-
rectly to the vehicle brake system.
Electric trailer brake controller
Trailers equipped with electric brakes may re-
quire the installation of an aftermarket trailer
brake controller.
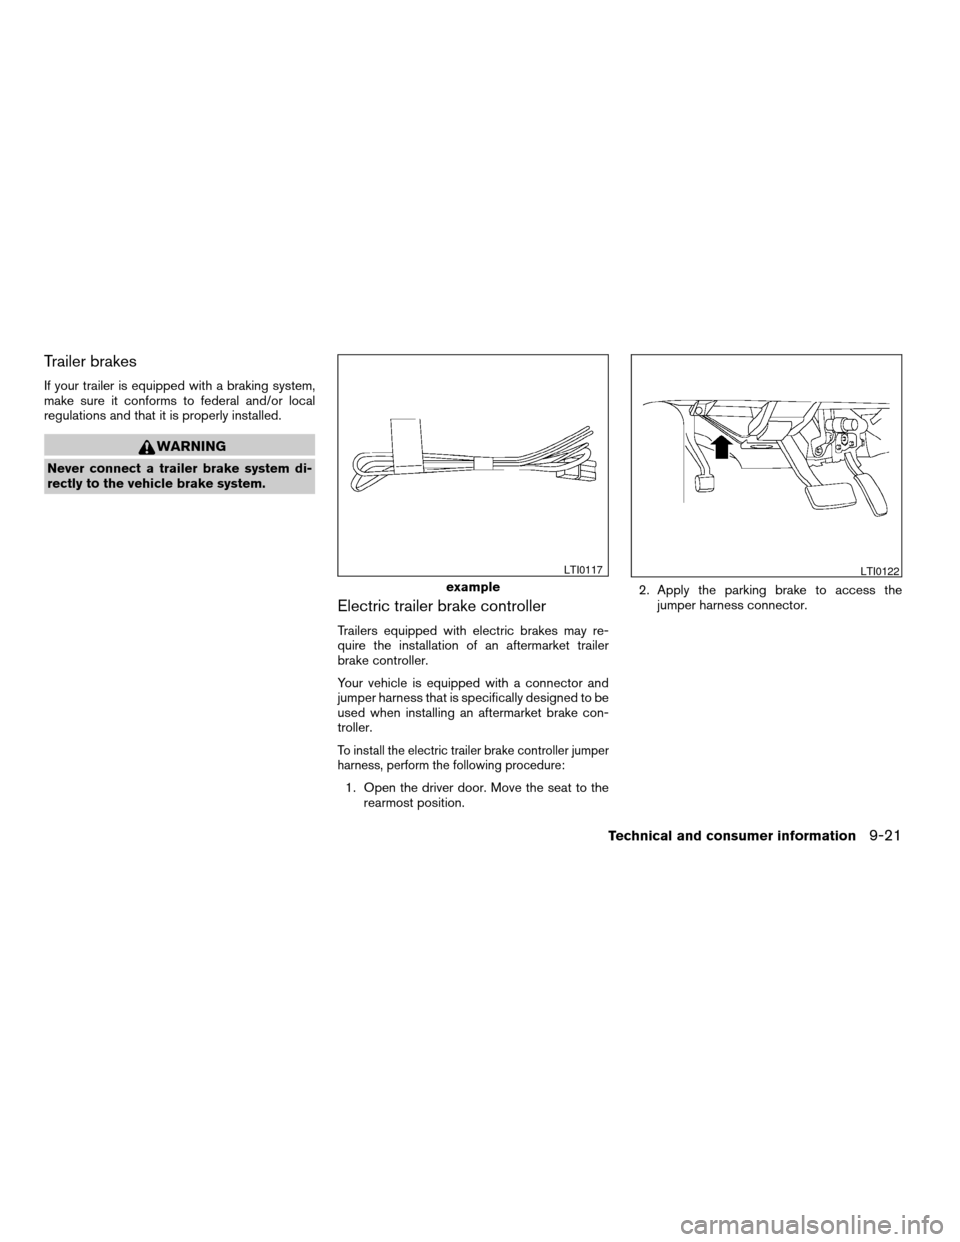
Your vehicle is equipped with a connector and
jumper harness that is specifically designed to be
used when installing an aftermarket brake con-
troller.
To install the electric trailer brake controller jumper
harness, perform the following procedure:
1. Open the driver door. Move the seat to the
rearmost position.2. Apply the parking brake to access the
jumper harness connector.
example
LTI0117LTI0122
Technical and consumer information9-21
ZREVIEW COPYÐ2006 Armada(wzw)
Owners ManualÐUSA_English(nna)
06/16/05Ðdebbie
X
Page 330 of 352
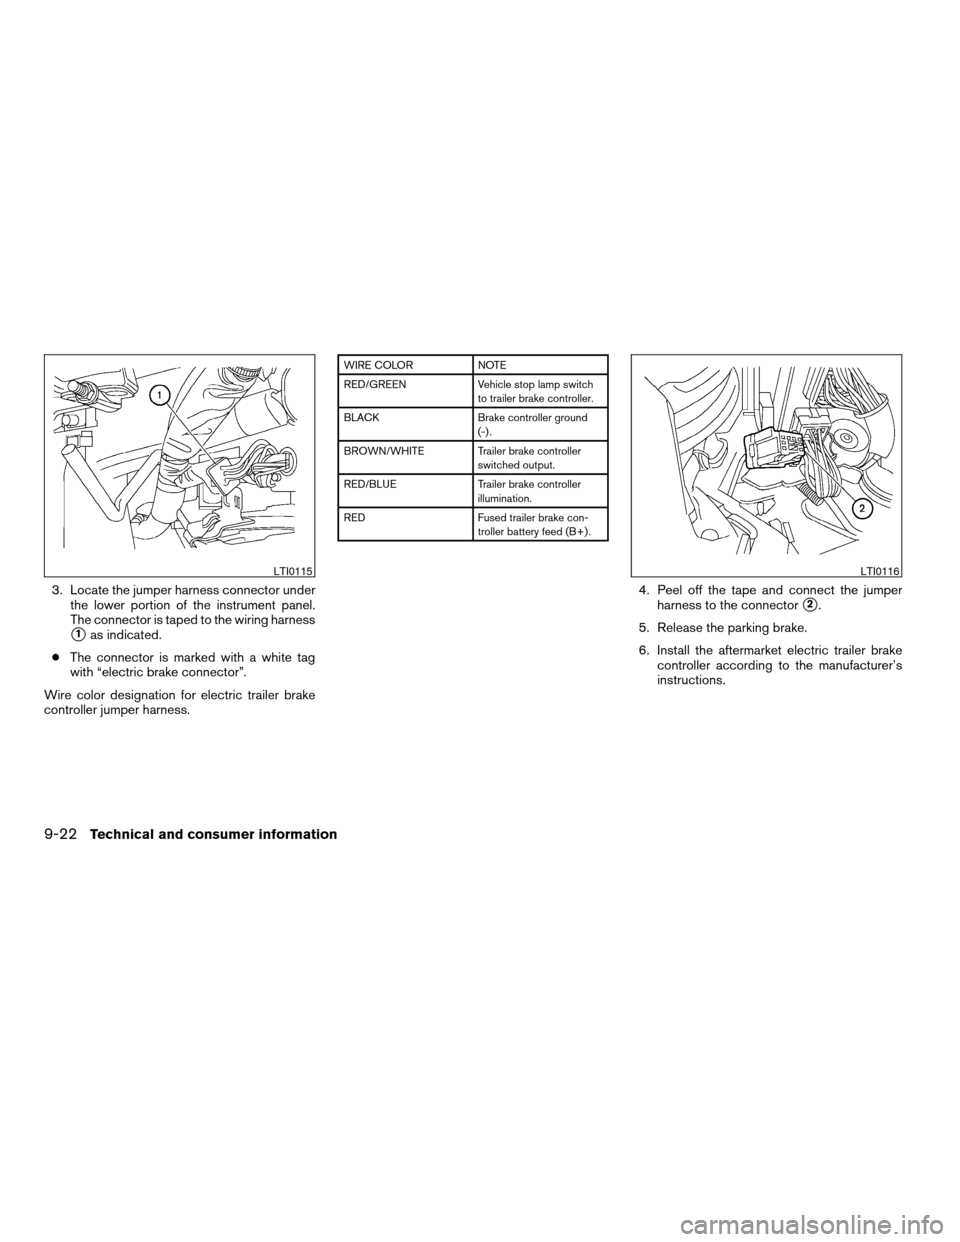
3. Locate the jumper harness connector under
the lower portion of the instrument panel.
The connector is taped to the wiring harness
s1as indicated.
cThe connector is marked with a white tag
with “electric brake connector”.
Wire color designation for electric trailer brake
controller jumper harness.
WIRE COLOR NOTE
RED/GREEN Vehicle stop lamp switch
to trailer brake controller.
BLACK Brake controller ground
(-) .
BROWN/WHITE Trailer brake controller
switched output.
RED/BLUE Trailer brake controller
illumination.
RED Fused trailer brake con-
troller battery feed (B+) .
4. Peel off the tape and connect the jumper
harness to the connector
s2.
5. Release the parking brake.
6. Install the aftermarket electric trailer brake
controller according to the manufacturer’s
instructions.
LTI0115LTI0116
9-22Technical and consumer information
ZREVIEW COPYÐ2006 Armada(wzw)
Owners ManualÐUSA_English(nna)
06/16/05Ðdebbie
X
Page 331 of 352

Pre-towing tips
cBe certain your vehicle maintains a level
position when a loaded and/or unloaded
trailer is hitched. Do not drive the vehicle if it
has an abnormal nose-up or nose-down
condition; check for improper tongue load,
overload, worn suspension or other possible
causes of either condition.
cAlways secure items in the trailer to prevent
load shift while driving.
cLoad the trailer so approximately 60% of the
trailer load is in the front half and 40% is in
the back half.
cCheck your hitch, trailer tire pressure, ve-
hicle tire pressure, trailer light operation, and
trailer wheel lug nuts every time you attach a
trailer to the vehicle.
cBe certain your rearview mirrors conform to
all federal, state or local regulations. If not,
install any mirrors required for towing before
driving the vehicle.
Trailer towing tips
In order to gain skill and an understanding of the
vehicle’s behavior, you should practice turning,
stopping and backing up in an area which is free
from traffic. Steering stability and braking perfor-mance will be somewhat different than under
normal driving conditions.
cAlways secure items in the trailer to prevent
load shift while driving.
cAvoid abrupt starts, acceleration or stops.
cAvoid sharp turns or lane changes.
cAlways drive your vehicle at a moderate
speed.
cWhen backing up, hold the bottom of the
steering wheel with one hand. Move your
hand in the direction in which you want the
trailer to go. Make small corrections and
back up slowly. If possible, have someone
guide you when you are backing up.
cAlways block the wheels on both vehicle and
trailer when parking. Parking on a slope is
not recommended; however, if you must do
so, first block the wheels and apply the park-
ing brake, and then move the transmission
shift selector lever into the P (Park) position.
If you move the shift selector lever to the P
(Park) position before blocking the wheels
and applying the parking brake, transmission
damage could occur.
c
When going down a hill, shift into a lower gear
and use the engine braking effect. When go-
ing up a long grade, downshift the transmis-sion to a lower gear and reduce speed to
reduce chances of engine overloading and/or
overheating. However, for long steep grades,
do not stay in 1st gear when driving above 35
MPH (56 km/h) or 2nd gear when driving
above 58 MPH (93 km/h) .
cIf the engine coolant rises to an extremely
high temperature when the air conditioner
system is on, turn off the air conditioner.
Coolant heat can be additionally vented by
opening the windows, switching the fan
control to high and setting the temperature
control to the HOT position.
cTrailer towing requires more fuel than normal
circumstances.
cAvoid towing a trailer for your vehicle’s first
500 miles (805 km) .
cFor the first 500 miles (805 km) that you do
tow, do not drive over 50 MPH (80 km/h) .
cHave your vehicle serviced more often than
at intervals specified in the recommended
Maintenance Schedule in the “NISSAN Ser-
vice and Maintenance Guide”.
cWhen making a turn, your trailer wheels will
be closer to the inside of the turn than your
vehicle wheels. To compensate for this,
make a larger than normal turning radius
during the turn.
Technical and consumer information9-23
ZREVIEW COPYÐ2006 Armada(wzw)
Owners ManualÐUSA_English(nna)
06/16/05Ðdebbie
X
Page 332 of 352

cCrosswinds and rough roads will adversely
affect vehicle/trailer handling, possibly caus-
ing vehicle sway. When being passed by
larger vehicles, be prepared for possible
changes in crosswinds that could affect ve-
hicle handling. If swaying does occur, firmly
grip the steering wheel, steer straight ahead,
and immediately (but gradually) reduce ve-
hicle speed. This combination will help sta-
bilize the vehicle. Never increase speed.
cBe careful when passing other vehicles.
Passing while towing a trailer requires con-
siderably more distance than normal pass-
ing. Remember, the length of the trailer must
also pass the other vehicle before you can
safely change lanes.
cTo maintain engine braking efficiency and
electrical charging performance, do not use
overdrive.
cAvoid holding the brake pedal down too long
or too frequently. This could cause the
brakes to overheat, resulting in reduced
braking efficiency.
cIncrease your following distance to allow for
greater stopping distances while towing a
trailer. Anticipate stops and brake gradually
cDo not use cruise control while towing a
trailer.cSome states or provinces have specific
speed limits for vehicles that are towing trail-
ers. Obey the local speed limits.
cCheck your hitch, trailer wiring harness con-
nections, and trailer wheel lug nuts after 50
miles (80 km) of travel and at every break.
cWhen stopped in traffic for long periods of
time in hot weather, put the vehicle in the P
(Park) position.
When towing a trailer, final drive gear oil
should be replaced and transmission
oil/fluid should be changed more fre-
quently. For additional information, see the
“Maintenance and do-it-yourself” section
earlier in this manual.
Tow mode
Tow mode should be used when pulling a heavy
trailer or hauling a heavy load. Press the tow
button to activate the tow mode. The tow indica-
tor in the instrument panel illuminates when the
tow mode is selected. Press the Tow button
again to turn the tow mode OFF. The Tow mode is
automatically cancelled when the key is turned
OFF.
The Tow mode does the following:
cReduces transmissions shifts when pulling a
trailer or hauling a load.cProvides similar shift feel to driver when the
vehicle is towing.
The Tow mode should be used when the vehicle
and trailer weight is at least 75% of the vehicle’s
GCWR. Tow mode is most useful in the following
driving conditions when towing a heavy trailer or
hauling a heavy load:
cRolling terrain.
cStop and go traffic.
cBusy parking lots.
Driving the vehicle in the Tow mode with no
trailer/load or light trailer/light load will not cause
any damage. However, fuel economy may be
reduced and the transmission/engine driving
characteristics may feel unusual.
When towing a trailer, final drive gear oil
should be replaced and transmission
oil/fluid should be changed more fre-
quently. For additional information, see the
“Maintenance and do-it-yourself” section
earlier in this manual.
9-24Technical and consumer information
ZREVIEW COPYÐ2006 Armada(wzw)
Owners ManualÐUSA_English(nna)
06/16/05Ðdebbie
X
Page 339 of 352

10 Index
4WD warning light...............2-15
A
Active head restraint...............1-9
Adjusting pedal position............3-16
Air bag (See supplemental restraint
system).....................1-57
Air bag system
Front (See supplemental front impact air
bag system).................1-64
Air bag warning labels.............1-71
Air bag warning light...........1-72, 2-16
Air cleaner housing filter............8-16
Air conditioner
Air conditioner service...........4-18
Air conditioner specification label.....9-11
Air conditioner system refrigerant and oil
recommendations..............9-6
Heater and air conditioner
controls................4-15, 4-15
Rear seat air conditioner..........4-17
Servicing air conditioner..........4-18
Alarm system
(See vehicle security system).........2-20
Anchor point locations.............1-46
Antenna.....................4-34
Anti-lock brake system (ABS).........5-26
Anti-lock brake warning light..........2-13
Audible reminders................2-19
Audio system..................4-18AM-FM-SAT radio with compact disc (CD)
changer...................4-26
Compact Disc (CD) changer.......4-28
Radio....................4-18
Rear audio controls.............4-33
Steering wheel audio control switch. . . .4-31
Autolight switch.................2-25
Automatic
Automatic drive positioner.........3-20
Automatic power window switch.....2-45
Automatic transmission position indicator
light.....................2-17
Driving with automatic transmission. . . .5-10
Transmission selector lever lock
release....................5-13
Automatic anti-glare inside mirror.......3-18
Automatic transmission fluid temperature
gauge.......................2-7
AUX jack.....................4-30
B
Battery......................8-13
Charge warning light............2-14
Before starting the engine............5-9
Belts (See drive belts).............8-14
Booster seats..................1-51
Brake
Anti-lock brake system (ABS).......5-26
Brake booster................8-22
Brake fluid..................8-11Brake light (See stop light).........8-27
Brake pedal.................8-21
Brake system................5-25
Brake warning light.............2-13
Brake wear indicators........2-19, 8-21
Parking brake check............8-21
Parking brake operation..........5-14
Self-adjusting brakes............8-21
Break-in schedule................5-17
Brightness control
Instrument panel..............2-27
Brightness/Contrast button..........4-11
Control panel buttons...........4-11
Bulb check/instrument panel..........2-12
Bulb replacement................8-27
C
Capacities and recommended
fuel/lubricants...................9-2
Captain’s chair adjustment (2nd row)......1-5
Car phone or CB radio.............4-43
Cargo light...................2-51
Cargo (See vehicle loading information) . . .9-12
CD care and cleaning.............4-31
CD changer (See audio system)........4-28
Child restraint with top tether strap......1-45
Child restraints.......1-17, 1-18, 1-25, 1-43
Precautions on child restraints . . .1-25, 1-51
Top tether strap anchor point locations . .1-46
Child safety rear door lock............3-5
ZREVIEW COPYÐ2006 Armada(wzw)
Owners ManualÐUSA_English(nna)
06/16/05Ðdebbie
X