2006 NISSAN ARMADA phone
[x] Cancel search: phonePage 203 of 352

1. VOL (volume) control button
2. MODE select button
3.
speaker control button
4. NEXT button
5. SEEK button
6. Headphone jacks7. Infrared headphone transmitter lens*
*Red transmitters will be visible when
infrared headphones are on.
REAR AUDIO CONTROLS (if so
equipped)
Push the REAR AV button on the front radio
control panel to turn the rear controls on. Push
the button again to turn rear controls off.
The headphones symbol illuminates on the front
display when the rear audio controls are on. Two
headphone jacks are provided so two rear seat
passengers may listen to the audio system pri-
vately.
The rear volume controls can only increase the
volume to the level at which the front radio volume
control is set.
One or two infrared headphones are included if
the vehicle is equipped with the DVD entertain-
ment system. Most portable radio headphones
work with the rear audio controls.
For vehicles equipped with the FM/AM/SAT radio
with compact disc player, if the rear passengers
turn off the rear speakers and are using head-
phones they may choose to listen to a different
media than the front passengers. The rear pas-
sengers can listen to the radio while the front
passengers can listen to the same thing, a CD or
SAT radio (if so equipped) .
LHA0322
Display screen, heater, air conditioner and audio systems4-33
ZREVIEW COPYÐ2006 Armada(wzw)
Owners ManualÐUSA_English(nna)
06/16/05Ðdebbie
X
Page 204 of 352
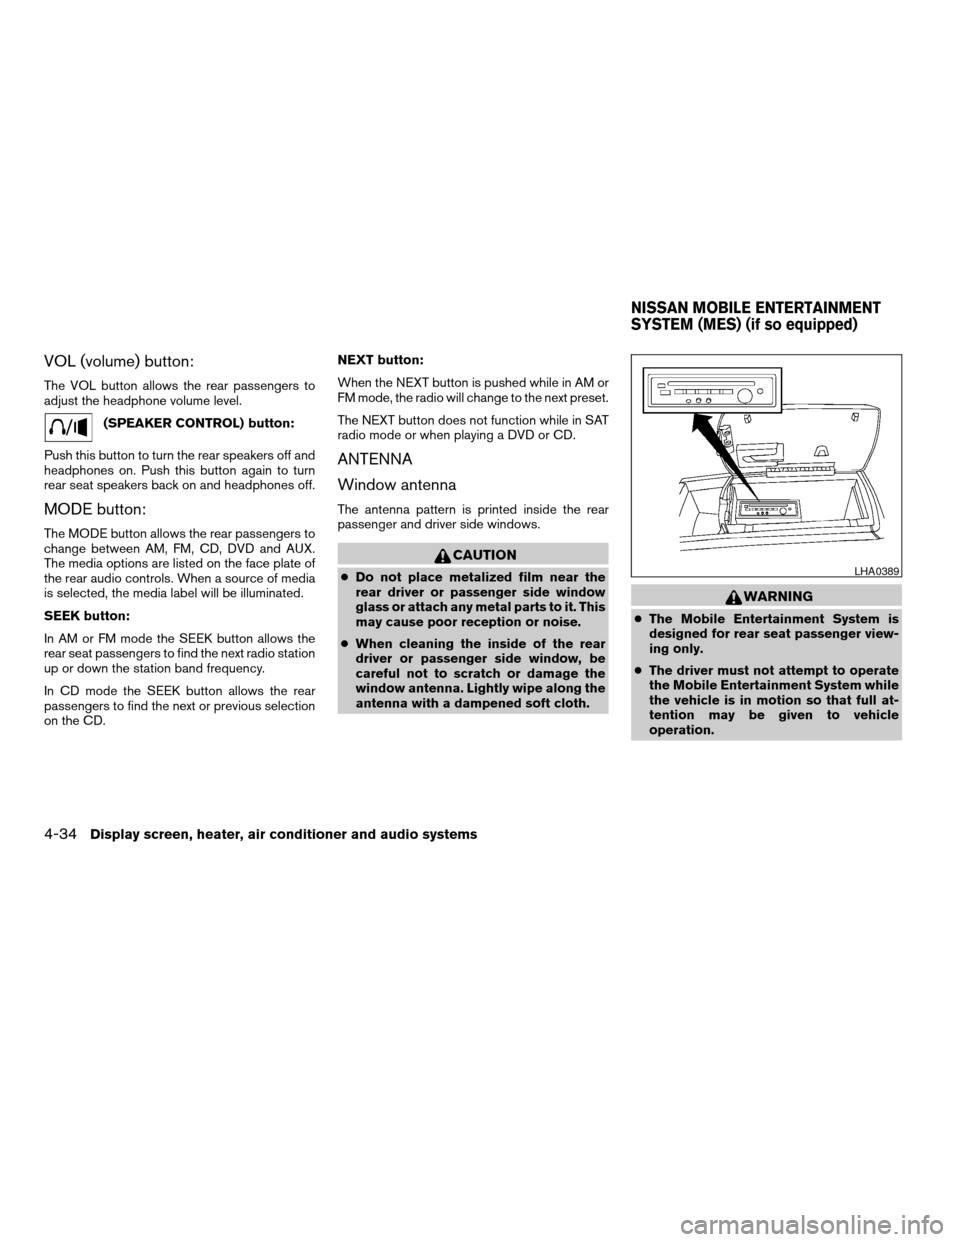
VOL (volume) button:
The VOL button allows the rear passengers to
adjust the headphone volume level.
(SPEAKER CONTROL) button:
Push this button to turn the rear speakers off and
headphones on. Push this button again to turn
rear seat speakers back on and headphones off.
MODE button:
The MODE button allows the rear passengers to
change between AM, FM, CD, DVD and AUX.
The media options are listed on the face plate of
the rear audio controls. When a source of media
is selected, the media label will be illuminated.
SEEK button:
In AM or FM mode the SEEK button allows the
rear seat passengers to find the next radio station
up or down the station band frequency.
In CD mode the SEEK button allows the rear
passengers to find the next or previous selection
on the CD.NEXT button:
When the NEXT button is pushed while in AM or
FM mode, the radio will change to the next preset.
The NEXT button does not function while in SAT
radio mode or when playing a DVD or CD.
ANTENNA
Window antenna
The antenna pattern is printed inside the rear
passenger and driver side windows.
CAUTION
cDo not place metalized film near the
rear driver or passenger side window
glass or attach any metal parts to it. This
may cause poor reception or noise.
cWhen cleaning the inside of the rear
driver or passenger side window, be
careful not to scratch or damage the
window antenna. Lightly wipe along the
antenna with a dampened soft cloth.
WARNING
cThe Mobile Entertainment System is
designed for rear seat passenger view-
ing only.
cThe driver must not attempt to operate
the Mobile Entertainment System while
the vehicle is in motion so that full at-
tention may be given to vehicle
operation.
LHA0389
NISSAN MOBILE ENTERTAINMENT
SYSTEM (MES) (if so equipped)
4-34Display screen, heater, air conditioner and audio systems
ZREVIEW COPYÐ2006 Armada(wzw)
Owners ManualÐUSA_English(nna)
06/16/05Ðdebbie
X
Page 207 of 352
cThe screen rotates down to view and up
into the housing to store when not in
use. Ensure that the screen is latched
securely into the housing when stored.
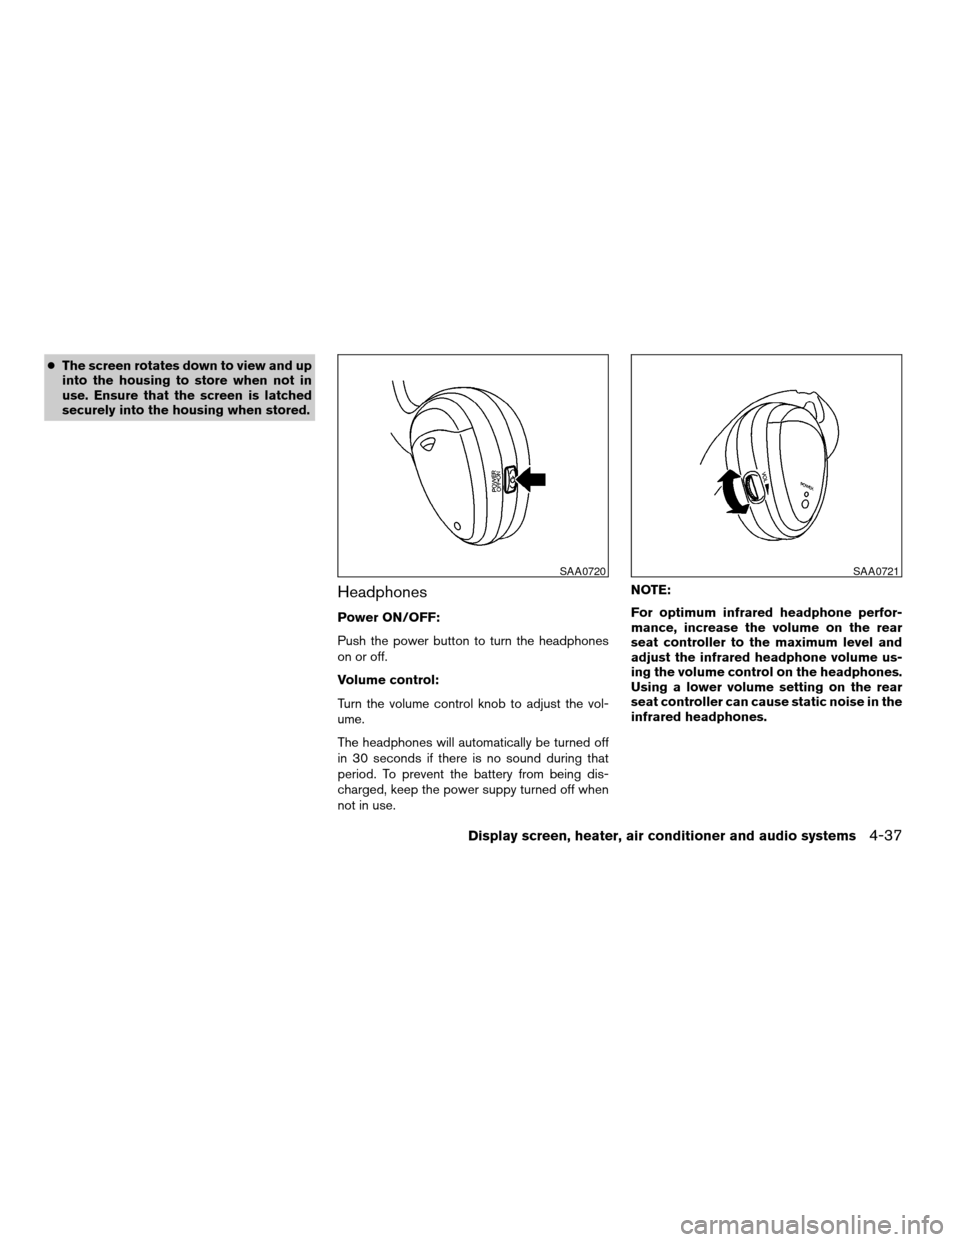
Headphones
Power ON/OFF:
Push the power button to turn the headphones
on or off.
Volume control:
Turn the volume control knob to adjust the vol-
ume.
The headphones will automatically be turned off
in 30 seconds if there is no sound during that
period. To prevent the battery from being dis-
charged, keep the power suppy turned off when
not in use.NOTE:
For optimum infrared headphone perfor-
mance, increase the volume on the rear
seat controller to the maximum level and
adjust the infrared headphone volume us-
ing the volume control on the headphones.
Using a lower volume setting on the rear
seat controller can cause static noise in the
infrared headphones.
SAA0720SAA0721
Display screen, heater, air conditioner and audio systems4-37
ZREVIEW COPYÐ2006 Armada(wzw)
Owners ManualÐUSA_English(nna)
06/16/05Ðdebbie
X
Page 208 of 352
PLAYING A DIGITAL VIDEO DISC
(DVD)
CAUTION
cOnly operate the DVD while the vehicle
engine is running. Operating the DVD
for extended periods of time with the
engine OFF can discharge the vehicle
battery.
cDo not allow the system to get wet.
Excessive moisture such as spilled liq-
uids may cause the system to
malfunction.
cThe driver must not attempt to wear the
headphones while the vehicle is in mo-
tion so that full attention may be given
to vehicle operation.
cWhile playing video CD media, this DVD
player does not guarantee complete
functionality of all video CD formats.
With the DVD player, you can hear DVD videos,
video CDs and CDs using headphones. Passen-
gers in the rear seat can enjoy the sound inde-
pendently of the front seat.Press the REAR AV button located on the front
controls for more than 1.5 seconds to hear the
sound of the DVD player through the speakers.
Pushing the
button on the front controls
turns the rear speakers on and off.
It is possible to operate the DVD player by remote
control.
Headphones are a wireless type and no cables
are necessary. You can use them in almost all the
ranges in the rear seat. (It is not possible to use
the headphones in the front seat.)
POWER on/off button:
With the ignition switch turned to the ACC or ON
position, push the POWER button to turn the
DVD player on or off.
Insert the DVD into the slot with the label side
facing up. The DVD will be guided automatically
into the slot.
If the DVD player is off and a DVD is inserted, the
DVD player will automatically turn on.
CAUTION
Do not force the compact disc into the
slot. This could damage the player.MODE select button:
Push the Mode button to select Audio/Video
source between DVD and AUX input (input jacks
on the faceplate, Red = right channel audio input,
White = left channel audio input, and Yellow =
Video input) .
The display will show the “AUX” in the upper left
corner of the display for 4 seconds once the
Mode is changed to AUX.
To use the input jacks, refer to “Auxiliary input
jacks” in this section.
orPLAY:
When the PLAY/PAUSE button on the player or
the PLAY button on the remote control is pushed,
the player will play.
In play mode, the display will briefly show
on the upper left corner of the display.
FF (Fast Forward) , REW
(Remote control only):
Push FAST FORWARD/FAST REVERSE but-
tons to carry out the fast forward or fast reverse
presentation at 5 times normal play speed.
Push FAST FORWARD/FAST REVERSE but-
tons again or PLAY button to resume the normal
play speed.
4-38Display screen, heater, air conditioner and audio systems
ZREVIEW COPYÐ2006 Armada(wzw)
Owners ManualÐUSA_English(nna)
06/16/05Ðdebbie
X
Page 212 of 352

DVD player operation precautions
Do not use the following DVD’s as they may
cause the DVD player to malfunction:
c3.1 in (8 cm) discs with an adaptercDVD’s with a region code other than
“1”. The region code
sAis displayed in
a small symbol printed on the top of
the DVD
sB
cDVD’s that are not round
cDVD’s with a paper label
cDVD’s that are warped, scratched, or
have unequal edges
cRecordable digital video discs (DVD-R)
c
Rewritable digital video discs (DVD-RW)
If a DVD with a paper label is used and
becomes jammed you may be able to reset
the unit and eject the jammed disc with the
following procedure:
1.Record the radio presets
2.Disconnect the negative terminal from
the battery for five minutes
3.
Reconnect the negative battery terminal
4.Check to see if the jammed DVD has
been ejected. If it has not, try to eject
the DVD by pushing the eject button.
5.If the disc cannot be ejected see your
Nissan dealer for further assistance
6.Re-program the radio presets
Remote control and headphones
battery replacement
Replace the battery as follows:
1. Open the lid.
2. Replace batteries with new ones.
cSize AA (remote control)
cSize AAA (headphones)
Make sure that the
andends on
the batteries match the markings inside the
compartment.
3. Close the lid securely.
LHA0484
LHA0318
4-42Display screen, heater, air conditioner and audio systems
ZREVIEW COPYÐ2006 Armada(wzw)
Owners ManualÐUSA_English(nna)
06/16/05Ðdebbie
X
Page 213 of 352
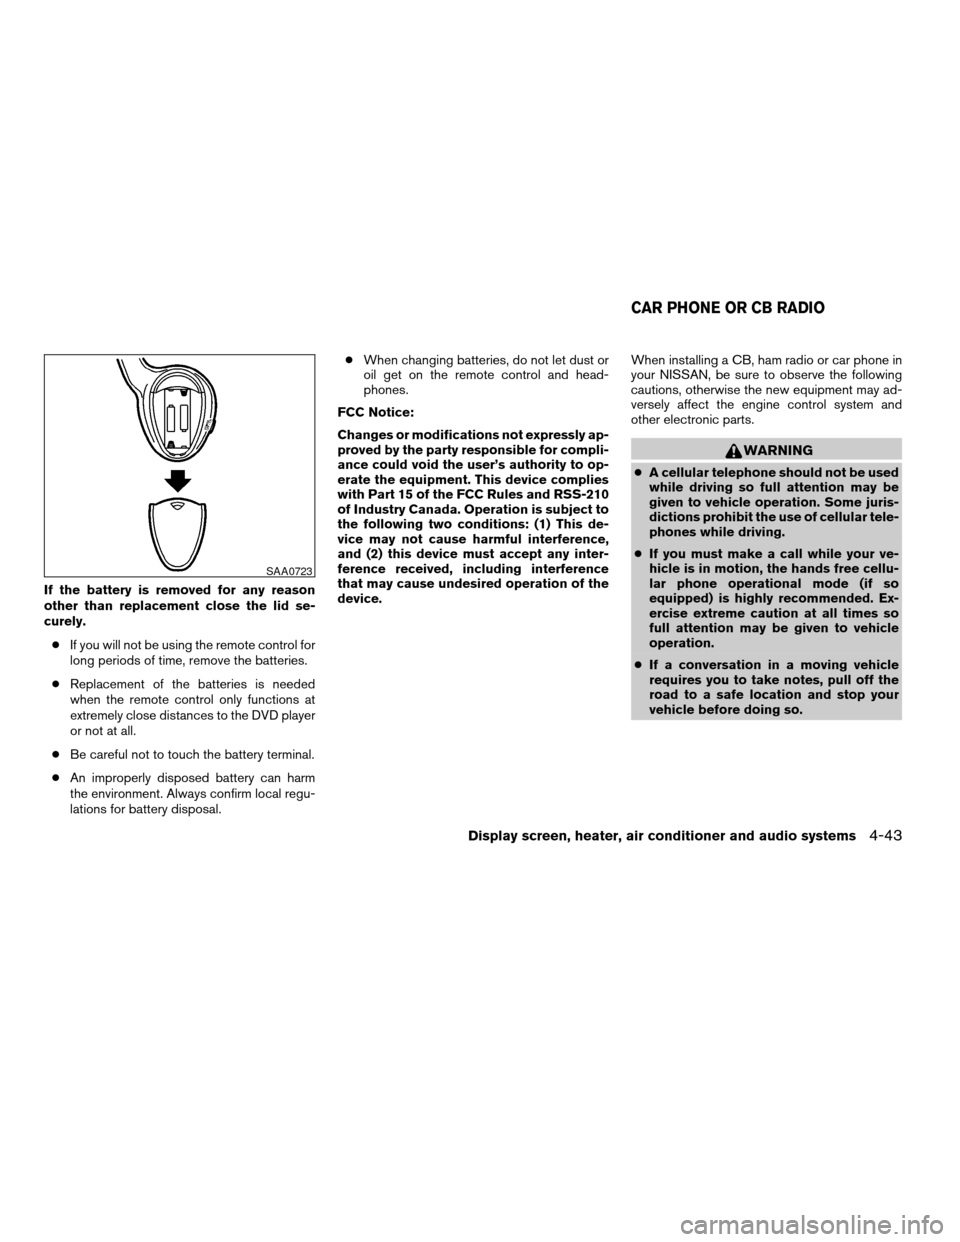
If the battery is removed for any reason
other than replacement close the lid se-
curely.
cIf you will not be using the remote control for
long periods of time, remove the batteries.
cReplacement of the batteries is needed
when the remote control only functions at
extremely close distances to the DVD player
or not at all.
cBe careful not to touch the battery terminal.
cAn improperly disposed battery can harm
the environment. Always confirm local regu-
lations for battery disposal.cWhen changing batteries, do not let dust or
oil get on the remote control and head-
phones.
FCC Notice:
Changes or modifications not expressly ap-
proved by the party responsible for compli-
ance could void the user’s authority to op-
erate the equipment. This device complies
with Part 15 of the FCC Rules and RSS-210
of Industry Canada. Operation is subject to
the following two conditions: (1) This de-
vice may not cause harmful interference,
and (2) this device must accept any inter-
ference received, including interference
that may cause undesired operation of the
device.When installing a CB, ham radio or car phone in
your NISSAN, be sure to observe the following
cautions, otherwise the new equipment may ad-
versely affect the engine control system and
other electronic parts.
WARNING
cA cellular telephone should not be used
while driving so full attention may be
given to vehicle operation. Some juris-
dictions prohibit the use of cellular tele-
phones while driving.
cIf you must make a call while your ve-
hicle is in motion, the hands free cellu-
lar phone operational mode (if so
equipped) is highly recommended. Ex-
ercise extreme caution at all times so
full attention may be given to vehicle
operation.
cIf a conversation in a moving vehicle
requires you to take notes, pull off the
road to a safe location and stop your
vehicle before doing so.
SAA0723
CAR PHONE OR CB RADIO
Display screen, heater, air conditioner and audio systems4-43
ZREVIEW COPYÐ2006 Armada(wzw)
Owners ManualÐUSA_English(nna)
06/16/05Ðdebbie
X
Page 337 of 352

Resolve Corporation
20770 Westwood Road
Strongsville, OH 44136
1-800-247-5321
For Canada
To purchase a copy of a genuine NISSAN Ser-
vice Manual or Owner’s Manual please contact
your nearest NISSAN dealer. For the phone num-
ber and location of a NISSAN dealer in your area
call the NISSAN Information Center at 1-800-
387-0122 and a bilingual NISSAN representa-
tive will assist you.
Also available are genuine NISSAN Service and
Owner’s Manuals for older NISSAN models.
IN THE EVENT OF A COLLISION
Unfortunately, accidents do occur. In this unlikely
event, there is some important information you
should know.
Many insurance companies routinely authorize
the use of non-genuine collision parts in order to
cut costs, among other reasons.
Insist on the use of genuine NISSAN
collision parts!
If you want your vehicle to be restored using parts
made to NISSAN’s original exacting specifica-
tions – if you want to help it to last and hold itsresale value, the solution is simple.Tell your
insurance agent and your repair shop to
only use Genuine NISSAN Collision Parts.
NISSAN does not warrant non-NISSAN parts,
nor does NISSAN’s warranty apply to damage
caused by a non-genuine part.
Using Genuine NISSAN Parts can help protect
your personal safety, preserve your warranty pro-
tection and maintain the resale value of your
vehicle. And if your vehicle was leased, using
Genuine NISSAN Parts may prevent or limit un-
necessary excess wear and tear expenses at the
end of your lease.
NISSAN designs its hoods with crumple zones to
minimize the risk that the hood will penetrate the
windshield of your vehicle in an accident. Non-
genuine (imitation) parts may not provide such
built-in safeguards. Also, non-genuine parts of-
ten show premature wear, rust and corrosion.
Why should you take a chance?
In over 40 states, the law says you must be
advised if non-genuine parts are used to repair
your vehicle. And some states have enacted laws
that restrict insurance companies from authoriz-
ing the use of non-genuine collision parts during
the new vehicle warranty. These laws help pro-
tect you, so you can take action to protect your-
self.
It’s your right!
If you should need further information visit us at:
www.nissanusa.com.
Technical and consumer information9-29
ZREVIEW COPYÐ2006 Armada(wzw)
Owners ManualÐUSA_English(nna)
06/16/05Ðdebbie
X
Page 339 of 352
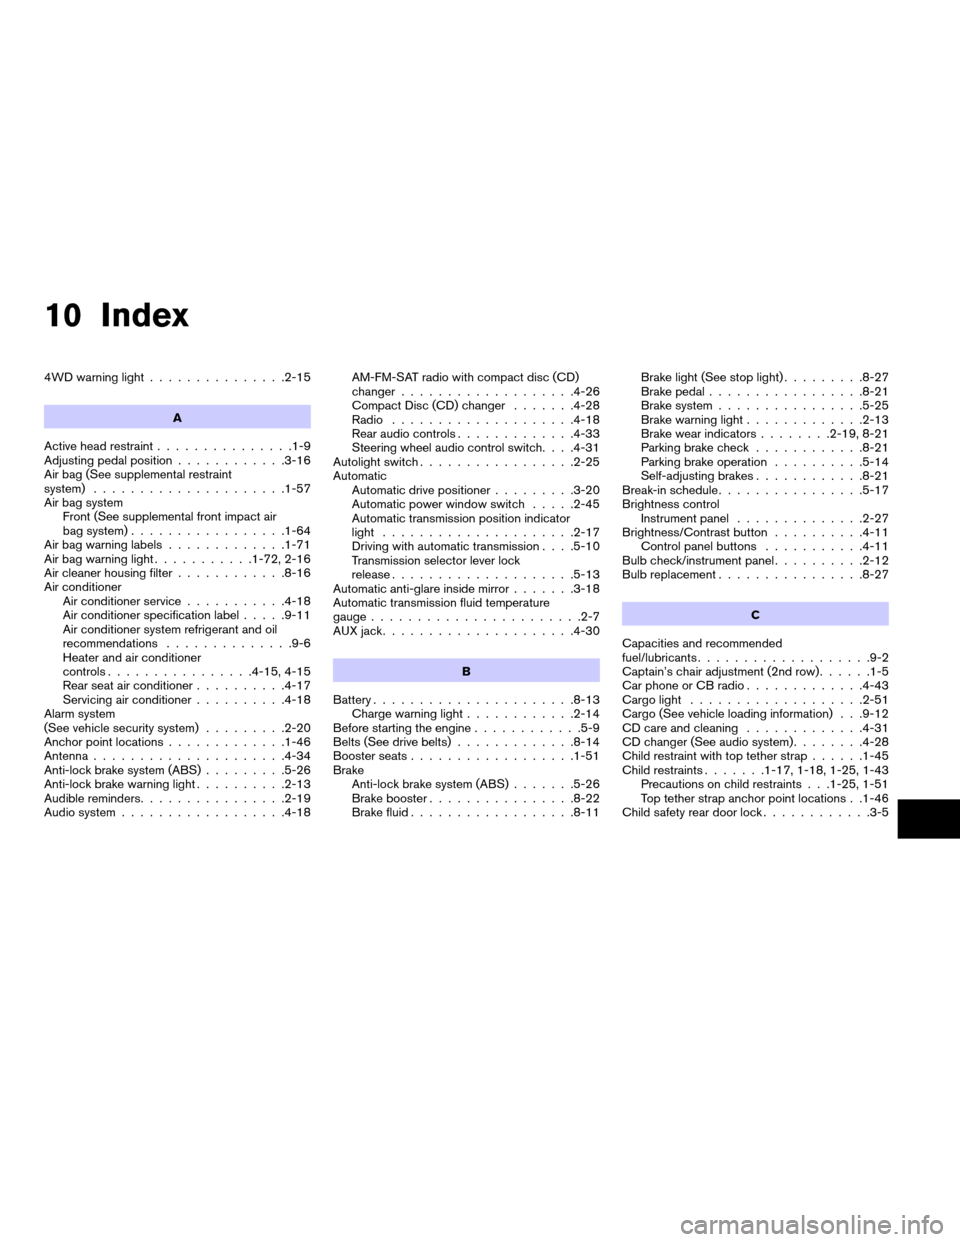
10 Index
4WD warning light...............2-15
A
Active head restraint...............1-9
Adjusting pedal position............3-16
Air bag (See supplemental restraint
system).....................1-57
Air bag system
Front (See supplemental front impact air
bag system).................1-64
Air bag warning labels.............1-71
Air bag warning light...........1-72, 2-16
Air cleaner housing filter............8-16
Air conditioner
Air conditioner service...........4-18
Air conditioner specification label.....9-11
Air conditioner system refrigerant and oil
recommendations..............9-6
Heater and air conditioner
controls................4-15, 4-15
Rear seat air conditioner..........4-17
Servicing air conditioner..........4-18
Alarm system
(See vehicle security system).........2-20
Anchor point locations.............1-46
Antenna.....................4-34
Anti-lock brake system (ABS).........5-26
Anti-lock brake warning light..........2-13
Audible reminders................2-19
Audio system..................4-18AM-FM-SAT radio with compact disc (CD)
changer...................4-26
Compact Disc (CD) changer.......4-28
Radio....................4-18
Rear audio controls.............4-33
Steering wheel audio control switch. . . .4-31
Autolight switch.................2-25
Automatic
Automatic drive positioner.........3-20
Automatic power window switch.....2-45
Automatic transmission position indicator
light.....................2-17
Driving with automatic transmission. . . .5-10
Transmission selector lever lock
release....................5-13
Automatic anti-glare inside mirror.......3-18
Automatic transmission fluid temperature
gauge.......................2-7
AUX jack.....................4-30
B
Battery......................8-13
Charge warning light............2-14
Before starting the engine............5-9
Belts (See drive belts).............8-14
Booster seats..................1-51
Brake
Anti-lock brake system (ABS).......5-26
Brake booster................8-22
Brake fluid..................8-11Brake light (See stop light).........8-27
Brake pedal.................8-21
Brake system................5-25
Brake warning light.............2-13
Brake wear indicators........2-19, 8-21
Parking brake check............8-21
Parking brake operation..........5-14
Self-adjusting brakes............8-21
Break-in schedule................5-17
Brightness control
Instrument panel..............2-27
Brightness/Contrast button..........4-11
Control panel buttons...........4-11
Bulb check/instrument panel..........2-12
Bulb replacement................8-27
C
Capacities and recommended
fuel/lubricants...................9-2
Captain’s chair adjustment (2nd row)......1-5
Car phone or CB radio.............4-43
Cargo light...................2-51
Cargo (See vehicle loading information) . . .9-12
CD care and cleaning.............4-31
CD changer (See audio system)........4-28
Child restraint with top tether strap......1-45
Child restraints.......1-17, 1-18, 1-25, 1-43
Precautions on child restraints . . .1-25, 1-51
Top tether strap anchor point locations . .1-46
Child safety rear door lock............3-5
ZREVIEW COPYÐ2006 Armada(wzw)
Owners ManualÐUSA_English(nna)
06/16/05Ðdebbie
X