Page 233 of 297

BRAKE FLUIDCheck the fluid level in the reservoir. If the fluid is
below the MIN line or the brake warning light
comes on, add Genuine NISSAN Super Heavy
Duty Brake Fluid or equivalentDOT 3fluid up to
the MAX line. If fluid must be added frequently,
the system should be thoroughly checked by a
NISSAN dealer.
CLUTCH FLUIDCheck the fluid level in the reservoir. If the fluid
level is below the MIN. line, add Genuine
NISSAN Super Heavy Duty Brake Fluid or
equivalentDOT 3fluid up to the MAX. line.
If fluid is added frequently, the system should be
thoroughly checked by a NISSAN dealer.Open the cap and add fluid when the low
washer fluid warning light comes on.
Add a washer solvent to the washer fluid for
better cleaning. In the winter season, add a
windshield washer anti-freeze. Follow the manu-
facturer’s instructions for the mixture ratio.
Recommended fluid is Genuine NISSAN Wind-
shield Washer Concentrate Cleaner & Anti-
freeze or equivalent.
SDI0847
SDI1478
SDI1444
WINDOW WASHER FLUID
8-14
Maintenance and do-it-yourself
�
05.10.18/Z33-D/V5.0
�
Page 234 of 297

WARNING
Anti-freeze is poisonous and should be
stored carefully in marked containers
out of the reach of children.
CAUTION
�Do not substitute engine anti-freeze
coolant for window washer solution.
This may result in damage to the
paint.
�Do not fill the window washer reser-
voir tank with washer fluid concen-
trates at full strength. Some methyl
alcohol based washer fluid concen-
trates may permanently stain the
grille if spilled while filling the win-
dow washer reservoir tank.
�Pre-mix washer fluid concentrates
with water to the manufacturer’s rec-
ommended levels before pouring the
fluid into the window washer reser-
voir tank. Do not use the windowwasher reservoir tank to mix the
washer fluid concentrate and water.�Keep the battery surface clean and dry. Any
corrosion should be washed off with a solu-
tion of baking soda and water.
�Make certain the terminal connections are
clean and securely tightened.
�If the vehicle is not to be used for 30 days or
longer, disconnect the (—) negative battery
terminal to prevent discharging it.
CAUTION
When the battery cable is removed from
the battery terminal, do not close either
of the front doors. The automatic win-
dow adjusting function will not work,
and the side roof panel/top side rail
may be damaged by doing so.
To disconnect the negative (−) battery ter-
minal, perform the procedure in the follow-
ing order. Otherwise, the window and the
side roof panel/top side rail may contact
and be damaged.
1. Close the windows.
2. Open the hood.BATTERY
Maintenance and do-it-yourself
8-15
�
05.10.18/Z33-D/V5.0
�
Page 235 of 297

3. Close and lock all the doors using the
key or keyfob.
4. Disconnect the negative (−) battery ter-
minal.
5. Securely close the hood.
To connect the negative (−) battery termi-
nal, perform the procedure in the following
order. Otherwise, the window and the side
roof panel/top side rail may contact and be
damaged.
1. Unlock (using the key) and open the
driver side door. Do not close the door.
2. Open the hood.
3. Connect the negative (−) battery termi-
nal. Then close the hood.
4. Fully open the driver side door window.
5. Close the driver side door and the win-
dow.
WARNING
�Do not expose the battery to flames
or electrical sparks. Hydrogen gas,
generated by battery fluid, is explo-
sive. Do not allow battery fluid tocontact your skin, eyes, fabrics, or
painted surfaces. After touching a
battery or battery cap, do not touch
or rub your eyes. Thoroughly wash
your hands. If the acid contacts your
eyes, skin or clothing, immediately
flush with water for at least 15 min-
utes and seek medical attention.
�Do not operate the vehicle if the fluid
in the battery is low. Low battery fluid
can cause a higher load on the bat-
tery which can generate heat, reduce
battery life, and in some cases lead
to an explosion.
�When working on or near a battery,
always wear suitable eye protection
and remove all jewelry.
�Battery posts, terminals and related
accessories contain lead and lead
compounds. Wash hands after han-
dling.
�Keep the battery out of the reach of
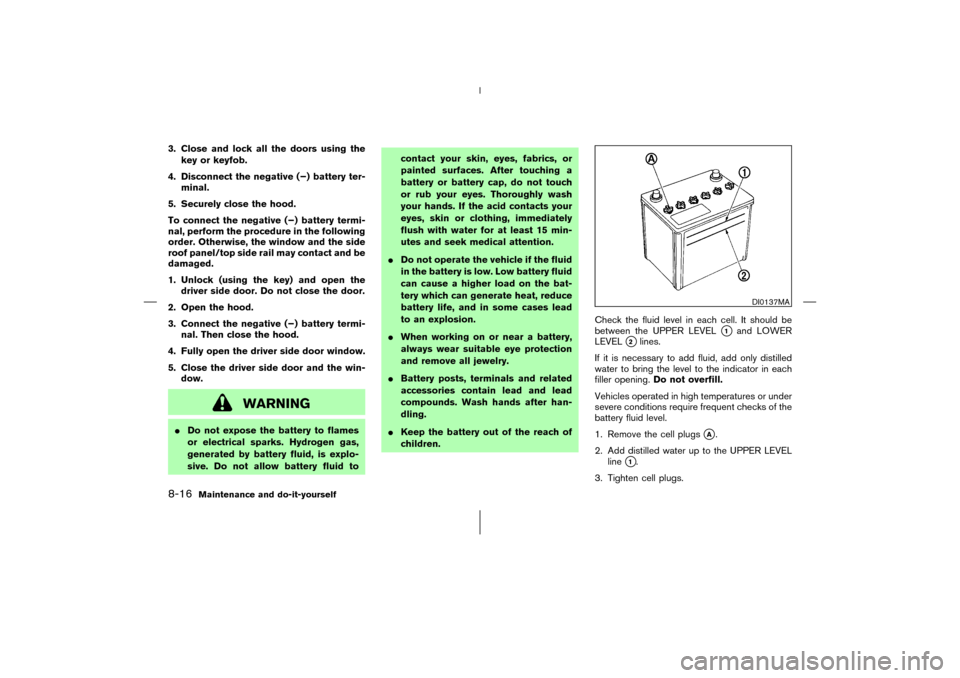
children.Check the fluid level in each cell. It should be
between the UPPER LEVEL
�1
and LOWER
LEVEL
�2lines.
If it is necessary to add fluid, add only distilled
water to bring the level to the indicator in each
filler opening.Do not overfill.
Vehicles operated in high temperatures or under
severe conditions require frequent checks of the
battery fluid level.
1. Remove the cell plugs
�A.
2. Add distilled water up to the UPPER LEVEL
line
�1.
3. Tighten cell plugs.
DI0137MA
8-16
Maintenance and do-it-yourself
�
05.10.18/Z33-D/V5.0
�
Page 236 of 297
JUMP STARTINGIf jump starting is necessary, see “Jump starting”
in the “6. In case of emergency” section. If the
engine does not start by jump starting, the
battery may have to be replaced. Contact a
NISSAN dealer.1. Power steering fluid pump
2. Alternator
3. Crankshaft pulley
4. Air conditioner compressor
�: Tension checking points
WARNING
Be sure the ignition key is in the OFF or
LOCK position. The engine could rotate
unexpectedly.1. Visually inspect each belt for signs of unusual
wear, cuts, fraying, oil adhesion or looseness.
If the belt is in poor condition or loose, have
it replaced or adjusted by a NISSAN dealer.
2. Have the belts checked regularly for condi-
tion and tension.
SDI1480
SDI1389A
DRIVE BELTS
Maintenance and do-it-yourself
8-17
�
05.10.18/Z33-D/V5.0
�
Page 237 of 297

REPLACING SPARK PLUGSIf replacement is required, see a NISSAN dealer
for servicing.
WARNING
Be sure the engine and ignition switch
are off and that the parking brake is
engaged securely.
CAUTION
Be sure to use the correct socket to
remove the spark plugs. An incorrect
socket can damage the spark plugs.
Platinum-tipped spark plugsIt is not necessary to replace the platinum-tipped
spark plugs as frequently as the conventional
type spark plugs since they will last much longer.
Follow the maintenance log but, do not reuse
them by cleaning or regapping.
Always replace with recommended
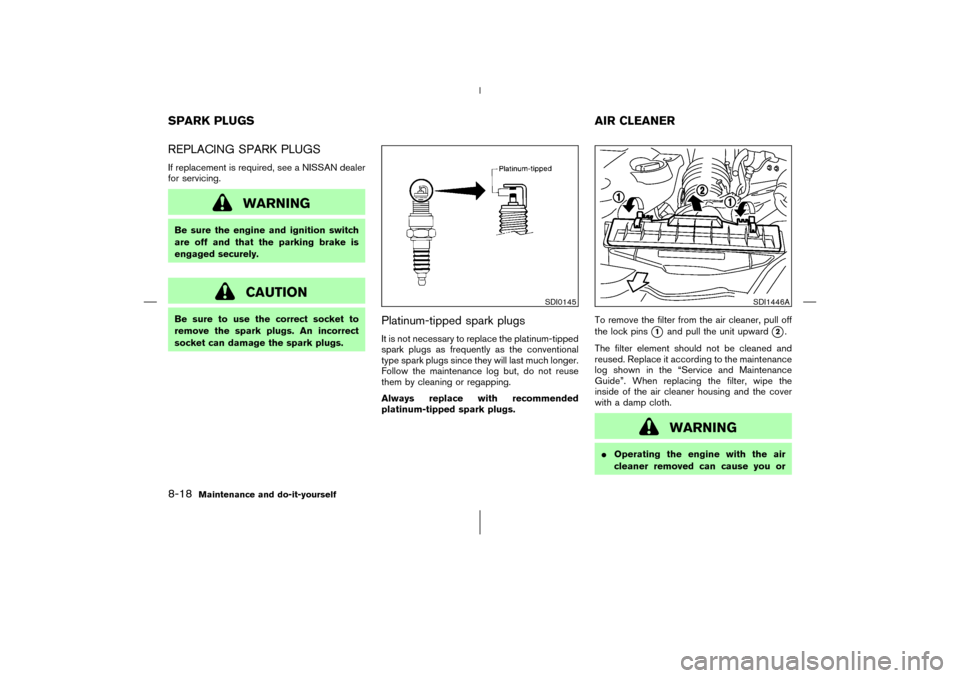
platinum-tipped spark plugs.To remove the filter from the air cleaner, pull off
the lock pins
�1
and pull the unit upward
�2.
The filter element should not be cleaned and
reused. Replace it according to the maintenance
log shown in the “Service and Maintenance
Guide”. When replacing the filter, wipe the
inside of the air cleaner housing and the cover
with a damp cloth.
WARNING
�Operating the engine with the air
cleaner removed can cause you or
SDI0145
SDI1446A
SPARK PLUGS AIR CLEANER8-18
Maintenance and do-it-yourself
�
05.10.18/Z33-D/V5.0
�
Page 240 of 297

CHECKING PARKING BRAKEFrom the released position, pull the parking
brake lever up slowly and firmly. If the number of
clicks is out of the range listed below, see a
NISSAN dealer.
�6 - 7 clicks under pulling force of 45 lb(200
N)
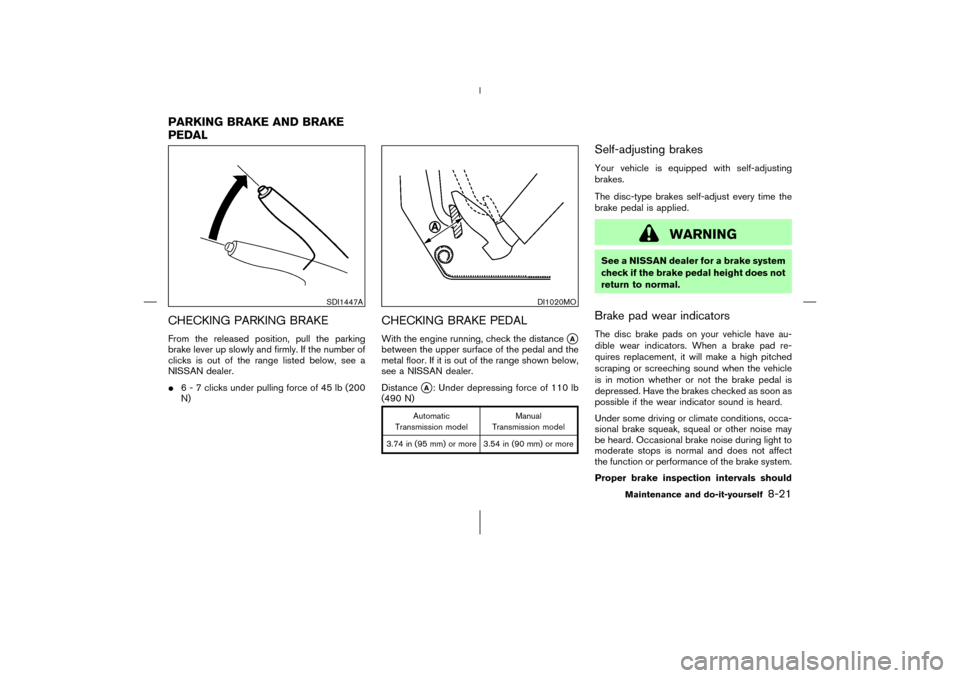
CHECKING BRAKE PEDALWith the engine running, check the distance
�A
between the upper surface of the pedal and the
metal floor. If it is out of the range shown below,
see a NISSAN dealer.
Distance
�A: Under depressing force of 110 lb
(490 N)
Automatic
Transmission modelManual
Transmission model
3.74 in (95 mm) or more 3.54 in (90 mm) or more
Self-adjusting brakesYour vehicle is equipped with self-adjusting
brakes.
The disc-type brakes self-adjust every time the
brake pedal is applied.
WARNING
See a NISSAN dealer for a brake system
check if the brake pedal height does not
return to normal.Brake pad wear indicatorsThe disc brake pads on your vehicle have au-
dible wear indicators. When a brake pad re-
quires replacement, it will make a high pitched
scraping or screeching sound when the vehicle
is in motion whether or not the brake pedal is
depressed. Have the brakes checked as soon as
possible if the wear indicator sound is heard.
Under some driving or climate conditions, occa-
sional brake squeak, squeal or other noise may
be heard. Occasional brake noise during light to
moderate stops is normal and does not affect
the function or performance of the brake system.
Proper brake inspection intervals should
SDI1447A
DI1020MO
PARKING BRAKE AND BRAKE
PEDAL
Maintenance and do-it-yourself
8-21
�
05.10.18/Z33-D/V5.0
�
Page 246 of 297
HEADLIGHTS
ReplacingIf replacement is required, see a NISSAN dealer.
Xenon headlight bulb:
WARNINGHIGH VOLTAGE
When xenon headlights are on, they
produce a high voltage. To prevent an
electric shock, never attempt to modify
or disassemble. Always have your xe-
non headlights replaced at a NISSAN
dealer. For additional information, see
“Headlight and turn signal switch” in
the “2. Instruments and controls” sec-
tion.
CAUTION
Use the same number and wattage as
originally installed:
Bulb no. (Wattage)
D2S (35W) - Xenon low/high-beam
Maintenance and do-it-yourself
8-27
�
05.10.18/Z33-D/V5.0
�
Page 249 of 297

TIRE PRESSURE
Tire pressure monitoring system
(TPMS)This vehicle is equipped with the tire pressure
monitoring system (TPMS). It monitors tire pres-
sure of all tires except the spare. When the low
tire pressure warning light is lit, one or more of
your tires is significantly under-inflated. The sys-
tem also displays pressure of all tires (except the
spare tire) on the trip computer by sending a
signal from a sensor that is installed in each
wheel.
The TPMS will activate only when the vehicle is
driven at speeds above 16 MPH (25 km/h). Also,
this system may not detect a sudden drop in tire
pressure (for example a flat tire while driving).
For more details, refer to “Trip computer” and
“Low tire pressure warning light” in the “2.
Instruments and controls” section, “Tire pressure
monitoring system (TPMS)” in the “5. Starting
and driving” section, and “Flat tire” in the “6. In
case of emergency” section.
Tire inflation pressureCheck the tire pressures (including the
spare) often and always prior to long
distance trips. The recommended tire
pressure specifications are shown on the
Tire and Loading Information label under
the “COLD TIRE PRESSURE” heading.
The Tire and Loading Information label is
affixed to the driver side center pillar. Tire
pressures should be checked regularly
because:
�Most tires naturally lose air over time.
�Tires can lose air suddenly when
driven over potholes or other objects
or if the vehicle strikes a curbwhile
parking.
The tire pressures should be checked
when the tires are cold. The tires are
considered COLD after the vehicle has
been parked for 3 or more hours, or
driven less than 1 mile (1.6 km) at mod-
erate speeds.
SDI1401A
WHEELS AND TIRES
8-30
Maintenance and do-it-yourself
�
05.10.18/Z33-D/V5.0
�