Page 210 of 480

209 Controls in detail
Driving systems
Distronic displays in the speedometer
dial
If Distronic detects a vehicle directly
ahead, the DTR indicator lamp E in the
speedometer dial comes on white.
If Distronic calculates that there is a dan-
ger of collision�
the DTR warning lamp E in the
speedometer comes on red
�
an intermittent warning sounds
�
Immediately brake the vehicle to avoid
a collision.
Under no circumstances should the
driver await the intermittent warning
sound before braking. See the follow-
ing warning note.
The intermittent warning sound ceases
and the red DTR warning lamp E
goes out when the necessary distance
to the vehicle ahead is again estab-
lished.
Warning!
G
Use of Distronic can be dangerous on slip-
pery roads. Rapid changes in tire traction
can result in wheel spin and loss of control.
Distronic does not act upon adverse sight
distance conditions. Do not use Distronic
during conditions of fog and heavy rain,
snow or sleet.Warning!
G
Close attention to road and traffic condi-
tions is imperative at all times, regardless of
whether or not Distronic is activated.
Use of Distronic can be dangerous on wind-
ing roads or in heavy traffic because condi-
tions do not allow safe driving at a steady
speed.
Distronic will not react to stationary objects
in the roadway (e.g. a stopped vehicle in a
traffic jam or a disabled vehicle). Distronic
will also not respond to oncoming vehicles.
Switch off Distronic:�
when changing from the left to the right
lane if vehicles are moving more slowly
in the left lane
�
when entering a turn lane or highway off
ramp
�
in complex driving situations, such as in
highway construction zones
In these situations, Distronic will continue to
maintain the set speed unless deactivated.
Distronic is designed and intended only to
maintain a set speed and keep a set dis-
tance from moving objects in front of it.
Warning!
G
The “Resume” function should only be oper-
ated if the driver is fully aware of the previ-
ously set speed and wishes to resume this
particular preset speed.
Page 223 of 480
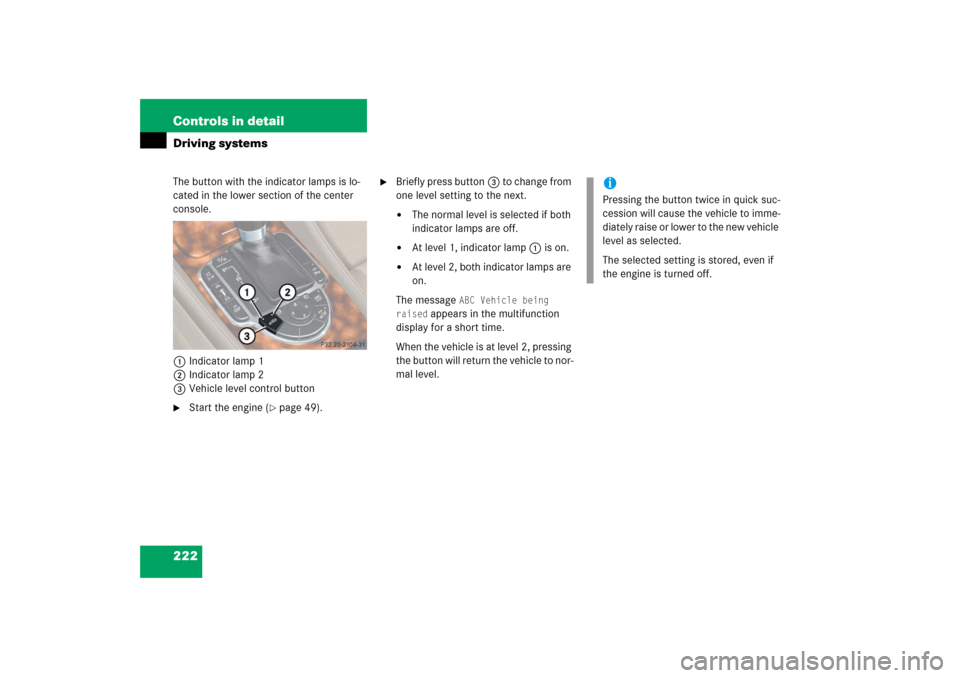
222 Controls in detailDriving systemsThe button with the indicator lamps is lo-
cated in the lower section of the center
console.
1Indicator lamp 1
2Indicator lamp 2
3Vehicle level control button�
Start the engine (
�page 49).
�
Briefly press button3 to change from
one level setting to the next.�
The normal level is selected if both
indicator lamps are off.
�
At level 1, indicator lamp1 is on.
�
At level 2, both indicator lamps are
on.
The message
ABC Vehicle being
raised
appears in the multifunction
display for a short time.
When the vehicle is at level 2, pressing
the button will return the vehicle to nor-
mal level.
iPressing the button twice in quick suc-
cession will cause the vehicle to imme-
diately raise or lower to the new vehicle
level as selected.
The selected setting is stored, even if
the engine is turned off.
Page 250 of 480

249 Controls in detail
Useful features
Step 5:�
After the indicator lamp1 changes
from a slow to a rapidly flashing light,
release the hand-held remote control
button and the signal transmitter but-
ton.
Step 6:
�
Press and hold the just-trained signal
transmitter button (2, 3 or4) and
observe the indicator lamp1.If the indicator lamp1 stays on
constantly, programming is complete
and your device should activate when
the respective signal transmitter
button (2, 3 or4) is pressed and re-
leased.
Step 7:
�
To program the remaining two signal
transmitter buttons, repeat the steps
above starting with step 3.Rolling code programming
To train a garage door opener (or other
rolling code devices) with the rolling code
feature, follow these instructions after
completing the “Programming” portion
(steps 1 through 6) of this text. (A second
person may make the following training
procedures quicker and easier.)
Step 8:
�
Locate “training” button on the garage
door opener motor head unit.
Exact location and color of the button
may vary by garage door opener brand.
Depending on manufacturer, the
“training” button may also be referred
to as “learn” or “smart” button. If there
is difficulty locating the transmitting
button, refer to the garage door opener
operator’s manual.
iThe indicator lamp1 flashes immedi-
ately the first time the signal transmit-
ter button is programmed. If this button
has already been programmed, the in-
dicator lamp will only start flashing af-
ter 20 seconds.
iIf the indicator lamp1 flashes rapidly
for about 2 seconds and then turns to a
constant light, continue with
programming steps 8 through 12 as
your garage door opener may be
equipped with the “rolling code”
feature.
��
Page 464 of 480

463 Index
C
CAC 453
California retail buyers and lessees, impor-
tant notice for 11
Call priority, Tele Aid 244
CAN System 454
Capacities and recommended
fuel/lubricants 445
Cargo area see Trunk
Carpets, cleaning 330
Catalytic converter 267
CD changer 142
CD player 142
Operating 142
Center console
Lower part 30
Upper part 29
Central locking
Automatic 112, 155
Central locking/unlocking switch 29,
113
Locking/unlocking from inside 113
Certification label 430
Check engine see Lamps, indicator and
warningChildren in the vehicle
Airbags 66
Indicator lamp, front passenger front
airbag 78
Infant and child restraint systems 64,
76
Cigarette lighter 234
Clock 23, 150
Cockpit 22, 454
Cockpit Management and Data System
see COMAND system
Cold tire inflation pressure 310, 454
Collapsible tire 454
COMAND system 29, 454
Driving instructions 266
Combination switch
High beam 53, 129
Turn signals 53
Windshield wipers 54
Consumer battery 279
Control and operation of radio
transmitters 266
Control system 135, 138, 454Control system menus
AUDIO 141
NAV 143
Settings 146
Standard display 140
TEL* 159
Trip computer 157
Vehicle status message memory 144
Control system submenus 139
Convenience 156
Instrument cluster 149
Lighting 152
Time 150
Vehicle 155
Controller Area Network see CAN System
Convenience feature 200
Coolant 450
Anticorrosion/antifreeze mixing ratio
and quantity 451
Checking coolant level 278
Coolant warning lamp 336
Messages in the multifunction
display 365, 366, 367, 368
Temperature 268
Temperature gauge 133