Page 224 of 480

223 Controls in detail
Driving systems
Parktronic* (Parking assist)
The Parktronic system is an electronic aid
designed to assist the driver during park-
ing maneuvers. It visually and audibly indi-
cates the relative distance between the
vehicle and an obstacle.
The Parktronic system is automatically ac-
tivated when you switch on the ignition, re-
lease the parking brake, or place the gear
selector lever in position D, R, or N. The
Parktronic system deactivates at speeds
above 11 mph (18 km/h). At lower speeds
the Parktronic system turns on again.
The Parktronic system also deactivates
when you place the gear selector lever in
position P or depress the brake pedal.The Parktronic system monitors the sur-
roundings of your vehicle with six sensors
in the front bumper and four sensors in the
rear bumper.
1Sensors in the front bumperWarning!
G
Parktronic is a supplemental system. It is
not intended to, nor does it replace, the
need for extreme care. The responsibility
during parking and other critical maneuvers
always rests with the driver.
Special attention must be paid to objects
with smooth surfaces or low silhouettes
(e.g. trailer couplings, painted posts, or road
curbs). Such objects may not be detected by
the system and can damage the vehicle.
The operational function of the Parktronic
system can be affected by dirty sensors, es-
pecially at times of snow and ice. See
“Cleaning the Parktronic* system sensors”
(�page 326).
Interference caused by other ultrasonic sig-
nals (e.g. working jackhammers, car wash,
or the air brakes of trucks) can cause the
system to send erratic indications, and
should be taken into consideration.
Warning!
G
Make sure no persons or animals are in the
area in which you are maneuvering. Other-
wise you run the risk of causing injury.
Page 225 of 480
224 Controls in detailDriving systemsRange of the sensors
To function properly, the sensors must be
free of dirt, ice snow and slush. Clean the
sensors regularly, being careful not to
scratch or damage the sensors, see
“Cleaning the Parktronic system* sensors”
(�page 326).
Front sensors
Rear sensors
Center
approx. 40 in (100 cm)
Corners
approx. 24 in (60 cm)
Center
approx. 48 in (120 cm)
Corners
approx. 32 in (80 cm)
!During parking maneuvers, pay special
attention to objects located above or
below the height of the sensors (e.g.
planters or trailer hitches).
The Parktronic system will not detect
such objects at close range and dam-
age to your vehicle or the object may
result.
Ultrasonic signals from outside sourc-
es (e.g. truck air brakes, car wash, or
jackhammers) may impair the opera-
tion of the Parktronic system.
Page 227 of 480

226 Controls in detailDriving systemsAs your vehicle approaches an object, one
or more distance segments will illuminate,
depending on the distance. When the
eighth distance segment illuminates, you
have reached the minimum distance.�
Front area: An intermittent acoustic
warning will sound as the first red dis-
tance segment illuminates and a con-
stant acoustic warning lasting a
maximum of two seconds will sound for
the second distance segment. The sig-
nal is canceled when the gear selector
lever is placed in position P or the park-
ing brake is set.
�
Rear area: An intermittent acoustic
warning will sound when the first dis-
tance segment illuminates. This signal
quickens with each additional distance
segment lit. When the eighth distance
segment illuminates, the acoustic
warning becomes a constant signal.
The signal is canceled when the gear
selector lever is placed in positionD
orP or the parking brake is set.Switching the Parktronic system
on/off
You can switch off the Parktronic system
manually.
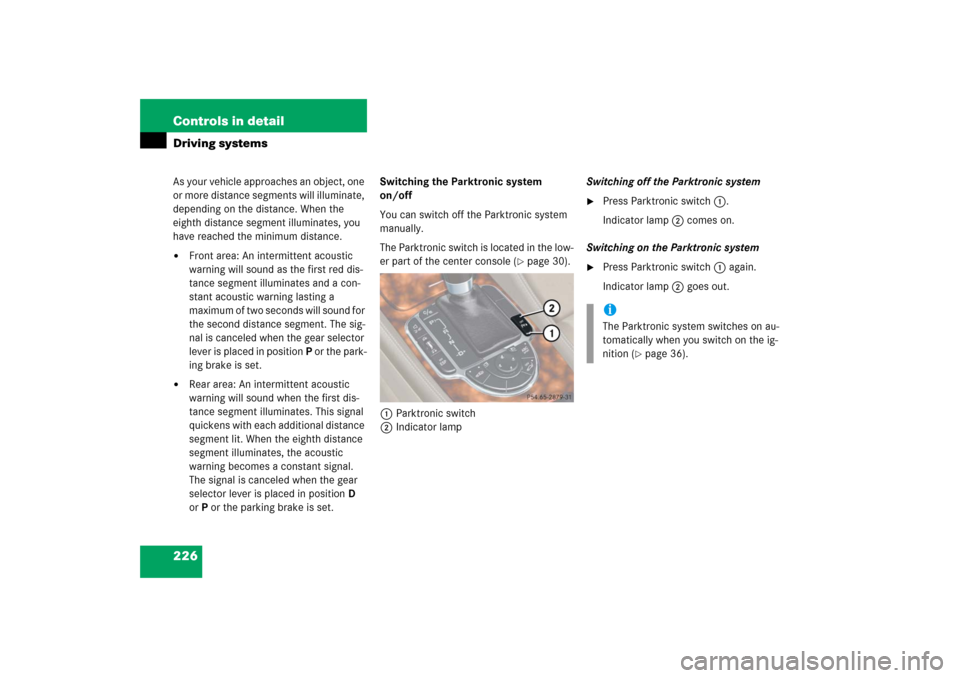
The Parktronic switch is located in the low-
er part of the center console (
�page 30).
1Parktronic switch
2Indicator lampSwitching off the Parktronic system
�
Press Parktronic switch1.
Indicator lamp2 comes on.
Switching on the Parktronic system
�
Press Parktronic switch1 again.
Indicator lamp2 goes out.iThe Parktronic system switches on au-
tomatically when you switch on the ig-
nition (
�page 36).
Page 228 of 480
227 Controls in detail
Driving systems
Parktronic system malfunction
If only the red distance segments illumi-
nate and a warning sounds, there is a mal-
function in the Parktronic system. The
Parktronic system will automatically
switch off after 20 seconds and the indica-
tor lamp in the Parktronic switch comes
on.�
Have the Parktronic system checked
by an authorized Mercedes-Benz
Center as soon as possible.
If only the red distance segments illumi-
nate and no warning sounds, the Parktron-
ic system sensors are dirty or there is an
interference from other radio or ultrasonic
signals. The Parktronic system will auto-
matically switch off after 20 seconds and
the indicator lamp in the Parktronic switch
comes on.
�
Switch off the ignition.
�
Clean Parktronic system sensors
(�page 326).
�
Switch on the ignition (
�page 36).
or
�
Check the Parktronic system operation
at another location to rule out interfer-
ence from outside radio or ultrasonic
signals.
Page 230 of 480
229 Controls in detail
Useful features
Opening�
Press release button 1.
Storage compartment lid 2 lid opens
upwards.
Armrest storage compartments
The buttons are located under the cushion
of the armrest.
1Button to open storage tray
2Button to open storage compartmentOpening storage tray
�
Press button1 and lift the armrest.
Opening storage compartment
�
Press button2 and lift the armrest.
Rear storage compartments
The CD changer is located in the left stor-
age compartment.
For instructions on the CD changer, see
separate COMAND Operator’s Manual.
1Release button
2Storage compartment lid
�
Press release button 1.
Storage compartment lid 2 lid opens
upwards.
Locking storage compartments
The storage compartments are centrally
locked when you lock the vehicle from the
outside.
You can also lock the storage compart-
ments separately, see “Locking the stor-
age compartments separately”
(
�page 230).
Page 231 of 480

230 Controls in detailUseful featuresLocking the storage compartments
separately
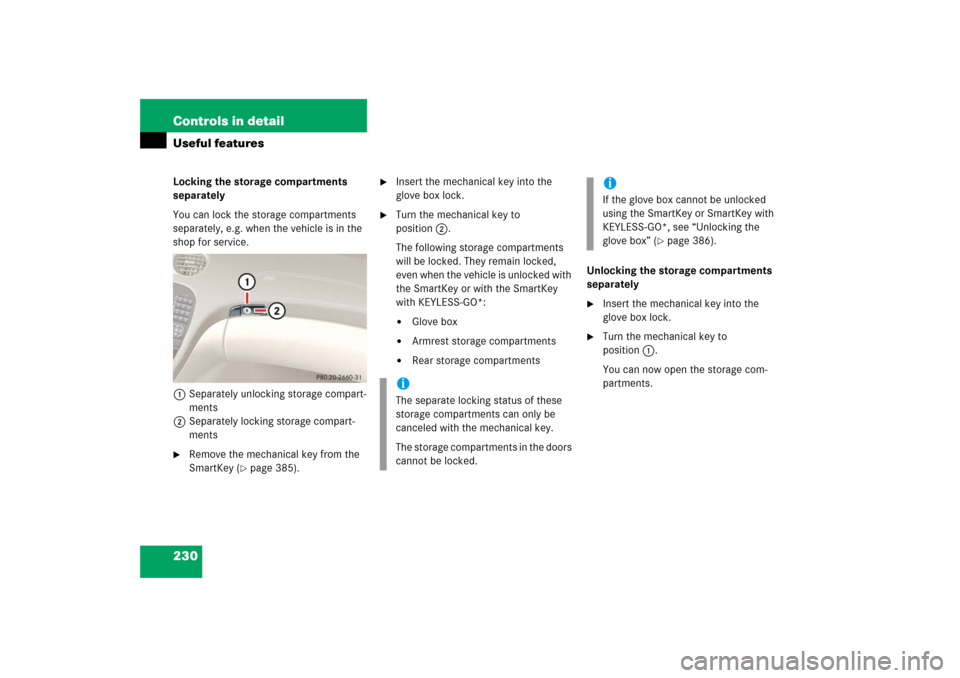
You can lock the storage compartments
separately, e.g. when the vehicle is in the
shop for service.
1Separately unlocking storage compart-
ments
2Separately locking storage compart-
ments�
Remove the mechanical key from the
SmartKey (
�page 385).
�
Insert the mechanical key into the
glove box lock.
�
Turn the mechanical key to
position2.
The following storage compartments
will be locked. They remain locked,
even when the vehicle is unlocked with
the SmartKey or with the SmartKey
with KEYLESS-GO*:�
Glove box
�
Armrest storage compartments
�
Rear storage compartmentsUnlocking the storage compartments
separately
�
Insert the mechanical key into the
glove box lock.
�
Turn the mechanical key to
position1.
You can now open the storage com-
partments.
iThe separate locking status of these
storage compartments can only be
canceled with the mechanical key.
The storage compartments in the doors
cannot be locked.
iIf the glove box cannot be unlocked
using the SmartKey or SmartKey with
KEYLESS-GO*, see “Unlocking the
glove box” (
�page 386).
Page 235 of 480

234 Controls in detailUseful featuresCigarette lighter�
Switch on the ignition (
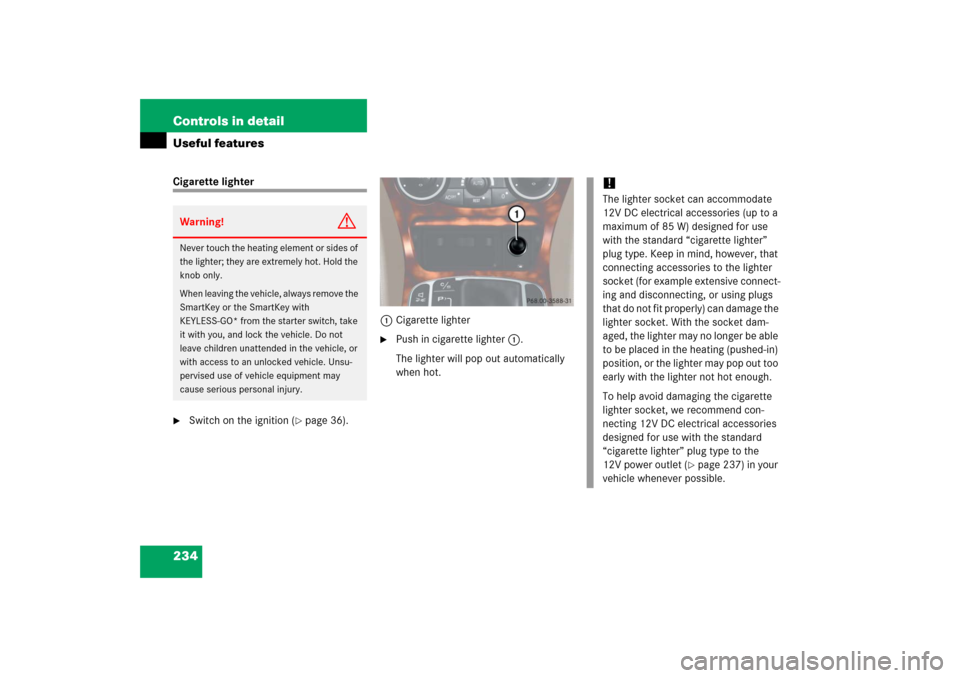
�page 36).1Cigarette lighter
�
Push in cigarette lighter1.
The lighter will pop out automatically
when hot.
Warning!
G
Never touch the heating element or sides of
the lighter; they are extremely hot. Hold the
knob only.
When leaving the vehicle, always remove the
SmartKey or the SmartKey with
KEYLESS-GO* from the starter switch, take
it with you, and lock the vehicle. Do not
leave children unattended in the vehicle, or
with access to an unlocked vehicle. Unsu-
pervised use of vehicle equipment may
cause serious personal injury.
!The lighter socket can accommodate
12V DC electrical accessories (up to a
maximum of 85 W) designed for use
with the standard “cigarette lighter”
plug type. Keep in mind, however, that
connecting accessories to the lighter
socket (for example extensive connect-
ing and disconnecting, or using plugs
that do not fit properly) can damage the
lighter socket. With the socket dam-
aged, the lighter may no longer be able
to be placed in the heating (pushed-in)
position, or the lighter may pop out too
early with the lighter not hot enough.
To help avoid damaging the cigarette
lighter socket, we recommend con-
necting 12V DC electrical accessories
designed for use with the standard
“cigarette lighter” plug type to the
12V power outlet (
�page 237) in your
vehicle whenever possible.
Page 236 of 480

235 Controls in detail
Useful features
Heated steering wheel*
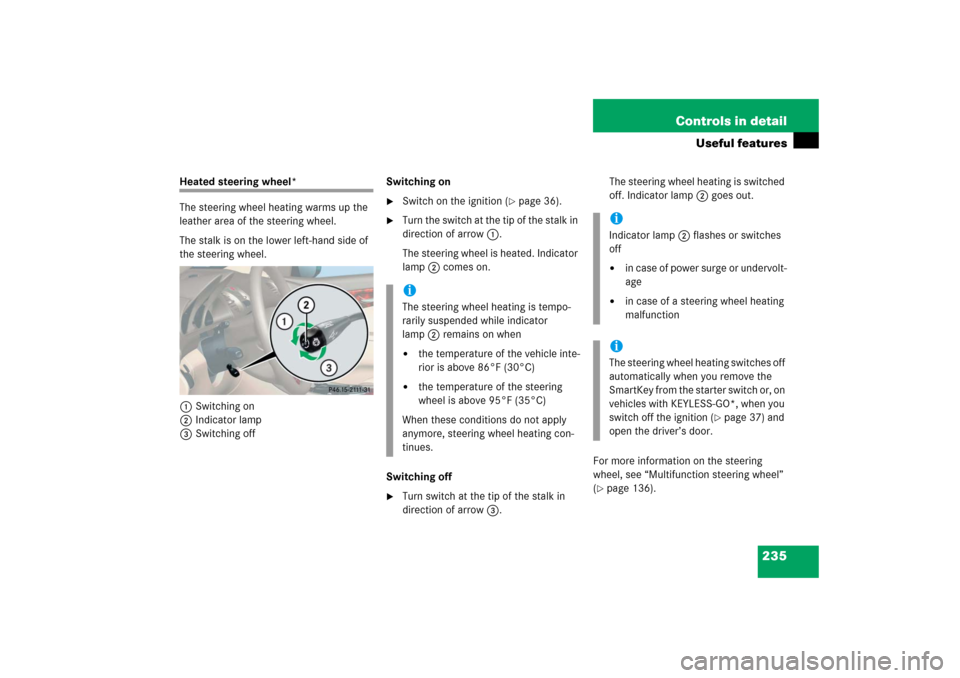
The steering wheel heating warms up the
leather area of the steering wheel.
The stalk is on the lower left-hand side of
the steering wheel.
1Switching on
2Indicator lamp
3Switching offSwitching on
�
Switch on the ignition (
�page 36).
�
Turn the switch at the tip of the stalk in
direction of arrow1.
The steering wheel is heated. Indicator
lamp2 comes on.
Switching off
�
Turn switch at the tip of the stalk in
direction of arrow3. The steering wheel heating is switched
off. Indicator lamp2 goes out.
For more information on the steering
wheel, see “Multifunction steering wheel”
(
�page 136).
iThe steering wheel heating is tempo-
rarily suspended while indicator
lamp2 remains on when�
the temperature of the vehicle inte-
rior is above 86°F (30°C)
�
the temperature of the steering
wheel is above 95°F (35°C)
When these conditions do not apply
anymore, steering wheel heating con-
tinues.
iIndicator lamp 2 flashes or switches
off�
in case of power surge or undervolt-
age
�
in case of a steering wheel heating
malfunction
iThe steering wheel heating switches off
automatically when you remove the
SmartKey from the starter switch or, on
vehicles with KEYLESS-GO*, when you
switch off the ignition (
�page 37) and
open the driver’s door.