Page 247 of 481
246 Controls in detailUseful featuresStorage compartments in the rear pas-
senger compartment
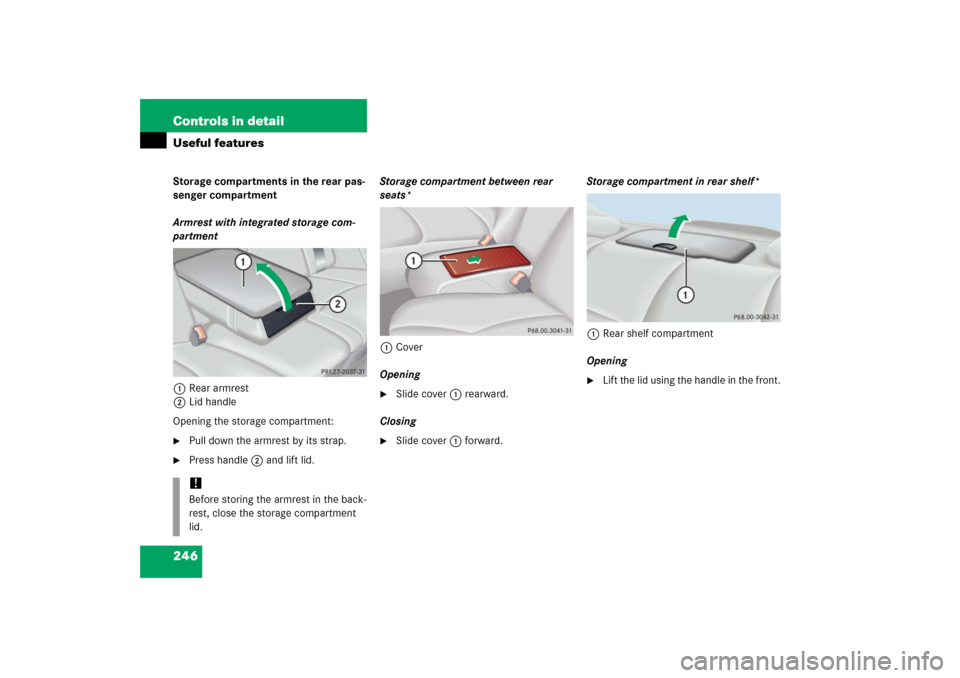
Armrest with integrated storage com-
partment
1Rear armrest
2Lid handle
Opening the storage compartment:�
Pull down the armrest by its strap.
�
Press handle2 and lift lid.Storage compartment between rear
seats*
1Cover
Opening
�
Slide cover1 rearward.
Closing
�
Slide cover1 forward.Storage compartment in rear shelf*
1Rear shelf compartment
Opening
�
Lift the lid using the handle in the front.
!Before storing the armrest in the back-
rest, close the storage compartment
lid.
Page 248 of 481
247 Controls in detail
Useful features
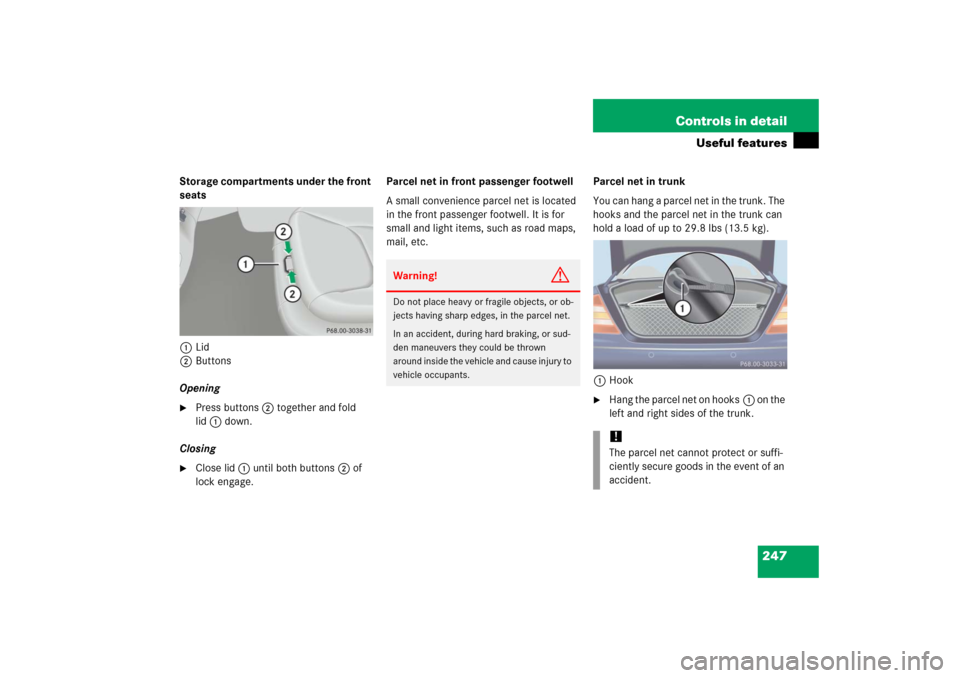
Storage compartments under the front
seats
1Lid
2Buttons
Opening�
Press buttons2 together and fold
lid1 down.
Closing
�
Close lid1 until both buttons2 of
lock engage.Parcel net in front passenger footwell
A small convenience parcel net is located
in the front passenger footwell. It is for
small and light items, such as road maps,
mail, etc.Parcel net in trunk
You can hang a parcel net in the trunk. The
hooks and the parcel net in the trunk can
hold a load of up to 29.8 lbs (13.5 kg).
1Hook
�
Hang the parcel net on hooks1 on the
left and right sides of the trunk.
Warning!
G
Do not place heavy or fragile objects, or ob-
jects having sharp edges, in the parcel net.
In an accident, during hard braking, or sud-
den maneuvers they could be thrown
around inside the vehicle and cause injury to
vehicle occupants.
!The parcel net cannot protect or suffi-
ciently secure goods in the event of an
accident.
Page 249 of 481

248 Controls in detailUseful featuresCup holders
Cup holder in front of seat armrestFolding out cup holder
The cup holder is located in the storage
compartment in front of the armrest.
1Button for folding out the cup holder
�
Open the storage compartment in front
of armrest (
�page 244).
�
Push button1.
The cup holder opens automatically.
Warning!
G
In order to help prevent spilling liquids on
vehicle occupants and/or vehicle equip-
ment, only use containers that fit into the
cup holder. Use lids on open containers and
do not fill containers to a height where the
contents, especially hot liquids, could spill
during braking, vehicle maneuvers, or in an
accident. Liquids spilled on vehicle occu-
pants may cause serious personal injury.
Liquids spilled on vehicle equipment may
cause damage not covered by the
Mercedes-Benz Limited Warranty.
When not in use, keep the cup holder
closed. An open cup holder may cause injury
to you or others when contacted during
braking, vehicle maneuvers, or in an acci-
dent.
Keep in mind that objects placed in the cup
holder may come loose during braking, vehi-
cle maneuvers, or in an accident and be
thrown around in the vehicle interior. Ob-
jects thrown around in the vehicle interior
may cause an accident and/or serious per-
sonal injury. !Only place containers with a maximum
diameter of 2
3/4in (72 mm) in the cup
holder. Larger containers could dam-
age the holder arm.
Page 250 of 481
249 Controls in detail
Useful features
Folding in cup holder
1Cup holder�
Swing cup holder1 back and press it
into the storage compartment until it
engages.Cup holder in rear seat armrest
1Compartment for cup holder
Opening cup holder
�
Push front of sliding compartment1.
The cup holder slides out.
Closing cup holder
�
Push sliding compartment1 back un-
til it engages.
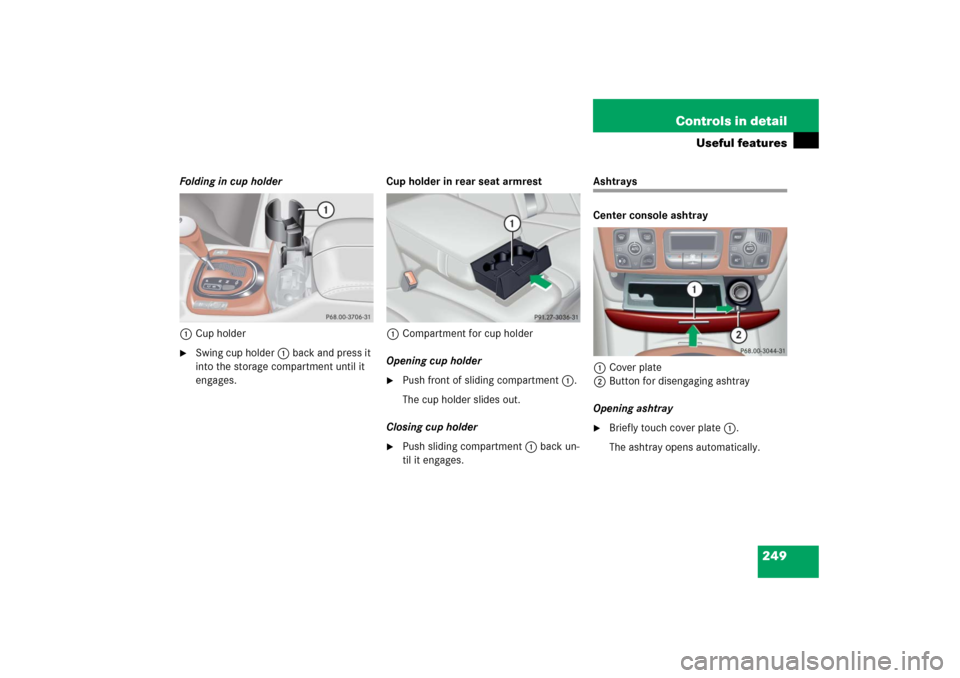
Ashtrays
Center console ashtray
1Cover plate
2Button for disengaging ashtray
Opening ashtray�
Briefly touch cover plate1.
The ashtray opens automatically.
Page 258 of 481

257 Controls in detail
Useful features
�
Wait for a voice connection to the
Response Center.
�
Close cover2 after the emergency
call is concluded.Roadside Assistance button• and
Information button¡
The Roadside Assistance button• and
the Information button¡ are located in
the storage compartment below the front
armrest (
�page 244).
1Information button¡
2Roadside Assistance button•Roadside Assistance button•
�
Press and hold the button • (for
longer than two seconds).
A call to a Mercedes-Benz Roadside As-
sistance dispatcher will be initiated.
The button will flash while the call is in
progress. The message:
CONNECTING
CALL
will appear in the multifunction
display and the audio system is muted.
When the connection is established, the
message: CALL CONNECTED
appears in the
multifunction display. The Tele Aid system
will transmit data generating the vehicle
identification number, model, color and lo-
cation (subject to availability of cellular
and GPS signals).
Warning!
G
If you feel at any way in jeopardy when in the
vehicle (e.g. smoke or fire in the vehicle, ve-
hicle in a dangerous road location), please
do not wait for voice contact after you have
pressed the emergency button. Carefully
leave the vehicle and move to a safe loca-
tion. The Response Center will automatically
contact local emergency officials with the
vehicle’s approximate location if they re-
ceive an automatic SOS signal and cannot
make voice contact with the vehicle occu-
pants.
Page 385 of 481
384 Practical hintsWhere will I find ...?First aid kit
The first aid kit is located in the storage
compartment under the front passenger
seat.
1Lid
2ButtonsRemoving the first aid kit
�
Press buttons2 together and fold
lid1 down.
�
Remove first aid kit.
Storing the first aid kit
�
Place first aid kit in the storage com-
partments.
�
Close lid1 until both buttons2 of
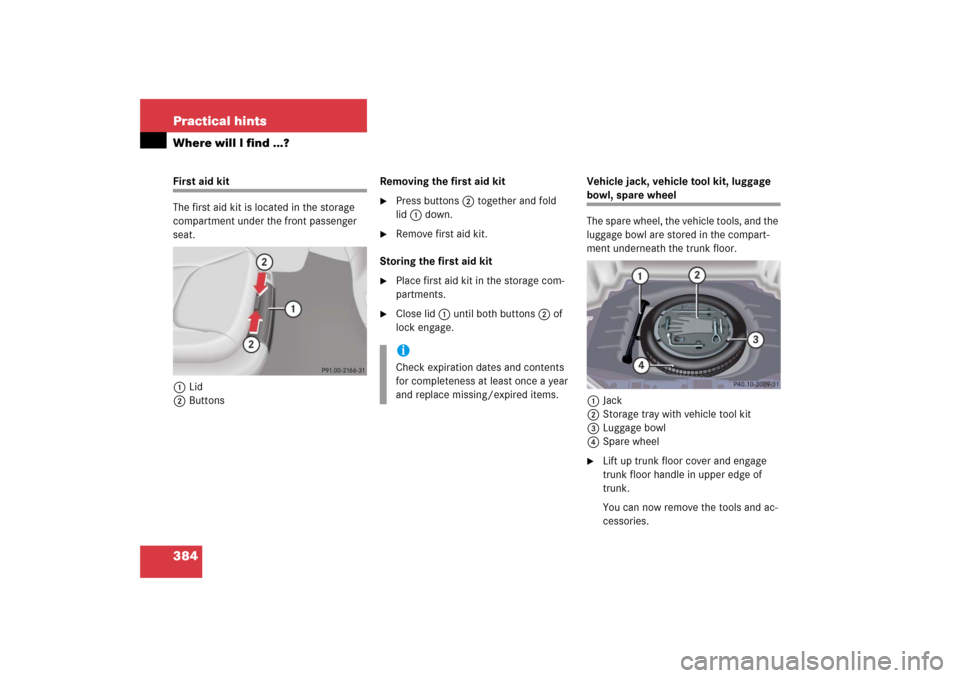
lock engage.Vehicle jack, vehicle tool kit, luggage
bowl, spare wheel
The spare wheel, the vehicle tools, and the
luggage bowl are stored in the compart-
ment underneath the trunk floor.
1Jack
2Storage tray with vehicle tool kit
3Luggage bowl
4Spare wheel�
Lift up trunk floor cover and engage
trunk floor handle in upper edge of
trunk.
You can now remove the tools and ac-
cessories.
iCheck expiration dates and contents
for completeness at least once a year
and replace missing/expired items.
Page 386 of 481
385 Practical hints
Where will I find ...?
The vehicle tool kit includes:�
One interchangeable slot/Phillips
screwdriver
�
One towing eye bolt
�
One wheel bolt wrench with socket
wrench
�
One alignment bolt
�
One pair of gloves
�
One fuse extractor
�
One fuse chart for the main fuse box
�
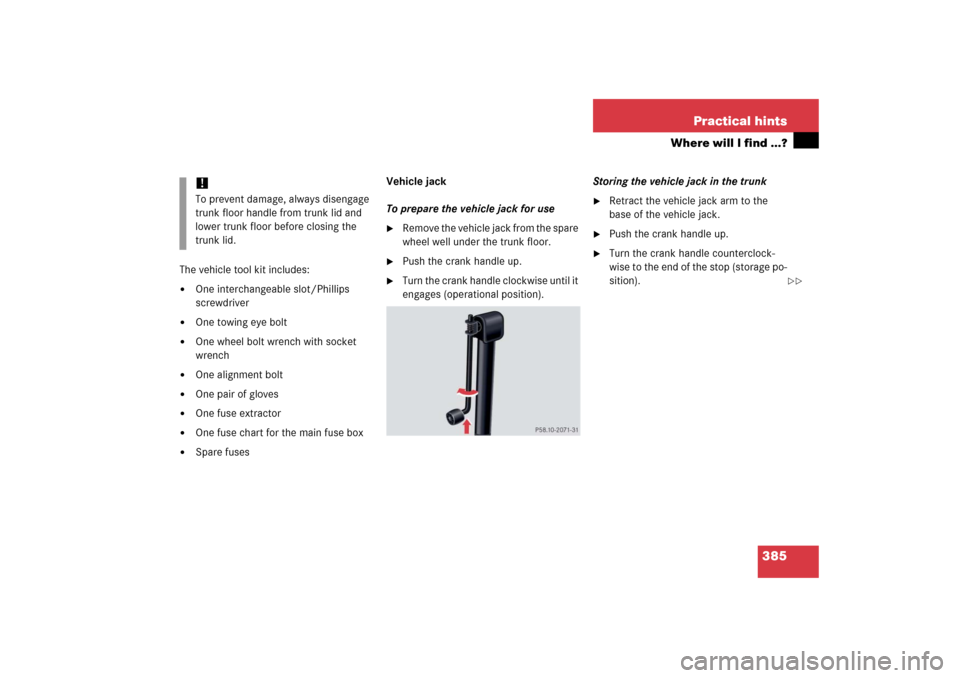
Spare fusesVehicle jack
To prepare the vehicle jack for use
�
Remove the vehicle jack from the spare
wheel well under the trunk floor.
�
Push the crank handle up.
�
Turn the crank handle clockwise until it
engages (operational position).Storing the vehicle jack in the trunk
�
Retract the vehicle jack arm to the
base of the vehicle jack.
�
Push the crank handle up.
�
Turn the crank handle counterclock-
wise to the end of the stop (storage po-
sition).
!To prevent damage, always disengage
trunk floor handle from trunk lid and
lower trunk floor before closing the
trunk lid.
��
Page 411 of 481
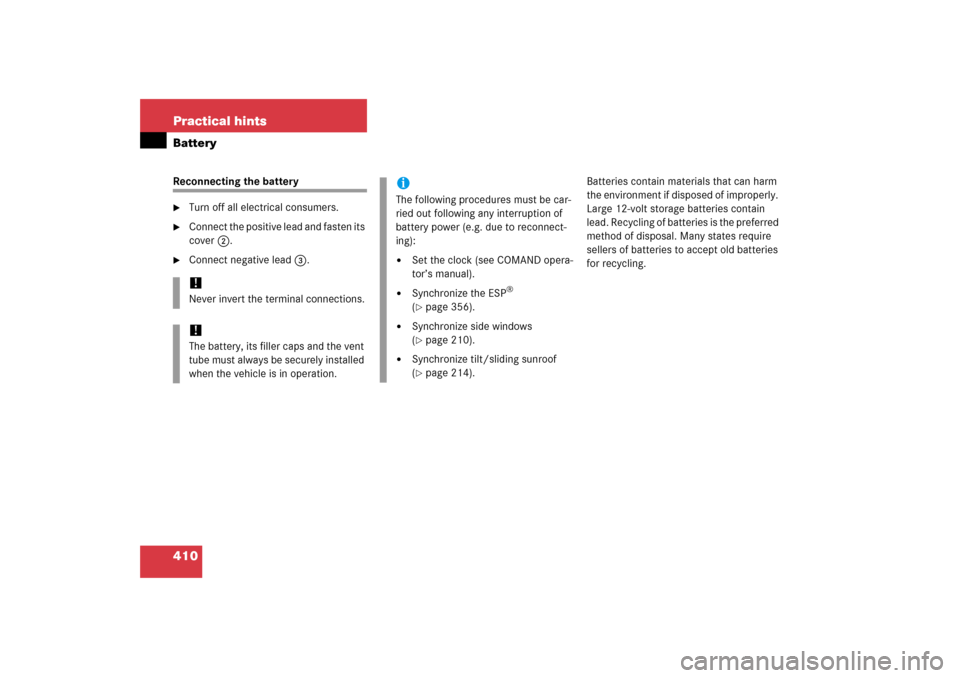
410 Practical hintsBatteryReconnecting the battery�
Turn off all electrical consumers.
�
Connect the positive lead and fasten its
cover2.
�
Connect negative lead3.Batteries contain materials that can harm
the environment if disposed of improperly.
Large 12-volt storage batteries contain
lead. Recycling of batteries is the preferred
method of disposal. Many states require
sellers of batteries to accept old batteries
for recycling.!Never invert the terminal connections.!The battery, its filler caps and the vent
tube must always be securely installed
when the vehicle is in operation.
iThe following procedures must be car-
ried out following any interruption of
battery power (e.g. due to reconnect-
ing):�
Set the clock (see COMAND opera-
tor’s manual).
�
Synchronize the ESP
®
(
�page 356).
�
Synchronize side windows
(�page 210).
�
Synchronize tilt/sliding sunroof
(�page 214).