Page 226 of 481
")
225 Controls in detail
Driving systems
Deactivating Distronic
There are several ways to deactivate the
Distronic system:�
Briefly tip the cruise control lever in the
direction of arrow3 (
�page 222).
or
�
Step on the brake pedal.
Distronic will be deactivated. The last
speed set will be stored into memory.Distronic deactivates automatically when:
�
You set the parking brake.
�
You drive slower than 22 mph
(35 km/h).
�
The ESP
® engages (
�page 81) or you
switch off the ESP
®.
�
You move the gear selector lever into
positionN.
A signal will sound. The
DISTRONIC OFF
message appears in the multifunction
display for approximately five seconds.Setting the following distance in
Distronic
You can set the specified following dis-
tance for Distronic by varying the time set-
ting between 1.0 and 2.0 seconds. Using
this time setting and the current speed of
your vehicle, Distronic calculates and sets
the required following distance to the vehi-
cle ahead. The set distance will be shown
in the multifunction display field.
iThe following message will appear in
the multifunction display for approxi-
mately five seconds:DISTRONIC OFFThe last stored speed is deleted when
you turn off the engine.
Warning!
G
Distronic switches off and releases the
brakes when the vehicle decelerates below
the minimum speed of approximately
22 mph (35 km/h) by operation of the sys-
tem. At that time the driver must apply the
brakes in order to reduce vehicle speed fur-
ther or bring it to a stop.
Warning!
G
It is up to the driver to exercise discretion to
select the appropriate setting given road
conditions, traffic, driver’s preferred driving
style and applicable laws and driving recom-
mendations for safe following distance.
Page 231 of 481

230 Controls in detailDriving systems1Indicator lamps
2Damping button�
Start the engine.
�
Press the damping button2 until the
desired suspension style is set.�
If both indicator lamps are out, you
have chosen the automatic mode
for soft damping. The message:AIRMATIC
CONVENIENCEfor Comfort suspension tuning ap-
pears in the multifunction display.
�
If one indicator lamp is on, the con-
trol system supports a primarily dy-
namic style of driving. The
message:AIRMATIC
SPORTS 1for Sporty 1 suspension tuning ap-
pears in the multifunction display.
�
If both indicator lamps are on, the
system is set for a dynamic style of
driving. The message:AIRMATIC
SPORTS 2for Sporty 2 suspension tuning ap-
pears in the multifunction display.Vehicle level control with Airmatic
Your vehicle automatically adjusts its ride
height to:
�
reduce fuel consumption
�
increase vehicle safety
The vehicle chassis ride height is raised or
lowered according to the selected level
setting and to the vehicle speed:
�
With increasing speed, ride height is re-
duced by up to approximately 0.8 in
(20 mm).
�
With decreasing speed, the ride height
is again raised to the selected vehicle
level.
iThe selected suspension style is stored
in memory, even after the SmartKey is
removed from the starter switch.
iThese height adjustments are so small
that you may not notice any change.
Page 232 of 481

231 Controls in detail
Driving systems
The following vehicle level settings can be
selected when the vehicle is stationary:
Select the “Raised” level setting only when
required by current driving conditions.
Otherwise:�
Fuel consumption may increase.
�
Handling may be impaired.The switch with the indicator lamps is lo-
cated on the upper part of the front center
console.
1Indicator lamp
2Vehicle level control switch
�
Start the engine.
�
Briefly press switch2 to change from
one level setting to the other.
The message:AIRMATIC
VEHICLE RISING appears in the multifunction display
when changing from normal level to
raised level.The indicator lamp is then lit. The dis-
play switches off when the vehicle is
raised.
�
Press switch2 again to lower the ve-
hicle. The indicator lamp is off.
The selected vehicle level setting remains
stored in memory even if the engine is
turned off and restarted except when you
�
exceed a speed of 75 mph (120 km/h)
or
�
maintain a speed of between 50 mph
(80 km/h) and 75 mph (120 km/h) for
more than 5 minutes
The vehicle then lowers to regular level.
The message:
AIRMATIC
LEVELING CANCELLEDappears in the multifunction display and
the indicator lamp is off. The display
switches off when the vehicle is raised.
LevelNormal
For driving on normal roads.
The indicator lamp is off.
Raised
For driving on rough roads or
with snow chains.The indica-
tor lamp is on.
Warning!
G
To help avoid personal injury, keep hands
and feet away from wheel housing area, and
stay away from under the vehicle when low-
ering the vehicle chassis.
Page 233 of 481
*
The ABC system automatically selects the
optimum suspension tuning and ride
height for your vehicle.
Suspension tuning
The suspension")
232 Controls in detailDriving systemsActive Body Control (ABC)*
The ABC system automatically selects the
optimum suspension tuning and ride
height for your vehicle.
Suspension tuning
The suspension tuning is set according to:�
your driving style
�
road surface conditions
�
the vehicle loading
�
your choice of suspension style
You can set following suspension style:
�
regular (convenience)
�
sportyThe ABC button with the indicator lamps is
located on the upper part of the front cen-
ter console.
1Indicator lamp
2ABC button
�
Start the engine.
Suspension for sporty driving style
The setting for sporty driving is selected
when indicator lamp1 is illuminated.
�
Press button2.
Indicator lamp1 comes on.The message:
ACTIVE BODY CONTROL
ABC
SPORTSappears in the multifunction display for
a short time.
Suspension for regular driving style
The setting for regular driving is selected
when indicator lamp1 is off.
�
Press button2.
Indicator lamp1 goes out.
The message:ACTIVE BODY CONTROL
ABC
CONVENIENCEappears in the multifunction display for
a short time.
iThe selected setting is stored, even if
the engine is turned off.
Page 235 of 481
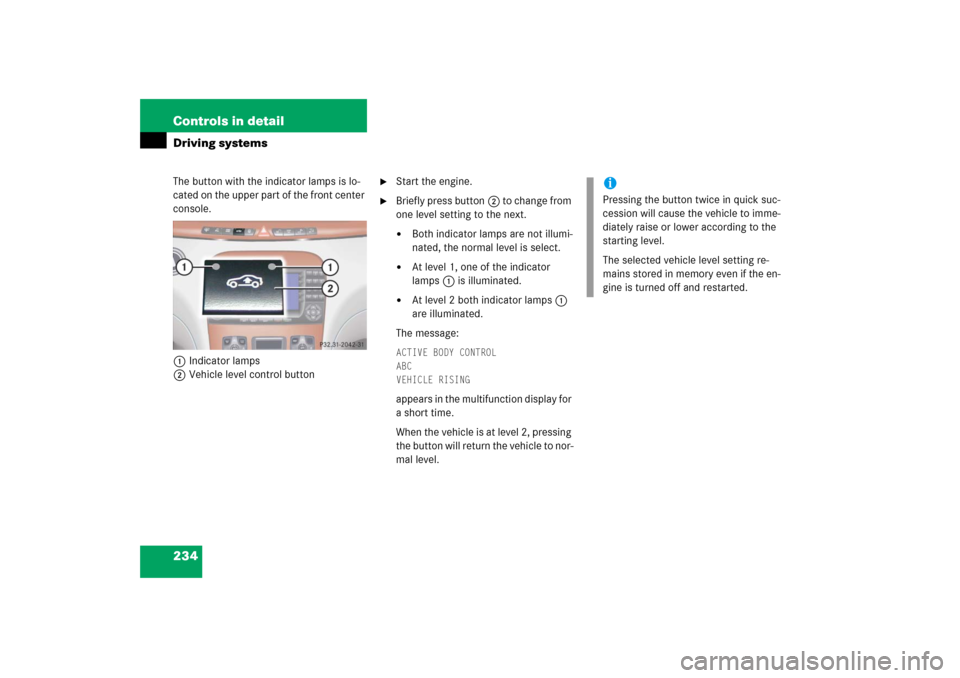
234 Controls in detailDriving systemsThe button with the indicator lamps is lo-
cated on the upper part of the front center
console.
1Indicator lamps
2Vehicle level control button
�
Start the engine.
�
Briefly press button2 to change from
one level setting to the next. �
Both indicator lamps are not illumi-
nated, the normal level is select.
�
At level 1, one of the indicator
lamps1 is illuminated.
�
At level 2 both indicator lamps1
are illuminated.
The message:
ACTIVE BODY CONTROL
ABC
VEHICLE RISINGappears in the multifunction display for
a short time.
When the vehicle is at level 2, pressing
the button will return the vehicle to nor-
mal level.
iPressing the button twice in quick suc-
cession will cause the vehicle to imme-
diately raise or lower according to the
starting level.
The selected vehicle level setting re-
mains stored in memory even if the en-
gine is turned off and restarted.
Page 251 of 481

250 Controls in detailUseful featuresRemoving ashtray insert�
Secure vehicle from movement by set-
ting the parking brake. Move the gear
selector lever to positionN.
Now you have more room to take out
the insert.
�
Push sliding button2 to the right.
The ashtray is disengaged and slides
out a short way.
�
Remove insert from ashtray frame.
Reinstalling the ashtray insert
�
Install insert by pushing it back into the
frame until it engages.Rear door ashtray
Opening ashtray
�
Lightly touch the back of the ashtray.
Removing ashtray insert
�
Pull the ashtray back slightly and re-
move the insert (see arrows).
Reinstalling the ashtray insert
�
Position the insert and press down
while sliding forward.
Cigarette lighters
Center console lighter
Warning!
G
Remove front ashtray only with vehicle
standing still. Set the parking brake to se-
cure vehicle from movement. Move gear se-
lector lever to positionN. With gear selector
lever in positionN turn off the engine.
Warning!
G
Never touch the heating element or sides of
the lighter; they are extremely hot. Hold the
knob only.
When leaving the vehicle, always remove the
SmartKey or SmartKey with KEYLESS-GO*
from the starter switch, take it with you, and
lock the vehicle. Do not leave children unat-
tended in the vehicle, or with access to an
unlocked vehicle. Unsupervised use of vehi-
cle equipment may cause an accident
and/or serious personal injury.
Page 254 of 481

253 Controls in detail
Useful features
Telephone*
Radio transmitters, such as a portable tele-
phone or a citizens band unit, should only
be used inside the vehicle if they are con-
nected to an antenna that is installed on
the outside of the vehicle.
The external antenna must be approved by
Mercedes-Benz. Please contact an autho-
rized Mercedes-Benz Center for informa-
tion on the installation of an approved
external antenna. Refer to the radio trans-
mitter operation instructions regarding use
of an external antenna.You can take and place telephone calls us-
ing thes andt buttons on the
steering wheel. To carry out other tele-
phone functions, use the control system
(
�page 153).
See separate operating manual for instruc-
tions on how to use the telephone.
Warning!
G
Never operate radio transmitters equipped
with a built-in or attached antenna (i.e. with-
out being connected to an external antenna)
from inside the vehicle while the engine is
running. Doing so could lead to a malfunc-
tion of the vehicle’s electronic system, pos-
sibly resulting in an accident and/or serious
personal injury.
Warning!
G
Please do not forget that your primary re-
sponsibility is to drive the vehicle. A driver’s
attention to the road must always be
his/her primary focus when driving. For
your safety and the safety of others, we rec-
ommend that you pull over to a safe location
and stop before placing or taking a tele-
phone call.
If you choose to use the telephone
1 while
driving, please use the hands-free device
and only use the telephone when road,
weather and traffic conditions permit. Some
jurisdictions prohibit the driver from using a
cellular telephone while driving a vehicle.
Only operate the COMAND (Cockpit Man-
agement and Data System)
1 if road, weather
and traffic conditions permit.
Bear in mind that at a speed of just 30 mph
(approximately 50 km/h), your vehicle is
covering a distance of 44 feet (approximate-
ly 14 m) every second.
1Observe all legal requirements.
Page 272 of 481
271 Operation
The first 1000 miles (1500 km)
Driving instructions
At the gas station
Engine compartment
Tires and wheels
Winter driving
Maintenance
Vehicle care

Driving instructions
At the gas station
Engine compartment
Tires and wheels
Winter driving
Maintenance
Vehicle care")