Page 382 of 481
381 Practical hints
What to do if …?
Display
Possible cause
Possible solution
H
TIRE PRESSURE, RF
CAUTION, TIRE PRES.
The right front tire is deflating.
�
Bring the vehicle to a halt, avoiding
abrupt braking maneuvers. Observe the
traffic situation around you.
�
Change the wheel (
�page 403).
�
Have the damaged wheel repaired or re-
placed at an authorized Mercedes-Benz
Center.
TIRE PRESSURE, RF
CHECK TIRES
The right front tire inflation pressure is
low.
�
Carefully bring the vehicle to a halt.
�
Check the tires. If no damage visible,
check and correct tire inflation pressure
as required (
�page 308).
�
If necessary, change the wheel
(�page 403).
�
Have the damaged wheel repaired or re-
placed at an authorized Mercedes-Benz
Center.
Warning!
G
Do not drive with a flat tire. A flat tire affects
the ability to steer or brake the vehicle.
You may lose control of the vehicle. Contin-
ued driving with a flat tire will cause exces-
sive heat build-up and possibly a fire.
Page 383 of 481
382 Practical hintsWhat to do if …?Display
Possible cause
Possible solution
H
TIRE PRESSURE, LR
CAUTION, TIRE PRES.
The left rear tire is deflating.
�
Bring the vehicle to a halt, avoiding
abrupt braking maneuvers. Observe the
traffic situation around you.
�
Change the wheel (
�page 403).
�
Have the damaged wheel repaired or re-
placed at an authorized Mercedes-Benz
Center.
TIRE PRESSURE, LR
CHECK TIRES
The left rear tire inflation pressure is low.
�
Carefully bring the vehicle to a halt.
�
Check the tires. If no damage visible,
check and correct tire inflation pressure
as required (
�page 308).
�
If necessary, change the wheel
(�page 403).
�
Have the damaged wheel repaired or re-
placed at an authorized Mercedes-Benz
Center.
Warning!
G
Do not drive with a flat tire. A flat tire affects
the ability to steer or brake the vehicle.
You may lose control of the vehicle. Contin-
ued driving with a flat tire will cause exces-
sive heat build-up and possibly a fire.
Page 384 of 481
383 Practical hints
What to do if …?
Display
Possible cause
Possible solution
H
TIRE PRESSURE, RR
CAUTION, TIRE PRES.
The right rear tire is deflating.
�
Bring the vehicle to a halt, avoiding
abrupt braking maneuvers. Observe the
traffic situation around you.
�
Change the wheel (
�page 403).
�
Have the damaged wheel repaired or re-
placed at an authorized Mercedes-Benz
Center.
TIRE PRESSURE, RR
CHECK TIRES
The right rear tire inflation pressure is
low.
�
Carefully bring the vehicle to a halt.
�
Check the tires. If no damage visible,
check and correct tire inflation pressure
as required (
�page 308).
�
If necessary, change the wheel
(�page 403).
�
Have the damaged wheel repaired or re-
placed at an authorized Mercedes-Benz
Center.
Warning!
G
Do not drive with a flat tire. A flat tire affects
the ability to steer or brake the vehicle.
You may lose control of the vehicle. Contin-
ued driving with a flat tire will cause exces-
sive heat build-up and possibly a fire.
Page 386 of 481
385 Practical hints
Where will I find ...?
The vehicle tool kit includes:�
One interchangeable slot/Phillips
screwdriver
�
One towing eye bolt
�
One wheel bolt wrench with socket
wrench
�
One alignment bolt
�
One pair of gloves
�
One fuse extractor
�
One fuse chart for the main fuse box
�
Spare fusesVehicle jack
To prepare the vehicle jack for use
�
Remove the vehicle jack from the spare
wheel well under the trunk floor.
�
Push the crank handle up.
�
Turn the crank handle clockwise until it
engages (operational position).Storing the vehicle jack in the trunk
�
Retract the vehicle jack arm to the
base of the vehicle jack.
�
Push the crank handle up.
�
Turn the crank handle counterclock-
wise to the end of the stop (storage po-
sition).
!To prevent damage, always disengage
trunk floor handle from trunk lid and
lower trunk floor before closing the
trunk lid.
��
Page 388 of 481

387 Practical hints
Where will I find ...?
Spare wheel S55AMG, S65AMG and
vehicles with Sport Package*
In case of a flat tire, you may temporarily
use the spare wheel when observing the
following restrictions:�
Do not exceed a vehicle speed of
50 mph (80 km/h).
�
Drive to the nearest tire repair facility
to have the flat tire repaired or re-
placed as appropriate.
�
Do not operate vehicle with more than
one spare wheel mounted.For more information, see “Rims and tires”
(
�page 426).
Warning!
G
The dimensions of the spare wheel are dif-
ferent from those of the road wheels. As a
result, the vehicle handling characteristics
change when driving with a mounted spare
wheel. Adapt your driving style accordingly.
Never operate the vehicle with more than
one spare wheel mounted.
The spare wheel is for temporary use only.
When driving with spare wheel mounted,
ensure proper tire inflation pressure and do
not exceed vehicle speed of 50 mph
(80 km/h).
The spare wheel rim is for temporary use
only. Use for over a total of 12 000 miles
(20 000 km) (aggregate of all uses) may
cause wheel rim failure leading to an acci-
dent and possible injuries.
The spare wheel should only be used tempo-
rarily and replaced with a regular road wheel
as quickly as possible.
Page 397 of 481

396 Practical hintsReplacing bulbsNotes on bulb replacement
�
Only use 12-volt-bulbs of the same
type and with the specified watt rating.
�
Switch lights off before changing a bulb
to prevent short circuits.
�
Always use a clean lint-free cloth when
handling bulbs.
�
Your hands should be dry and free of oil
and grease.
�
If the newly installed bulb does not
come on, visit an authorized
Mercedes-Benz Center.Have the LEDs and bulbs for the following
lamps replaced by an authorized
Mercedes-Benz Center.
�
Additional turn signal lamps in the exte-
rior rear view mirrors
�
Bi-Xenon lamps*
�
High mounted brake lamp
�
Brake lamps
�
Rear side marker lamps
�
Rear parking lamps
Warning!
G
Keep bulbs out of reach of children.
Bulbs and bulb sockets can be very hot. Al-
low the lamp to cool down before changing
a bulb.
Halogen lamps contain pressurized gas. A
bulb can explode if you:�
touch or move it when hot
�
drop the bulb
�
scratch the bulb
Wear eye and hand protection.
Because of high voltage in Xenon lamps, it is
dangerous to replace the bulb or repair the
lamp and its components. We recommend
that you have such work done by a qualified
technician.
iHave the headlamp adjustment
checked regularly.
Page 398 of 481
397 Practical hints
Replacing bulbs
Replacing bulbs for front lamps
Before you start to replace a bulb for a
front lamp, do the following first:�
Turn the exterior lamp switch to M
(�page 50).
�
Open the hood (
�page 287) (except
for side marker lamps).
1Headlamp cover for fog lamp
2Headlamp cover for high beam halogen
headlamp bulb, parking and standing
lamp
3Headlamp cover for Bi-Xenon* (low and
high beam) or halogen (low beam)
headlamp bulb4Bulb socket for fog lamp
5Bulb socket for parking and standing
lamp
6Electrical connector for high beam
halogen headlamp bulb
7Electrical connector for low beam
headlamp bulb
8Bulb socket for turn signal lampReplacing low beam bulbs
Bi-Xenon* headlamp
Warning!
G
Do not remove the cover for the Bi-Xenon
headlamp. Because of high voltage in Xenon
lamps, it is dangerous to replace the bulb or
repair the lamp and its components. We rec-
ommend that you have such work done by a
qualified technician.
Page 407 of 481

406 Practical hintsFlat tire�
Keeping jack in this position, turn
crank3 clockwise until the jack base
meets the ground. Make sure the jack
is vertical (plumb line).
�
Continue to turn the crank until the tire
is a maximum of 1.2 in (3 cm) from the
ground.Removing the wheel
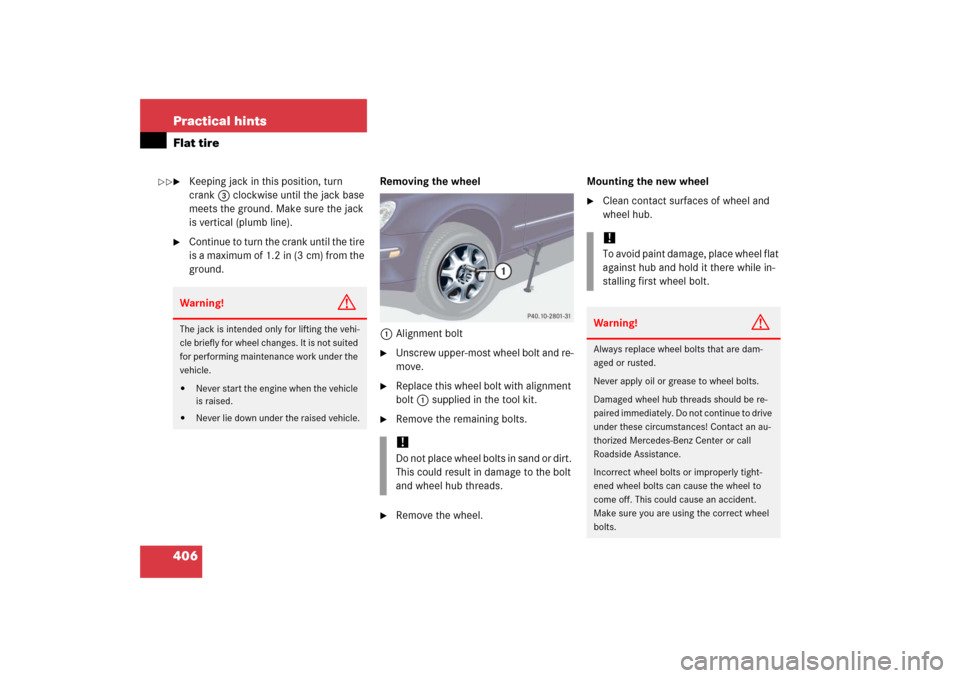
1Alignment bolt
�
Unscrew upper-most wheel bolt and re-
move.
�
Replace this wheel bolt with alignment
bolt1 supplied in the tool kit.
�
Remove the remaining bolts.
�
Remove the wheel.Mounting the new wheel
�
Clean contact surfaces of wheel and
wheel hub.
Warning!
G
The jack is intended only for lifting the vehi-
cle briefly for wheel changes. It is not suited
for performing maintenance work under the
vehicle.�
Never start the engine when the vehicle
is raised.
�
Never lie down under the raised vehicle.
!Do not place wheel bolts in sand or dirt.
This could result in damage to the bolt
and wheel hub threads.
!To avoid paint damage, place wheel flat
against hub and hold it there while in-
stalling first wheel bolt.Warning!
G
Always replace wheel bolts that are dam-
aged or rusted.
Never apply oil or grease to wheel bolts.
Damaged wheel hub threads should be re-
paired immediately. Do not continue to drive
under these circumstances! Contact an au-
thorized Mercedes-Benz Center or call
Roadside Assistance.
Incorrect wheel bolts or improperly tight-
ened wheel bolts can cause the wheel to
come off. This could cause an accident.
Make sure you are using the correct wheel
bolts.
��