Page 4 of 561

Contents
Introduction.......................................... 9
Product information ................................ 9
Operator’s Manual ............................... 10
Service and warranty information .. 10
Important notice for California
retail buyers and lessees of
Mercedes-Benz automobiles .......... 11
Maintenance .................................. 12
Roadside Assistance ...................... 12
Change of address or ownership.... 13
Operating your vehicle outside
the USA or Canada......................... 13
Where to find it .................................... 14
Symbols ............................................... 15
Operating safety .................................. 16
Proper use of the vehicle ............... 16
Problems with your vehicle .................. 17
Reporting safety defects...................... 18
Reporting safety defects ................ 18
Vehicle data recording ......................... 19
Information regarding electronic
recording devices ........................... 19
At a glance.......................................... 21
Cockpit ................................................. 22
Instrument cluster ................................ 24
Multifunction steering wheel ................ 28
Center console ..................................... 29
Upper part ...................................... 29
Lower part ...................................... 30
Overhead control panel ........................ 31
Storage compartments ......................... 32
Door control panel................................ 34
Getting started................................... 35
Unlocking ............................................. 36
Unlocking with the SmartKey ......... 36
Unlocking with Keyless-Go* ........... 37
Starter switch positions .................. 38
Adjusting .............................................. 42
Seats .............................................. 42
Steering wheel ................................ 45
Mirrors ............................................ 47
Driving .................................................. 50
Fastening the seat belts ................. 50
Starting the engine ......................... 53
Parking brake ................................. 56
Driving ............................................ 56
Switching on headlamps ................. 58
Turn signals .................................... 58
Windshield wipers ........................... 59
Rear window wiper/washer ............ 61
Problems while driving.................... 62
Parking and locking .............................. 64
Parking brake ................................. 65
Switching off headlamps................. 65
Turning off the engine..................... 66
Releasing seat belts........................ 67
Locking ........................................... 67
Page 22 of 561
21 At a glance
Cockpit
Instrument cluster
Multifunction steering wheel
Center console
Overhead control panel
Storage compartments
Door control panel
Page 24 of 561
23 At a glance
Cockpit
Item
Page
1
Cruise control lever
265
2
Instrument cluster
24
3
Multifunction steering
wheel
28
4
Horn
5
Steering wheel gearshift
buttons
206
6
Gear selector lever for
automatic transmission
53
7
Front Parktronic* warning
indicators
276
8
Overhead control panel
31
9
Glove box release
Glove box lock
294
295
Item
Page
a
Glove box
294
b
Electrical outlet
307
c
Center console
29
d
Starter switch
38
e
Steering wheel adjustment,
manual
45
f
Steering wheel adjustment,
electrical*
46
g
Hood lock release
345
h
Parking brake pedal
65
j
Remote tailgate switch
123
Item
Page
k
Parking brake release
56
l
Headlamp washer switch*
208
m
Exterior lamp switch
147
n
Door control panel
34
o
Combination switch�
Turn signals
58
�
Windshield wipers
59
�
High beam
58
�
Rear window wiper
61
Page 32 of 561
31 At a glance
Overhead control panel
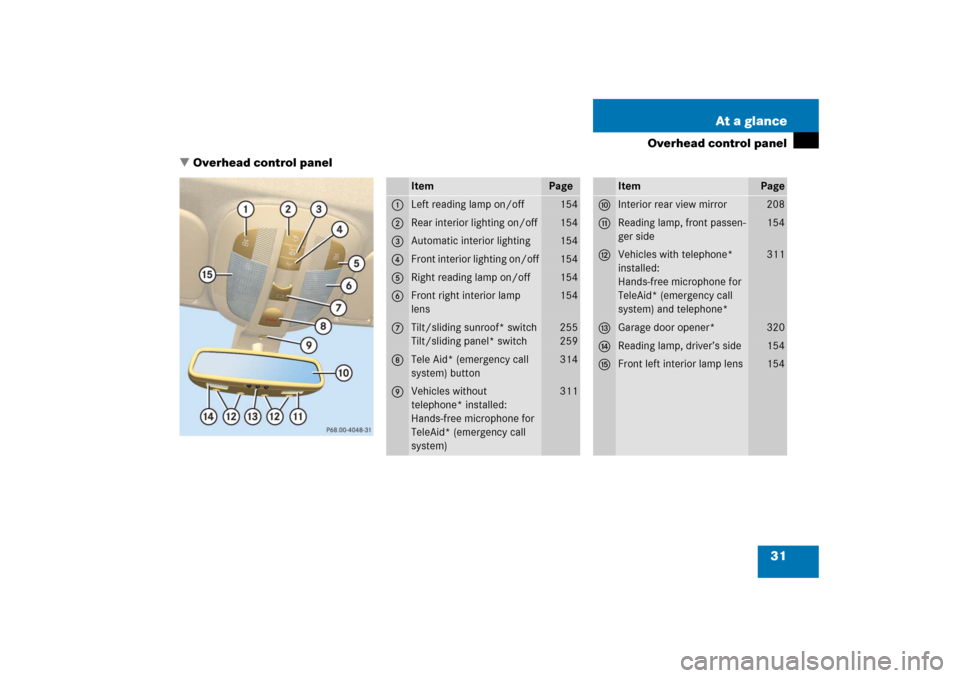
�Overhead control panel
Item
Page
1
Left reading lamp on/off
154
2
Rear interior lighting on/off
154
3
Automatic interior lighting
154
4
Front interior lighting on/off
154
5
Right reading lamp on/off
154
6
Front right interior lamp
lens
154
7
Tilt/sliding sunroof* switch
Tilt/sliding panel* switch
255
259
8
Tele Aid* (emergency call
system) button
314
9
Vehicles without
telephone* installed:
Hands-free microphone for
TeleAid* (emergency call
system)
311
Item
Page
a
Interior rear view mirror
208
b
Reading lamp, front passen-
ger side
154
c
Vehicles with telephone*
installed:
Hands-free microphone for
TeleAid* (emergency call
system) and telephone*
311
d
Garage door opener*
320
e
Reading lamp, driver’s side
154
f
Front left interior lamp lens
154
Page 155 of 561
154 Controls in detailLightingSwitching on hazard warning flasher�
Press hazard warning flasher
switch1.
All turn signals are flashing.
Switching off hazard warning flasher
�
Press hazard warning flasher switch1
again.
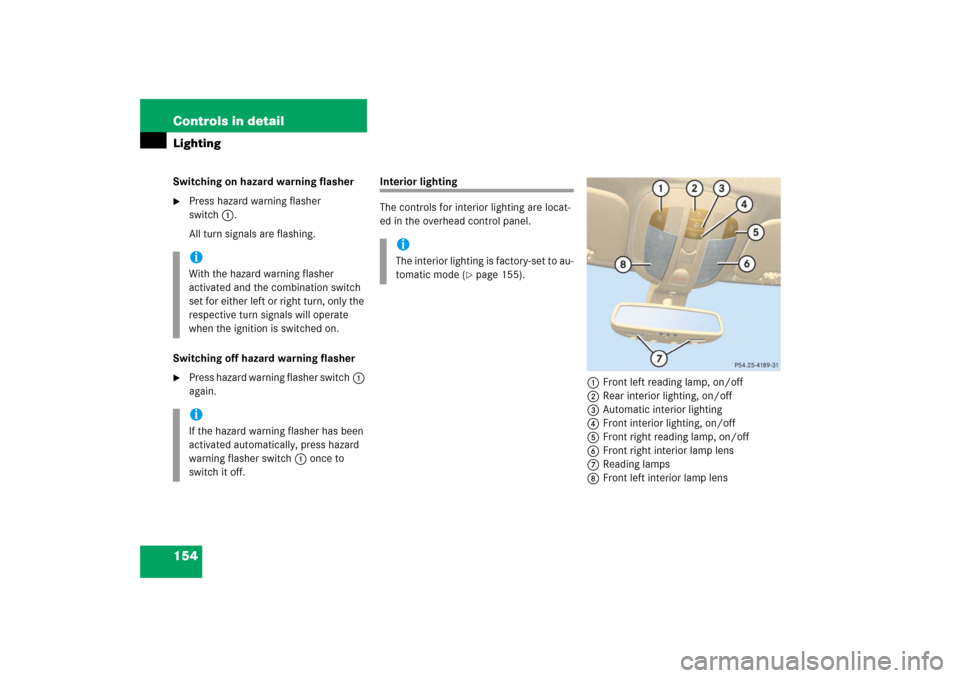
Interior lighting
The controls for interior lighting are locat-
ed in the overhead control panel.
1Front left reading lamp, on/off
2Rear interior lighting, on/off
3Automatic interior lighting
4Front interior lighting, on/off
5Front right reading lamp, on/off
6Front right interior lamp lens
7Reading lamps
8Front left interior lamp lens
iWith the hazard warning flasher
activated and the combination switch
set for either left or right turn, only the
respective turn signals will operate
when the ignition is switched on.iIf the hazard warning flasher has been
activated automatically, press hazard
warning flasher switch1 once to
switch it off.
iThe interior lighting is factory-set to au-
tomatic mode (
�page 155).
Page 157 of 561
156 Controls in detailLightingSwitching front reading lamps on and off�
Press button1 or 5.
The corresponding front reading lamp
comes on.
�
Press button1 or 5 again.
The corresponding reading lamp goes
out.Switching second-row reading lamps on
and off
The second row reading lamps are located
above the side windows.
1Second-row reading lamp
�
Press on reading lamp 1 in direction
of arrow.
The reading lamp comes on.
�
Press on reading lamp 1 in direction
of arrow once more.
The reading lamp goes out.Switching third-row reading lamps* on
and off
The switches for the third-row reading
lamps are located in the rear overhead
control panel.
1Rear right reading lamp, on/off
2Rear left reading lamp, on/off
3Rear left reading lamp lens
4Rear interior lamp lens
5Rear right reading lamp lens
Page 158 of 561
157 Controls in detail
Lighting
�
Press button 1 or 2.
The corresponding reading lamp
comes on.
�
Press button 1 or 2 once more.
The corresponding reading lamp goes
out.
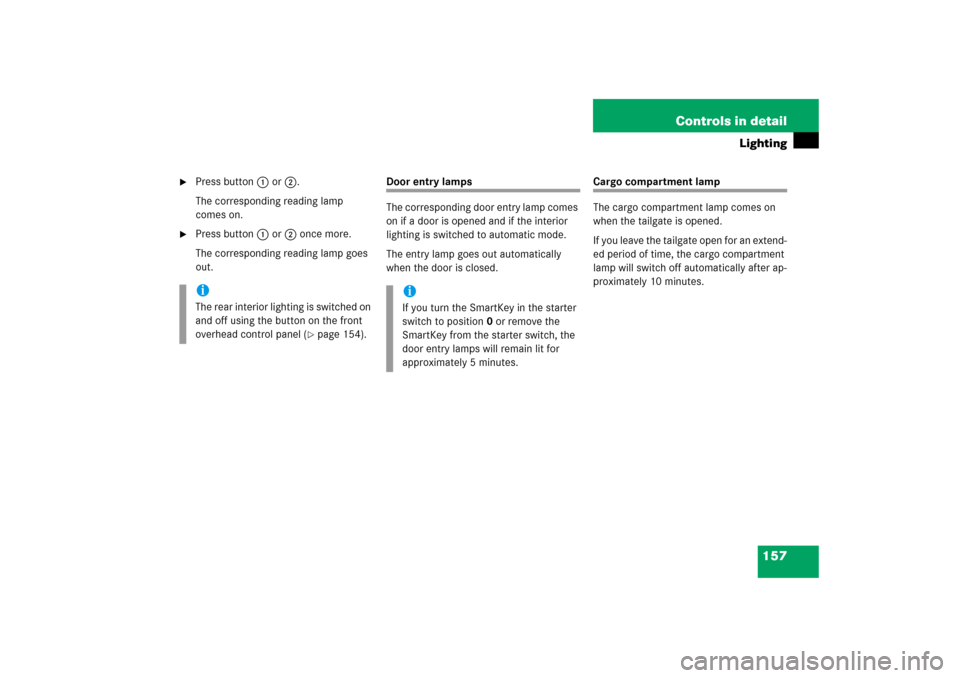
Door entry lamps
The corresponding door entry lamp comes
on if a door is opened and if the interior
lighting is switched to automatic mode.
The entry lamp goes out automatically
when the door is closed.
Cargo compartment lamp
The cargo compartment lamp comes on
when the tailgate is opened.
If you leave the tailgate open for an extend-
ed period of time, the cargo compartment
lamp will switch off automatically after ap-
proximately 10 minutes.
iThe rear interior lighting is switched on
and off using the button on the front
overhead control panel (
�page 154).
iIf you turn the SmartKey in the starter
switch to position0 or remove the
SmartKey from the starter switch, the
door entry lamps will remain lit for
approximately 5 minutes.
Page 260 of 561

259 Controls in detail
Panorama roof with power tilt/sliding panel*
�Panorama roof with power tilt/sliding panel*
Roller sunblinds for the panorama roof with power tilt/sliding panel
The tilt/sliding panel and the front and
rear roller sunblinds are opened and
closed electrically. The switch for the
tilt/sliding panel and the roller sunblinds is
located on the overhead control panel.
The roller sunblinds only operate with the
tilt/sliding panel closed. The front and rear
roller sunblind cannot be operated individ-
ually.Roof panel switch1Open roller sunblinds
2Close roller sunblinds
�
Switch on the ignition (
�page 38).
�
To open or close the roller sunblinds,
move the roof panel switch to the resis-
tance point in the required direction of
arrow1 or2.
Release the roof panel switch when the
roller sunblinds have reached the de-
sired position.Fully opening the roller sunblinds (Ex-
press-open)
�
Move the roof panel switch past the re-
sistance point in direction of arrow1
and release.
The roller sunblinds opens completely.
Stopping the roller sunblinds during
Express-operation
�
Move the roof panel switch in any
direction.
Warning!
G
When closing the roller sunblinds, make
sure that no one is in danger of being injured
by the closing procedure. The closing of the
roller sunblinds can be immediately halted
by releasing the switch.