Page 24 of 561
23 At a glance
Cockpit
Item
Page
1
Cruise control lever
265
2
Instrument cluster
24
3
Multifunction steering
wheel
28
4
Horn
5
Steering wheel gearshift
buttons
206
6
Gear selector lever for
automatic transmission
53
7
Front Parktronic* warning
indicators
276
8
Overhead control panel
31
9
Glove box release
Glove box lock
294
295
Item
Page
a
Glove box
294
b
Electrical outlet
307
c
Center console
29
d
Starter switch
38
e
Steering wheel adjustment,
manual
45
f
Steering wheel adjustment,
electrical*
46
g
Hood lock release
345
h
Parking brake pedal
65
j
Remote tailgate switch
123
Item
Page
k
Parking brake release
56
l
Headlamp washer switch*
208
m
Exterior lamp switch
147
n
Door control panel
34
o
Combination switch�
Turn signals
58
�
Windshield wipers
59
�
High beam
58
�
Rear window wiper
61
Page 346 of 561

345 Operation
Engine compartment
�Engine compartment
Hood
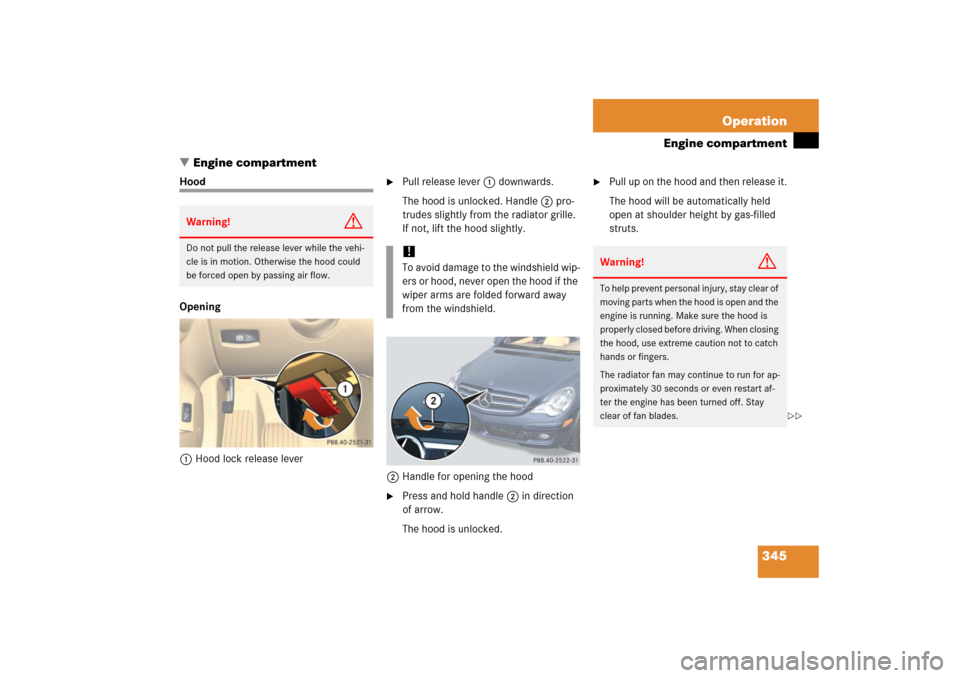
Opening
1Hood lock release lever
�
Pull release lever1 downwards.
The hood is unlocked. Handle2 pro-
trudes slightly from the radiator grille.
If not, lift the hood slightly.
2Handle for opening the hood
�
Press and hold handle2 in direction
of arrow.
The hood is unlocked.
�
Pull up on the hood and then release it.
The hood will be automatically held
open at shoulder height by gas-filled
struts.
Warning!
G
Do not pull the release lever while the vehi-
cle is in motion. Otherwise the hood could
be forced open by passing air flow.
!To avoid damage to the windshield wip-
ers or hood, never open the hood if the
wiper arms are folded forward away
from the windshield.
Warning!
G
To help prevent personal injury, stay clear of
moving parts when the hood is open and the
engine is running. Make sure the hood is
properly closed before driving. When closing
the hood, use extreme caution not to catch
hands or fingers.
The radiator fan may continue to run for ap-
proximately 30 seconds or even restart af-
ter the engine has been turned off. Stay
clear of fan blades.
��
Page 352 of 561

351 Operation
Engine compartment
Coolant level
The engine coolant is a mixture of water
and anticorrosion / antifreeze. To check
the coolant level, the vehicle must be
parked on level ground and the engine
must be cool.
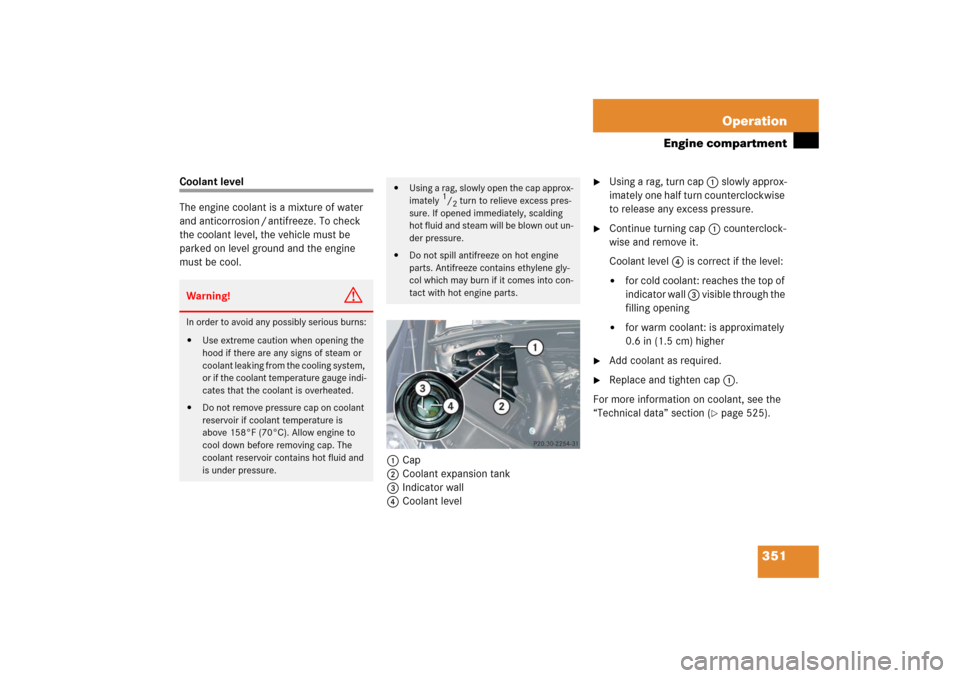
1Cap
2Coolant expansion tank
3Indicator wall
4Coolant level
�
Using a rag, turn cap 1 slowly approx-
imately one half turn counterclockwise
to release any excess pressure.
�
Continue turning cap 1 counterclock-
wise and remove it.
Coolant level 4 is correct if the level:�
for cold coolant: reaches the top of
indicator wall 3 visible through the
filling opening
�
for warm coolant: is approximately
0.6 in (1.5 cm) higher
�
Add coolant as required.
�
Replace and tighten cap 1.
For more information on coolant, see the
“Technical data” section (
�page 525).
Warning!
G
In order to avoid any possibly serious burns:�
Use extreme caution when opening the
hood if there are any signs of steam or
coolant leaking from the cooling system,
or if the coolant temperature gauge indi-
cates that the coolant is overheated.
�
Do not remove pressure cap on coolant
reservoir if coolant temperature is
above 158°F (70°C). Allow engine to
cool down before removing cap. The
coolant reservoir contains hot fluid and
is under pressure.
�
Using a rag, slowly open the cap approx-
imately
1/2 turn to relieve excess pres-
sure. If opened immediately, scalding
hot fluid and steam will be blown out un-
der pressure.
�
Do not spill antifreeze on hot engine
parts. Antifreeze contains ethylene gly-
col which may burn if it comes into con-
tact with hot engine parts.
Page 476 of 561

475 Practical hints
Replacing wiper blades
�Replacing wiper blades
Front wiper blades Removing
�
Remove the SmartKey from the starter
switch.
or
�
Vehicles with KEYLESS-GO*:
Make sure the vehicle’s on-board
electronics have status0 (
�page 39).
�
Fold the wiper arms forward until they
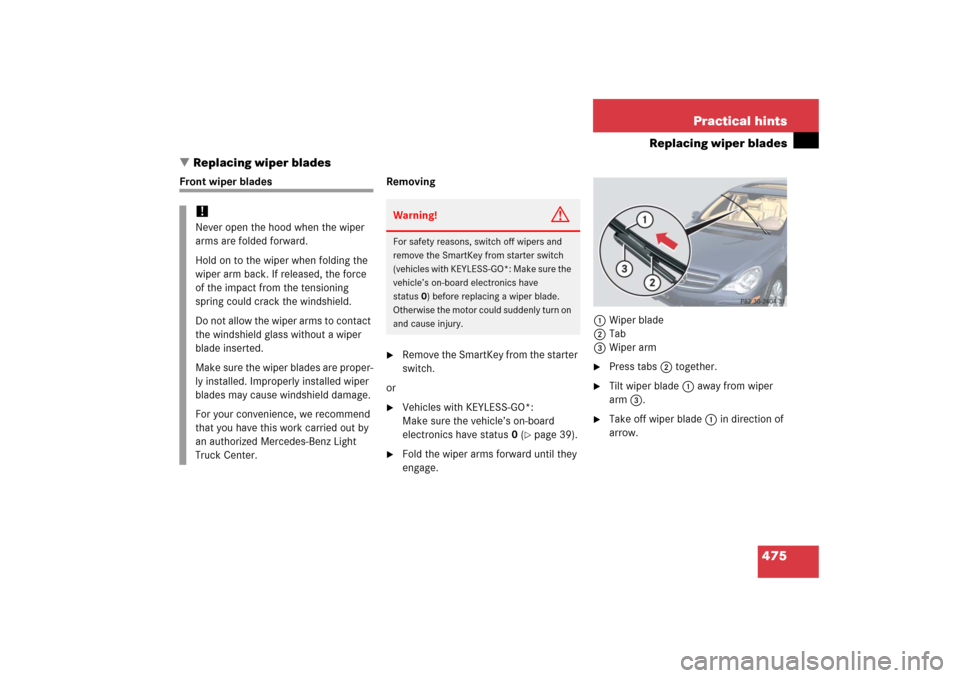
engage.1Wiper blade
2Tab
3Wiper arm
�
Press tabs2 together.
�
Tilt wiper blade 1 away from wiper
arm 3.
�
Take off wiper blade 1 in direction of
arrow.
!Never open the hood when the wiper
arms are folded forward.
Hold on to the wiper when folding the
wiper arm back. If released, the force
of the impact from the tensioning
spring could crack the windshield.
Do not allow the wiper arms to contact
the windshield glass without a wiper
blade inserted.
Make sure the wiper blades are proper-
ly installed. Improperly installed wiper
blades may cause windshield damage.
For your convenience, we recommend
that you have this work carried out by
an authorized Mercedes-Benz Light
Truck Center.
Warning!
G
For safety reasons, switch off wipers and
remove the SmartKey from starter switch
(vehicles with KEYLESS-GO*: Make sure the
vehicle’s on-board electronics have
status0) before replacing a wiper blade.
Otherwise the motor could suddenly turn on
and cause injury.
Page 505 of 561

504 Practical hintsFusesMain fuse box
The main fuse box is located on the pas-
senger side of the engine compartment.�
Open the hood (
�page 345).
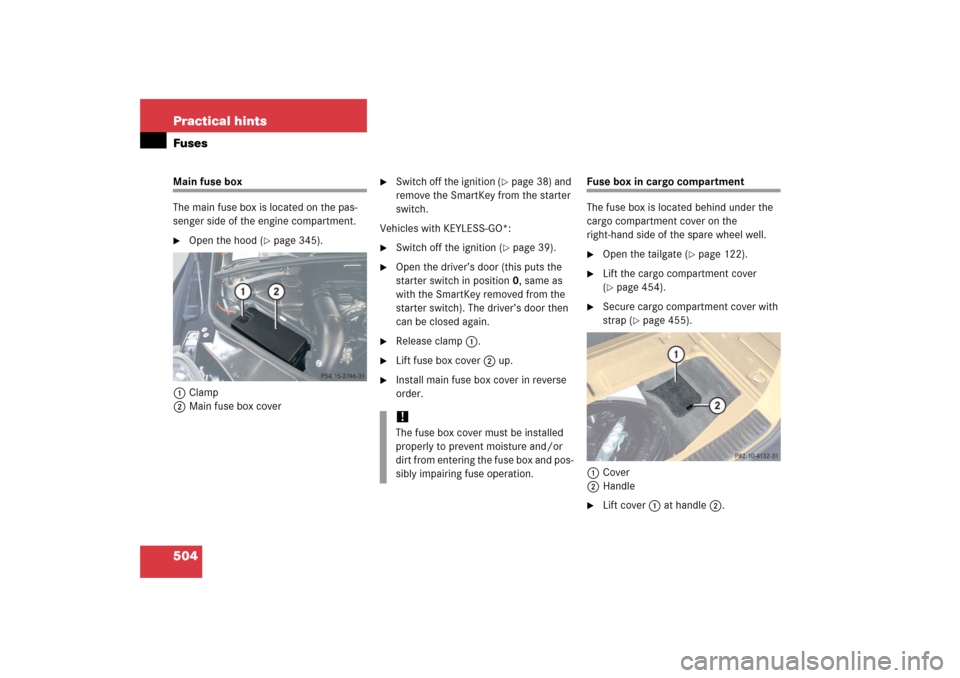
1Clamp
2Main fuse box cover
�
Switch off the ignition (
�page 38) and
remove the SmartKey from the starter
switch.
Vehicles with KEYLESS-GO*:
�
Switch off the ignition (
�page 39).
�
Open the driver’s door (this puts the
starter switch in position 0, same as
with the SmartKey removed from the
starter switch). The driver’s door then
can be closed again.
�
Release clamp1.
�
Lift fuse box cover2 up.
�
Install main fuse box cover in reverse
order.
Fuse box in cargo compartment
The fuse box is located behind under the
cargo compartment cover on the
right-hand side of the spare wheel well.�
Open the tailgate (
�page 122).
�
Lift the cargo compartment cover
(�page 454).
�
Secure cargo compartment cover with
strap (
�page 455).
1Cover
2Handle
�
Lift cover1 at handle 2.
!The fuse box cover must be installed
properly to prevent moisture and/or
dirt from entering the fuse box and pos-
sibly impairing fuse operation.