Page 137 of 539
136 Controls in detailMemory function*The memory button and stored position
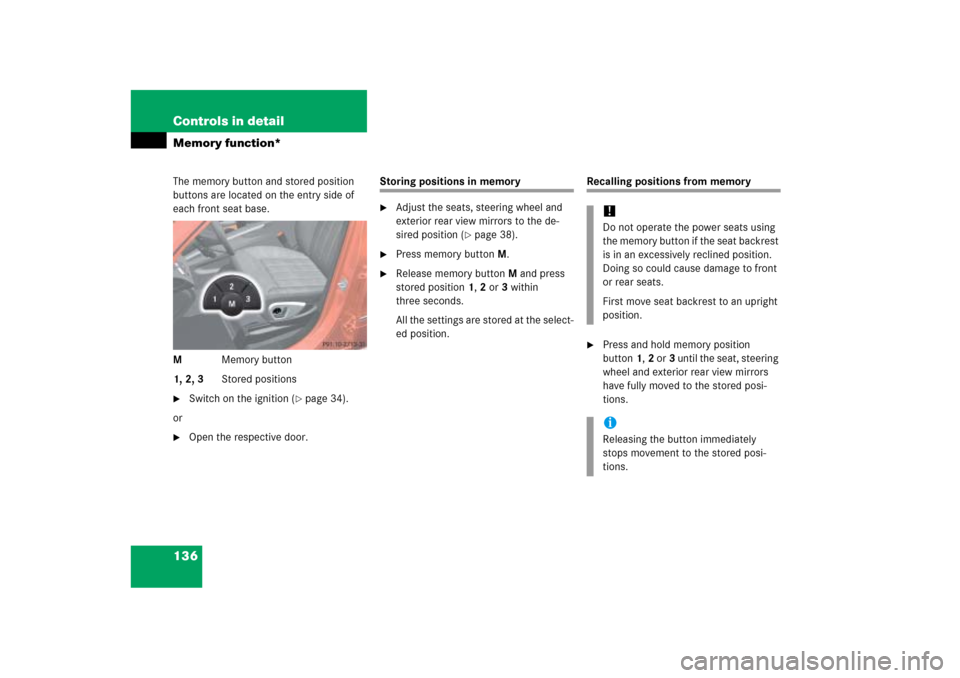
buttons are located on the entry side of
each front seat base.
MMemory button
1, 2, 3Stored positions�
Switch on the ignition (
�page 34).
or
�
Open the respective door.
Storing positions in memory�
Adjust the seats, steering wheel and
exterior rear view mirrors to the de-
sired position (
�page 38).
�
Press memory buttonM.
�
Release memory buttonM and press
stored position1,2 or3 within
three seconds.
All the settings are stored at the select-
ed position.
Recalling positions from memory�
Press and hold memory position
button1,2 or3 until the seat, steering
wheel and exterior rear view mirrors
have fully moved to the stored posi-
tions.!Do not operate the power seats using
the memory button if the seat backrest
is in an excessively reclined position.
Doing so could cause damage to front
or rear seats.
First move seat backrest to an upright
position.iReleasing the button immediately
stops movement to the stored posi-
tions.
Page 222 of 539
221 Controls in detail
3-zone automatic climate control*
Rear air conditioning
You can switch on and off the rear air con-
ditioning with the climate control panel in
the front.
Deactivating�
Press button> on the climate con-
trol panel (
�page 218).
The indicator lamp on button>
comes on. The rear air conditioning is
switched off. REAR OFF
appears in the
climate control display.
Activating
�
Press button> on the climate con-
trol panel (
�page 218).The indicator lamp on button>
goes out. The rear air conditioning is
adjusted automatically.
REAR ON
ap-
pears in the climate control display.
For more information on rear air condition-
ing, see “Rear air conditioning”
(
�page 227).
Setting the temperature
Use temperature control1 and9
(�page 218) to separately adjust the air
temperature on each side of the passenger
compartment. You should raise or lower
the temperature setting in small incre-
ments, preferably starting at 72°F (22°C).
The climate control will adjust to the set
temperature as fast as possible.Increasing
�
Turn the temperature control1
and/or9 slightly to the right.
The climate control system will corre-
spondingly adjust the interior air tem-
perature.
Decreasing
�
Turn the temperature control1
and/or9 slightly to the left.
The climate control system will corre-
spondingly adjust the interior air tem-
perature.
iFor information on operating the rear
climate control panel from the rear
seats, see “Rear air conditioning”
(�page 227).
iYou can switch on and off the rear air
conditioning by pressing the respective
button on the rear climate control pan-
el.
Page 261 of 539

260 Controls in detailLoadingFor additional safety when transporting
cargo while the rear seats are unoccupied,
fasten the outer seat belts crosswise into
the opposite side buckles.Cargo tie-down rings
The vehicle is equipped with six tie-down
rings.
Four tie-down rings are located in the
cargo compartment.
1Cargo tie-down ringTwo additional tie-down rings are located
on the floor in front of the rear bench seat.
1Cargo tie-down ring
�
Carefully secure cargo by applying
even load on all rings with rope of suffi-
cient strength to hold down the cargo.
iThe cargo compartment is the pre-
ferred place to carry objects. The en-
larged cargo compartment should only
be used for items which do not fit in the
cargo compartment alone.
iWhile the partition net* will help pro-
tect you from smaller objects, it cannot
prevent the movement of large, heavier
objects into the passenger compart-
ment in an accident, during hard brak-
ing or sudden maneuvers. Such items
must be properly secured using the
cargo tie-down rings.
Page 262 of 539
261 Controls in detail
Loading
Hooks
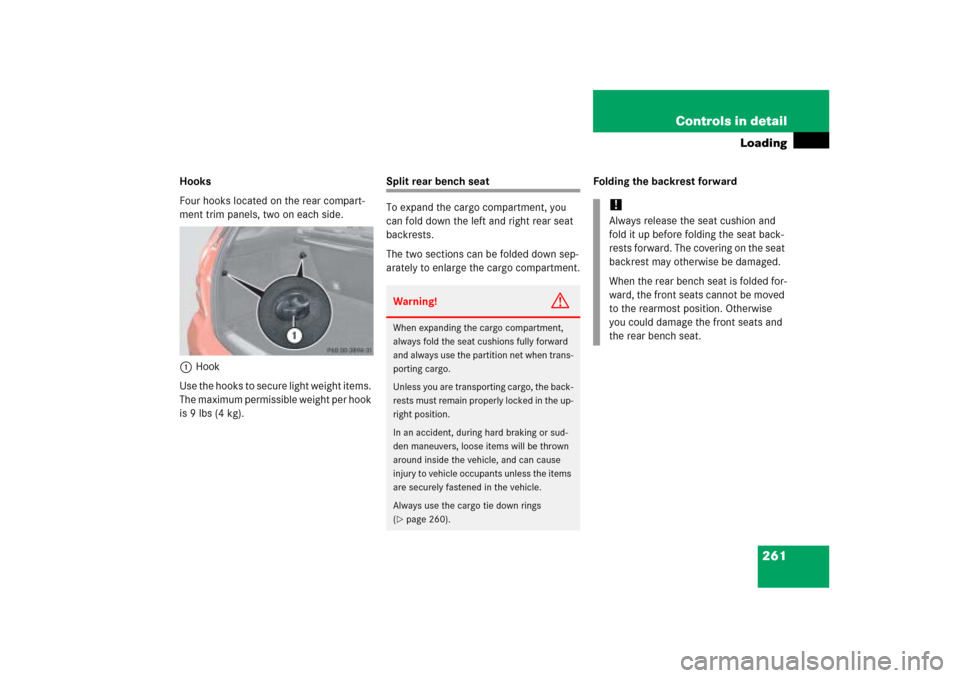
Four hooks located on the rear compart-
ment trim panels, two on each side.
1Hook
Use the hooks to secure light weight items.
The maximum permissible weight per hook
is 9 lbs (4 kg).
Split rear bench seat
To expand the cargo compartment, you
can fold down the left and right rear seat
backrests.
The two sections can be folded down sep-
arately to enlarge the cargo compartment.Folding the backrest forwardWarning!
G
When expanding the cargo compartment,
always fold the seat cushions fully forward
and always use the partition net when trans-
porting cargo.
Unless you are transporting cargo, the back-
rests must remain properly locked in the up-
right position.
In an accident, during hard braking or sud-
den maneuvers, loose items will be thrown
around inside the vehicle, and can cause
injury to vehicle occupants unless the items
are securely fastened in the vehicle.
Always use the cargo tie down rings
(�page 260).
!Always release the seat cushion and
fold it up before folding the seat back-
rests forward. The covering on the seat
backrest may otherwise be damaged.
When the rear bench seat is folded for-
ward, the front seats cannot be moved
to the rearmost position. Otherwise
you could damage the front seats and
the rear bench seat.
Page 264 of 539
263 Controls in detail
Loading
Partition net*Use of the partition net is a particularly im-
portant safety factor when the vehicle is
loaded higher than the top of the seat
backrests with smaller objects.
The partition net can be installed behind
the backrests of the front or rear seats.
�
Open the partition net zipper.
�
Roll out the partition net.
�
Unfold the partition net until it audibly
engages.
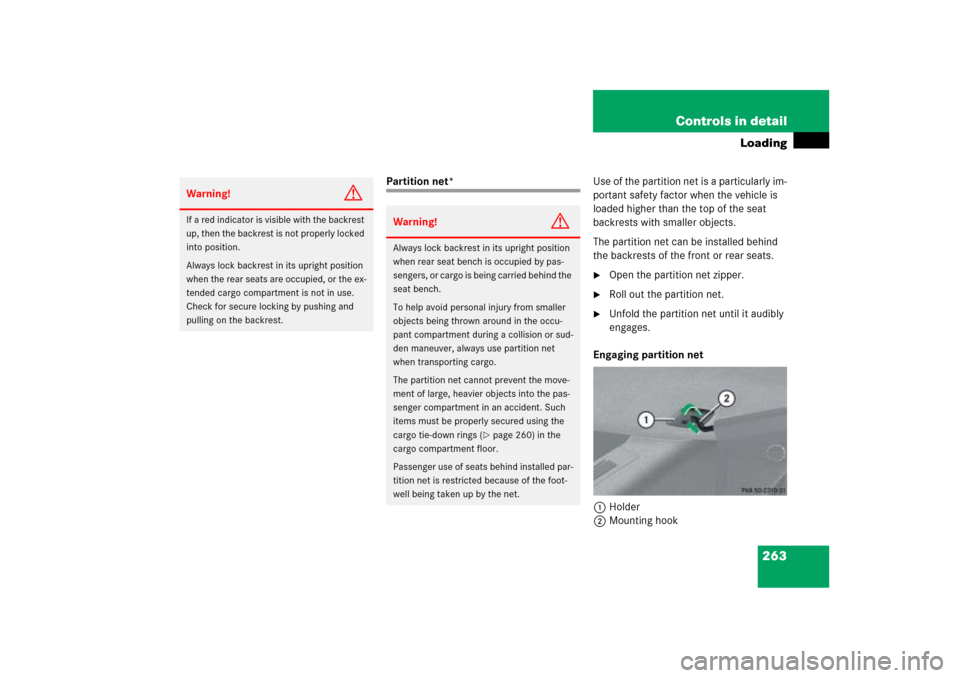
Engaging partition net
1Holder
2Mounting hook
Warning!
G
If a red indicator is visible with the backrest
up, then the backrest is not properly locked
into position.
Always lock backrest in its upright position
when the rear seats are occupied, or the ex-
tended cargo compartment is not in use.
Check for secure locking by pushing and
pulling on the backrest.
Warning!
G
Always lock backrest in its upright position
when rear seat bench is occupied by pas-
sengers, or cargo is being carried behind the
seat bench.
To help avoid personal injury from smaller
objects being thrown around in the occu-
pant compartment during a collision or sud-
den maneuver, always use partition net
when transporting cargo.
The partition net cannot prevent the move-
ment of large, heavier objects into the pas-
senger compartment in an accident. Such
items must be properly secured using the
cargo tie-down rings (
�page 260) in the
cargo compartment floor.
Passenger use of seats behind installed par-
tition net is restricted because of the foot-
well being taken up by the net.
Page 265 of 539
264 Controls in detailLoading�
One after the other, engage the two
mounting hooks2 in the holder1.
�
Push both mounting hooks2 forward
into holder1.
Tightening partition net
Installation behind the front seats1Tie-down hook
2Ring
Installation behind the rear seats1Tie-down hook
2Ring�
Insert tie-down hook1 in rings2.Removing partition net
�
Disengage tie-down hooks1 from
rings2.
�
Remove mounting hooks2
(�page 263) from holder1
(�page 263).
�
Roll up and close the partition net.
�
Store partition net behind rear seat
bench.iWhen storing the partition net after
use, press the red button on the
partition net bar to fold in.
Page 269 of 539
268 Controls in detailLoadingTelescoping rod
1Telescoping rod
2Mounting element
�
Insert one mounting element2 into
each cargo rail.
�
Turn mounting element2 in cargo rail
toN.
�
Insert telescoping rod1 into mount-
ing element2.
�
Turn mounting element2 in cargo rail
until it engages in the‹ position.
You should be able to feel the mounting
element engage in the cargo rail.Removing rear seat cushions
If your vehicle is equipped with the cargo
management system* you can remove the
rear seat cushions.
Removing the rear seat cushions will pro-
vide you with a larger, flat cargo compart-
ment.
�
Fold the seat cushions forward
(�page 262).
1Release lever
�
Pull seat cushion release lever1 and
remove the seat cushion by pulling it
upward.
iThe telescoping rod can be used to
tighten the load against the rear seats
so as to secure it from slipping.
Page 366 of 539
365 Operation
Tires and wheels
Tire and loading terminology
Accessory weight
The combined weight (in excess of those
standard items which may be replaced) of
automatic transmission, power steering,
power brakes, power windows, power
seats, radio, and heater, to the extent that
these items are available as
factory-installed equipment (whether
installed or not).
Air pressure
The amount of air inside the tire pressing
outward on each square inch of the tire.
Air pressure is expressed in pounds per
square inch (psi), or kilopascal (kPa) or
bars.
Aspect ratio
Dimensional relationship between tire
section height and section width
expressed in percentage.Bar
Another metric unit for air pressure. There
are 14.5038 pounds per square inch (psi)
to 1 bar; there are 100 kilopascals (kPa)
to 1 bar.
Bead
The tire bead contains steel wires wrapped
by steel cords that hold the tire onto the
rim.
Cold tire inflation pressure
Tire inflation pressure when your vehicle
has been sitting for at least three hours or
driven no more than one mile (1.6 km).
Curb weight
The weight of a motor vehicle with stan-
dard equipment including the maximum
capacity of fuel, oil, and coolant, and, if so
equipped, air conditioning and additional
optional equipment, but without passen-
gers and cargo.DOT (D
epartment o
f T
ransportation)
A tire branding symbol which denotes the
tire meets requirements of the
U.S. Department of Transportation.
GAWR (G
ross A
xle W
eight R
ating)
The GAWR is the maximum permissible
axle weight. The gross vehicle weight on
each axle must never exceed the GAWR for
the front and rear axle indicated on the
certification label located on the driver’s
door B-pillar.
GTW (G
ross T
railer W
eight)
The GTW is the weight of the trailer plus
the weight of all cargo, equipment, luggage
etc. loaded on the trailer.