Page 231 of 539

230 Controls in detailPower windowsOpening and closing the windows
The side windows are opened and closed
electrically. The switches for all of the side
windows are on the driver’s door. The
switches for the respective windows are
on the front passenger door and the rear
doors.
1Left rear window
2Left front window
3Right front window
4Right rear window
5Rear window override switch
(
�page 89)
Warning!
G
When closing the windows, make sure that
there is no danger of anyone being harmed
by the closing procedure.
The closing of the door windows can be im-
mediately halted by releasing the switch or,
if switch was pulled past the resistance
point and released, by either pressing or
pulling the respective switch.
The door windows are equipped with the
express-close and automatic reversal
function. If the window encounters an ob-
struction that blocks its path in a circum-
stance where you pulled the switch past the
resistance point and released it to close the
window, the automatic reversal function will
stop the window and open it slightly.
If the window encounters an obstruction
that blocks its path in a circumstance where
you are closing the window by pulling and
holding the switch, by pressing and holding
button‹on the SmartKey, by pressing
and holding the lock button (vehicles with
KEYLESS-GO*) on a door handle, or by
pressing and holding button: on the
climate control panel, the automatic rever-
sal function will not operate.
When leaving the vehicle, always remove the
SmartKey or SmartKey with KEYLESS-GO*
from the starter switch, take it with you, and
lock the vehicle. Do not leave children unat-
tended in the vehicle, or with access to an
unlocked vehicle. Unsupervised use of vehi-
cle equipment can cause an accident
and/or serious personal injury.
Page 233 of 539
�
Press switch1 to4 past the resis-
tance point and release.
The corresponding window opens com-
pletely.
Fully closing the")
232 Controls in detailPower windowsFully opening the windows
(Express-open)�
Press switch1 to4 past the resis-
tance point and release.
The corresponding window opens com-
pletely.
Fully closing the windows
(Express-close)
�
Pull switch1 to4 past the resis-
tance point and release.
The corresponding window closes com-
pletely.
Stopping windows during
Express-operation
�
Press or pull respective power window
switch again.
Synchronizing power windows
The power window must be resynchro-
nized each time�
after the battery has been
disconnected
�
if the power windows cannot be fully
opened (Express-open) or closed
(Express-close)
Synchronizing
�
Close all doors.
�
Switch on the ignition (
�page 34).
�
Pull and hold the power window
switches1 to4 until the side win-
dows are completely closed.
With the side windows completely
closed, hold the switches for approxi-
mately three seconds.
The power windows are synchronized.
Warning!
G
Driver’s door only:
If within five seconds switch is again pulled
past the resistance point and released, the
automatic reversal will not operate.
!If the upward movement of the window
is blocked during the closing proce-
dure, the window will stop and open
slightly.
Remove the obstruction, pull the re-
spective power window switch again
past the resistance point and release.
If the window still does not close when
there is no obstruction, then pull and
hold the respective power window
switch. The side window will then close
without the obstruction sensor func-
tion.
Page 259 of 539

258 Controls in detailDriving systems
Parktronic* system malfunction
If only the red distance segments illumi-
nate and an acoustic warning sounds,
there is a malfunction in the Parktronic
system. The Parktronic system will auto-
matically switch off after 20 seconds.�
Have the Parktronic system checked
by an authorized Mercedes-Benz Light
Truck Center as soon as possible.
If only the red distance segments illumi-
nate and no acoustic warning sounds, the
Parktronic system sensors are dirty or
there is an interference from other radio or
ultrasonic signals. The Parktronic system
will automatically switch off after
20 seconds.
�
Switch off the ignition (
�page 34).
�
Clean the Parktronic system sensors
(�page 377).
�
Switch on the ignition.
or
�
Check the Parktronic system operation
at another location to rule out interfer-
ence from outside radio or ultrasonic
signals.
iThe message
Parktronic on
reappears
as soon as the system senses that you
get closer to the object again, even if
you cleared the message before by
pressingèÿk or
buttonj on the multifunction
steering wheel.
iThe Parktronic system is automatically
switched on when the ignition is
switched on.
Vehicles with original equipment
Mercedes-Benz Trailer Hitch Kit:
The rear Parktronic sensor will auto-
matically disengage when towing a
trailer as soon as the electrical connec-
tion between the vehicle and the trailer
has been established.
��
Page 262 of 539

261 Controls in detail
Loading
Hooks
Four hooks located on the rear compart-
ment trim panels, two on each side.
1Hook
Use the hooks to secure light weight items.
The maximum permissible weight per hook
is 9 lbs (4 kg).
Split rear bench seat
To expand the cargo compartment, you
can fold down the left and right rear seat
backrests.
The two sections can be folded down sep-
arately to enlarge the cargo compartment.Folding the backrest forwardWarning!
G
When expanding the cargo compartment,
always fold the seat cushions fully forward
and always use the partition net when trans-
porting cargo.
Unless you are transporting cargo, the back-
rests must remain properly locked in the up-
right position.
In an accident, during hard braking or sud-
den maneuvers, loose items will be thrown
around inside the vehicle, and can cause
injury to vehicle occupants unless the items
are securely fastened in the vehicle.
Always use the cargo tie down rings
(�page 260).
!Always release the seat cushion and
fold it up before folding the seat back-
rests forward. The covering on the seat
backrest may otherwise be damaged.
When the rear bench seat is folded for-
ward, the front seats cannot be moved
to the rearmost position. Otherwise
you could damage the front seats and
the rear bench seat.
Page 268 of 539

267 Controls in detail
Loading
�
Turn mounting element2 in the cargo
rail toN.
�
Insert cargo tie-down ring1 into
mounting element2.
�
Turn mounting element2 until it en-
gages in the ‹position.
You should be able to feel the mounting
element engage in the cargo rail.Belt reel
1Belt reel
2Mounting element
3Locking button
�
Insert two mounting elements2 into a
cargo rail.
�
Turn mounting element2 in the cargo
rail toN.
�
Insert belt reel1 into mounting
element2.
�
Turn mounting element2 in the cargo
rail until it engages in the‹ posi-
tion.
Y o u s h o u l d b e a b l e t o f e e l t h e m o u n t i n g
element engage in the cargo rail.
�
Press locking button3 on the belt
reel1 and pull cargo net out in direc-
tion of arrow.
�
Place load between the cargo net and
the side wall of the cargo compart-
ment.
�
Press locking button3 on belt
reel1. With the other hand, slowly
pull net over load until it is taut.
Warning!
G
The cargo tie-down rings should be subject
to equal loads. Make sure to comply with
the information provided in the loading in-
structions (
�page 259).
iThe belt reel can be used to tighten
light-weight loads against the side wall
of the cargo compartment, thus secur-
ing them from slipping.
Page 270 of 539
269 Controls in detail
Loading
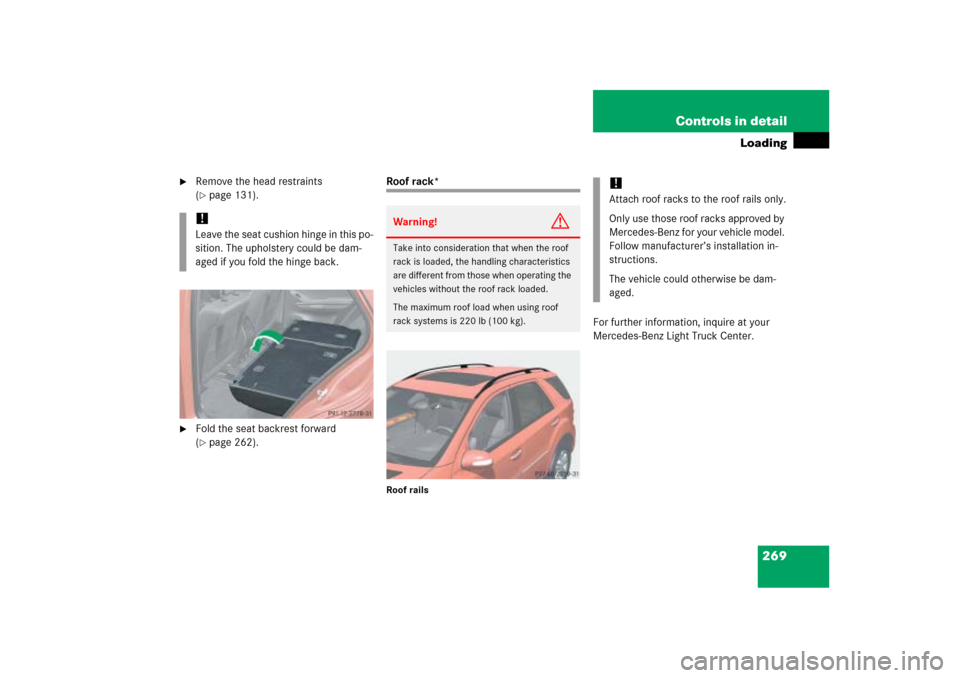
�
Remove the head restraints
(�page 131).
�
Fold the seat backrest forward
(�page 262).
Roof rack*Roof rails
For further information, inquire at your
Mercedes-Benz Light Truck Center.
!Leave the seat cushion hinge in this po-
sition. The upholstery could be dam-
aged if you fold the hinge back.
Warning!
G
Take into consideration that when the roof
rack is loaded, the handling characteristics
are different from those when operating the
vehicles without the roof rack loaded.
The maximum roof load when using roof
rack systems is 220 lb (100 kg).
!Attach roof racks to the roof rails only.
Only use those roof racks approved by
Mercedes-Benz for your vehicle model.
Follow manufacturer’s installation in-
structions.
The vehicle could otherwise be dam-
aged.
Page 271 of 539

270 Controls in detailUseful featuresStorage compartments Parcel net in front passenger footwell
A small convenience parcel net is located
in the front passenger footwell. It is for
small and light items, such as road maps,
mail, etc.Glove box
1Glove box lid release
2Glove box lid
Opening the glove box
�
Grab in recess and pull lid release1.
Glove box lid2 opens downward.
Closing the glove box
�
Push glove box lid2 up to close.
Warning!
G
To help avoid personal injury during a colli-
sion or sudden maneuver, exercise care
when storing objects in the vehicle. Put lug-
gage or cargo in the cargo compartment if
possible. Do not pile luggage or cargo higher
than the seat backs.
Always use partition net when transporting
cargo. Partition net cannot secure hard or
heavy objects.
Parcel nets cannot secure hard or heavy ob-
jects.
Keep compartment lids closed. This will help
to prevent stored objects from being thrown
about and injuring vehicle occupants during
an accident.
Warning!
G
The parcel net is intended for storing
light-weight items only.
Heavy objects, objects with sharp edges or
fragile objects may not be transported in the
parcel net.
The parcel net cannot protect transported
goods in the event of an accident.
Page 274 of 539
273 Controls in detail
Useful features
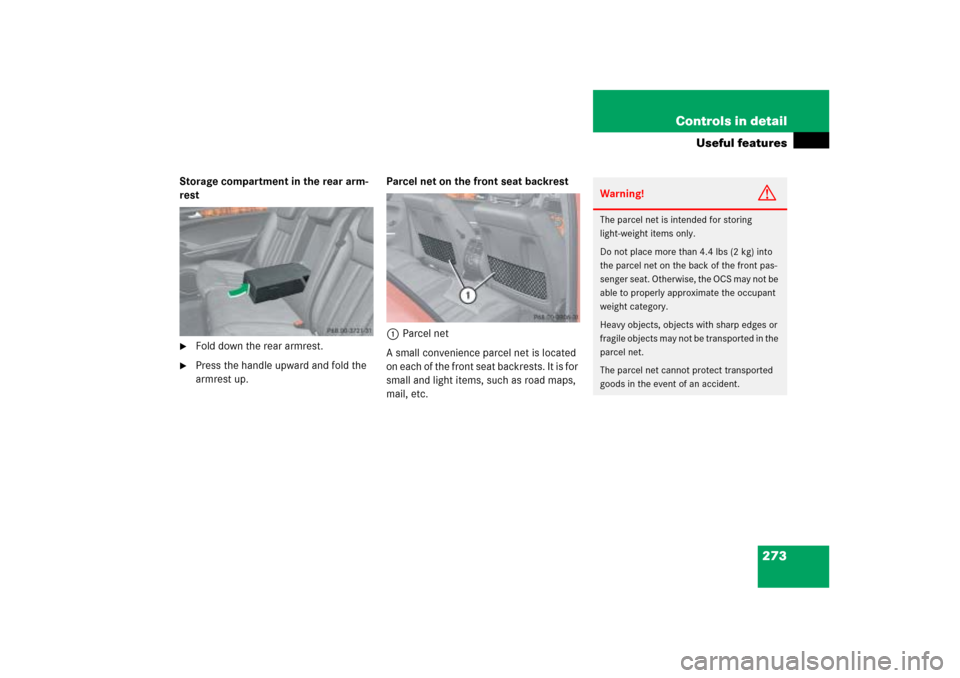
Storage compartment in the rear arm-
rest�
Fold down the rear armrest.
�
Press the handle upward and fold the
armrest up.Parcel net on the front seat backrest
1Parcel net
A small convenience parcel net is located
on each of the front seat backrests. It is for
small and light items, such as road maps,
mail, etc.
Warning!
G
The parcel net is intended for storing
light-weight items only.
Do not place more than 4.4 lbs (2 kg) into
the parcel net on the back of the front pas-
senger seat. Otherwise, the OCS may not be
able to properly approximate the occupant
weight category.
Heavy objects, objects with sharp edges or
fragile objects may not be transported in the
parcel net.
The parcel net cannot protect transported
goods in the event of an accident.