Page 409 of 539
408 Practical hintsWhat to do if …Display symbol
Display message
Possible cause
Possible solution
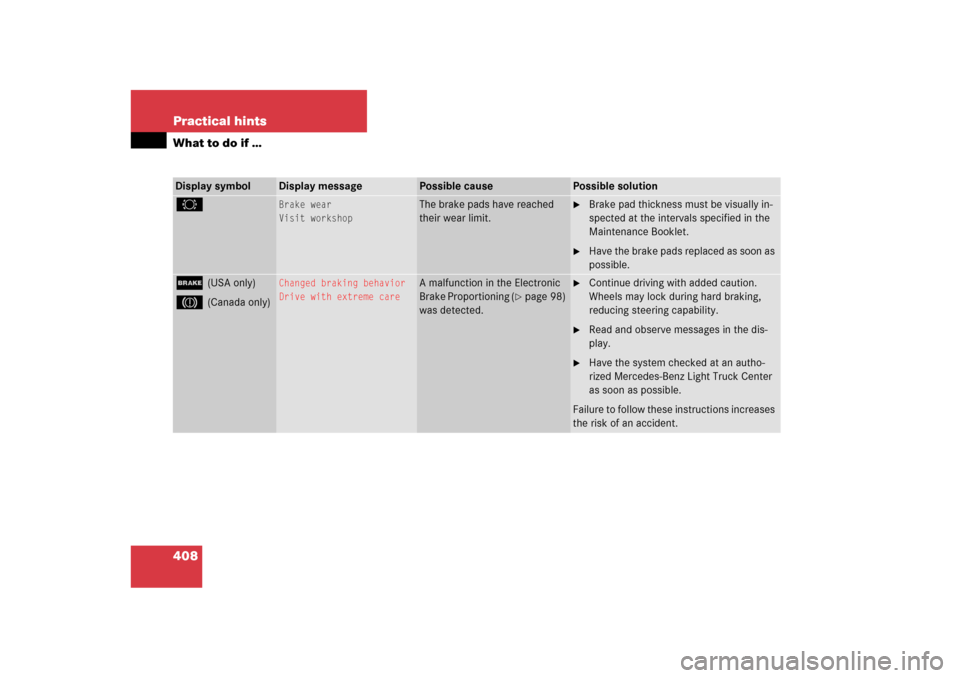
2
Brake wear
Visit workshop
The brake pads have reached
their wear limit.
�
Brake pad thickness must be visually in-
spected at the intervals specified in the
Maintenance Booklet.
�
Have the brake pads replaced as soon as
possible.
;
(USA only)
3
(Canada only)
Changed braking behavior
Drive with extreme care
A malfunction in the Electronic
Brake Proportioning (
�page 98)
was detected.
�
Continue driving with added caution.
Wheels may lock during hard braking,
reducing steering capability.
�
Read and observe messages in the dis-
play.
�
Have the system checked at an autho-
rized Mercedes-Benz Light Truck Center
as soon as possible.
Failure to follow these instructions increases
the risk of an accident.
Page 410 of 539

!
(Canada only)
Release
parking brake
You are driving with the parking
brake set.
�")
409 Practical hints
What to do if …
Display symbol
Display message
Possible cause
Possible solution
;
(USA only)
!
(Canada only)
Release
parking brake
You are driving with the parking
brake set.
�
Release the parking brake (
�page 52).
Brake fluid too low
Visit workshop
There is insufficient brake fluid
in the reservoir.
�
Risk of accident! Stop the vehicle and no-
tify an authorized Mercedes-Benz Light
Truck Center. Do not add brake fluid! This
will not solve the problem.
Warning!
G
Driving with the message
Brake fluid
too low Visit workshop
displayed can
result in an accident. Have your brake
system checked immediately. Do not add
brake fluid before checking the brake
system. Overfilling the brake fluid reservoir
can result in spilling brake fluid on hot
engine parts and the brake fluid catching
fire. You can be seriously burned.!If you find that the brake fluid in the
brake fluid reservoir has fallen to the
minimum mark or below, have the
brake system checked for brake pad
thickness and leaks.
!Brake pad thickness must be visually
inspected by a qualified technician at
the intervals specified in the
Maintenance Booklet.
Page 419 of 539

418 Practical hintsWhat to do if …Display symbol
Display messages
Possible cause
Possible solution
.
3rd brake lamp
The high mounted brake lamp is
malfunctioning. This message
will only appear if all light emit-
ting diodes have stopped work-
ing.
�
Visit an authorized Mercedes-Benz Light
Truck Center as soon as possible.
Brake lamp, left
Substitute bulb on
The left brake lamp is malfunc-
tioning. A substitute bulb is be-
ing used.
�
Visit an authorized Mercedes-Benz Light
Truck Center as soon as possible.
Brake lamp, right
Substitute bulb on
The right brake lamp is malfunc-
tioning. A substitute bulb is be-
ing used.
�
Visit an authorized Mercedes-Benz Light
Truck Center as soon as possible.
Display malfunction
Visit workshop
The display for the lamps or the
system is malfunctioning.
�
Visit an authorized Mercedes-Benz Light
Truck Center as soon as possible.
Front foglamp,
left
The left front fog lamp is mal-
functioning.
�
Replace the bulb as soon as possible.
Front foglamp,
right
The right front fog lamp is mal-
functioning.
�
Replace the bulb as soon as possible.
Rear foglamp,
left
The left rear fog lamp is malfunc-
tioning.
�
Replace the bulb as soon as possible.
Rear foglamp,
right
The right rear fog lamp is mal-
functioning.
�
Replace the bulb as soon as possible.
Page 432 of 539

431 Practical hints
Where will I find ...?
Trunk area shown with spare wheel
removed1Wheel bolt wrench with screwdriver
2Vehicle jack
3Collapsible wheel chock
4Spare fuses, fuse chart, fuse extractor
5Towing eye bolt
6Alignment bolt
7Wheel bolts for 17" light alloy rims or
Minispare wheel1Wheel bolt wrench
2Screwdriver
3Interchangeable slot
Screwdriver2 is placed inside the handle
of wheelbolt wrench1.Vehicle jack
iVehicles with scissors-type jack see
separate instructions.
!To prevent damage, always disengage
the elastic strap and lower the cargo
compartment floor (
�page 430) be-
fore closing the tailgate.
Warning!
G
The jack is designed exclusively for jacking
up the vehicle at the jack take-up brackets
built into both sides of the vehicle. To help
avoid personal injury, use the jack only to lift
the vehicle during a wheel change. Never
get beneath the vehicle while it is supported
by the jack. Keep hands and feet away from
the area under the lifted vehicle. Always
firmly set parking brake and block wheels
before raising vehicle with jack.
Do not disengage parking brake while the
vehicle is raised. Be certain that the jack is
always vertical (plumb line) when in use, es-
pecially on hills. Always try to use the jack
on level surface.
Make sure that the jack arm is fully seated
in the jack take-up bracket. Always lower
the vehicle onto sufficient capacity jack-
stands before working under the vehicle.
Page 444 of 539

443 Practical hints
Replacing bulbs
�Replacing bulbs
Bulbs
Safe vehicle operation depends on proper
exterior lighting and signaling. It is there-
fore essential that all bulbs and lamp as-
semblies are in good working order at all
times.
Correct headlamp adjustment is extremely
important. Have headlamps checked and
readjusted at regular intervals. See an
authorized Mercedes-Benz Light Truck
Center for headlamp adjustment.Front lamps
iSubstitute bulbs will be brought into
use when the following lamps malfunc-
tion:�
Brake lamps
�
Parking lamps
�
Turn signal lamps
�
Tail lamps
Observe the messages in the multi-
function display (
�page 418).
iIf the headlamps or front fog lamps are
fogged up on the inside as a result of
high humidity, driving the vehicle a dis-
tance with the lights on should clear up
the fogging.
Lamp
Type
1
Parking and standing
lamp
W5W
2
High beam/high
beam flasher lamp
H7 (55 W)
3
Low beam
1
1Vehicles with Bi-Xenon headlamps*: Do not re-
place the Bi-Xenon bulbs yourself. See your autho-
rized Mercedes-Benz Light Truck Center.
H7 (55 W)
Bi-Xenon*:
D2S-35 W
4
Additional turn signal
lamp
LED
5
Side marker lamp
WY 5 W
6
Turn signal lamp
3457 AK S-8
(30/2.2 cp
bulb)
7
Front fog lamp
H11 (55 W)
Page 445 of 539

444 Practical hintsReplacing bulbsRear lamps Notes on bulb replacement
�
Only use 12 volt bulbs of the same type
and with the specified watt rating.
�
Switch lights off before changing a bulb
to prevent short circuits.
�
Always use a clean lint-free cloth when
handling bulbs.
�
Your hands should be dry and free of oil
and grease.
�
If the newly installed bulb does not
come on, visit an authorized
Mercedes-Benz Light Truck Center.
Lamp
Type
8
High mounted brake
lamp
LED
9
Brake lamp
P21W
a
Backup lamp
P21W
b
Turn signal lamp
PY 21 W
c
Side marker lamp
P21/4W
d
Tail, parking, standing
lamp, rear fog lamp
(only driver’s side)
P21/4W
e
License plate lamps
C5W
Warning!
G
Bulbs and bulb sockets can be very hot.
Allow the lamp to cool down before chang-
ing a bulb.
Keep bulbs out of reach of children.
Halogen lamps contain pressurized gas.
A bulb can explode if you:�
touch or move it when hot
�
drop the bulb
�
scratch the bulb
Wear eye and hand protection.
Because of high voltage in Xenon lamps, it is
dangerous to replace the bulb or repair the
lamp and its components. We recommend
that you have such work done by a qualified
technician.
Page 446 of 539
445 Practical hints
Replacing bulbs
Have the LEDs and bulbs for the following
lamps replaced by an authorized
Mercedes-Benz Light Truck Center:�
Additional turn signals in the exterior
rear view mirrors
�
Bi-Xenon lamps*
�
Front fog lamps (vehicles with sport
package*)
�
High mounted brake lamp
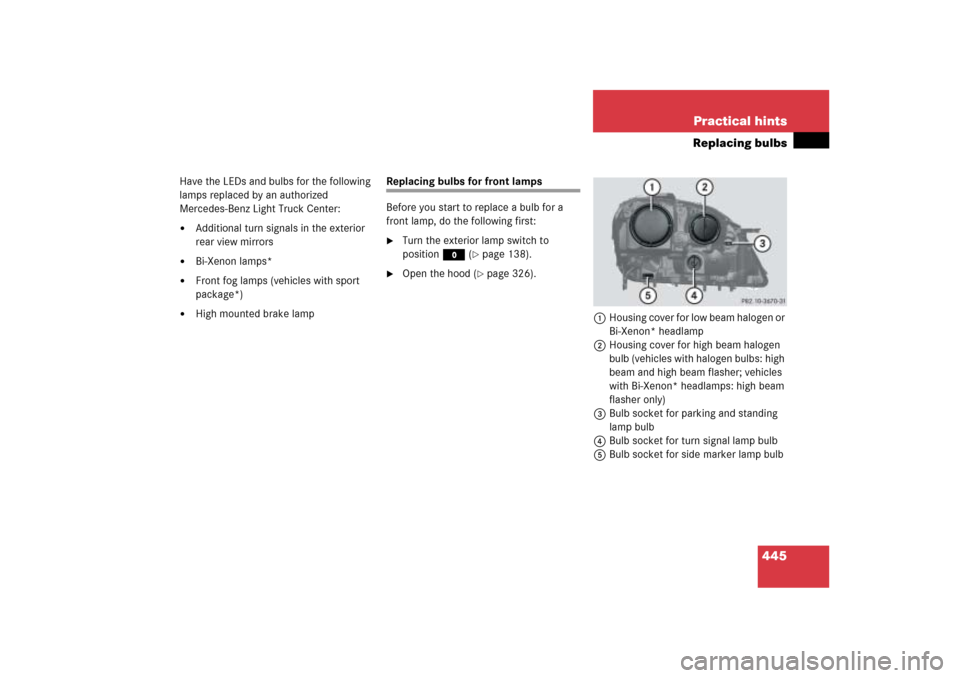
Replacing bulbs for front lamps
Before you start to replace a bulb for a
front lamp, do the following first:�
Turn the exterior lamp switch to
positionM (
�page 138).
�
Open the hood (
�page 326).
1Housing cover for low beam halogen or
Bi-Xenon* headlamp
2Housing cover for high beam halogen
bulb (vehicles with halogen bulbs: high
beam and high beam flasher; vehicles
with Bi-Xenon* headlamps: high beam
flasher only)
3Bulb socket for parking and standing
lamp bulb
4Bulb socket for turn signal lamp bulb
5Bulb socket for side marker lamp bulb
Page 457 of 539

456 Practical hintsFlat tire
Preparing the vehicle�
Park the vehicle as far as possible from
moving traffic on a hard surface.
�
Turn on the hazard warning flashers.
�
Turn the steering wheel so that the
front wheels are in a straight ahead po-
sition.
�
Set the parking brake.
�
Shift automatic transmission to park
positionP.
Vehicles with Air suspension package*:
�
Do not open or close a door or tailgate
while mounting the spare wheel.
Vehicles with SmartKey:
�
Turn off the engine (
�page 34).
�
Remove the SmartKey from the starter
switch.Vehicles with KEYLESS-GO*:
�
Turn off the engine by pressing the
KEYLESS-GO* button once
(�page 63).
�
Open the driver’s door (this puts the
starter switch in position0, same as
with the SmartKey removed from the
starter switch). The driver’s door then
can be closed again.
�
Have any passenger exit the vehicle at
a safe distance from the roadway.
Warning!
G
The dimensions of the Minispare wheel are
different from those of the road wheels. As
a result, the vehicle handling characteristics
change when driving with a mounted
Minispare wheel. Adapt your driving style
accordingly.
The Minispare wheel is for temporary use
only. When driving with a Minispare wheel
mounted, ensure proper tire pressure and
do not exceed a vehicle speed of
50 mph (80 km/h).
Drive to the nearest Mercedes-Benz Light
Truck Center as soon as possible to have the
Minispare wheel replaced with a regular
road wheel.
Never operate the vehicle with more than
one spare wheel mounted.
Do not switch off the ESP
® when a
Minispare wheel is mounted.
iOpen doors only when conditions are
safe to do so.