Page 117 of 539
116 Controls in detailLocking and unlocking
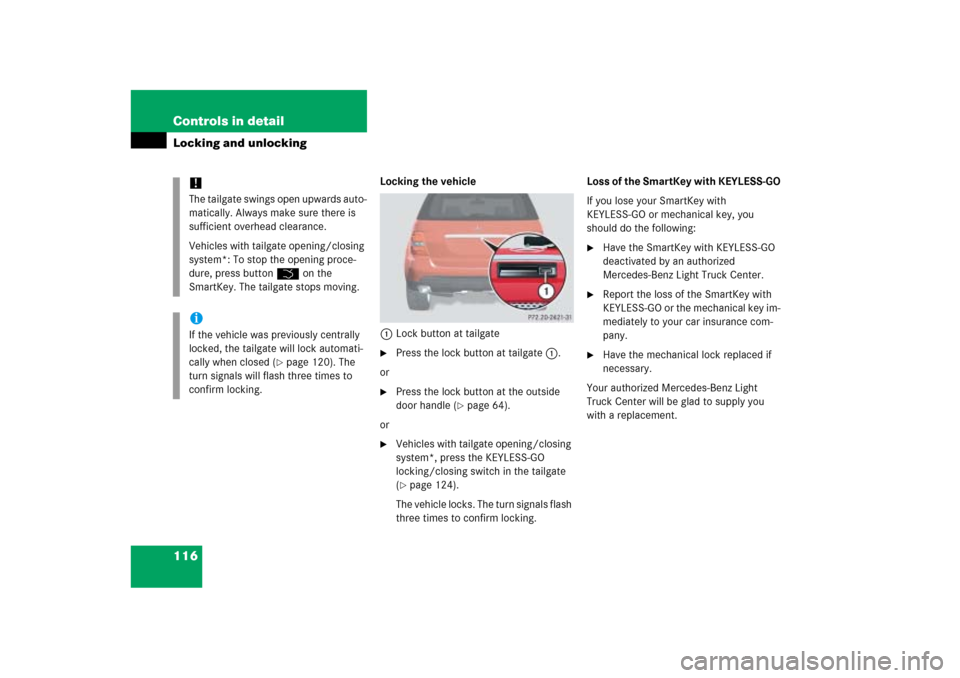
Locking the vehicle
1Lock button at tailgate�
Press the lock button at tailgate1.
or
�
Press the lock button at the outside
door handle (
�page 64).
or
�
Vehicles with tailgate opening/closing
system*, press the KEYLESS-GO
locking/closing switch in the tailgate
(�page 124).
The vehicle locks. The turn signals flash
three times to confirm locking.Loss of the SmartKey with KEYLESS-GO
If you lose your SmartKey with
KEYLESS-GO or mechanical key, you
should do the following:
�
Have the SmartKey with KEYLESS-GO
deactivated by an authorized
Mercedes-Benz Light Truck Center.
�
Report the loss of the SmartKey with
KEYLESS-GO or the mechanical key im-
mediately to your car insurance com-
pany.
�
Have the mechanical lock replaced if
necessary.
Your authorized Mercedes-Benz Light
Truck Center will be glad to supply you
with a replacement.
!The tailgate swings open upwards auto-
matically. Always make sure there is
sufficient overhead clearance.
Vehicles with tailgate opening/closing
system*: To stop the opening proce-
dure, press buttonŠ on the
SmartKey. The tailgate stops moving.iIf the vehicle was previously centrally
locked, the tailgate will lock automati-
cally when closed (
�page 120). The
turn signals will flash three times to
confirm locking.
Page 119 of 539

118 Controls in detailLocking and unlockingOpening the tailgate
Opening the tailgate from the outside
A minimum height clearance of 7 ft
(2.15 m) is required to open the tailgate.
The handle is located above the rear
license plate recess.
Vehicles without KEYLESS-GO*:
The vehicle must be unlocked.�
Pull on the handle.
The tailgate opens.The tailgate can also be opened using the
SmartKey (
�page 106).Opening the tailgate from the inside
electrically*
You can open the tailgate from the inside if
the vehicle is stationary.
A minimum height clearance of 7 ft
(2.15 m) is required to open the tailgate.
The switch is located on the door control
panel.
1Remote tailgate switch with indicator
lamp
!The tailgate swings open upwards auto-
matically. Always make sure there is
sufficient overhead clearance.
Vehicles with tailgate opening/closing
system*: To stop the opening proce-
dure, press buttonŠ on the
SmartKey. The tailgate stops moving.iIf the vehicle was previously centrally
locked, the tailgate will lock automati-
cally after closing it (
�page 120). The
turn signals will flash three times to
confirm locking.
Page 120 of 539

119 Controls in detail
Locking and unlocking
�
Pull remote tailgate switch1 until
tailgate begins to open.
The tailgate opens. The indicator lamp
in the remote tailgate switch comes on
and remains lit until the tailgate is
closed. While the tailgate is opening an
acoustic signal sounds.Limiting opening height of tailgate*
Vehicles with tailgate opening/closing
system*:
The tailgate opening height can be limited
when transporting goods on a roof rack
(e.g. presence of an MB sport luggage con-
tainer*). When activated, the tailgate
opens to approximately 6.4 ft (1.95 m).
�
Activate the limiting opening height of
tailgate using the control system
(�page 173).
Warning!
G
Maintain sight of the area around the rear of
the vehicle while operating the tailgate with
the door-mounted remote tailgate switch or
with the Šbutton on the SmartKey or
SmartKey with KEYLESS-GO*. Monitor the
opening procedure carefully to make sure
no one is in danger of being injured.
To interrupt the opening procedure, press or
pull the door-mounted remote tailgate
switch or press the Šbutton on the
SmartKey or SmartKey with KEYLESS-GO*.
!The tailgate swings open upwards auto-
matically. Always make sure there is
sufficient overhead clearance. To stop
the opening procedure, press or pull re-
mote tailgate switch1 or press the
Šbutton on the SmartKey or
SmartKey with KEYLESS-GO*. The
tailgate stops moving.iVehicles with tailgate opening/closing
system*:
The tailgate can also be opened using
the buttonŠ on the SmartKey or
SmartKey with KEYLESS-GO*.
Page 137 of 539
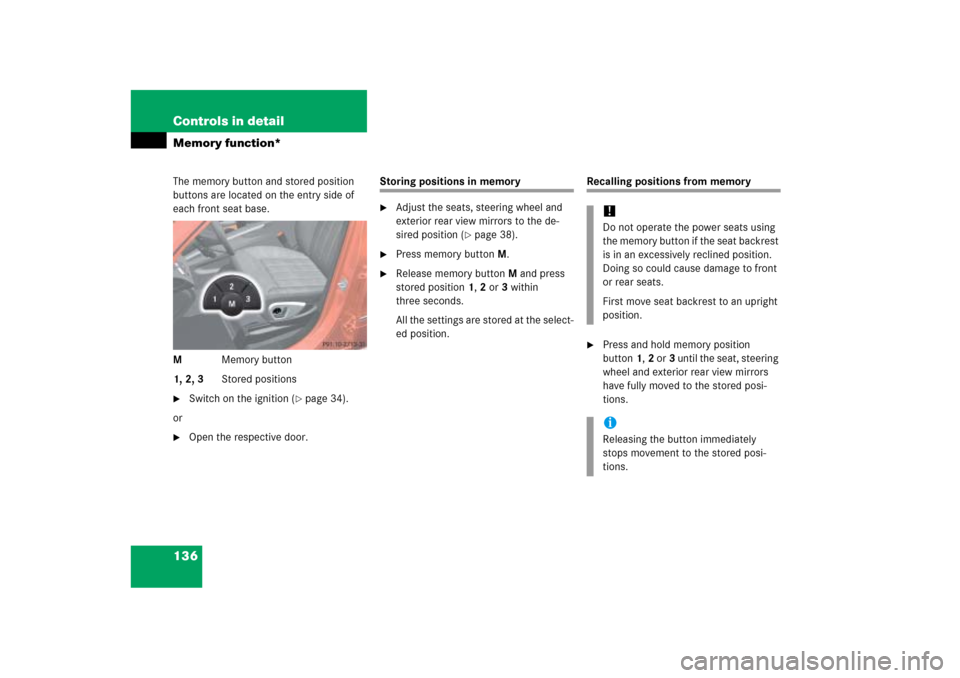
136 Controls in detailMemory function*The memory button and stored position
buttons are located on the entry side of
each front seat base.
MMemory button
1, 2, 3Stored positions�
Switch on the ignition (
�page 34).
or
�
Open the respective door.
Storing positions in memory�
Adjust the seats, steering wheel and
exterior rear view mirrors to the de-
sired position (
�page 38).
�
Press memory buttonM.
�
Release memory buttonM and press
stored position1,2 or3 within
three seconds.
All the settings are stored at the select-
ed position.
Recalling positions from memory�
Press and hold memory position
button1,2 or3 until the seat, steering
wheel and exterior rear view mirrors
have fully moved to the stored posi-
tions.!Do not operate the power seats using
the memory button if the seat backrest
is in an excessively reclined position.
Doing so could cause damage to front
or rear seats.
First move seat backrest to an upright
position.iReleasing the button immediately
stops movement to the stored posi-
tions.
Page 149 of 539
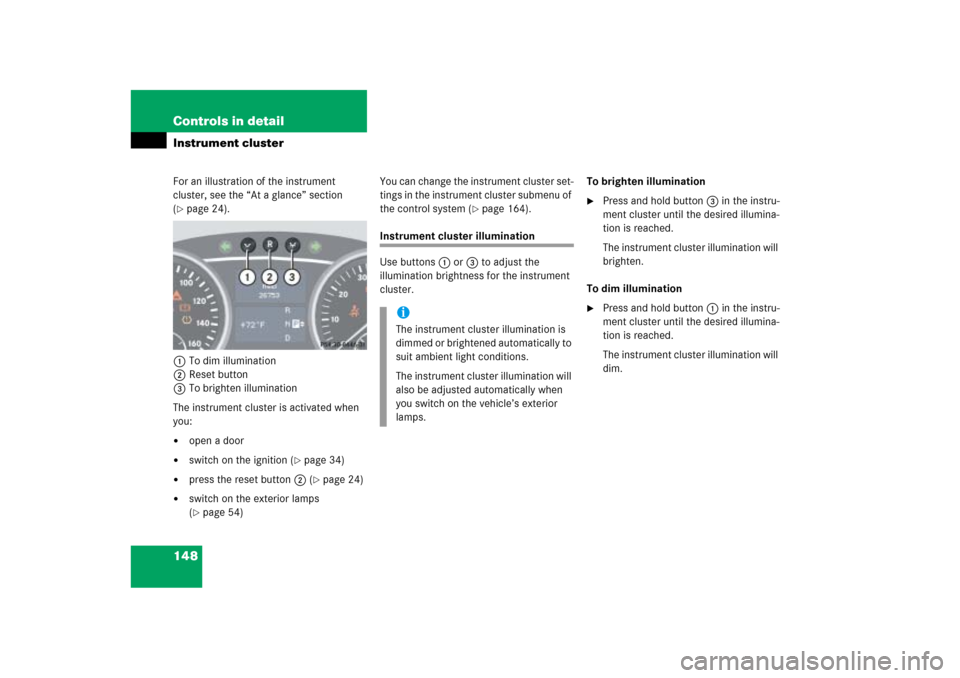
148 Controls in detailInstrument clusterFor an illustration of the instrument
cluster, see the “At a glance” section
(�page 24).
1To dim illumination
2Reset button
3To brighten illumination
The instrument cluster is activated when
you:
�
open a door
�
switch on the ignition (
�page 34)
�
press the reset button2 (
�page 24)
�
switch on the exterior lamps
(�page 54)You can change the instrument cluster set-
tings in the instrument cluster submenu of
the control system (
�page 164).
Instrument cluster illumination
Use buttons1 or3 to adjust the
illumination brightness for the instrument
cluster.To brighten illumination
�
Press and hold button3 in the instru-
ment cluster until the desired illumina-
tion is reached.
The instrument cluster illumination will
brighten.
To dim illumination
�
Press and hold button1 in the instru-
ment cluster until the desired illumina-
tion is reached.
The instrument cluster illumination will
dim.
iThe instrument cluster illumination is
dimmed or brightened automatically to
suit ambient light conditions.
The instrument cluster illumination will
also be adjusted automatically when
you switch on the vehicle’s exterior
lamps.
Page 152 of 539
151 Controls in detail
Control system
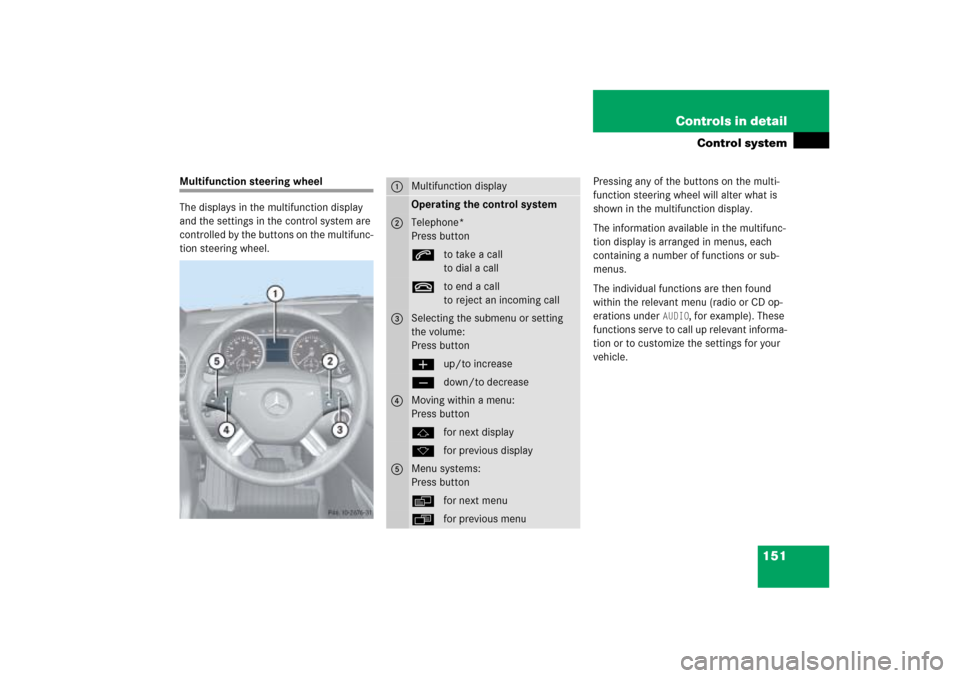
Multifunction steering wheel
The displays in the multifunction display
and the settings in the control system are
controlled by the buttons on the multifunc-
tion steering wheel.Pressing any of the buttons on the multi-
function steering wheel will alter what is
shown in the multifunction display.
The information available in the multifunc-
tion display is arranged in menus, each
containing a number of functions or sub-
menus.
The individual functions are then found
within the relevant menu (radio or CD op-
erations under
AUDIO
, for example). These
functions serve to call up relevant informa-
tion or to customize the settings for your
vehicle.
1
Multifunction displayOperating the control system
2
Telephone*
Press buttonsto take a call
to dial a calltto end a call
to reject an incoming call
3
Selecting the submenu or setting
the volume:
Press buttonæup/to increaseçdown/to decrease
4
Moving within a menu:
Press buttonjfor next displaykfor previous display
5
Menu systems:
Press buttonèfor next menuÿfor previous menu
Page 180 of 539
179 Controls in detail
Control system
You can use the functions in the
TEL
menu
to operate your telephone, provided it is
connected to a hands-free system and
switched on.
�
Switch on the telephone and Modular
COMAND system.
�
Press buttonÿ orè on the
steering wheel repeatedly until you see
the
TEL
menu in the display.Which messages will appear in the display
field depends on whether your telephone is
switched on or off:
�
If the telephone is off, the message in
the multifunction display is:
PHONE OFF
.
�
If the telephone is on:
The telephone will then search for a
network. During this time the display is
empty.
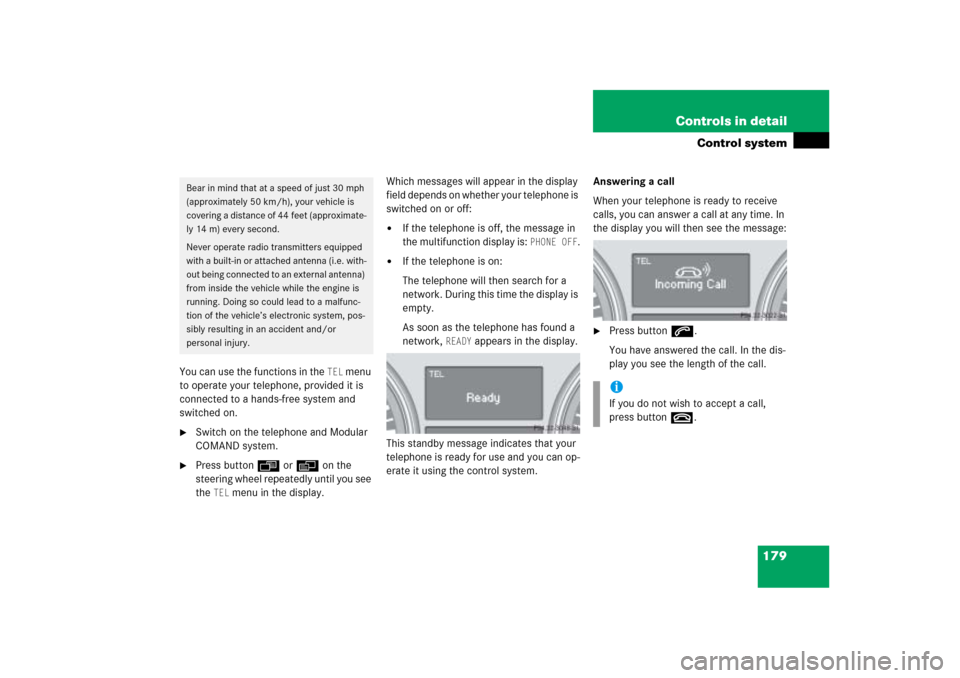
As soon as the telephone has found a
network,
READY
appears in the display.
This standby message indicates that your
telephone is ready for use and you can op-
erate it using the control system.Answering a call
When your telephone is ready to receive
calls, you can answer a call at any time. In
the display you will then see the message:
�
Press buttons.
You have answered the call. In the dis-
play you see the length of the call.
Bear in mind that at a speed of just 30 mph
(approximately 50 km/h), your vehicle is
covering a distance of 44 feet (approximate-
ly 14 m) every second.
Never operate radio transmitters equipped
with a built-in or attached antenna (i.e. with-
out being connected to an external antenna)
from inside the vehicle while the engine is
running. Doing so could lead to a malfunc-
tion of the vehicle’s electronic system, pos-
sibly resulting in an accident and/or
personal injury.
iIf you do not wish to accept a call,
press buttont.
Page 181 of 539
180 Controls in detailControl systemEnding a call�
Press buttont.
You have ended the call. In the display
you will again see the standby mes-
sage.
Dialing a number from the phone book
If your telephone is ready to receive calls,
you may select and dial a number from the
phone book at any time.
�
Press buttonÿ orè repeatedly
until you see the
TEL
menu in the dis-
play.
�
Press buttonj ork.
The control system reads the phone
book which is stored in the telephone.
This may take up to four minutes. In the
display you will see the message Please wait
.
When the message
Please wait
disap-
pears, the phone book has been load-
ed.
�
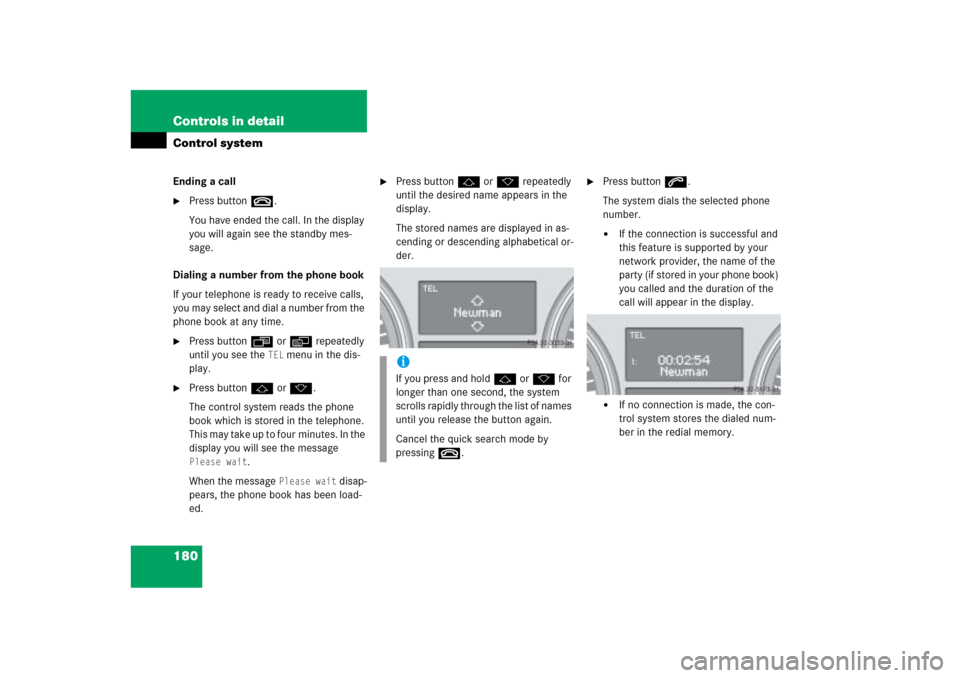
Press buttonj ork repeatedly
until the desired name appears in the
display.
The stored names are displayed in as-
cending or descending alphabetical or-
der.
�
Press buttons.
The system dials the selected phone
number.�
If the connection is successful and
this feature is supported by your
network provider, the name of the
party (if stored in your phone book)
you called and the duration of the
call will appear in the display.
�
If no connection is made, the con-
trol system stores the dialed num-
ber in the redial memory.
iIf you press and holdj ork for
longer than one second, the system
scrolls rapidly through the list of names
until you release the button again.
Cancel the quick search mode by
pressingt.