Page 138 of 417
137 Controls in detail
Control system
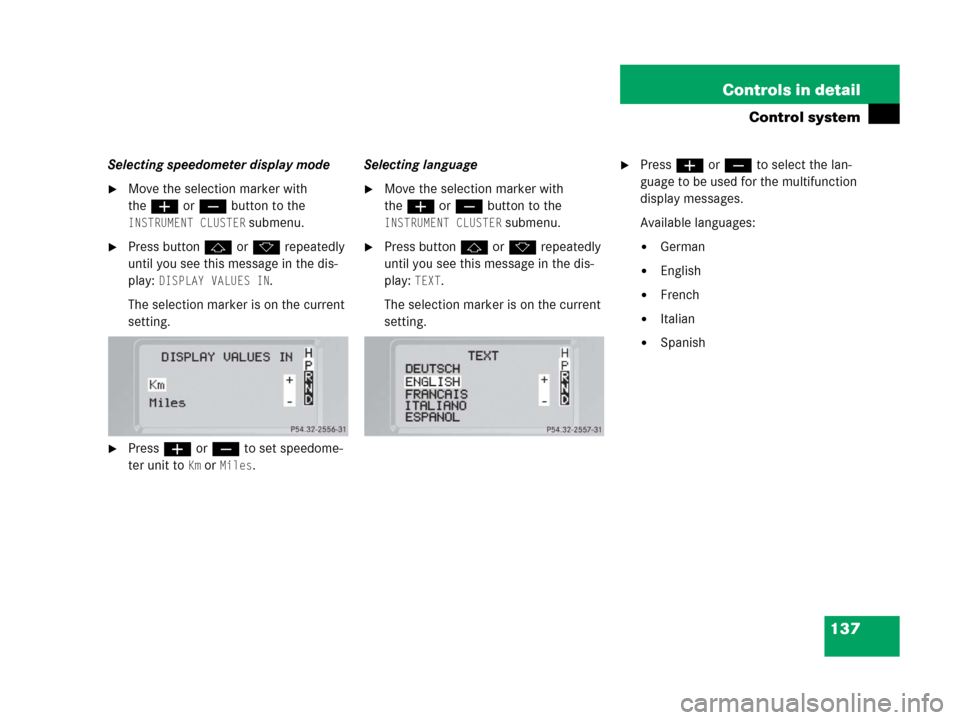
Selecting speedometer display mode
�Move the selection marker with
theæ orç button to the
INSTRUMENT CLUSTER submenu.
�Press buttonj ork repeatedly
until you see this message in the dis-
play:
DISPLAY VALUES IN.
The selection marker is on the current
setting.
�Press æ or ç to set speedome-
ter unit to
Km or Miles.Selecting language
�Move the selection marker with
theæ orç button to the
INSTRUMENT CLUSTER submenu.
�Press buttonj ork repeatedly
until you see this message in the dis-
play:
TEXT.
The selection marker is on the current
setting.
�Pressæ orç to select the lan-
guage to be used for the multifunction
display messages.
Available languages:
�German
�English
�French
�Italian
�Spanish
Page 139 of 417

�Move the selection marker with
theæ orç button to the
INSTRUMENT CLUSTER submenu.
�Press buttonj o")
138 Controls in detail
Control system
Selecting display (speed display or out-
side temperature)
�Move the selection marker with
theæ orç button to the
INSTRUMENT CLUSTER submenu.
�Press buttonj ork repeatedly
until you see this message in the dis-
play:
SELECT DISPLAY.
The selection marker is on the current
setting.
�Pressæ orç to select the dis-
play permanently shown in the multi-
function display.Lighting submenu
Access the
LIGHTING submenu via the
SETTINGS menu. Use the LIGHTING sub-
menu to change the lamp and lighting set-
tings on your vehicle. The following
functions are available:Setting daytime running lamp mode
(USA only)
�Move the selection marker with
theæ orç button to the
LIGHTING submenu.
�Press buttonj ork repeatedly
until you see this message in the dis-
play:
LIGHT CIRCUIT HEADLIGHT MODE.
FunctionPage
Setting daytime running lamp
mode (USA only)138
Setting locator lighting139
Setting night security
illumination140
Setting interior lighting delayed
shut-off141
i
This function is not available in coun-
tries where the daytime running lamp
mode is mandatory and therefore in a
constant mode.
Page 147 of 417

146 Controls in detail
Control system
Resetting fuel consumption statistics
�Press buttonÿ orè repeatedly
until you see the first function of the
Trip computer menu.
�Press buttonj ork repeatedly
until you see the reading that you want
to reset in the display.
�Press and hold the reset button in the
instrument cluster (
�page 120) until
the value is reset to
0.Calling up range (distance to empty)
�Press buttonÿ orè repeatedly
until you see the first function of the
Trip computer menu.
�Press buttonj ork repeatedly
until you see this message in the dis-
play:
RANGE.
In the display you will see the calculat-
ed range based on the current fuel tank
level.
TEL menui
All statistics stored since the last en-
gine start will be reset approximately
four hours after the SmartKey in the
starter switch is turned to position0 or
removed from the starter switch.
Resetting will not occur if you turn the
SmartKey back to position1or2 with-
in this time period.
Warning!G
A driver’s attention to the road and traffic
conditions must always be his/her primary
focus when driving. For your safety and the
safety of others, we recommend that you
pull over to a safe location and stop before
placing or taking a telephone call. If you
choose to use the telephone while driving,
please use the hands-free device and only
use the telephone when weather, road and
traffic conditions permit.
Some jurisdictions prohibit the driver from
using a cellular telephone while driving a ve-
hicle.
Bear in mind that at a speed of just 30 mph
(approximately 50 km/h), your vehicle is
covering a distance of 44 feet
(approximately 14 m) every second.
��
Page 210 of 417
,
and the reserve key is not handy:
�Contact the Mercede")
209 Controls in detail
Useful features
Remote door unlock
In case you have locked your vehicle unin-
tentionally (e.g. SmartKey inside vehicle),
and the reserve key is not handy:
�Contact the Mercedes-Benz Response
Center at 1-800-756-9018 (in the USA)
or 1-888-923-8367 (in Canada).
You will be asked to provide your pass-
word which you provided when you
completed the subscriber agreement.
�Then return to your vehicle and press
the tailgate lock for minimum of
20 seconds until the SOS button is
flashing.
The message
EMERGENCY CALL –
CALL CONNECTED
appears in the multi-
function display.
As an alternative, you may unlock the vehi-
cle via Internet using the ID and password
sent to you shortly after the completion of
your acquaintance call.
!
If the indicator lamp continues to flash
or the system does not reset, contact
the Response Center at
1-800-756-9018 (in the USA) or
1-888-923-8367 (in Canada), or
Mercedes-Benz Customer Assistance
at 1-800-FOR-MERCedes
(1-800-367-6372) in the USA or
Customer Service at 1-800-387-0100
in Canada.
i
When a Tele Aid call has been initiated,
the COMAND system audio is muted
and the selected mode (radio or CD)
pauses. The optional cellular phone (if
installed) switches off. If you must use
this phone, the vehicle must be parked.
Disconnect the coiled cord and place
the call. The navigation system (if en-
gaged) will continue to run. The display
in the instrument cluster is available for
use and spoken commands are only
available by pressing the RPT button on
the COMAND unit. A pop-up window
will appear in the COMAND display to
indicate that a Tele Aid call is in
progress.
Page 217 of 417
216 Controls in detail
Useful features
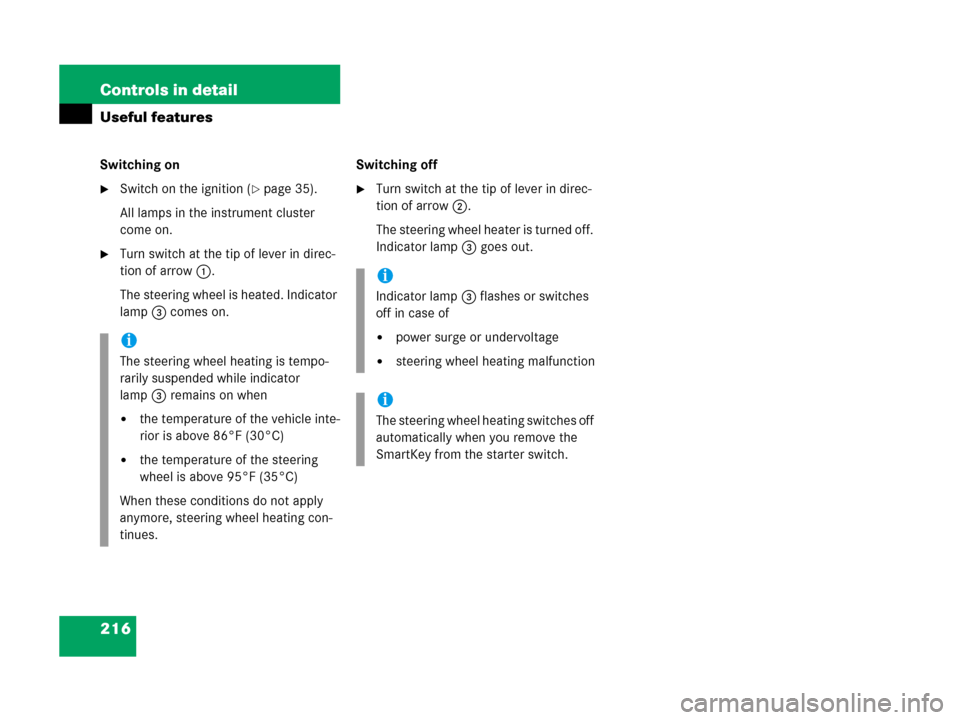
Switching on
�Switch on the ignition (�page 35).
All lamps in the instrument cluster
come on.
�Turn switch at the tip of lever in direc-
tion of arrow1.
The steering wheel is heated. Indicator
lamp3 comes on.Switching off
�Turn switch at the tip of lever in direc-
tion of arrow2.
The steering wheel heater is turned off.
Indicator lamp3 goes out.
i
The steering wheel heating is tempo-
rarily suspended while indicator
lamp3 remains on when
�the temperature of the vehicle inte-
rior is above 86°F (30°C)
�the temperature of the steering
wheel is above 95°F (35°C)
When these conditions do not apply
anymore, steering wheel heating con-
tinues.
i
Indicator lamp3 flashes or switches
off in case of
�power surge or undervoltage
�steering wheel heating malfunction
i
The steering wheel heating switches off
automatically when you remove the
SmartKey from the starter switch.
Page 247 of 417

246 Operation
Engine compartment
Checking engine oil level with the oil
dipstick
When checking the oil level the vehicle
must
�be parked on level ground
�be at normal operating temperature
�have been stationary for at least
5 minutes with the engine turned offTo check the engine oil level with the oil
dipstick, do the following:
�Open the hood (�page 242).
�Pull out oil dipstick1 (�page 247).
�Wipe oil dipstick1 clean.
�Fully insert oil dipstick1 into the
dipstick guide tube.
�Pull out oil dipstick1 again after
approximately three seconds to obtain
accurate reading.
Oil dipstick
The oil level is correct when it is between
the lower (min) and upper (max) mark of
the oil dipstick.
�If necessary, add engine oil.
For adding engine oil, see (
�page 247).
For more information on engine oil, see the
“Technical data” section (
�page 376) and
(
�page 377).
For more information on messages in the
multifunction display concerning engine
oil, see the “Practical hints” section
(
�page 311).
i
The engine oil level can be checked by
either the oil dipstick or via the multi-
function display in the instrument
cluster (
�page 244). The amount of
engine oil needed is shown more
precisely in the multifunction display.
i
The filling quantity between the upper
and lower marks on the oil dipstick is
approximately 2.1 US qt. (2.0 l).
Page 288 of 417

287 Operation
Vehicle care
Light alloy wheels
Mercedes-Benz approved Wheel Care
should be used for regular cleaning of the
light alloy wheels.
If possible, clean wheels once a week with
Mercedes-Benz approved Wheel Care, us-
ing a soft bristle brush and a strong spray
of water.
Follow instructions on container.Instrument cluster
Use a gentle dishwashing detergent or
mild detergent for delicate fabrics as a
washing solution. Wipe with a cloth moist-
ened in lukewarm solution. Do not use
scouring agents.
Steering wheel and gear selector lever
Wipe with a damp cloth and dry thoroughly
or clean with Mercedes-Benz approved
Leather Care.
Cup holder
Use a gentle dishwashing detergent or
mild detergent for delicate fabrics as a
washing solution. Wipe with a cloth moist-
ened in lukewarm solution. Do not use
scouring agents.Hard plastic trim items
Pour Mercedes-Benz approved Interior
Care onto soft lint-free cloth and apply
with light pressure.
Headliner
Clean with soft bristle brush, or use a
dry-shampoo cleaner in case of excessive
dirt.
Seat belts
The webbing must not be treated with
chemical cleaning agents. Use only clear,
lukewarm water and soap. Do not dry the
webbing at temperatures above 176°F
(80°C) or in direct sunlight.
!
Only use acid-free cleaning materials.
Acid may cause corrosion or damage
the clear coat.
Warning!G
Do not bleach or dye seat belts as this may
severely weaken them. In a crash they may
not be able to provide adequate protection.
Page 291 of 417

290 Practical hints
What to do if …
Lamps in instrument clusterGeneral information:
If any of the following lamps in the instru-
ment cluster fails to come on during thebulb self-check when switching on ignition,
have the respective bulb checked and re-
placed if necessary.
ProblemPossible causeSuggested solution
-The yellow ABS indicator lamp
comes on while driving.You engaged the differential locks. The ABS,
ESP, BAS, EBB and 4-ETS are switched off. �The driving systems will switch on
again after the differential locks have
been disengaged.
The ABS has detected a malfunction and has
switched off. The ESP, BAS, EBB and 4-ETS
are also switched off (see messages in dis-
play).
If the ABS control unit is malfunctioning, oth-
er systems such as the navigation system or
Rear Parking Assist* may also malfunction.
The brake system is still functioning normally
but without the ABS available.�Continue driving with added caution.
Wheels will lock during hard braking
reducing steering capability.
�Read and observe messages in the
multifunction display (
�page 300).
�Have the system checked at an autho-
rized Mercedes-Benz Light Truck
Center as soon as possible.
Failure to follow these instructions in-
creases the risk of an accident.