Page 127 of 521

126 Controls in detailLocking and unlockingClosing the trunk and locking the vehi-
cle from the outside (vehicles with
KEYLESS-GO*)
In vehicles with trunk opening/closing sys-
tem* and KEYLESS-GO, you can close the
trunk and lock the vehicle simultaneously
from the outside using the KEYLESS-GO
locking/closing switch.
1KEYLESS-GO locking/closing switch
You can close the trunk and lock the vehi-
cle simultaneously.�
Make sure you have the SmartKey with
KEYLESS-GO with you.
�
Press switch1 briefly.�
The trunk closes.
�
All turn signal lamps flash three
times.
�
The locking knobs in the doors
move down.
�
The anti-theft alarm system is
armed.
If the trunk lid comes into contact with an
object while closing (e.g. luggage that has
been piled too high), the closing procedure
is stopped and the trunk reopens slightly.
iYou can also close the trunk by hand.iTo prevent a possible inadvertent lock-
out, the trunk will open automatically if
a SmartKey with KEYLESS-GO is recog-
nized inside the vehicle or in the trunk.
Warning!
G
Monitor the closing procedure carefully to
make sure no one is in danger of being in-
jured. To prevent possible personal injury,
always keep hands and fingers away from
the trunk opening when closing the trunk.
Be especially careful when small children
are around. To stop the closing procedure,
do one of the following: �
press KEYLESS-GO locking/closing
switch1 (
�page 126)
�
press trunk closing switch (
�page 124)
�
press button Š on the SmartKey with
KEYLESS-GO
�
press the remote trunk switch (on the
driver’s door) (
�page 120)
Page 128 of 521

127 Controls in detail
Locking and unlocking
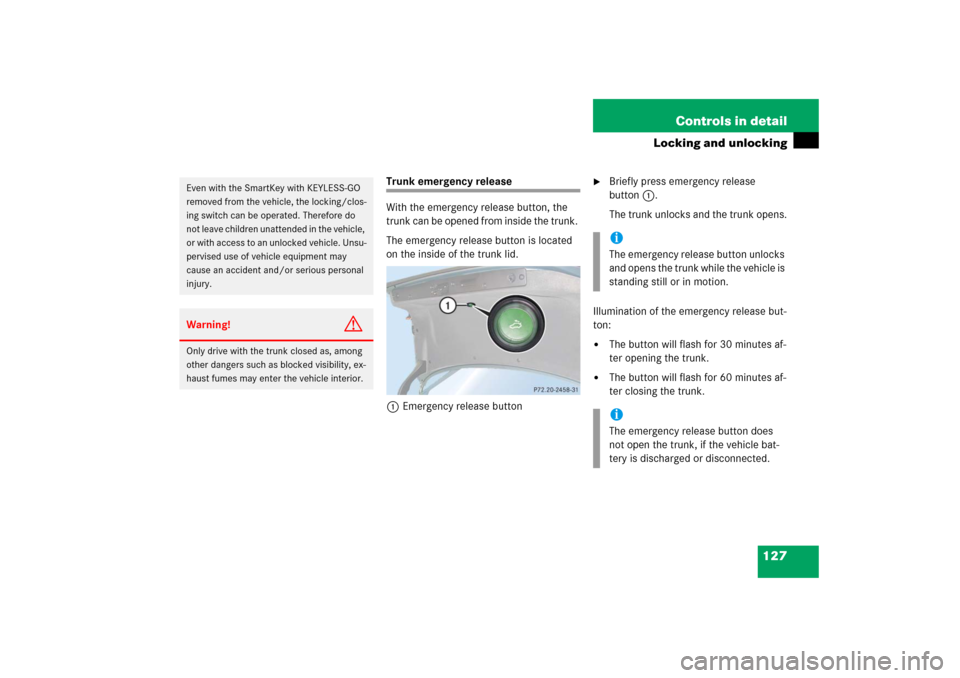
Trunk emergency release
With the emergency release button, the
trunk can be opened from inside the trunk.
The emergency release button is located
on the inside of the trunk lid.
1Emergency release button
�
Briefly press emergency release
button1.
The trunk unlocks and the trunk opens.
Illumination of the emergency release but-
ton:
�
The button will flash for 30 minutes af-
ter opening the trunk.
�
The button will flash for 60 minutes af-
ter closing the trunk.
Even with the SmartKey with KEYLESS-GO
removed from the vehicle, the locking/clos-
ing switch can be operated. Therefore do
not leave children unattended in the vehicle,
or with access to an unlocked vehicle. Unsu-
pervised use of vehicle equipment may
cause an accident and/or serious personal
injury.Warning!
G
Only drive with the trunk closed as, among
other dangers such as blocked visibility, ex-
haust fumes may enter the vehicle interior.
iThe emergency release button unlocks
and opens the trunk while the vehicle is
standing still or in motion.iThe emergency release button does
not open the trunk, if the vehicle bat-
tery is discharged or disconnected.
Page 129 of 521

128 Controls in detailLocking and unlocking
Valet locking
1Neutral position
2Locked�
Close the trunk (
�page 122).
�
Pull the mechanical key out of the
SmartKey (
�page 426).
�
Insert the mechanical key in the trunk
lid lock.
�
Turn the mechanical key clockwise to
position 2 to lock the trunk.
The trunk remains locked even when the
vehicle is centrally unlocked.
�
Insert the mechanical key in the trunk
lid lock.
�
Turn the mechanical key counterclock-
wise to neutral position 1 to unlock
the trunk.
You can now open the trunk
(�page 120).
iIf the emergency release button is
pressed and the vehicle was centrally
locked using the SmartKey, the exterior
lamps will flash and the alarm will
sound as the trunk opens.
To cancel the alarm, do one of the
following:�
Insert the SmartKey in the starter
switch.
�
Press button Œ or ‹ on the
SmartKey.
In vehicles with KEYLESS-GO*
�
Pull an outside door handle.
The SmartKey with KEYLESS-GO
must be within 3 ft (1 m) of the ve-
hicle.
�
Press the KEYLESS-GO* start/stop
button (
�page 37).
The SmartKey with KEYLESS-GO
must be inside the vehicle.
iTo deny any unauthorized person ac-
cess to the trunk, e.g. when you valet
park the vehicle, lock it separately with
the mechanical key. Leave only the
SmartKey or SmartKey with
KEYLESS-GO* less its mechanical key
with the vehicle.
iYou can only cancel the separate trunk
locking mode by means of the
mechanical key.
Page 130 of 521

129 Controls in detail
Locking and unlocking
Automatic central locking
The doors and the trunk automatically lock
when the ignition is switched on and the
wheels are turning at vehicle speeds of ap-
proximately 9mph (15km/h) or more.
You can open a locked door from the in-
side. Open door only when conditions are
safe to do so.For more information on towing the vehi-
cle, see the “Practical hints” section
(
�page 457).
You can deactivate the automatic locking
mode using the control system
(�page 174).
Locking and unlocking from the inside
You can lock or unlock the doors and the
trunk from inside using the central locking
switch. This can be useful, for example, if
you want to lock the vehicle before starting
to drive.
The fuel filler flap cannot be locked or un-
locked with the central locking switch.
iThe doors unlock automatically after an
accident if the force of the impact ex-
ceeds a preset threshold.
The vehicle automatically locks when
the ignition is switched on and the
wheels are turning at vehicle speeds of
approximately 9 mph (15 km/h) or
more. You could therefore lock yourself
out when the vehicle�
is pushed or towed
�
is on a test stand
Warning!
G
When leaving the vehicle, always remove the
SmartKey or the SmartKey with
KEYLESS-GO* from the starter switch, take
it with you, and lock the vehicle. Do not
leave children unattended in the vehicle, or
with access to an unlocked vehicle. Unsu-
pervised use of vehicle equipment may
cause an accident and/or serious personal
injury.
Page 131 of 521
130 Controls in detailLocking and unlockingThe switch is located in the center console.Central locking switch1Locking
2UnlockingLocking
�
Press lower half 1 of the central lock-
ing switch.
If all doors are closed, the vehicle
locks.
Unlocking
�
Press upper half2 of the central lock-
ing switch.
The vehicle unlocks.
iYou can open a locked door from the
inside. Open door only when conditions
are safe to do so.
If the vehicle was previously centrally
locked using the SmartKey, it will not
unlock using the central locking switch.
If the vehicle was previously locked
with the central locking switch.�
while in the selective remote con-
trol mode, only the front door
opened from the inside is unlocked.
�
while in the global remote control
mode, the vehicle is unlocked com-
pletely when a front door is opened
from the inside.
Page 132 of 521

131 Controls in detailSeats
� Seats
For more information on seat adjustment,
see the “Getting started” section
(�page 41).
Front seat active head restraints
You cannot remove the active head re-
straint on the driver’s and passenger’s
seats.For removal of the active head restraints
we recommend that you contact an autho-
rized Mercedes-Benz Center.
For information on head restraint adjust-
ment, see “Seats” (
�page 42).
For information on active head restraints,
see “Active head restraints” (
�page 77).
Rear seat head restraints
Folding head restraints back with
switch in the center console
The rear seat head restraints can be folded
backward for increased visibility.
1Head restraint release switch�
Switch on the ignition (
�page 36).
Warning!
G
For your protection, drive only with properly
positioned head restraints.
Adjust head restraint so that the center of
the head restraint supports the back of the
head at eye level. This will reduce the poten-
tial for injury to the head and neck in the
event of an accident or similar situation.
Do not drive the vehicle without the seat
head restraints. Head restraints are intend-
ed to help reduce injuries during an acci-
dent.
iAdjust the head restraint in such a way
that it is as close to the head as possi-
ble.
iThe rear seat head restraints cannot be
adjusted.
��
Page 133 of 521

132 Controls in detailSeats�
Press the symbol-side on switch1to
release the head restraints.
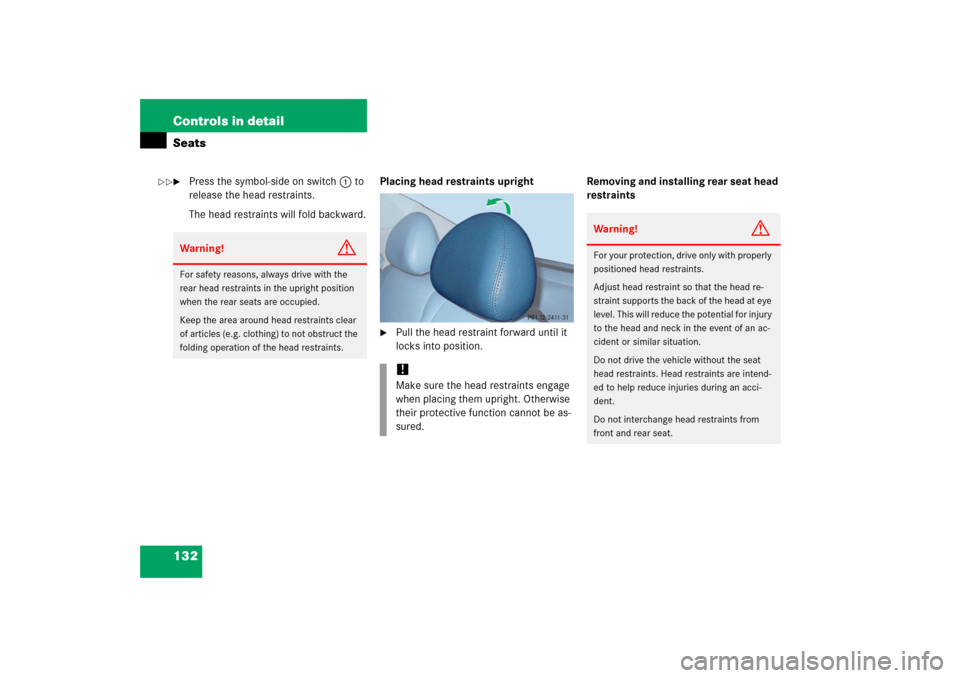
The head restraints will fold backward.Placing head restraints upright
�
Pull the head restraint forward until it
locks into position.Removing and installing rear seat head
restraints
Warning!
G
For safety reasons, always drive with the
rear head restraints in the upright position
when the rear seats are occupied.
Keep the area around head restraints clear
of articles (e.g. clothing) to not obstruct the
folding operation of the head restraints.
!Make sure the head restraints engage
when placing them upright. Otherwise
their protective function cannot be as-
sured.
Warning!
G
For your protection, drive only with properly
positioned head restraints.
Adjust head restraint so that the head re-
straint supports the back of the head at eye
level. This will reduce the potential for injury
to the head and neck in the event of an ac-
cident or similar situation.
Do not drive the vehicle without the seat
head restraints. Head restraints are intend-
ed to help reduce injuries during an acci-
dent.
Do not interchange head restraints from
front and rear seat.
��
Page 134 of 521
133 Controls in detailSeats
1Release catch
Removing rear seat head restraints�
Fold the backrest forward
(�page 271).
�
Fold back head restraint (
�page 131).
�
Press head restraint release catch1
and pull the head restraints out of the
guides.
�
Fold the backrest back to its original
position.Installing rear seat head restraints
Lumbar support
The curvature of the driver’s seat can be
adjusted to help enhance lower back sup-
port and seating comfort.
1Adjustment lever�
Move adjustment lever1 in direction
of the arrows until you have reached a
comfortable seating position.
iWhen installing the head restraints,
make sure that:�
you place the correct head restraint
on the middle seat. It is marked
with the letter “M” on the outside of
the metal bars.
�
the head restraints engage fully.