Page 82 of 521

81 Safety and Security
Occupant safety
Occupant Classification System
The Occupant Classification System (OCS)
automatically turns the front passenger
front air bag on or off based on the classi-
fied occupant weight category determined
by weight sensor readings from the front
passenger seat.
Occupants must sit properly belted in a
nearly upright position with their back
against the seat backrest and feet on the
floor to be correctly classified. If the occu-
pant’s weight is transferred to another
object in the vehicle (e.g. by leaning on
armrests), the OCS may not be able to
properly approximate the occupant’s
weight category. Furthermore, the occupant weight may ap-
pear to increase or decrease due to
objects hanging on the seat, other passen-
gers pushing on the seat, objects lodged
underneath the seat or stuffed between
seat and middle console or between seat
and door or due to objects applying pres-
sure on the back of the seat. Always make
sure that the seat has clearance in all di-
rections at all times.
Both driver and the front passenger should
always use the 75 indicator
lamp as an indication of whether or not the
front passenger is properly positioned.
When the child restraint is not in use, re-
move it from the vehicle or secure it with the
seat belt to prevent the child restraint from
becoming a projectile in the event of an ac-
cident.
Do not leave children unattended in the ve-
hicle, even if the children are secured in a
child restraint system. Unsupervised chil-
dren in a child restraint system may use ve-
hicle equipment and may cause an accident
and/or serious personal injury.
iThe system does not deactivate the
front passenger side impact air bag,
the window curtain air bag and the
emergency tensioning device.
iIf your seat, including your trim cover
and cushion needs to be serviced in
any way, take the vehicle to your autho-
rized Mercedes-Benz Center.
Only seat accessories approved by
Mercedes-Benz may be used.
Page 90 of 521

89 Safety and Security
Occupant safety
Blocking of rear door window operation
1Override switch
2Indicator lamp�
Press override switch1.
Indicator lamp2 comes on. The rear
door windows can no longer be operat-
ed using the switches located in the
rear doors.
!Make sure the seat belt for the center
seat can operate freely with a child
seat installed.iNon-LATCH type child seats may also
be used and can be installed using the
vehicle’s seat belt system (
�page 78).
Install child seat according to the man-
ufacturer’s instructions.
Warning!
G
Children too big for a toddler restraint must
ride in seats using regular seat belts. Posi-
tion shoulder belt across chest and shoul-
der, not face or neck. A booster seat may be
necessary to achieve proper belt positioning
for children over 41 lbs until they reach a
height where a lap/shoulder belt fits proper-
ly without a booster.
Install child seat according to manufactur-
er’s instructions.
T h e c h i l d s e a t m u s t b e f i r m l y a t t a c h e d i n t h e
right and left side anchors2.
An incorrectly mounted child seat may come
loose during an accident which could result
in serious injury or death to the child.
Damaged or impact damaged child seats or
child seat mounting fittings must be re-
placed.
Do not leave children unattended in the ve-
hicle, even if the children are secured in a
child restraint system.
!Operation of the rear door windows
with the switches located on the door
control panel of the driver’s door is still
possible.
Page 91 of 521
90 Safety and SecurityOccupant safetyFor more information on power windows,
see the “Controls in detail” section
(�page 231).Warning!
G
Activate the override switch when children
are riding in the back seats of the vehicle.
The children may otherwise injure them-
selves, e.g. by becoming trapped in the win-
dow opening.
When leaving the vehicle, always remove the
SmartKey or SmartKey with KEYLESS-GO*
from the starter switch, take it with you, and
lock the vehicle. Do not leave children unat-
tended in the vehicle, or with access to an
unlocked vehicle. Unsupervised use of vehi-
cle equipment can cause an accident
and/or serious personal injury.
Page 106 of 521
105 Controls in detail
Locking and unlocking
Seats
Memory function
Lighting
Instrument cluster
Control system
Automatic transmission
Good visibility
Dual-zone automatic climate control (USA only)
4-zone automatic climate control*
Power windows
Power tilt/sliding sunroof*
Panorama roof with power tilt/sliding panel*
Driving systems
Loading
Useful features
Page 109 of 521

108 Controls in detailLocking and unlockingFactory settingGlobal unlocking
�
Press buttonŒ.�
All turn signal lamps flash once.
�
An acoustic signal sounds once
(if equipped and feature activated).
�
The locking knobs in the doors
move up.
�
The anti-theft alarm system is dis-
armed.
The vehicle will lock again automatically
and reactivate the anti-theft alarm system
within approximately 40 seconds of un-
locking if:
�
neither a door nor the trunk is opened
�
the SmartKey is not inserted in the
starter switch
�
the central locking switch is not acti-
vatedGlobal locking
�
Press button‹.�
All turn signal lamps flash three
times.
�
An acoustic signal sounds three
times (if equipped and feature acti-
vated).
�
The locking knobs in the doors
move down.
�
The anti-theft alarm system is
armed.
Selective setting
If you frequently travel alone, you may wish
to reprogram the SmartKey so that
pressingŒ only unlocks the driver’s
door and the fuel filler flap.
�
Press and hold buttonsŒ and‹
simultaneously for about 5 seconds un-
til battery check lamp5 (
�page 106)
flashes twice.
The SmartKey will then function as fol-
lows:
iYou can also open and close the power
windows and tilt/sliding sunroof* or
tilt/sliding panel* using the SmartKey
(�page 234).
iYour vehicle may be equipped with an
acoustic lock and unlock confirmation
signal feature. If your vehicle is
equipped with this feature and the fea-
ture is activated, an acoustic signal will
sound when the vehicle is locked or un-
locked using the SmartKey.
To determine whether or not your vehi-
cle is equipped with this feature, con-
tact an authorized Mercedes-Benz
Center. If equipped and you wish to ac-
tivate or deactivate the feature, or ad-
just its signal volume, also contact an
authorized Mercedes-Benz Center.
Page 113 of 521

112 Controls in detailLocking and unlocking
Important notes on using KEYLESS-GO�
You can also use the SmartKey with
KEYLESS-GO like a normal SmartKey
(�page 106).
�
You can combine KEYLESS-GO func-
tions with normal SmartKey functions
(e.g. unlocking with KEYLESS-GO and
locking with button ‹).
�
Always carry the SmartKey with
KEYLESS-GO with you.
iUSA only:
This device complies with Part 15 of
the FCC Rules. Operation is subject to
the following two conditions:
(1) This device may not cause harmful
interference, and
(2) this device must accept any inter-
ference received, including interfer-
ence that may cause undesired
operation.
Any unauthorized modification to this
device could void the user’s authority
to operate the equipment.
iCanada only:
This device complies with RSS-210 of
Industry Canada. Operation is subject
to the following two conditions:
(1) This device may not cause interfer-
ence, and
(2) this device must accept any inter-
ference received, including interfer-
ence that may cause undesired
operation of the device.
Any unauthorized modification to this
device could void the user’s authority
to operate the equipment.
iYou can also open and close the power
windows and tilt/sliding sunroof* or
tilt/sliding panel* using the SmartKey
(�page 234).
iWhen you unlock the vehicle, the elec-
trohydraulic brake system is activated
(�page 97).
Page 199 of 521

198 Controls in detailGood visibility
Activating exterior rear view mirror
parking position
Follow these steps to activate the mirror
parking position so that the passen-
ger-side exterior rear view mirror will be
turned downward to the stored position.
The buttons are located on the driver’s
door.
1Driver’s side exterior rear view mirror
button
2Passenger-side exterior rear view
mirror button�
Make sure you have stored a parking
position for the passenger-side exterior
rear view mirror (
�page 140).
Warning!
G
The auto-dimming function does not react if
incoming light is not aimed directly at sen-
sors in the interior rear view mirror.
The interior rear view mirror and the exterior
rear view mirror on the driver’s side do not
react, for example, if the rear window sun-
shade* is in raised position.
Glare can endanger you and others.Warning!
G
In case of an accident, liquid electrolyte may
escape from the mirror housing if the mirror
glass breaks.
Electrolyte has an irritating effect. Do not al-
low the liquid to come into contact with
eyes, skin, clothing, or respiratory system.
In case it does, immediately flush affected
area with water, and seek medical help if
necessary.
!Electrolyte drops coming into contact
with the vehicle paint finish can be
completely removed only while in the
liquid state by applying plenty of water.Warning!
G
Exercise care when using the
passenger-side exterior rear view mirror.
The mirror surface is convex (outwardly
curved surface for a wider field of view). Ob-
jects in mirror are closer than they appear.
Check your interior rear view mirror or
glance over your shoulder before changing
lanes.
Page 201 of 521

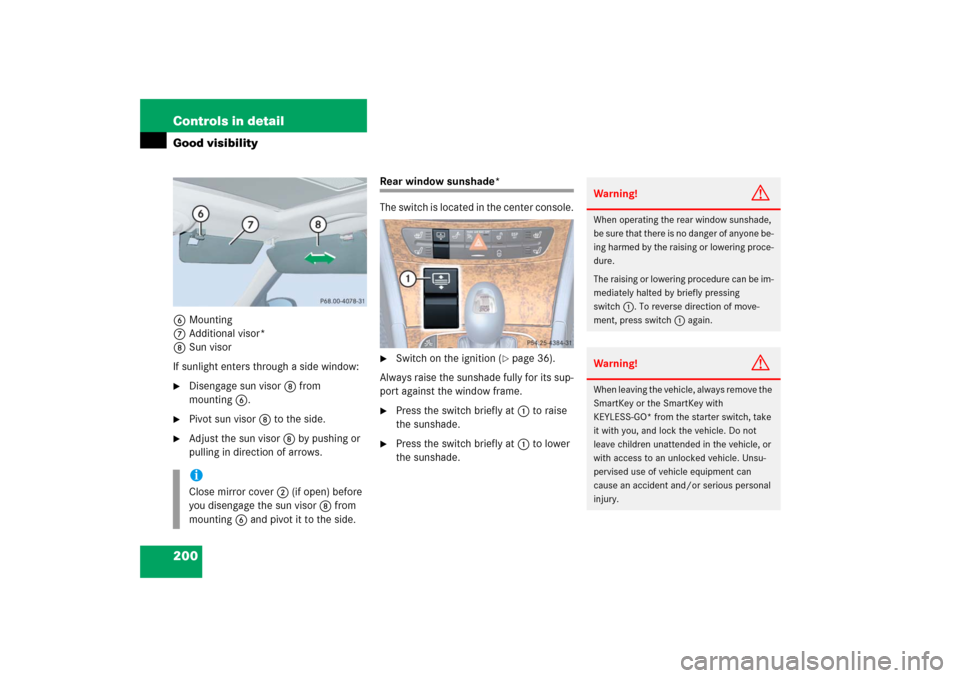
200 Controls in detailGood visibility6Mounting
7Additional visor*
8Sun visor
If sunlight enters through a side window:�
Disengage sun visor 8 from
mounting6.
�
Pivot sun visor 8 to the side.
�
Adjust the sun visor 8 by pushing or
pulling in direction of arrows.
Rear window sunshade*
The switch is located in the center console.�
Switch on the ignition (
�page 36).
Always raise the sunshade fully for its sup-
port against the window frame.
�
Press the switch briefly at 1 to raise
the sunshade.
�
Press the switch briefly at 1 to lower
the sunshade.
iClose mirror cover2 (if open) before
you disengage the sun visor 8 from
mounting 6 and pivot it to the side.
Warning!
G
When operating the rear window sunshade,
be sure that there is no danger of anyone be-
ing harmed by the raising or lowering proce-
dure.
The raising or lowering procedure can be im-
mediately halted by briefly pressing
switch1. To reverse direction of move-
ment, press switch1 again.Warning!
G
When leaving the vehicle, always remove the
SmartKey or the SmartKey with
KEYLESS-GO* from the starter switch, take
it with you, and lock the vehicle. Do not
leave children unattended in the vehicle, or
with access to an unlocked vehicle. Unsu-
pervised use of vehicle equipment can
cause an accident and/or serious personal
injury.