Page 137 of 521
.
Switching seat heating on
�
Press switch1 repeatedly until the
desired heating level is set.
One or more red indic")
136 Controls in detailSeats1Seat heating switch�
Switch on the ignition (
�page 36).
Switching seat heating on
�
Press switch1 repeatedly until the
desired heating level is set.
One or more red indicator lamps on the
switch show the selected heating level.Switching seat heating off
�
Press switch1 repeatedly until all in-
dicator lamps go out.
Seat ventilation*
The switch is located on the center con-
sole. Seat ventilation can be activated
manually with the ignition on, or by the
summer opening feature (
�page 234).
The blue indicator lamps on the switch
show the ventilation level selected:
iIf one or more of the lamps on the seat
heating switch are flashing, there is in-
sufficient voltage available since too
many electrical consumers are turned
on. The seat heating switches off auto-
matically.
The seat heating will switch back on
again automatically as soon as suffi-
cient voltage is available.
Level3
Three indicator lamps on
(highest level)
2
Two indicator lamps on
1
One indicator lamp on
(lowest level)
off
No indicator lamp on
Page 138 of 521
137 Controls in detailSeats
1Seat ventilation switch�
Switch on the ignition (
�page 36).Switching seat ventilation on
�
Press button1 repeatedly until the
desired ventilation level is set.
Switching seat ventilation off
�
Press button1 repeatedly until all in-
dicator lamps go out.iThe seat ventilation is automatically set
to the highest level if activated via sum-
mer opening feature (
�page 234).
iIf one or more of the lamps on the seat
ventilation switch are flashing, there is
insufficient voltage available since too
many electrical consumers are turned
on. The seat ventilation switches off au-
tomatically.
The seat ventilation will switch back on
again automatically as soon as suffi-
cient voltage is available.
Page 140 of 521
139 Controls in detail
Memory function
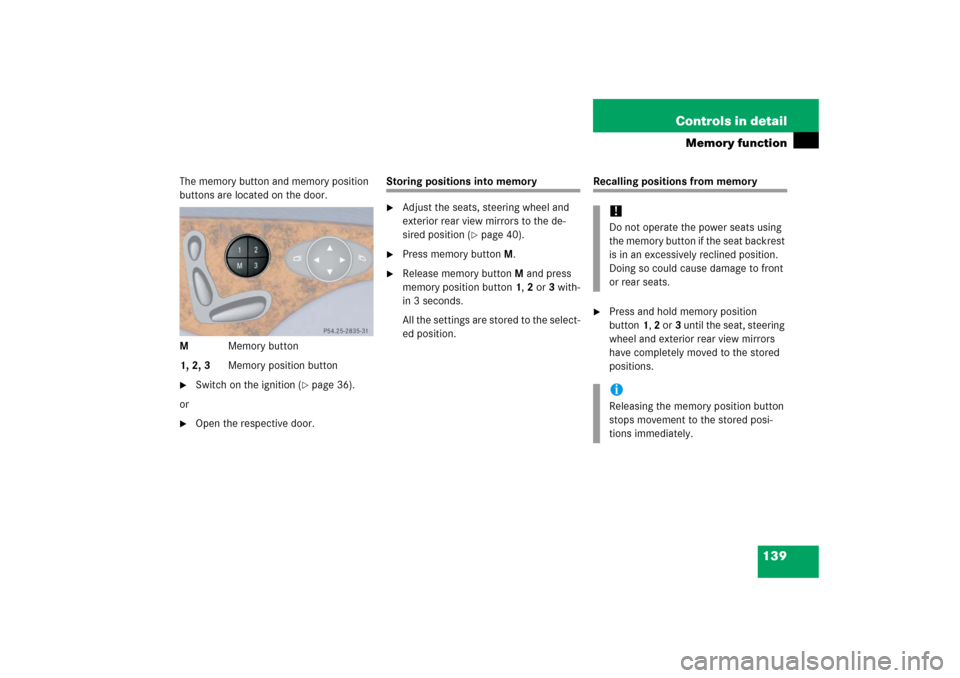
The memory button and memory position
buttons are located on the door.
MMemory button
1, 2, 3Memory position button�
Switch on the ignition (
�page 36).
or
�
Open the respective door.
Storing positions into memory�
Adjust the seats, steering wheel and
exterior rear view mirrors to the de-
sired position (
�page 40).
�
Press memory buttonM.
�
Release memory buttonM and press
memory position button 1, 2 or 3 with-
in 3 seconds.
All the settings are stored to the select-
ed position.
Recalling positions from memory�
Press and hold memory position
button1, 2 or3 until the seat, steering
wheel and exterior rear view mirrors
have completely moved to the stored
positions.!Do not operate the power seats using
the memory button if the seat backrest
is in an excessively reclined position.
Doing so could cause damage to front
or rear seats.iReleasing the memory position button
stops movement to the stored posi-
tions immediately.
Page 178 of 521

177 Controls in detail
Control system
Dynamic seat* submenu
Access the
Dynamic Seat
submenu via the
Settings
menu. Use the
Dynamic Seat
submenu to change the settings for the dy-
namic seats. The following functions are
available:Adjusting the dynamic seat
The function dynamic seat adjustment lets
you determine the way the seat adjusts
while driving.
�
Move the selection marker with
buttonæ orç to the Dynamic Seat
submenu.
�
Press buttonj ork repeatedly
until the message
Dyn. multi-cont.
seat, driver
for the driver seat or
Dyn. multi-cont. seat, fr. pass.
for the passenger seat appears in the
multifunction display.
The selection marker is on the current
setting.
�
Press buttonæ orç to switch
function to
Weak
or
Powerful
.The following settings are available:
Function
Page
Adjust driver seat
177
Adjust passenger seat
177
Weak
(Comfort) Less lat-
eral support and
slow air pressure
build-up in the air
chambers of the
backrest side bol-
sters
Powerful
(Sporty) Strong lat-
eral support and
fast air pressure
build-up in the air
chambers of the
backrest side bol-
sters
Page 273 of 521

272 Controls in detailLoading�
Pull release handle1.
The seat cushion automatically springs
upward slightly.
1Seat cushion
2Seat backrest
�
Grip the back of seat cushion1 and
fold forward.
�
Push the rear seat head restraints all
the way in.
�
Pull the handle in the trunk.
The seat backrest is released and the
head restraints fold back.
�
Fold the seat backrest forward.Returning seat backrest to original po-
sition
1Seat cushion
2Seat backrest
�
Swing seat backrest2 to the rear until
it engages.
�
Swing seat cushion1 to the rear and
press the center front of the cushion
until it audibly engages.
iIf tall persons have occupied the driv-
er’s and front passenger seats, it may
be necessary to move these seats for-
ward slightly in order to fold the rear
seat backrests forward.
iI f t h e r e a r c e n t e r s e a t i s t o b e o cc u p i e d
while driving, it may be necessary to
fold the seat belt buckle up again.
!Make sure the head restraints fit all the
way into the seat cushion pockets. This
will prevent the backrests from being
damaged during loading.
Page 278 of 521
277 Controls in detail
Useful features
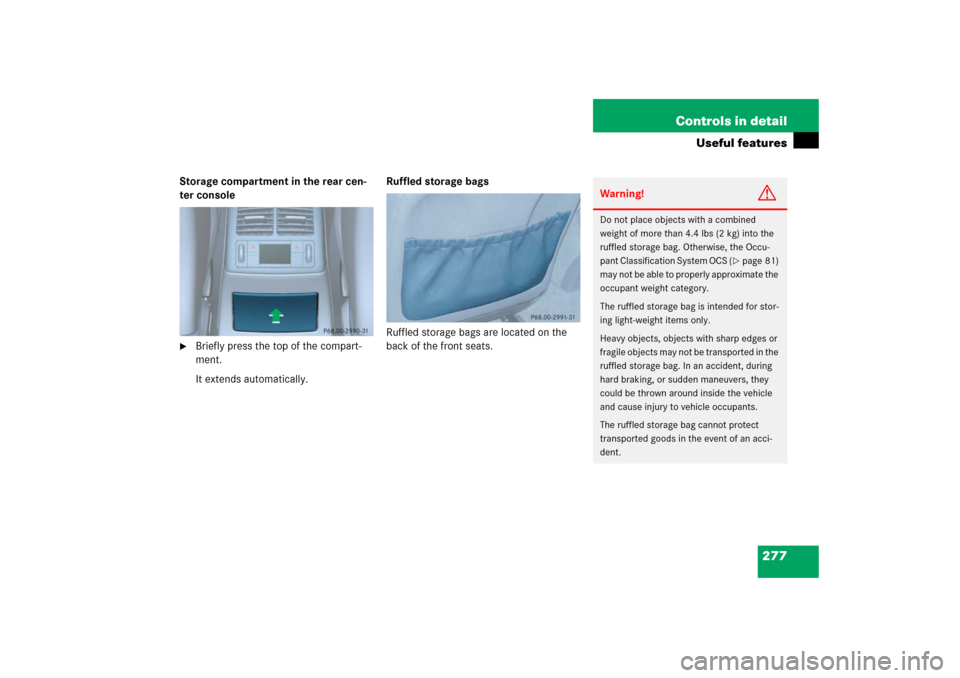
Storage compartment in the rear cen-
ter console�
Briefly press the top of the compart-
ment.
It extends automatically.Ruffled storage bags
Ruffled storage bags are located on the
back of the front seats.
Warning!
G
Do not place objects with a combined
weight of more than 4.4 lbs (2 kg) into the
ruffled storage bag. Otherwise, the Occu-
pant Classification System OCS (
�page 81)
may not be able to properly approximate the
occupant weight category.
The ruffled storage bag is intended for stor-
ing light-weight items only.
Heavy objects, objects with sharp edges or
fragile objects may not be transported in the
ruffled storage bag. In an accident, during
hard braking, or sudden maneuvers, they
could be thrown around inside the vehicle
and cause injury to vehicle occupants.
The ruffled storage bag cannot protect
transported goods in the event of an acci-
dent.
Page 354 of 521

353 Operation
Tires and wheels
Tire ply material
1Plies in sidewall
2Plies under tread
This marking tells you about the type of
cord and number of plies in the sidewall
and under the tread.
Tire and loading terminology
Accessory weight
The combined weight (in excess of those
standard items which may be replaced) of
automatic transmission, power steering,
power brakes, power windows, power
seats, radio, and heater, to the extent that
these items are available as
factory-installed equipment (whether
installed or not).
Air pressure
The amount of air inside the tire pressing
outward on each square inch of the tire.
Air pressure is expressed in pounds per
square inch (psi), or kilopascal (kPa) or
bar.
Aspect ratio
Dimensional relationship between tire
section height and section width
expressed in percentage.
Warning!
G
The temperature grade for this tire is estab-
lished for a tire that is properly inflated and
not overloaded. Excessive speed, underin-
flation, or excessive loading, either sepa-
rately or in combination, can cause
excessive heat build-up and possible tire
failure.
iFor illustration purposes only. Actual
data on tires are specific to each vehi-
cle and may vary from data shown in
above illustration.
Page 372 of 521

371 Operation
Vehicle care
Hard plastic trim items�
Use Pour Mercedes-Benz approved
Interior Care, a soft, lint-free cloth and
apply with light pressure onto.
Steering wheel and gear selector lever
�
Wipe with a damp cloth and dry thor-
oughly or clean with Mercedes-Benz
approved Leather Care.
Carpets
�
Use Mercedes-Benz approved Carpet
and Fabric Care for cleaning the car-
pets.
Headliner and shelf below rear window
�
Use a soft bristle brush or a dry-sham-
poo cleaner in case of excessive dirt. Seat belts
�
Only use clear, lukewarm water and
soap.Upholstery
Using aftermarket seat covers or wearing
clothing that have the tendency to give off
coloring (e.g. when wet, etc.) may cause
the upholstery to become permanently dis-
colored. By lining the seats with a proper
intermediate cover, contact-discoloration
will be prevented.
Leather upholstery
�
Wipe leather upholstery with a damp
cloth and dry thoroughly or clean with
Mercedes-Benz approved Leather
Care.
Exercise particular care when cleaning per-
forated leather as its underside should not
become wet.
!To prevent scratches, do not use scour-
ing agents.
!The webbing must not be treated with
chemical cleaning agents. Do not dry
the webbing at temperatures above
176°F (80°C) or in direct sunlight.Warning!
G
Do not bleach or dye seat belts as this may
severely weaken them. In a crash they may
not be able to provide adequate protection.